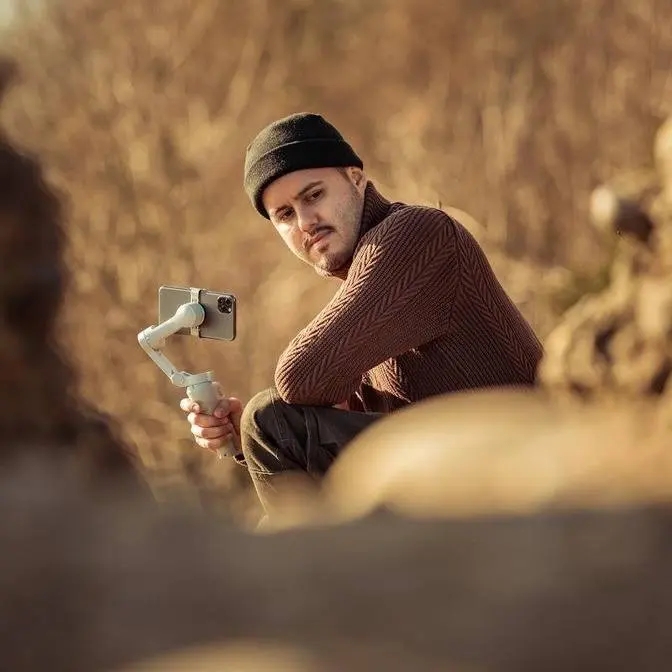
DISCLAIMER Some links are affiliate links, where I earn a small commission if you click on the link and purchase an item. You are not obligated to do so, but it does help support this YouTube channel and allow me to continue making videos for you. I appreciate your support!
TIMESTAMPS: 00:00 - Intro 00:58 - Why the Ace Pro 2? 01:49 - Audio 04:04 - Mini 2-in-1 Tripod 04:54 - Explorer Grip Pro Kit 06:30 - Pocket Printer 07:09 - Battery Neck Mount 08:06 - Cinematic Lens 08:35 - Ultra Wide Lens 09:35 - Macro Lens 10:04 - Camera Settings 11:28 - What I don’t like 12:23 - Ace Pro 2 LUTs 12:52 - Outro
Vlogging doesn't have to be complicated.
At the end of the day, it's all about having a simple setup that just works.
And the Insta360 Ace Pro 2 promises exactly that.
So in this video, I'm putting it to the test.
I'm going to talk about what I like, what I don't like,
and also whether this is actually a vlogging camera you should be using in 2026.
I'm also filming this entire video on the Ace Pro 2
so that you can see how it performs in real world situations.
And if you stick till the end,
I'll also be sharing with you my go-to camera settings,
as well as a few useful accessories that make the vlogging experience better.
Now to be fully transparent with you guys, Insta360 did send me this camera.
I actually reached out to them because I was genuinely interested in this camera
and told them that I wanted to make an honest review.
So I'm super excited to talk about this camera
as I've been using it now for three weeks.
And I can already say that this camera is a lot of fun to use.
So why would you choose the Ace Pro 2 for vlogging?
First up, it has a large screen that you can flip.
So when I'm talking to the camera, I can actually see myself.
And this is a really must-have for any vlogging camera
that you're able to see yourself while filming.
Second is the image quality.
I think it looks great and I'm able to record up to 8K,
but for my vlogs, I usually stick to 4K.
And third is the great image stabilization.
I don't need a gimbal, I can just film handheld and the videos look super smooth.
Then we also have the built-in audio that you're listening to right now,
which I'll get into later.
Then there's the abundant of accessories that make the shooting process just so much more fun,
as well as being able to be more creative with my shots.
So let's now talk about audio.
Right now you're listening to the Insta360 Mic Air
This makes it really convenient.
Once I turn it on, it connects directly to it.
Now, another cool thing about using their mic
is that I can trigger recording by just pressing the button once.
And also it comes with noise reduction.
So if you're filming in a loud environment, you can enable that.
I usually add noise reduction in post.
Now for action type shots, like when I'm skiing,
I prefer using the internal mic, which sounds surprisingly good.
Man, look at the weather. It's awesome.
And by the way, I'm using the internal mic on the Ace Pro 2.
It also has a built-in windshield, by the way.
And the audio shouldn't sound that bad.
Usually with a wireless mic setup, you'd use the Insta360 Mic Air.
But yeah, it requires an additional step.
It mounts via the magnets.
So not so good when you're skiing, as you could easily lose it.
I used to snowboard before, but I switched to skiing.
Just to try something different.
And I got these skis from my girlfriend on my birthday.
Now let me know what you guys think of the internal audio.
It should sound pretty good.
So we're now going to compare the internal mic with the Insta360 Mic Air.
So right now you're listening to the Mic Air, and this is how it sounds like.
I'm also going to enable noise reduction so that you can hear that as well.
Now noise reduction is enabled, and this is how it sounds like.
I'm going to disable it.
And now noise reduction is disabled.
Let's now switch over to the internal mic.
And now you're listening to the internal mic on the Ace Pro 2.
Let me know if you can hear a difference.
Now, whenever I'm close to the mic, I actually prefer using the internal mic
because it's just so convenient and it sounds great.
But if I do have to be further away from the camera, like this far,
then it's better to use a wireless mic.
Because now with the wireless mic connected, you can hear me much more clearly.
So let's now talk about accessories.
If you're thinking about getting the Ace Pro 2,
then you do have to check out the mini 2-in-1 tripod that I'm using right now.
It has a built-in extension pole.
This way I can fit more in the frame.
And it's also very comfortable to vlog with this tripod.
Now you can also get the Bluetooth shutter separately to trigger recording from a distance.
It's detachable, which is great.
And also it comes with built-in tripod legs.
This way I can record myself hands-free just like that, which is super convenient.
So I really like this tripod.
I've used it for all of my activities such as snowboarding, hiking.
And it's really worth the investment getting one.
The next accessory which I find most exciting is the Explorer Grip Pro Kit.
And this basically upgrades your action camera into a street photography tool.
So you get this cage with a grip, which also comes with a shutter control and a dial.
And this allows you to zoom in, control the exposure,
switch between different filters, and much more.
Now the grip also has a built-in battery with 2010 milliamp.
So it actually charges the Ace Pro 2 and also extends the runtime.
You get around 5 hours and 40 minutes of battery runtime.
Now do keep in mind that the Explorer Grip is not waterproof.
There is a slot to the side where you can insert an SD card,
but that's just a dummy slot.
Doesn't actually transfer files.
Also you're not able to transfer files directly from the grip.
You do have to directly plug it to the action camera.
It's really just meant to store your SD card in it.
Now the grip makes it really fun to take photos with it.
And I get all the basic button functions that I need.
And I took a bunch of photos with this setup.
And the experience was really fun.
So it is cherry blossom season and it only lasts for a really short time.
And I want to take a few photos because I think it's going to turn out really great.
Look at how beautiful it is.
Now a really cool accessory is this sun hood,
which I can magnetically attach to the Ace Pro 2's screen.
And it really helps remove those reflections,
especially on a sunny day like today.
So let's capture some shots.
Now another really cool accessory that pairs well with the Explorer Grip
is the pocket printer,
which is super portable and compact and allows you to print those photos that you've taken.
Now the setup is really simple.
I can connect it via Bluetooth and I'm ready to go.
And then I can go through my pictures and the ones I like.
I can then start printing.
Now the printing time does take a bit long, around one minute.
But I still find it cool that you're able to print a photo on location
and really hold that photo physically in your hand.
I just find it special to have something in your hand
rather than just taking a photo with your phone and,
you know, saving it into your photos app.
The next accessory I want to show you is the FOMO Power Neck Mount,
which doubles as a power bank.
It has 4,800 milliamp of power for continuous first-person view shooting.
Now I can simply remove this part over here, put it around my neck.
Now you can see I can mount the Action Pro 2 over here
and then plug this to the side to extend the recording time.
So we're going to go for a little drive so that you can see how it would look like
mounting the Ace Pro 2 onto this neck mount.
All right, so this is how it looks like, guys.
I'm using the widest field of view.
I think it's called the Mega View.
This way I can fit more in the frame.
And I think this perspective looks great.
Now I still have the wireless mic connected, which is in my pocket.
But what I'm saying in this video is that you can connect
conversion lenses to achieve creative shots with the Ace Pro 2.
So I now have the cinematic lens attached to the Ace Pro 2
just to show you how it would look like when vlogging with this lens.
Now I do think it lives up to its name.
You get that 2.35 by 1 aspect ratio.
And also when you film towards bright sunlight, you get those epic sun flares
making your videos really look interesting.
By the way, I've set the field of view to linear.
This way we don't get a lot of distortion.
So now I have the ultra wide-angle lens attached.
And you can see it is super wide.
It fits a lot into the frame.
And I'm not even using the extension pole.
If I do use it, you can see that I can fit even more in the frame.
I think this makes it a really unique lens for vlogging.
I'm just gonna walk around and show you this beautiful nature here.
And I think this is the most wide-angle lens I've used in any action camera.
Now I think this lens is also especially interesting to use for photography
giving you really that immersive perspective.
Especially at a place like this where you really want to show the landscape.
I mean, look at the place I'm at right now.
This is the Kaumassee here in Flims, Switzerland.
And it's just beautiful.
So now I switched over to the macro lens.
And what's cool about it is that there's a ring
that allows you to switch between human and macro shots.
And what's cool about the macro lens is that you can create really nice close-ups
that would otherwise not be possible just using the standard lens.
Oh, and by the way, what's also really cool
is that you get focus peaking built into the screen.
This way you can really see what's in focus
which can be really difficult on a smaller screen.
When it comes to camera settings, I'm filming everything in 4K, 25 frames per second.
HDR, I've turned on.
I'm using the standard stabilization.
In terms of field of view, I've set it to action view.
Especially for action type shots like right now.
This way I can fit more in the frame.
But when I'm vlogging on the streets, I set it to linear
as I don't want the distortion.
The exposure I set to auto.
This way I don't have to think about it.
I set the EV to negative 0.3.
This way I can protect the highlights a bit more.
In terms of color profile, I set it to standard.
This still gives me a little bit of leeway to color grade
and add a final look to my video.
The sharpness I set to medium.
I think it's a good balance.
In terms of audio, I'm using the internal mic and I've set it to voice enhancement.
Internal audio sounds pretty good on this one.
In case I forgot something, I'll mention it later.
But yeah, leaving it in those settings makes vlogging just way more easier.
I can just focus on the moment
and not think about the camera settings and tweaking it every time.
Let's see, where are we going now?
So for me, there are a couple of cons of using the Ace Pro 2.
First of all, it doesn't detect switching lenses.
I have to do that manually every time.
And sometimes I even forget I've switched lenses.
Second is the processing time it takes for the photo or video to be written onto the SD card.
So there's always some buffer time that I have to wait until I can continue shooting.
Number three is the flip out screen.
Even though I like that I'm able to see myself and the screen is big enough,
it is an additional step.
Whenever I'm filming myself, I do need to flip the screen.
And if I'm filming B-roll, then I have to flip the screen back.
Then last is the weak battery compared to other action cameras.
However, combining it with the Explorer Grip, you get a much longer runtime.
But just with the camera itself, it is shorter compared to other action cameras.
Now, if you're interested in the colors that I'm using,
I've created a custom LUT pack for the Ace Pro 2.
It's designed for footage shot in the standard picture profile.
So you can instantly turn your clips into a clean cinematic look that stands out.
It gives you more control over your style.
I've also included my go-to camera settings in the pack
so that you can get a very similar look right away.
Super easy to use and it makes your footage pop without spending a ton of time color grading.
I'll leave a link in the video description if you want to check it out.
All right, folks, there you have it.
That is my simple take on the Insta360 Ace Pro 2.
Now, if you do want to see a comparison between this camera and the Action 6,
let me know in the comment section below.
And also, if you have any questions, feel free to write me.
Other than that, thank you so much for watching.
Take care, and I'll see you in the next one.