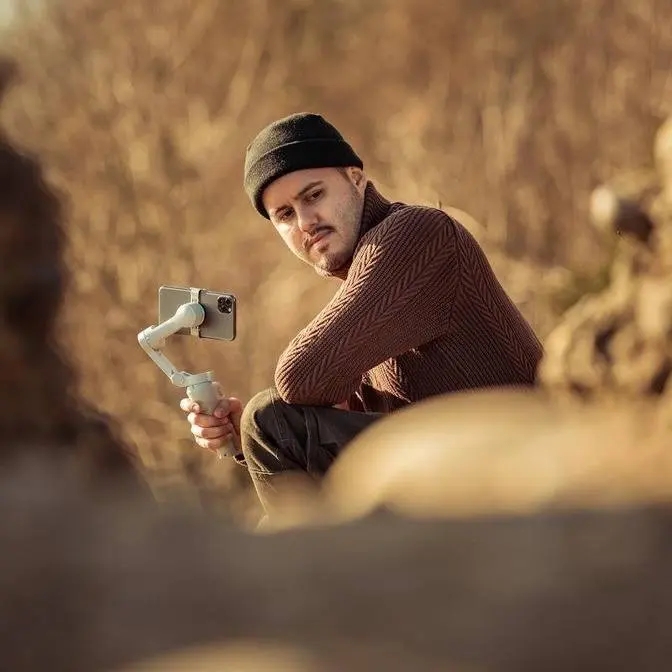
DISCLAIMER Some links are affiliate links, where I earn a small commission if you click on the link and purchase an item. You are not obligated to do so, but it does help support this YouTube channel and allow me to continue making videos for you. I appreciate your support!
TIMESTAMPS: 00:00 - Intro 00:41 - Car Wash 01:08 - Why use an Action Cam for Vlogging? 02:03 - Do You Need ND Filter? 03:50 - DJI Mic 05:20 - 2X Zoom 05:47 - Film Tones 06:41 - DJI Mimo App 07:08 - Macro Lens 07:47 - Variable Aperture 08:27 - Drawbacks 09:25 - Open Gate 09:54 - Accessories 11:40 - Camera Settings 15:47 - Image Quality 6 vs. 5 vs. 4 17:00 - LOW LIGHT TEST 18:26 - Is it worth upgrading?
Good morning, lovely people.
Today, we will be reviewing the DJI Osmo Action 6
that I'm recording on right now.
Now, this video is not sponsored by DJI.
I bought this camera with my own money
and I had it for around a week.
I was able to test it
and I'm gonna give you my honest thoughts on this camera,
what I like, what I don't like about it
and bring you guys along this journey.
I'm filming this entire video on the Osmo Action 6
so this way you can see how well it performs.
Now, be sure to also stick till the end
as I'll be sharing with you my simple camera settings
for vlogging with this camera.
So right now, I'm driving to the car wash
because this car needs cleaning.
Got myself some snacks.
So let's now head to the lake.
I wanna quickly talk about why I prefer the action camera
over the iPhone for vlogging.
First of all is the ease of use.
I can simply press the button on top
and it will turn on and start recording.
With an iPhone, I first have to unlock it,
open up the default camera app and can then start recording.
Number two is how lightweight, durable
and compact the action camera is.
While the iPhone is pocket friendly,
it's way easier to mount the action camera
with their included accessories.
The action camera is also more durable
so if it falls, it doesn't break immediately.
And number three, the Osmo Action cameras
actually come with a front screen
which makes it super convenient to monitor
and see what I'm actually shooting.
Whereas with my iPhone,
I would need to attach an external monitor
or use the selfie camera,
which usually doesn't provide the highest quality.
Now, the next thing I wanna talk about is motion blur.
Do you really need it for vlogging?
Now, I personally don't use ND filters when vlogging.
I think it's too much of a hassle.
First of all, if you do want to follow
the 180 degree shutter rule
where you record your videos in 25 frames per second
and you have your shutter speed at one over 50,
the stabilization won't work as well on the action camera
and you will get a lot of jitter.
So you will need to use some kind of stabilizer.
Secondly, most people don't really care about motion blur.
What they do care is the story you're telling in your vlog.
So now I have the ND 16 mounted on the Osmo Action 6
and I have set the shutter speed to one over 100.
So you should be able to see motion blur in the background.
Now, the reason why I've set it to one over 100
instead of one over 50
when recording in 25 frames per second,
this way the stabilization will work better
and you'll get much less jitter.
Now, if we move the ND filter and set the exposure to auto,
you should see less motion blur as I move the camera.
And just to show you how well the footage stabilizes,
right now I don't have the ND filter applied
and I've set the exposure to auto
and I'm using horizon balancing.
I'm just gonna walk so that you can see the difference.
And now I have the ND filter applied
with the shutter speed set to one over 100
and the stabilization to horizon balancing.
And this is how it looks like.
What DJI did really well
is that I can simply press this button up here
to start and stop recording
without needing to press the button
on the action camera itself.
Now, an even cooler feature, which I wished DJI would include
would be to start recording
even if the camera is turned off.
So if I could just press this button
and the camera would turn on and start recording,
that would save battery life
and make it even more convenient.
Now, with the DJI Mic Mini, it's as simple as plug and play.
Once connected, I can start recording audio
and I also can see the audio meter on the front screen.
So this way I know the audio is recording.
Now, what if I forgot my wireless mic at home
or maybe the transmitter runs out of battery?
Well, you can still use the internal mic on the Action 6.
So this is how it sounds like
using the internal mic on the Action 6.
I'm about an arm length away
and it should sound pretty good.
You can definitely use it if you don't have a wireless mic
as long as you're fairly close to the camera.
Let's now switch over to the DJI Mic Mini.
And this is how it sounds like using the DJI Mic Mini.
You should hear a noticeable difference.
If you want the best quality possible,
it's best to use DJI's wireless mic.
But if you don't own one and want to keep it very simple,
the internal mic is totally usable.
Just be sure to be fairly close to the camera when talking.
Now, something I find really useful on the Osmo Action 6
is that you can zoom in two times without quality loss.
Whereas on the Action 5 Pro,
you could also zoom in twice, but digitally,
which basically crops into the image,
which does affect the quality.
So being able to zoom in without quality loss
allows me to use this feature to capture more diverse B-roll.
Now, what got me excited are the film tones.
I think for those who want to speed up
the color grading process,
you can apply a look directly to your recorded video.
So it will bake it in.
And what's also cool is that you can adjust
the intensity of the look.
Now, right now I'm using the normal color profile.
So right now you're looking at the CC film tone.
Now you're looking at the TR film tone,
which looks nice too.
And this is the WT film tone.
And then we got the FE.
And finally, we have the NV look, which looks really great.
And you can really use those film tone
to create your own distinctive style
and skip the color grading process.
Now, I still prefer to apply my look in the edit,
but for those who want to skip that process,
this is a really great feature
that really adds a lot of instant noodles.
Now, what's really cool about the Osmo Action 6
and also the other action cameras from DJI
is that I can pair it with my iPhone
using the DJI Mimo app.
And this allows me to film myself
from a distance like right now,
because I can't really see what's on the tiny screen.
So by having a real-time preview,
it makes it easier to frame myself
and get a nicer composition.
Now, what's new on the Action 6
is that you can attach their macro lens.
Now, I didn't get my hands on it.
I'm using the standard lens.
And I also don't think from the reviews that I've seen
that I'll be using it.
I think if you like having that shallow depth of field
and needing to get closer shots, then yes,
but because it's a lens that you need to manually focus,
it just adds another step.
And it's also not easy to set focus with it.
You might need to use the DJI Mimo app
where you can enable focus peaking.
So I'll probably just gonna stick with the standard lens,
which I think is good enough.
Now, if you're wondering if there's a difference
in background blur when switching between a fixed 2.8
and a fixed F4, let's test it out.
So right now I have it at F2.8,
and now I switched over to F4.
You probably won't see much of a difference.
So now I have the camera closer.
We're at F2.8, and now I switched over to F4,
and this is how it looks like.
Now, something else to mention,
and also when you use F4 and film towards the sun,
you get that six point star burst effect,
which can look pretty awesome.
DJI would add to it.
First would be lock white balance on recording.
Second would be to include a lens cap
when purchasing the Osmo Action 6,
and also missing record canceling feature,
just like on the DJI Osmo Pocket,
where I can just press and hold the record button
to cancel the recording.
What else did I write down?
Also, the Osmo Action 6 doesn't come with a dedicated cage,
like on the 5 Pro and the Action 4,
and I do like my action camera protected,
so I did order a cage from SmallRig.
Future Bennett here, I already got my cage
and mounted it on the Action 6,
and just to show you how it looks like,
you can see that we have also one quarter screw hole
and a cold shoe mount.
It's still pretty lightweight to vlog with it,
and you still have access to all the buttons and ports,
and it can also remove it pretty easily.
Overall, I'm quite happy with the cage.
Now, the Osmo Action 6 uses a 1 over 1.1 inch square sensor.
This means you can record in a four by three format,
like I'm doing right now,
and repurpose your content for horizontal or vertical video.
And this could be a game changer
for those who use different platforms,
as you don't have to film twice.
So if you do content for multiple platforms,
this might be a feature you want
and could be worth upgrading from the Action 5 Pro.
So the next thing I want to talk about are accessories,
and accessories allow you to capture your shots
more creatively using different accessories.
I'll also be sure to link all products
in the video description below.
The first one is this clamp from Ulanzi,
and this allows me to clamp it on any object
to sort of create a POV perspective.
Next up is the magnetic chest mount from Telson,
which I can attach magnetically to this neck strap.
This works great for creating first person view shot.
You can see that I have the magnetic action mount attached,
and I recommend attaching them to all of your accessories,
so this way you can switch between them seamlessly.
Next up is the multifunctional handle,
which I've mentioned in some of my other videos.
And I really like it because it's not only a handle,
but it also has a built-in power bank,
which allows me to charge the Osmo Action,
and also extends the shooting time.
Now the Osmo Action 6 lasts around two hours,
but if I use the multifunctional handle,
I can extend it another two hours,
giving me a total of four hours, which is awesome.
I can also start and stop recording using the buttons,
and it's just way more convenient to hold and vlog with it.
And it also has built-in tripod legs,
this way I can place it on a flat surface like right now,
and record hands-free.
And last but not least is the suction mount from SmallRig,
which I've used at the beginning of this video,
especially for car scenes,
I can set it up indoors or outdoors,
and it holds pretty well.
I can get pretty creative with the angles,
and it's also easy to bring along
as it doesn't use up much space.
So let me walk you through the camera settings
that I've used throughout this video.
I've set it to pro, and in terms of exposure,
I've set it to auto going from 100 to 256,000.
And the exposure value is set to negative 0.3.
If it's really sunny outside, I set it to negative 0.7.
In terms of white balance, I've set it to auto.
At the front, you have a white balance sensor,
which does a fairly good job
at detecting the white balance.
But if you want the best results,
you could first set it to auto white balance,
and before you start recording, switch to manual,
so it locks the white balance throughout the recording.
Next up, the color mode, I've set to normal 10 bit.
Now, if you do want more flexibility,
then I recommend setting the 2D log M 10 bit.
But because I want to keep my vlogs simple,
and don't want to do much color grading,
I've set it to normal.
Now, quality priority, you can turn it on if you want.
Just keep in mind that it will use more battery,
and what this does is it improves the visual experience.
Then over here, you have your film tones,
which we discussed, and you can see when I select one,
I can adjust the intensity over here.
In terms of variable aperture,
I've set it to auto going from F2 to F4.
Now, if you're not using the macro lens,
it will go from 2.8 to F4.
If I film in a low light environment,
it will lower the F stop to F2,
which will improve the low light performance.
Terms of stabilization, I've set it to daily,
and for the image adjustment,
I've set the texture to minus two,
and noise reduction to minus one.
Now, for the mic, the transmitter gain,
I recommend pushing it all the way down to negative 12.
This way, your audio won't distort.
Now, in the settings,
I also recommend setting the bit rate to high.
This way, you get the best quality out of your videos.
I also enable grid so that I can frame my shots better,
and over here in the wireless mic section,
I also enable the clipping control, LED, auto power off,
and also what I like to do
is having the built-in mic audio backup
set to video audio track.
This way, it will save an extra audio track
in the video file.
What I forgot to mention is the resolution I'm shooting in.
So I'm shooting in 4K, 25 frames per second for normal speed
and for slow motion, I can switch to 50.
You can also shoot 8K on the Action 6, which is new,
but since it produces larger file size,
I think it's overkill for vlogging.
As for the stabilization, I leave it at horizon balancing,
which does a horizontal adjustment of plus minus 45 degree,
which gives you around a 15 millimeter focal length.
So the only option you can choose here is standard D-Warp.
Now, you can also choose horizon steady,
and you'll notice that it crops in more.
This gives me an equivalent of 17 millimeter.
So just to show you the difference
between horizon balancing and horizon steady,
this is how it looks like vlogging in horizon balancing,
having the camera arm length away.
And now you're looking at horizon steady,
and yeah, that's the difference.
Now what horizon steady does is,
no matter how you hold the camera,
it will always be leveled, which is crazy.
Whereas with horizon balancing,
you get negative plus 45 degree correction,
as you can see.
What I forgot to mention is that the Action 6
has 50 gigabytes of internal storage,
whereas the Action 5 Pro has 47.
So just three gigabytes more,
but still it's great to have internal storage
in case you forget your SD card.
So one is shot on the Action 6,
and the other is shot on the Action 5 Pro.
Do you know which is which?
So over here we have the Action 5 Pro,
and up here we have the Action 6.
Now they're set to the default settings.
It's gonna walk around so that you can see
how each camera performs.
Now you won't notice much of a difference.
The image quality is basically the same on both.
So there are no really major improvements here,
but yeah, you be the judge of it.
And now we're gonna do the same with the Action 4.
Can you tell which is which?
So let me know if you can see any difference
in image quality between the Action 4 and the Action 5.
So the camera to the left is the Action 6,
and the camera to the right is the Action 5 Pro.
And I can clearly see from the screen
that the Action 6 is doing better at low light,
but it might have more noise.
Now I'm using the same vlog settings.
Now what's great is that when filming in low light,
the aperture on the Action 6 will go down to F2.
Otherwise during the day, it will go as low as 2.8.
So it's good to leave it in auto.
This way it will detect low light
and will switch to the lowest aperture.
So I'm just gonna walk around so that you guys can see.
So we're now using super night mode recording in 4K 25,
rock steady, stabilization, and neutral wide.
And this is how it looks like.
ISO is set to auto as well as white balance.
Now, from what I see, I can't see any difference,
but let me know which one you think is better.
If you're wondering whether it's worth upgrading
from the Action 5 Pro to the Action 6,
the Action 5 Pro shares a lot of similar features
and there's no major improvement in terms of image quality.
If open gate recording is important to you
and using their macro lens,
then upgrading to the Action 6 might be worth it.
But otherwise I would keep the Action 5 Pro.
And if you don't own any Action camera yet,
then the Action 6 is a great option.
But if you're on a budget,
then the Action 5 Pro will still do a great job.
I'm actually traveling to the Philippines next week
and I'm gonna bring the Action 6 with me
to record some travel content.
And I'm gonna bring you guys along
and also share with you some of the tips
on how to capture engaging and cinematic footage
with this camera while keeping things simple.
So stay tuned for that.
Other than that, thank you so much for watching guys.
Take care and I'll see you in the next video.