
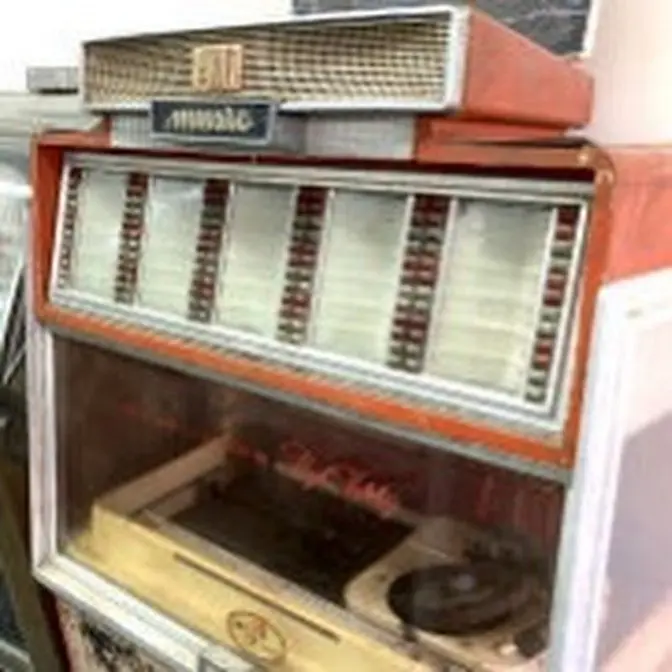
Repairing The Control Unit In A Rock Ola 490 Jukebox For A Customer!
455 Video Views·Jan 7, 2025
ladies and gentlemen this is Joe's
classic video games back with another
cool jukebox repair video for you this
evening this is a rockola 490 that we
have been working on if you haven't seen
our previous video where we mess with
the power supply go check that out if
you've got a rockola 490 you may be
interested in that uh also may be
interesting to you if you have any of
them near there so like a 488 or a
rockola 484 rockola 480 they're very
similar rockola
494 but this 490 we found out in the
previous video wow look at look at how
bright we are uh we found out in the
previous video that the power supply was
fine we rebuil it anyway um but the this
CPU system 2 control
unit uh this control unit on the 490 had
a short on it so the short was making a
couple of the voltages turn off on the
power supply if this was plugged in
and then at the very end of the video we
figured out that there were two tanum
capacitors on the on one of the boards
that are shorted but we haven't fixed
that yet so I'm going to do I'm going to
do this video just on the
rockola 490 system 2 control unit so you
can see what they look like how they
work U I don't I'm not an expert on them
but I can show you what I know and we
can go through one and see if we can fix
this one and maybe it'll help you fix
yours um these are pretty a lot of the
490s the problem is in this unit so um
we can look at a couple things and see
if we can get this one to work hopefully
so if you have a 490 that's giving you
trouble this might be where you need to
look but I would watch the first video
that we did on this first we've also
done some uh rockola videos in the past
you can go check out they're here on our
channel uh that might help you get it um
get it going also I want to
plug I want to I want to do a plug for
there is a forum on the internet that's
free they're not paying me anything they
don't know me uh that's called jukebox
addicts now I have a I have a strong
southern accent so it's a d d i c TS
jukebox addicts like
uh uh you're addicted to
drugs Juke jukebox addicts if you will
Google that you will find a forum that U
um talks all about jukeboxes if you post
on that Forum they will help you fix
your jukebox um if you're willing to do
a little work and work on it yourself
there some good people over there so you
might want to go check that out but
we're going to get into this so I took
this out of this out of the box you know
it hangs on a couple screws here and it
has some connectors that come off the
top um we had determined by looking on
the back that a few of the Rails are
shorted I'll show you that again here in
a minute uh there are some little wing
nuts that go on the front of this sucker
and you can take this little plate off
the front
um and when you
do you will be down inside it now some
of these boards will have red buttons
all the way on them that's a slightly
different version you will also have
some of these that this is different
this connector will be different and
these two connectors will not even be
there um so they're just from for
different models the 490 had the rockola
490 the original one which is what this
is out of and then I had a rockola
490 D1
not a 491 a 490 D1 the first revision
and then there was a rockola 490 dash2
they're all very similar it's the Super
Sound and the Super Sound 2 uh rockola
Juke boxes but they they all have a
similar um control unit in it but they
are a little bit different I don't know
if you can always swap them because one
of the differences is this connector
here on some of them it has a uh a
ribbon cable here and on some of them it
has more of a wired cable here so the
display up in the top of the box on the
Super Sound and the Super Sound 2 the
490 the 4901 the 4902 sometimes the
display is different sometimes the power
supply is different there's just a bunch
of variations of this every part that
you see in the in the machine will will
be marked though they were great about
marking them so this one is the
5445
Dasa control
unit so you will you will see a number
on everything that you've got so
whenever you're looking in the
schematics and things like that
um you'll see that there are different
parts for things but they will all be
properly marked so if you're working on
like we're working on this if I find the
schematics and they're labeled as that
then I know I got the right
schematics that sounds like it's real
simple and of course but um it's a big
problem on these particular ones cuz you
say I've got a rock all 490 and they are
they they have completely different
parts in them depending on which
revision of it it is uh but these are
all they're they're fairly similar um
I've got some partial schematics that we
may be able to use to fix it but one of
the one of the good things you'll notice
about them is that every chip is
socketed so if you do figure out that
you have a bad chip it's going to be
really easy to change it because they
put sockets on everything that also
means though that some of the chips
depending on how they were made have
tons of uh
oxidation on them look at that see all
the tarnish or whatever on the on the
legs so that could be a problem that's
keeping things from running right so you
might have to remove the chips and clean
those legs um and it just depends on how
they were created I think if they have
silver a silver coating they look like
that if they have a tin coating they
look more like this but I may have that
backwards or
something um so the first thing I'm
going to do is I'm going to try to take
this back plate off there are screws
here and nuts here that hold everything
together so we're going to start taking
it all apart and see if we can get it
out of
there
um these back six hold this plate they
may help me get it apart too so I'll
start taking screws off and we'll see
what we end up
with okay so I took the six screws off
the back and that plate and uh it made
it where the both boards were able to
pop up and out of it uh so this is the
back board that we haven't looked at yet
uh you see one socket is unpopulated on
this revision for whatever reason here's
another one nothing in it so what we
figured out on this one
was when we had this plugged in the
power supply two of the voltages there
are four little LEDs on the power supply
that indicate that the voltages are on
two of the voltages would drop out if
this board was plugged in and what we
eventually figured out was that
by looking at the schematics this
c203 and this c204 down in here these
are tantalum caps and they are known
whenever they get old for shorting I'm
not saying these two caps are I'm saying
any tantalum cap whenever it gets old
one of the ways that they fail is they
short together so these are
tantalums this is a tantalum it's the
ones that look like big gumdrops or
something that's a tantalum that's a
tantalum that's a pum
um and that's about it so these ones
here are more like a like a a
film capacitor they're not prone to
short this is a
tanum
[Applause]
um this is a
tantalum this is an electrolytic they
usually don't short whenever they go bad
usually they open up but electrolytics
they they have like a paste inside of
them that that dries out after a while
so they should be changed too if they're
really old so ours basically this board
is not doing its thing and it's shorting
out the power supply so it needs
extensive work okay but here's what
you're going to run into on these there
is a damn battery on the back side of
this the battery of
Doom this one looks clean uh many many
times if you have a problem with this
your problem is going to be that battery
has leaked alkaline all over the board
and you have major damage on the traces
on your board so you may run into that
looks like I'm going to get lucky on
this one so we're going to take that off
and replace it with something else but
um look there for sure if you're messing
with one of these you notice on the
front too that there's a spot here for
another prom that's not populated then
there's an empty socket there too so
they would design these boards boards
door they could do plenty of things and
then for a certain revision they may not
need all of that or they might change it
later or whatever so um and just
for for
uh completion sake this is 543 86-1 it's
the S2 memory it says and then on this
side it
says S2 CPU 54370 D1 a so that's what
we're working with so the first thing I
want to do is mess with these two
capacitors that I know are shorted and
while I'm replacing them I'm going to
replace the other ones too if I have
them at least uh so I'm going to
continue taking it apart until I can get
this whole board off uh which there's
just some more screws here there's some
posts and then there's this big ribbon
cable on the end so we're going to get
it down to just this board and then
start working through
it all right I got it apart I'm going to
show you something cool so somebody
anonymously out there I don't even know
who sent me a
present they sent me a
present off Amazon so when we got it
in look what they have sent me so I
always do videos where I'm like I hate
the tripod we're probably G to set it up
here in a minute but I hate using the
tripod because I like being able to say
look at this part look at this part
tripod you can't do any of that on a
tripod I'm trying to go like
this can you see that can you can can
you see that you know I just don't like
it you have to have one for certain
things but for stuff like this screwed
that and I know you could Mount one like
this not doing it people I'm not doing
it I like being able to move so so I'm
usually trying
to make everything
work with one hand while I'm holding the
camera in the other hand man and people
have told me oh you can mount it on your
forehead well I guess I could if I
wanted to look like a goober but anyway
somebody out
there look at this they have sent me a
brand new now there's no note in the bag
or anything so I don't know who it is I
got a couple ideas of who it might be
they have sent me a test lead kit now I
believe what this is it'll be leads that
I can hook on
stuff right
and wouldn't you know it I just so
happen to need that right now let's see
what else is in here got
that oh look at that wow it's a
chopstick
lead you can squeeze it together I guess
if it touches that'd be bad well I guess
depends on what you're
checking these are just the normal
ones that's very cool very very
cool and then here's some other
attachments wow all right so whoever
sent me
these thank you very much I appreciate
that I will put them to good use we
actually need those all the time now I
can't I can't promise that I will always
use the appropriate lead even though I
now own
them but
but it'll probably help me a lot so like
the ones with the little the little
grabbing thing I'll probably use them a
lot I'm going to use them right now
actually so or try to so uh yeah let me
set all that up and I'll show you what
our problem ended up being on this board
and something that one actually that uh
that we found in the last
video okay I got me all rigged up here
people so here's the deal
so this is so if this is plugged in uh
it's shorted you got problems it turns
off the power supply this is the power
connector right here and if you look
very
closely you know a lot of times you can
tell the power rails by how thick they
are you know like so these little thin
rails usually are like signals or
something not always but um come to find
out this Trail here this track here and
this track here this one's ground and
this one and this one I wish I had
a I use one of these probes one of these
other probes this is the ground Trail
Trace
connector this is like -28 and this is
plus 25 which is the ones that are
shorting well if you look this one
capacitor that's a tanum is across
ground and one of these and with my cool
little clip probes on
it it is a dead freaking
short and then the same with this one
this one is is is across the ground than
one of the other
um traces so if you look on the back you
see that once they come down off this
connector they go to these big traces
that run across the board to power rails
so you got a direct short from the power
rail to the ground and these two tantum
capacitors go across those twoo so my
guess is although I may be wrong but my
guess is those capacitors are shorted
I'm testing them in board so what I'm
going to do is I'm going to pull them
off the board and then see if it's if
the traces are still shorted and then we
can also test the the capacitor off the
board so I'll do that and uh we'll check
it
out all right so we pulled it
out look at that it even fixed my damn
meter that was off
point2 all right so at least that
capacitor is shorted so I'll test the
traces now too you know to see if this
and the one that it's connected to is
still shorted if it's not that was the
only thing shorted but just as a
preventative thing I'm going to go
around the board and and find every
tantalum cap and replace them because
we're already getting them failing on
this board so uh it's just a matter of
time before the other ones do too um so
let me go through that a little bit oh I
have to replace the capacitor too of
course the value of it is a little weird
to understand it's blue black and brown
which I don't know how to really read
that on these capacitors they're not
mark it does have the positive end
marked so I'm going to look on the
schematics again and see what it tells
us the the value is but so we can swap
them a lot of the other ones it has it
actually printed on the on the capacitor
but
uh we are getting
[Music]
there all right so I have changed out
the tantalums on this one and uh my
three traces are no longer
shorted so I believe if I put it back in
right now it would uh not turn the power
supply off but it may not work but it
wouldn't turn the PES SP off so now I'm
going to go through and um I'm not going
to clean all of the chips just CU
there's so many of them but I'm going to
pull out any of the ones that look like
they have got any kind
of
um oxidation somebody was getting on me
earlier because I pronounced it
wrong get over it people any
oxidation
oxidization on the um on the pins if it
looks bad I'll clean that particular one
but most of them look pretty pretty
shiny so I don't think I got to do all
of them but then uh that's it for this
board there's not really anything else
on there now this one over here has
similar issues going on so we'll mess
with it
next so this is the second board the
memory board and another tantalum I
guess I should mention I'm replacing
them with electrolytics from what I
understand the tantalums are are more uh
precise but the um on an older setup
usually you you don't necessarily have
to replace them with a tantalum so I'm
using
electrolytics and we'll see what happens
um and there are other electrolytics
here I'm also going to replace while I'm
at
it uh and
then same thing I'm going to clean some
of the chips and I'm going to replace
this battery with a button
battery we're going to see if we can
figure out if that's the original one or
if it's been replaced already once
before what the deal
is so I I'll start on the caps and then
I'll clean the chips and then we'll do a
little thing on the
battery okay folks so I have pulled the
battery off and
it isn't really corroded
but there's no date on it either it's
been corroded and look see
the see that that's where they've been
cleaning this with sandpaper probably
the first time they did it and the
corrosion is came back a little bit or
they never got it all the way off so I'm
going to clean this up better take this
off and get it nice and shiny again and
then neutralize it with a little bit of
vinegar and then um clean it up a little
bit but um usually this is very minor
usually it's like way over into here
you're causing you problems on the other
chips around it so um we'll clean that
up and then I'm going to put a little
button battery on
it okay so I've cleaned up the edge
connector for the ribbon
cable uh there was a like the eom the it
looked like it had some uh dirty legs
clean them and then what I've decided to
do I've seen people uh and I've done it
before where you put like a triple
battery holder and and things on it this
battery that was on it the board uh
recharges so you need to put a diode
between your battery and the positive so
so what I've done is I took a
little button
Mount and installed it in two of the
holes that don't connect to
anything and then connected the ground
to ground and then used a a um diode to
connect from the positive the positive
so when the board's on it's not charging
trying to charge the
battery
um that isn't
rechargeable and plus with that mount
that mounts in there like that so it'll
be easy for people to take that little
cover off which you can do in the
machine and swap the battery so we'll
see how that
works definitely better than
this okay so I'm going to start putting
it all back together and then we'll test
it and see if it works I mean it may not
even there may be problems with the U
with the logic on it but we'll put it
all back together and see if we can get
it back in the
machine okay so we got it back
together everything mounted how it
should
be very
cool we'll put the little cover back on
it and then try it in the machine it may
or may not
work
um
but I uh cleaned off chips I replaced
capacitors I fixed a little battery
damage I put in a new battery now they
will work without a
battery but
um there you go all right so let's try
it back in the machine and see if we get
anything okay folks so we put it back in
and I took this ball blue so that the
brightness won't uh make it where we
can't see the LEDs on
the on the
um control units so let's see if
anything different
happens
okay yeah I like that so it went to
enable pricing or initializing lock on
and then it jumped over there to normal
operation but I thought that at the
beginning these um would rotate around
one time maybe not on this one uh my
four lights are still on on my power
supply everything's looking good so
maybe
um maybe we can add some
credits
it's saying top selection 100 let me see
if I can put the credit on
it sometimes you can just kind
of Nagle these a little bit and it'll
add some credit
got 11 credits I do not have a record
but we're going to try one so let's try
190 all right and it even could tell
that there was no record great
smooth as
silk
wow wow all right so here's what I'm
going to do I'm going to go get a
record all right we're Blinded By the
Light again but here we go I put one in
111 that's way too bright I'm going to
make it real dark just so that we can
actually see it
[Music]
playing if it's going to
play there we go that's a little more
like
it now I have no clue if the amp Works
anything like
that o missed
it might need to adjust that a little
bit grabbed 101 instead of 111 H might
need a little adjustment on the mech but
that would be for another video I just
want to make sure that the CPU is
working uh let's see if I tell it 121 if
it'll grab
it this is our control unit video people
not our mechanism adjustment
video that'll do
it
so I need to adjust the mech we're off
on that a little
bit but I think that has fixed our
control unit very very cool so there you
go now like I was saying if if you get
uh if yours isn't working right
definitely check those capacitors like
we did
but um that's not typical usually you're
going to have tons of battery damage you
might have some other stuff going on too
but but there you go hope that helps you
a little bit
so I guess we should see what it looks
like let's see what it looks like with
the top
down such a good looking box these sound
really good too you can't really tell
with that record it's not really a uh
much of
a much of a
cooker but uh such a goodlook box these
are one of my
favorites so anyway leave your comments
below hope you enjoyed it hopefully
that'll help you on your CPU so you at
least know what you're looking at in
there and uh make sure to leave your
comments below let us know what you
think I'd love to see more people fix
these uh older Juke boxes because a lot
of them are being very neglected right
so it's easy to find one broke so find
one broke near you you might try list I
don't know if you'll find one this nice
this thing is in good shape holy crap
well it's not perfect but it's very nice
so leave your comments down below you
can see all the games that we have
available for sale if you're interested
in buying one on our website go to lions
arcade.com and we it's always up to date
or you can come by and see us we're in
downtown Rock Hill South Carolina which
is about 15 miles south of Charlotte
North Carolina and we got a
building full of arcade games and
pinball machines it's just a few were
working on right there uh so you can
come by and see us now if you can't come
by and see us that's fine just subscribe
to us we had a gentleman from Wisconsin
telling us earlier that uh he watches
our videos thank you Wisconsin we see
you up there right um leave your
comments uh below and let us know where
you where you're watching from we think
that's pretty cool and we'll try to give
you a shout out um if you remind us
enough and uh down below we'll have a
link to uh something on Amazon now if
you
uh follow that link to Amazon anything
you buy on Amazon doesn't cost you any
extra it doesn't raise your prices or
anything but it gives us a royalty for
sending you to Amazon because Amazon
considers that advertising and pays us
as such so it doesn't give you it
doesn't cost you money it costs Amazon
money and that's what I like to
hear Look At Matt laughing at me we see
you out there man but uh um um so go buy
some stuff on Amazon using our link and
it'll give us uh Amazon's money so we
appreciate it leave your comments below
let us know what you think make sure to
give us a thumbs up for filming us
working on this thing for you tonight
I've still got a little bit of stuff I
got to do left to it I got to check the
light bulbs and stuff and I got to
adjust the mech so that it grabs the
right record um may end up having to
rebuild the amp or something like that
but that would be a separate video folks
uh we just wanted to do one just about
the control unit so there you go hope
you enjoyed it see you on the next one