
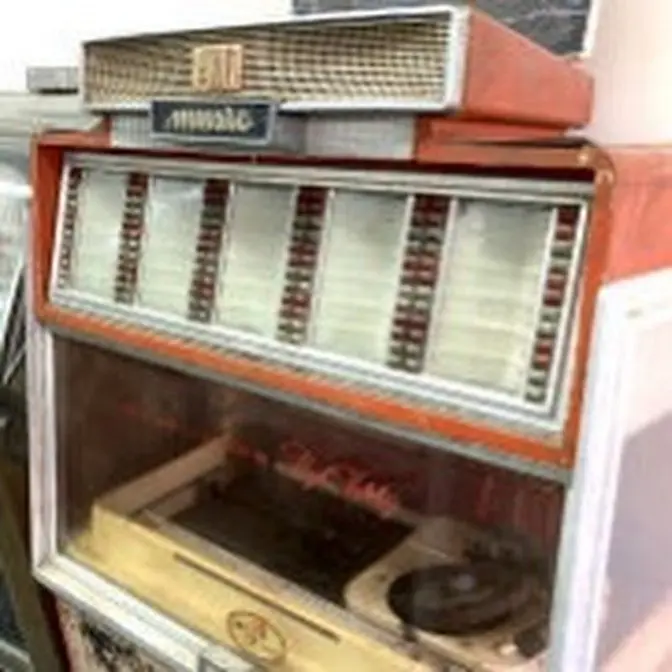
How The Sensors And Mech Board Works In A Rock-Ola 496 Jukebox
796 Video Views·Apr 21, 2025
We repair some sensor board and mechanism board issues in a Rock-Ola 496 jukebox, this is very similar and sometimes the exact same parts that were in the 490, the 494, and even the 3000X and things like that, the CD versions of the jukebox. If you have issues with your mechanism actually playing, or finding the records, this may help you!
ladies and gentlemen this is Joe's
classic video games back with another
rockola repair video for you
today if you have a rockola juke box
especially a
496 hopefully this will help you
understand a little bit of how it works
as we try to figure out how it works and
fix this thing now this one is the 496
so it uses the system
3 uh control unit which there's I I
think this and maybe one other machine
used it so it's kind of the most uh rare
of the control units so the system one
stuff was the profit Setter computers I
believe they called them which was in
like rockol
488s uh 480s stuff like that and then
they had the system 2 that was in the
rockola 490 the
494 and then they had uh system 3 which
is this one and then shortly after this
they switched over to CD boxes and they
kind of redesigned designed this one to
make it the system 4 setup but we're
working on the system 3 board today and
the mechanism so as you can see we've
got it all torn apart it looks crazy but
it's not that crazy so we've got the
door up in the
air we've got the front glass off it's
right
here um and we've got the display apart
because on the previous video that we
did on this we were working on this
display so we had to repair the board to
get the display working again which we
kind of wanted to do first because uh if
you can read the display it kind of
gives you a little bit of information
about what's going on with the machine
so there's some LEDs up here that light
up and on the cover here it shows you
what they mean the one that uh is lit up
now says default pricing uh which just
basically means that it hasn't been set
up yet but it's actually up and running
uh and the display says
100 uh which I think is the most popular
selection with which is just a generic
number because the battery has been
replaced so it forgot all its settings
and then 284 is the position that it's
at right now it's at record
284 uh or it says it is I wonder if
we're even close to that looks to me
like we're at record
248 H or
one 124 something like that I don't know
we'll figure that out later right but
since we just turned it on and it hasn't
been spinning maybe it's doesn't know
where it's at yet but the problem with
this right at the moment is whenever you
let it operate it just spins and Spins
and
Spins okay so it's spinning around it
never comes to the home
position and we're trying to figure out
why that is
so now that I look at
it it does seem like it's not like lined
up right like it says we're at 106 but
we're at
one uh
37 that ain't right Joe that's not even
close to right it's broke it's broke
that's his answer for everything we're
trying to troubleshooting he just wants
to tell me come on now all right so
let's turn it off and back on and see if
it uh catches it different so we'll
let's do we'll turn it off first so
we'll turn it
off and then I'm going to put it in
operate mode and then we'll turn it on
and see if it can tell where it
is so it's going to initialize and then
go up the default
price let's see if it can catch itself
at home
position normal operation is when it
comes on it will turn around maybe one
time and then stop it can tell if it's
on 100 or 200 because of that switch you
hear in the back there's a big clunk
going on not sure what that is but
basically that switch is getting
pressed so if I stop it there that's at
about home position you can see here it
says we're at
282
um when we're really at
200
and so the second time around now we're
at 172 so I don't think that it's
counting right uh it could be we have
this
misadjusted but when it comes up it kind
of wants to be at the position that it's
at now so let's try resetting it with it
at that
position of course this wouldn't fix it
we're just trying to diagnose
it started it
[Music]
moving might take it a little while to
index itself and know where it's
at H looking
better so we're at uh 155 it says we're
at 145 so that's
not yeah so we probably didn't have
stopped right at the index
position that's probably a little
closer if this is all confusing we'll
clarify here in a minute
but so we're trying to start it at
zero and see if it can figure out where
it's at
might help us understand how it
works okay we'll let it go around
twice so we are
at
221 or
121 221 so I think the problem is you
know usually after it played a record it
would uh hang it up and uh stop at zero
and then whenever you turned it on it
would know that it was at zero and start
indexing by counting the little things
on the side
um and uh that would get it
going so it's counting properly as long
as you start at
zero but there ought to be some way for
it to fix itself if it was turned off
where it's not at zero but ours isn't
doing that and it's not stopping when it
gets to zero uh I guess because it can't
tell that it's at zero now the
unfortunate part of this is we don't
have schematics for this
one I can't find them but I'm going to
look here on the side and see if I can
figure out how it's supposed to
determine that it's at zero position
usually there's a home switch that it
hits but on this particular one I can't
see one so uh I haven't found that yet
so I was thinking that it was just doing
it by
counting um with the optic on the side
but I don't know so let me see what I
can figure out and uh I'll come back
okay so this is the optic from the 496
it also appears to be the optic from the
CD boxes so
the
uh what do they call that the CD the
laser 2000 and the 3000 The Mirage
3000 so uh the next rockolas apparently
used the same sensor
board so if you look at the other side
our mystery is solved look at this
little number
here
so this is reading the encoder wheel and
that's what's
counting these
two should catch the
um should catch the home position
because of the way it's all set up seems
like a strange way to do
it see
how it was silk screen
for
um
OCT two and OCT
one Optical circuit 2 Optical circuit
one maybe that's what that
means but that's not how it was put
together they they just put some taller
ones up
above the other
one and it looks like that's probably
Factory um and they did silk screen it
in where you could use either one right
so I guess that's just how it came from
the
factory and then uh it comes down to
here jumps across that so it's
getting let's see if I can figure out
how it's
working so there is a
resistor there's no silk screen on the
top or there's no uh traces on the top
so the
[Music]
one is connected to one of the voltages
I
guess and then the other
one is connected to the same Trace that
the inside one is and then on this
side our Strange one
here this is
just is also connected to a
resistor I'm trying to figure out how it
sends the signal
back is
it is that one
separate I mean it has to have a
separate
signal
J1 runs to there
there which
is C1 and then to the chip
yeah so that one yeah it does it looks
like it's connected because all the
flux well I think we kind of can tell
how it must have been
designed oh yeah it's not connected see
the little square cutout around it it
just looks like it's connected so this
bottom left one
here is our signal yeah so it's two
separate signals just making
sure okay so those could just be dirty
or they're bad wonder if there's a part
number on it kind of it almost looks
like there's a housing or something
missing yeah it kind of looks like there
was some kind
of pot glue or whatever potting on
it what do you think has that been torn
apart by
something maybe I can find another
picture of this
assembly and see if I'm missing
something part of the smaller one is H22
A1 which I found this in the rockola
3000 manual it uses the same part but it
doesn't say what the part number is of
the these extra ones
here just enough to mess this up and as
you can see there's no part number on
them so if they are messed up we'll just
have to get generic with
it okay so
uh I don't think I don't know if there's
a way to check
those so see how they're up higher than
this that makes sense if you look at the
encoder wheel on the actual machine so
on the side there is this black encoder
wheel here that runs through the
sensor and so you see all the little
teeth are close to the edge that's what
this the the One sensor is reading that
gives us the you know where it can
tell what record we're on and then when
you get to the home position there is
this
Gap that's farther in that this sensor
wouldn't be able to see
but the other one
would so it must be that it's set up
where whenever that thing sees that hole
it stops and that's the home
position so just our top set of Optics
either isn't working or the board isn't
reading them or whatever so we're just
going to try to Simply clean it and put
it back in and make sure it's adjusted
in the right
position okay so we got it back in and
it's doing the same thing so I have a
logic probe hooked up to the board still
from where we were working on it the
last video
and you can see as it turns that that
led
blinks okay so if I go down
here there are only four wires not five
wires so one of them is high all the
time that's going to be our
power
right one of them is low all the
time that is our
uh that is our uh ground
one of them is pulsing all the
time you can see that it's in rhythm
with the LED
because and when it gets to the middle
it
stops because there's that spot in the
encoder where there's
no where there's no U way for the the
signal to get from one optic to the
other right it's
blocked so it just stays low that whole
time right so if I go over to this other
one
I can get my connection on it
here come on you sucker okay it's that
one we are low and here's the see how we
went right through the home position the
home position of course is where there's
records
missing
it just always stays low so what's going
on it's not seeing through that
hole so it's never creating the
signal uh where it sees through the hole
and I guess tells it that that's the
home position in the
stop so we've got something wrong with
that optic those Optics and they are not
listed in the parts manual that I have
what are they doing to me
let's see if we can tell if it's lined
up right maybe it's in the wrong
spot okay I'm G Turn it it's going to
make a lot of noise so watch
yourselves one's
hurring
who I went past
it I don't have enough hands here
people
what do y'all
think it looks to me like it's lined up
perfect this little freaking switch over
here
are they up too
high man it could be they're up too
high H I wonder if we're missing some
spacers
from this little
board and it should be farther
out or that bracket looks like it can
move
H all right we might have some options
here maybe it just it doesn't look like
it's quite lined up does
it yeah look at that the optic is at the
top of those little things so I don't
think it's shining through I think we
got the board down too low so I looked
on the I looked on the uh in the manual
and there are not any little missing
spacers or
anything
but if I can get to it where are we
we're lost what
happened look people I'm trying to show
you all of the good stuff okay if you
don't like it you can fast
forward where are
[Music]
we there we are look at that we've got
it
buried
if it'll grab that there we go look at
that it's touching so we're just too low
so I need to figure out a way to make
that up higher it must be bent or
something or I might just loosen that
screw and it moves but we need to get
that up in the manual it says 3 64s of
an inch right now we're at zero of an
inch okay it let me pivot it a little
bit by just loosening that screw over
there so I have some clearance
now which
uh hopefully will work a lot better for
us hopefully hopefully keep your fingers
crossed
people it's still reading so we got that
one right at
least
ha yeah yeah yeah fixed another
one let's see if it'll do it
again yeah
yeah I'd like to thank all of the little
people without your support I could not
do what I do I mean I know I'm great
but I by the way I did this gimmick one
time on a video and some idiot replied
and was like oh you think you're so
buddy it's a joke okay lighten up a
little bit all
right all right so uh
wow I think it's doing what it's
supposed to be
doing so we got to fix the display back
together I showed this on the previous
video now we worked on this we got this
thing working right but obviously that's
not how it's supposed to
go excuse me yep yep yep got me or I
need to clear my
throat this is the
original keyboard that goes on there
notice the
problem the way they designed this thing
it had a
membrane which if you don't know how
that works basically you there's there
is a printed piece of plastic and when
you press on it it touches another piece
of plastic and that conducts enough
through the lines to be a switch
basically
where you you connect the two electrical
lines together but the problem is these
things they they rot actually after
they're after they get pretty old they
don't work anymore that's all screwed up
and this flexible tape here if you get a
little crack in it or any kind of
corrosion where it
crimps um it just stops working so we
had three of these and none of them
worked right they had buttons that were
screwed up so we've been wanting to do
this for a while this is a big problem
people run into it all the
time that keyboard is very similar to
the CD boxes too the laser 2 the laser
2000 and the CD
3000 okay so we thought hey why
not just drill holes and put a bunch of
buttons on it so that's what we did we
drilled holes through the original spots
and just put buttons now we got one a
little crooked it'll be all right PE
people it doesn't have to be perfect
people it's close enough to perfect for
me that's for that's for our buddy N I
know he's
watching that's about as good as we
could get it now I'm sure you could do
it better but we just drilled and put
buttons in the holes we put a little
silicone on the back so they don't come
off and then we just wired it all up and
made a new connector and the old stuff
is still there but it's not going to
work cuz we're not going to plug it
in
what do you think I think that'll
probably work we're going to try it so
I'm going to mount that back onto this
and mount it back up in there where it
goes and then we'll see if we can get
any of the selections to work uh I
couldn't tell before if they were
working because we couldn't read the
display but now that we have the display
fixed maybe it will uh maybe it will
cooperate we have to do one last thing
though before we do that this little
chip is unpopulated on this board
because I pulled it out while we were
working on some stuff
that chip we figured out on the previous
video uh drives these LEDs on this
display not the actual digits but the
the little lights so it's used to drive
those four lights so I got to put one of
those back in it's a
uln2803 so we'll put that back in and
then we'll uh we'll bolt this back onto
the keyboard and see if we can get any
of the selections to
work what do you
think looks great
okay
um so we haven't played it
yet because we haven't had the keyboard
working okay so if I press the fourth
button on this it should add a
credit yep One play
okay yeah
buddy so if I do three it'll start a
record so we're going to not do that one
two worked one three
worked you can't start anything with
four right one four worked one five
works one six works and reset Works 1 s
Works 1 eight works one nine
Works 20 works perfect uh view hits
Works
two 30
seven I have no
clue if it'll pick up or
anything it is on
[Music]
237 sounds like we only have one speaker
working
[Music]
this one's Stone
[Music]
dead this one's
working that one's
dead uh crazy so this is the Left
Channel that's the right channel
obviously so we got one on the left
channel one on the right Channel unless
they're not wired right so they may have
the wires reversed or something I don't
even know how you get to that down there
where the speakers
are
H
well that's our next thing but hey the
thing's playing and we got the uh
keyboard
working and it seems like it's up and
running
this one they've got a
capacitor on the red wire this one
they've got a capacitor on the black
wire which I think they do as a
um I think they do that to so they're
out of phase with each other or they're
whatever I think it's supposed to be
like that
um that capacitor could be bad though
the hell with it I'm going SW swap the
wires I don't think that it matters
though the way they've got
that yeah and these are kind of trained
where it looks like they've always been
like
that yeah no
difference so that's probably supposed
to be like
that um let me get a multimeter and I'll
just check the uh resistance of the of
the um
speaker and then
uh we'll jump over that cap if we need
to and see if we can get at least that
one back okay so this thing measures 7
ohms
resistance I know resistance doesn't
really tell you but that's all I can do
right so uh I think it's probably fine
and if I plug the wiring from that side
into this speaker this speaker no longer
works so kind of seems like one of our
channels is completely
out
um so that is what it is okay uh
also whenever it lays it down it kind of
stutters a little bit jerks a lot of
times that's a physical thing but on
this on this particular box there is a
Mech board over here and it seems like
when the relay if you if I wiggle the
relay it makes it work a little better
so I think we just got a bad relay
socket but we're kind of getting there
wonder if
it did that because it needs to get a
let's see if it's messed up again
I don't like that oh it's playing it's
trying to play another one yeah so see
how it's not doing anything now if you
mess with this relay big ice cube
relay it kind of goes through the
motions
here there's cool and the
Gang
all right so
um I think we got amp
problems and I don't like how this is
not stopping where it's supposed to stop
again did I lean on the basket and mess
it up
again I don't know it's keep trying to
keep playing the same things all right I
got to reset all of the all of the U
credits I
guess um and then we'll go from there so
I hit the button that clears the
selections and it went back to home and
stopped
so okay so uh let's see about uh let's
look at the mech board with
the the cube um relay in it and see if
we can figure that out so here is this
little Mech
board
55180 d
a same thing seems like it was in in the
496 which was the 45 box that could also
do CDs and then it was in the uh 498 I
think there was a
498 uh and then it was in the laser 2000
and it was in the um I mean the laser
200 yeah did I say laser 2000 laser 2000
and the Mirage 3000 which were the CD
boxes it may have been in some later CD
boxes too but that early age of the CD
boxes there's not
much there's not much information about
all that out there uh I actually have
one of the laser 2000s we're going to do
a whole series of videos on because
that's fascinating to me that it was
like the first CD box
so this one's actually the first CD box
but it was like an addin but the the
Blazer 2000 was strictly
CDs okay so yeah so whenever I have the
problem where it stops if I wiggle this
relay
um it does its thing
so let's see what the socket looks
like looks like we've scraped the crap
out of
the
leads so I think maybe we spr spray some
contact cleaner down in there let's see
what the bottom looks like let's see
what these solder joints look like what
do you
think
H they're probably all right but I'm
going Reflow all of
them okay so I'm just going to Reflow
some solder I'm going to clean the
socket clean the bottom of this it could
be the contacts in here but since
whenever you wiggle it they work I don't
know and of course we could always just
put a new relay in it I don't have one
of these
but it's a 24volt
coil
SK
np20 or
2C something like
that Sky
Electronics it's just a very simple
relay with two sets of
contacts the play relay I
believe
this one is a different
one okie
dokie so let me clean it up a little bit
so it is still doing it and if I wiggle
the wire
harness doesn't do anything if I wiggle
the ribbon cable it doesn't do anything
but the
cube
relay if I mess with
it it does
something I don't know I have another
one of those boards I guess we'll try
swapping it it could be the actual
socket but everything looked
fine so uh and it won't cancel sometimes
I think that's a similar
situation so we're we're still messing
with
that so here's the one that's in there I
took the relay apart and it seems fine
the throw isn't great on
it but it is working and if you test the
continuity everything's
fine um and then if I put it in the
socket and I test continuity through the
socket everything's
fine but I have these two boards this is
the one that we're using it's cleaner
this is another one I don't even know
where we got this but it's got a bunch
of you know Corr well not it's not
really corrosion it's
just filth it's got a bunch of Filth on
it um
but uh I can compare values and this is
an MPS
a56
here and when I compare between the
Middle leg and this one it's almost
shorted it's like it's
0.1 when I do it on this one it's a
08 I mean a 05 I wonder if it's because
I got this relay in
though that might do it all right let me
try it again yeah if I take the the um
relay out it's fine so I don't know
everything tests
fine and we've drenched it in contact
cleaner and it actually looks fairly
clean and it connects through with
the multimeter
H I don't know you saw it though clear
as day if I press on that it makes it
[Music]
work and I can't find anything that's
maybe broke in half or something none of
that I don't
know I don't know it's a mystery to me
and if the uh if you wiggle the ribbon
cable it it won't do it Ribble the
connector up here it won't do it it's
just a if you push on the cube relay
this kind of crap we run into I hate
intermittent problems they're so hard to
figure out because they don't they'll
start working and everything's cool and
then they'll act up days
later so those big old Power transistors
are nte
392s uh but they seem fine and
everything's work it if you best with
it um which tells me any bad solder
joints so you know what I'm going to do
I'm going to resolder all the solder
joints deal with
it okay folks I'm trying to figure out
how in the world this thing works this
is the latch relay because it actually
latches one way and then the other this
is the reverse relay so this is the one
that when I tapped on it it would make
it start working like whenever it was
laying it down right well now it won't
cancel and it's the reverse relay which
makes sense right so again these are the
wrong schematics these are from an
earlier one but it's it looks like it's
pretty similar so I've been messing with
this for like literally two or three
hours just trying to wrap my head around
how it works so there is a black wire
that comes
on this board and it appears this board
and goes over to a
switch uh which is the the cancel switch
and then there is a black and orange
wire which also goes to the cancel
switch and if the two connect that's
supposed to cancel the record and return
it now on the back of the box if you hit
the cancel
button you hear a click click click
right when you hit the cancel on the
tone arm it goes click click click but
you're hearing it from like the
amplifier so what it's doing is it's
turning on the mute
relay because you're you're hanging up
the record so it's muting it so what's
that tell you it tells you all the
wiring and everything's fine so we must
have some kind of problem with this
board or something right so if you look
whenever that thing connects the black
orange and the black line part of my
chicken
scratch basically what it does is this
is the ground
line and
instead through a a switch on the cam
that's closed it connects the black and
orange line to ground so the black and
orange line
goes over here and goes back over to the
mpu and the amp which is turns on the
mute relay but you're basically
connecting this point right here to
ground through the switch that you're
hitting the cancel switch so you're
taking this black line here and making
it up here
instead well if the latch relay is a
certain way which is this
one that ground then connects through to
the reverse relay which is this
one the reverse relay would then pull in
and reverse
everything
so with that uh that is not happening
that's never happening so then I started
thinking well maybe it's this side of
the line you know because it's getting
the ground maybe it's not getting the
power so this side connects over to
here pin 4 which there calling um when
did I lose it they're calling it the cam
one line coming from the CPU so it's
like the power so it comes down through
here blah blah blah blah blah off the
page and through a
switch that connects it
to this
line This bottom line which is a red and
blue
line so again these are the wrong
schematics but they're
similar so here is our cam one line it
comes down it goes through the cam
switch
one uh whenever it's in the position
that it's in which is down I guess that
connects the power from here to here
this red and blue line and this red and
blue line is basically the power input
that is before the fuse so my whole
point is for this to have power
this switch has to be closed so see how
on the earlier ones like the 490 rockola
490 it had four switches number one
number two outer number two inner and
number
three well guess what by the 496 they
have simplified it and there are now
just two
switches so it looks like they've got
rid of the number two enter and the
number two
outer so this is the cam number one
switch I'll destroy this freaking record
uh this is the cam number one switch
which is closed but there's 67 ohms
resistance in the switch so in other
words the switch is screwed up so uh I'm
going to try taking that off cleaning it
repairing it replacing it something and
uh see if that works I think to test my
theory though I'm just going to put a
little jumper on it and see if uh see if
everything
works okay so I have removed the
offending switch so I'll show you what
I'm talking
about I try to make these videos where
people can understand them but I can't
tell if they can understand them because
I don't have any feedback cuz nobody's
here right now except
me okay so this is just your typical
micro switch now I see these in arcade
games
constantly so this is like ain't no
thing to me you know what I mean we get
these all the time this particular one
has a little
roller on the blade here the
actuator a lot of times we have them
that don't even have an actuator in
arcade games cuz they use them for push
buttons and joysticks and all that stuff
so here's the theory at
least right
now this is your common terminal
here okay and this is your normally
connected terminal right normally closed
whatever so right now those two should
be connected connected so if we test it
with the
multimeter
2.1 ohms
resistance okay that's how it's supposed
to be my leads have about 02 ohms
resistance in them so I just I just shut
it with my finger right so when I shut
it it disconnects the normally connected
so now it's an open Line let it go back
it's connected again okay so this one is
supposed to do the same thing but in the
opposite it's normally open so right now
it's open so when you connect
it it's not
connecting sometimes you'll
get something
like 200 ohm 60 ohms or something like
that so that's our problem bad micro
switch so when I say bad
whoa so when I say bad what that really
means is
dirty
sometimes you can pop them apart and
clean them but a lot of times there's
just too much going on inside of them to
get them
clean almost stabbed
myself
this isn't one of the ones that's
riveted
so it will probably pop
apart oh yeah it did pop
apart oh it's great okay so inside of
this is a bunch of dirt
okay
so the one we were having trouble
connecting to was this one so if we
could have got it apart without the
whole thing breaking we might have been
able to
clean you know the
rivets the contacts but what can you do
so here's what I'm going to try to do
I'm G see if I can get this roller off
I'mma need
that come
on I'm trying to save you so you may
live
again so with that with this switch
being screwed up you're not going to get
power to your reverse relay so it'll
never cancel that's my
theory get
up I'm trying to crack everything around
it and not that actuator itself I want
to save the
actuator I don't want to pull on it and
bend it
there we go all right so the little
actuator you can just transfer over to
another
switch so here's a brand new one we get
these by the bucket
loads and if you look there's two little
lines up in the top if we can get this
actuator in
there it'll work just like the other one
so I'm going to try to pry it apart
just barely enough to slip that down in
that little
line yeah
buddy that's more like it get rid of all
this old stuff so 1988 to
2022 Christmas 2022 we were able to put
the actuator back in a new Switch so
that it may live on let's see if it'll
do what we need it to
do that's normally
connected open Line it works fine this
one is open
Line normally connected that might do it
okay I'm going to go try to put it back
in and end this super long video by the
way if you're if you're watching this
video because you have one of your own
you need to check this with a multimeter
first don't just replace it cuz it
doesn't necessarily mean it'll fix it
but this one you know we tested it's got
problems so you kind of need to use a
Multimeter do just like we did and test
the switch you can do it in the machine
but you need to unplug the wires from it
and don't don't mix up where the wires
go
either okay folks so I've got it all
back in uh I've turned down the volume
if you saw earlier we have a speaker and
a half worker and so the amp needs a lot
of work and uh you know copyright laws I
can't just play you all kinds of stuff
but let's see see if it's going to
work 2 one
two it's looking for
it everything seems to be cool so
far went through the ab switch oh it has
selected a
record that's a dirty record though
than's
filthy huh anything huh
I guess I've got it turned down so low
you can't hear it at
[Music]
all
yeah okay so
uh when it eventually gets to the
end the per purple
one keep your fingers
crossed the purple one has
spoken there it goes oh
yeah it's like butter people all right
so if you get that problem where it
won't reverse it could be a lot of
things but it could be that switch and
again this is the 496 so it's a little
different than the 490 and all of that
but I hope that helps you ours is a
little farther along I'll do another
video where we work on the amplifier
because obviously uh we've got some
major issues with it so hope you enjoyed
it looks like we've got it kind of
mechanically doing its thing I still
need to disassemble the gripper arm and
oil it and all that cuz I see it
stuttering a little bit and I think
that's what's going on there but um very
cool so uh we've got it kind of doing
its thing where we can make selections
that will play the record and then hang
it up so mechanically it's at least
functioning it just needs to function a
little better and uh sonically it's not
working very well at all yet so if
you've got one of these that's what you
need to look at I hope it helped you
leave your comments down below make sure
to give us a thumbs up for taking the
trouble to film all this for you by the
way you know how you can support our
Channel go check out our website go to
Lions arcade.com we have a parts page on
our website uh where we are uh we list a
bunch of the stuff that we use uh on our
to do repairs on our videos so things
like um tools and oil and and stuff like
that that we that we use whenever we do
these so go check that out you you might
see something on there you'd like now if
you follow one of those links it will
take you to
Amazon once you go on Amazon through one
of our links anything you buy on Amazon
even if it's not something from our link
uh pays us a little percentage of your
purchase without raising your rates or
anything just as a fee for advertising
and sending you there through that link
so we appreciate everybody that's been
doing that finally last but not least
don't forget to check out my brother
Donnie the link is down below that is my
brother's channel here on YouTube we do
arcade games jukeboxes pinball machines
all of that cool stuff and my brother
Donnie does old Vehicles old buildings
things like that so uh I'm over there
with them on the channel hope you
enjoyed it I can't wait to get this
thing working so this is a rockola 496
if you have this problem though it's
going to be a similar problem on your
rockola 490 494 488
480 um the ones that used computer
systems so I hope you enjoyed it we will
see you on the next one