
How to knit a very easy baby vest
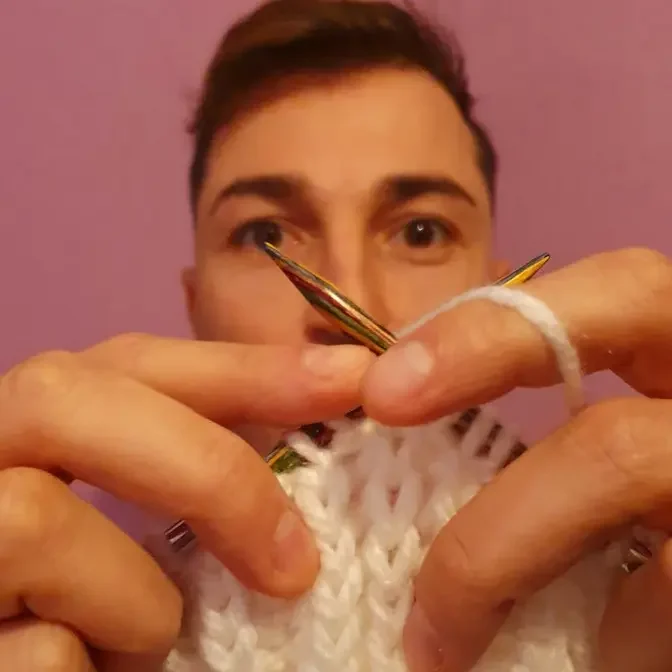
In this tutorial we learn how to knit a baby vest without any sewing parts.
What I used to knit the vest is; abou 110 gr. of sport yarn, 4,5mm. needles and 10 buttons.
Follow me:
instagram: https://www.instagram.com/diywithemil
blog: www.diymodaconemil.com
#tutorial #knitting #babyvest
Hello everyone, welcome to my channel. My name is Samuel and today we are going to learn how to
knit this baby vest. With 50 centimeters breast circumference and 35 centimeters long we made it
for 6 to 12 months young babies. So let's get started. What I have used to make the vest is
about 110 grams of this yarn which is recommended to work with 4 to 5 millimeter knitting needles
and I have used four and a half millimeter knitting needles no matter if they are straight
or cable. Then we're gonna need as well craft needle, scissors and 10 buttons. Well let's get
started with the front part of the vest and we are going to cast on 48 stitches on the knitting
needles and you don't need to leave a very long tail at the front part as we are not going to use
it for any sewing part. And then we are going to continue with the ribbing. So first we are going
to knit five. One, two, three, four and five which will be border and we'll make two borders on each
side with five stitches in the knit stitch and you have to know as well that the very first stitch we
have knitted in this case but we are not going to work it anymore as it's border stitch. So knit
five and then we're going to continue with the ribbing stitch two by two. Knit two, one, two and purl two.
One, two. This is all the sequence we are going to repeat until the last five stitches of the first
row. Knit two and purl two. So let's continue with it. Knit two and purl two. So we continue with the
sequence of knit two and purl two and if everything is going okay the last two stitches before the
border stitches, the five border stitches, they should be knit two. One and two. And then we have
the last five stitches knit stitch. Knit five. So this way we get symmetrical the labor on both sides
and we start with knit two and we end with knit two. And let's turn the labor and we're gonna continue
on the wrong side. If you remember I said that we are not going to work the very first stitch anymore
and this means that it will be slip stitch. It's a border stitch so we are not going to work it
anymore. We just slip it to the right hand needle and this is all what we're gonna do with
all the border stitches. And then we're gonna knit four. One, two, three and four. Again five stitches for
the border stitch at knit stitch. And then we're gonna continue with the opposite sequence of the
right side of the labor which is purl two and knit two. Purl two and knit two until the last five
stitches again. As the sequence is the opposite of the right side of the labor so we're gonna
over it. Purl two before the last five stitches. Knit five for the border. And this is the second
row of the vest. Well these two rows we are going to repeat for four times a total or another three
times until we have eight rows of the ribbing stitch two by two. Knit two and purl two. But before that we
have to continue with the buttonholes and the buttonholes we will make in the rows number three,
23, 43 and 63. In total there are eight buttonholes and it is one on the right side and one
on the left side. So let's continue with the first two buttonholes on the row number three which is
the very first stitch, slip stitch and then knit one. And for the first
buttonhole we are going to take yarn over and knit two together. And then knit one. So these are the
five stitches of the border and this is how it looks like the buttonhole. And then we're gonna
continue with the sequence of knit two and purl two until the last five stitches where we are going
to make the second buttonhole of the row number three. Well here I am with the last five stitches
of the border stitch and here is where we are going to make the second buttonhole and we are
going to knit one. Then we're gonna do knit two together, yarn over and knit. And this is how we do
on this side the buttonhole. And then we're gonna continue and with the row number four on the wrong
side with the same sequence of knit five and then continue with the purl two and knit two. And
we're gonna continue until we have the eight rows of the ribbing two by two with the five borders
on each side of the vest. Well once we have the eight rows of the ribbing stitch two by two what
we are going to do is continue with another 56 rows of the knit stitch which is knitting on both
sides of the labor. The right side and the wrong side as well. We are just going to knit all the
stitches until the row number 64 if we count the previous eight rows of the ribbing stitch.
And don't forget that we have buttonholes in the rows number 23, 43 and 63. We already have done
the buttonholes of the row number three so we got another six buttonholes. And let's continue with
them another 56 rows of knit stitch. This is how it looks like after the 56 rows of the knit stitch.
And if you count the eight previous rows of the ribbing stitch there should be 64 rows in total.
Now what we are going to do is continue decreasing five stitches on each side of the vest for the
armholes and then we're gonna continue with the shoulders. So let's continue with them.
Well this is a row number 65 and we're gonna start with decreasing five stitches with purl two
together. So the very first two stitches we're gonna purl together. Then we're gonna put back
the stitch to the left hand needle and we're gonna repeat the same. Purl two together. Again put the
stitch to the left hand needle and again purl two together. So we already have three decreases.
Again put the stitch to the left hand needle and purl two together. Four and five. And what you are
going to do now is knit five more stitches. One, two, three, four and five. Which are four stitches
for the border stitch and then knit two for two by two. Which is knit two, purl two. So we're gonna
continue it. Purl two and again knit two and purl two. And this sequence we are going to continue
until the last nine stitches. So knit two and purl two. Purl two and the last two stitches before the
should be knit two as well. This is how we get the symmetrical front part of the vest. Then what
we are going to do is continue it. Knit four for the border stitch. One, two, three, four. And then we're
gonna decrease the last five stitches on the wrong side and for it we are going to purl all of them.
And five. Purl five. Turn the labor and we're going to decrease these five stitches on the
wrong side. For it what you are going to do is slip the very first stitch, knit one and the previous
stitch with the left hand needle pick up and move it over the next one. Again knit the next one
and the previous stitch with the left hand needle and pass over the next one. Two, three, four and
five. Five decreases. And then what we are going to do is continue with knit three. One, two and three.
So these are the four border stitches and then we're going to continue with the opposite sequence
of the right side which is purl two and knit two. Purl two and knit two. To the last four stitches
of the row number 66. Knit two, purl two until the last four stitches, border stitches. One, two, three,
four, knit stitch. And this was the row number 66. After the five decreases on each side of
the vest what we are going to do is continue with another 22 rows of the same sequence with
four border stitches on each side and with the ribbing stitch two by two in the middle. So we're
going to have knit four, then knit two, purl two, knit two, purl two until the last four stitches. Knit four
and then on the wrong side knit four, purl two, knit two, purl two, knit two until the last four stitches
on the wrong side which are knit two as well. So we already have two rows and we're going to continue
with another 22 rows and a total there should be 24 rows with the same sequence. Once we have
the 22 rows or the 24 rows including the rows with the decreases what we are going to do is
decrease another seven stitches in the columns of the purl stitch. So what we're gonna do is
knit all the stitches and the columns of the purl stitch we have we are going to decrease the
stitches knitting two together. So every two purl stitches we're gonna knit together. Again knit two
and knit two together which are the two purl stitches of each column of purl stitch.
Of the purl stitch. So there are one, two, three, four, five, six, seven. So there should be seven
decreases as well together. Knit two, knit two together. So let's continue with it. Last two
stitches knit two together and then we over the row knitting all the rest of the stitches.
And then what we're going to do is turn the labor, turn the vest and on the wrong side we are going
to continue knitting all the stitches again. The first stitch slip stitch and then we knit all the
stitches, we knit all the stitches till the end of the row of the wrong side. This is how it looks
like after the seven decreases and what we are going to do is continue with another four rows
of knit stitch. So we're gonna knit four rows, another four rows. Once we once we have the four
rows of the knit stitch we're gonna decrease all the stitches and what we're going to do is just
slip the very first stitch then we're gonna knit the next one and the previous one we're gonna
we're gonna move over the next one. Knit another one and the previous one with the left hand needle
move over the next one. This is how we're gonna decrease all the stitches and if everything is
going okay they should be 31 stitches. And this is how we over the front side of the vest and
now we're gonna continue with the back. This is how it looks like the front side of the vest and
what we're going to do is only hide the two tails of each side of the vest and then we're
gonna continue with the back. Well, the back of the vest starts absolutely the same as the front
side with the same 48 stitches and the eight rows of the ribbing two by two. Knit two, purl two,
knit two and we have the same five border stitches on both sides of the label and then we continue
with the same 56 rows of the knit stitch but in this case we don't do the buttonholes.
The buttonholes we do them only on the front side and actually in the back we are going to put
the buttons. Well, so what we're gonna do then is continue with the five decreases on each side
of the vest of the label for the armholes. So we're gonna start with five decreases the same as
this part then we're gonna continue till the end of the row and on the wrong side we're gonna
continue with the next five decreases and then we're gonna over the row of the wrong side which
it will be 66. So we're gonna continue with 65, 66 and then we're gonna continue with the back
where we're gonna have another eight decreases. But let's continue with these two rows and then
we're gonna continue with the eight decreases on the back part which is not the same as the front
part here. So we start with the same five decreases, purl two together and then return the stitch to
the left hand needle. Again, purl two together and return the stitch to the left hand needle.
Two decreases, three, four and five decreases and then we're gonna continue knitting all the
stitches till the end of the row. Row number 65. Knit all the stitches till the end of the row 65
and then we're gonna continue on the wrong side. Turn our label on the wrong side and on the wrong
side we start with another five decreases. If you remember we have the simple decrease on this side.
So we're gonna slip the very first stitch and then knit one and the previous stitch we pass over
the stitch we just knitted. Then again knit one and the previous pass over the next one. Two and five
decreases and then we continue knitting all the stitches again till the end of the row. Row number
66. Well, these are the 66 rows of the back with five decreases on each side of the vest. And what
we are going to do is continue with another eight decreases, which we will make in the rows number
67, 69, 71 and 73. And they will be one on this side and one of the left side. On the right, on
and on the left. On the wrong side we are not going to do any decreases. So, let's continue with them.
Well, for the first decrease of the row 67 we are going to do it after the second stitch. So we're
gonna slip the very first stitch and then knit one. And for the first decrease we are going to knit
two stitches together. Knit two together and for the second decrease we're gonna continue
knitting until the last four stitches of the row 67. So we go to the last four stitches and
what we're gonna do is the same. Knit two together, two stitches together and knit the last two stitches
as well. And then what we're gonna do is continue on the wrong side. Turn the labor and continue
knitting all the stitches of the row 68, where we don't do any decreases. So, in all the vests we
don't do any decreases on the wrong side. So, I'm going to repeat you again. The decreases are in the
rows number 67, 69, 71 and 73. So, let's continue with them. Once we have the eight decreases in
eight rows what we are going to do is continue another 22 rows with knit stitch without any
decreases or any increases. 22 rows. This is how it looks like after the 22 rows and if we add the
eight rows of the decreases we have the same 30 rows as the front part of the vest. And now what
we are going to do is continue with the suspenders, with the vest suspenders and they will be
on each side with seven stitches. So, let's continue with them. So, let's continue with the
first shoulder or the first suspender and what we are going to do is knit seven. So, the very first
stitch, slip stitch and then two, three, four, five, six and seven. Then turn and we're gonna continue on
the wrong side again, knit seven. The very first stitch, slip stitch and then two, three, four, five, six, seven.
So, this way we are going to continue with the first seven stitches. So, this is how we are going to
continue for 24 rows of the knit stitch until we have the first suspender of the vest. Once we have
the 24 rows what we are going to do is the buttonhole and we're gonna slip the very first stitch.
Then we're gonna knit two, one, two, yarn over and knit two together. Knit two, one, two and this is how we make
the buttonhole in the suspender. And then we're gonna turn the suspender, the labor and we're
gonna continue again knitting all the stitches on the wrong side and then we're gonna continue
with another four rows of the knit stitch and then we're gonna bind off the seven stitches
for the first suspender. And to bind off the stitches we are going to do the same as we did
for the armhole where we purl two together. So, we're gonna purl two together. Then we pass the stitch
to the left hand needle and again purl two together. Again move back to the left hand needle and purl
two together. This is how we bind off all the seven stitches for the first suspender, for the first
shoulder. To continue with the left suspender what we are going to do is bind off 16 stitches. So,
this how we should get seven stitches in the end where we are going to continue with the same
suspender on the left side. So, what we are going to do is bind off by purl two together. So, we're
gonna slip the needle through the first two stitches and we're gonna purl them together.
Move back to the left hand needle, the stitch and purl two together. Again pass back to the
left hand needle and purl two together until we bind off 16 stitches. And we should
have seven stitches on the left hand needle. Once we have the seven stitches in the end of the row
what we are going to do is continue with absolutely the same suspender of 24 rows in each stitch.
Then we're gonna make the buttonhole in two rows and then another four rows before we bind off
all the stitches. And then we bind off the stitches and over with the second suspender.
Once we have both parts of the vest what we're going to do is hide all the tails and then we're
gonna continue with the buttons as we don't have any sewing part in this vest. And this is how it
looks like the vest with 50 centimeters breast circumference and 35 centimeters long. I hope you
really like it and if you have any question don't hesitate to do it in the comments below
and don't forget to subscribe and follow me on my Instagram. Bye-bye.