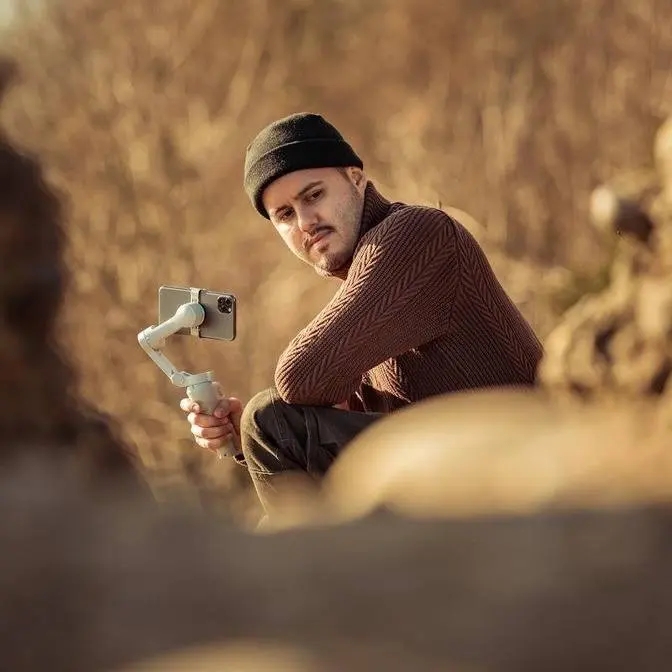
What’s in my camera bag for 2025 and the exact gear I use almost daily as a content creator. A lightweight, versatile setup for travel, vlogging, and cinematic shots without overpacking.
DISCLAIMER Some links are affiliate links, where I earn a small commission if you click on the link and purchase an item. You are not obligated to do so, but it does help support this YouTube channel and allow me to continue making videos for you. I appreciate your support!
TIMESTAMPS: 00:00 - Start 00:15 - Intro 00:48 - Versatile Kit 01:52 - Freewell Hybrid Filter Kit 03:10 - Insta360 Flow 2 Pro 05:07 - Anker Nano 05:36 - DJI Mic Mini 06:02 - Real Travel Tripod 06:45 - Sony ZV-E1 07:12 - Sony 20-70mm F4 07:26 - Nisi VND 07:56 - Multi-Tool 08:08 - Insta360 X5 09:47 - DJI Action 5 Pro 11:09 - DJI Neo 2 13:07 - Wandrd Backpack 14:05 - Outro
[music]
In this [music] video, I'm going to show
you what's inside my camera bag for 2025
and the exact gear I use almost daily
[music] for content creation. My goal
with this setup is simple. Stay
versatile without [music] overpacking. I
want equipment that is lightweight,
practical, and works in as many
situations as possible, especially when
I'm traveling or filming on the [music]
go. I've tested a lot of gear over the
years, and this is what earned a
permanent spot in my kit. This video is
not sponsored. Everything you see here
[music] is the gear I actually use and
rely on. If you want to take a closer
look, all [music] links are in the video
description below. One of the biggest
challenges when filming on the go
[music] is knowing what to pack. And
especially when traveling, I never fully
know what to expect. So my goal is
simple. Bring the gear that covers
[music] a wide range of shooting
scenarios without weighing me down. I
focus on lean setup that is [music]
flexible, reliable, and quick to use. On
a waterfall trip in Brazil, I carried
maybe 12 kilos of equipment on a 3-hour
hike. And by the [music] time we reached
the spot, I was super exhausted. I can't
talk like that.
>> How it is to vlog and go up.
>> Already out of breath. He's bringing a
lot of stuff in here, you know. Don't do
that.
>> I talk a lot about mobile film making,
but carrying a whole bag with me.
[laughter]
>> But I later realized I could have taken
[music] lighter alternatives that would
have done the same job with less effort.
Since then, I've cut [music] down my
kit. In the end, what matters most is
storytelling. You don't always need the
most cinematic shots and high-end
equipment. Authentic moments. [music]
Imperfect shots can just be as powerful
and often connect better also with the
audience. My pants are super wet right
now. Oh yeah. I want to start with the
mobile gear I use. First, I always have
my iPhone with me. It fits in my pocket.
It's lightweight. And most importantly,
it shoots high quality videos. And I'm
currently rocking the iPhone 17 Pro Max.
Now, to me, [music] the iPhone works
great as a main camera, as a Bcam, and a
backup. And it's also perfect for
capturing quick, authentic [music]
moments. Also, you have three lenses on
the back which give you multiple
perspectives which makes my videos more
dynamic compared [music] to shooting
with just one focal length. Helicopter.
Helicopter. For a more professional
[music] look, I film with the Blackmagic
camera app. I usually record in Apple
Log 2 because it gives me more
flexibility in color grading and makes
it easier [music] to match footage with
other cameras. It also reduces digital
sharpness you often see in phone footage
and creates a more natural image. I also
use a case with a V&D filter to get a
natural motion blur and a more cinematic
feel in my shots. Now, my [music]
favorite accessory is the hybrid filter
kit from Freewell. You can swap out
[music] the plates over here, but most
of the time I just use the ND32, which
gives me up to 10 [music] stops of light
control. Now, this filter right here
attaches magnetically to the case, which
makes the setup quick and easy, and the
whole kit fits neatly into the carrying
case. Next, as for the mobile gimbal, I
use the Insta [music] 360 Flow 2 Pro.
The DJI OM8 comes very close, and you
cannot go wrong with either of them. The
main reason I chose the Flow 2 Pro is
the fast setup time and the free tilt
mode, which makes it easy to create
smooth crane-like shots. The Insta3
Companion app also includes a [music]
built-in teleprompter, which is useful
if you script your videos or prefer a
more structured delivery. It also has a
built-in power bank allowing me to
charge [music] my phone while filming or
when not in use. Now, you're probably
wondering if I can use this gimbal
[music]
with the case and V&D. The answer is
yes. The most important part is that you
use the clamp and shift it as close as
possible to the V&D, so the gimbal does
not [music] use unnecessary power and
it's more well balanced. And you can see
as I move the gimbal, it [music] holds
up really well and doesn't tip or lose
its balance. I don't use a mobile gimbal
all the time, but when vlogging with
[music] my iPhone 17 Pro Max, especially
when I want to use the rear camera for
the best [music] image quality, its AI
tracker keeps me centered in the frame,
so I do not have to worry about being
cut out. So, this is how it looks like
when vlogging with the iPhone 17 Pro Max
using the Flow 2 Pro. I'm using the
extension pole and I'm filming this in
4K 25 frames per second using the
default camera app. I'm also filming
with the ultra wide angle lens. This way
I can fit more in the frame and I also
think it looks better when vlogging. Now
you can see I'm walking so the footage
should look stable using this gimbal.
I'm also using the DJI Mic Mini to
record highquality audio since I can't
see myself. I'm also using the AI
tracker. This way it keeps me centered
in the frame no matter where I move my
head. You can see that it follows me.
And this is great for filming yourself
or for demonstration videos or behind
the scenes. Even though the Flow 2 Pro
has a built-in power bank, it doesn't
offer fast charging. And this right here
is a pocket-sized power bank by Ankor
that offers fast charging with [music]
5,000 milliamp. And this is great if you
want to fast charge any of your devices.
What's really cool is that the USBC
[music] is foldable, so it doesn't stick
out. And you can also press this button
to [music] see how much charge is left.
I use this a lot when filming with my
iPhone as [music] it drains the battery
quickly and this extends the run time.
When recording audio, I use [music] the
DJI Mic Mini, which is my go-to wireless
mic. In fact, I'm using it right now
with my Sony ZV1 camera. Now, what's
cool is that I can also use this mic
with my iPhone and the Insta3 Flow 2
[music] Pro mobile gimbal. And what I
love about the DJI Mic Mini is the sound
quality and how simple [music] it is to
use. Basically, plugandplay. and the
fact that I can use it with multiple
cameras. Now, a tripod is one of the
essential tools every creator should
have because it lets you position your
camera however you like. [music] I'm
also using it right now for this video.
The main tripod I carry with me is the
Freewell Real Travel tripod. It is one
of the lightest tripods I have ever
used, yet is still very sturdy. It
weighs only 0.9 kg. It folds down very
small, but can also extend high enough
for standing talking head videos. And
the best part is that the plate doubles
as a tripod clamp. It has a ball head to
help you level your shots and a center
column that you can extend for [music]
extra height. Now, it is on the pricier
side, but overall, I think it's a great
option if you want to keep your setup
lightweight while still having all the
essential functions [music] of a tripod.
I also use my full-frame camera, the
Sony ZV1. It offers almost the same
capabilities as the Sony A7S3 in a
smaller form factor, and I mainly use my
Sony camera for talking head videos
[music] like you're seeing right now.
But I also use it for B-rolls for
shooting my thumbnails. [music] The
stabilization is also excellent for
handheld shots. I also use it with a
small rig cage for protection and better
grip. And even with the cage, it's still
very lightweight. Now, the go-to [music]
lens that I always put on is the 20 to
70 mm f4 from Sony. I absolutely love
this lens as it's super [music]
versatile, lightweight, and even at f4,
it produces a nice natural bokeh,
especially if you zoom in. Now, the V&D
filter [music] I use is from Nissi. It's
part of the Swift system, which allows
me to also [music] stack additional
filters from the kit, but most of the
time I just use the one to five stop.
I've tested out a bunch of V&D filters,
and the quality on the Nissi is
excellent. To mount the V&D, I use the
Revo ring [music] from HNY. The filter
has an 82 millimeter thread and with
this adapter I can mount it on [music]
any lens between 82 millimeters and 67
millimeters. And this very convenient
because I don't need step-up rings. Now
a tool I always carry with me is the
multi-tool from Small Rig. It includes
different screw types. It lets me
[music] mount the plates on the camera
for the tripod and tighten parts
whenever I need. If you create
tutorials, this 360 camera makes
capturing behind the scenes incredibly
[music] easy. This is the Insta3 X5, a
360 camera that captures everything
around you. And the best part is that
you can [music] start recording without
thinking about framing and choose the
framing later in post. For behind thes
scenes footage, I usually mount it onto
my backpack strap [music] using a quick
release mount from PGY Tech together
with a adjustable swivel from Small Rig.
And by mounting it onto my backpack
strap, you can achieve a natural POV
shot. And the internal microphone sounds
surprisingly good too. So you can use it
while talking or demonstrating [music]
something. So just to show you how it
would look like from the perspective of
the X5 mounted onto the backpack strap.
So now we switched over to the X5 and
you're also listening to the internal
mic. And because I'm close to the X5,
the audio quality should sound pretty
good. And you can see I have my Sony ZV1
camera here with the zoom lens D20 to70
which I really love. And I have it
mounted onto the Freewell travel tripod
which is super versatile. And this whole
setup is pretty lightweight. So yeah,
let's now switch back to the camera. And
there you have it. That is how awesome
it is to use the X5. You can really just
start recording without thinking about
framing and do that later in post. What
I really like about the X5 [music] is
that the lenses are interchangeable. So,
if you ever damage a lens, you can
replace it yourself using the lens
repair kit without sending the camera
[music] in or waiting days for service.
And this makes me much more confident
using [music] this camera on the go.
Next up, we have the DJI Action 5 Pro. I
would say it's even a better vlogging
camera than the iPhone or the Osmo
Pocket 3 because it's compact,
waterproof, and [music] durable. It also
has two screens on the front and on the
back, which makes framing myself easy.
[music] The battery life on this one is
impressive, giving me around four hours
of recording time. And with the
multi-functional handle I carry with me,
I can extend it to about 6 hours. So,
this is how it looks like vlogging with
the Action 5 Pro. I'm recording this in
4K 25 frames per second using rock
steady stabilization
and the warp. I also love how convenient
it is to use the DJI Mic Mini with the
Action 5 Pro. I don't need a receiver
and the audio quality sounds great. Now,
as I walk around, you can see how stable
the footage looks. I'm using it with the
multi-functional handle. This way, I can
be a bit further away from the camera,
and it's also more comfortable to vlog
with it. If you're getting the Action 5
Pro, I think [music] the handle is a
great addition. It not only extends the
battery life, it also makes vlogging
[music] more comfortable and also has
built-in tripod legs to place it on any
flat [music] surface. You can also
trigger the recording directly from the
handle, which is very [music]
convenient. Now, the Action 5 Pro is
also great for action shots where I
would not risk using my iPhone. I can
mount [music] it on my bike and ride it
around without worrying about it getting
damaged. Next up is the DJI Neo2. I
don't use drones often [music] in my
videos, but when I need aerial shots,
nothing replaces a drone. And the DJI
Neo is a great compact option at an
affordable price. [music] I only got the
drone itself as that is all I need for
my shooting needs. And you don't
necessarily need a controller to operate
it. You can fly the drone alone or pair
it with your smartphone through the DJI
Fly app and control it using the virtual
joystick. Now, you get a range of around
50 m when flying it with your phone and
a flight time of around 17 minutes. Now,
I do recommend bringing some additional
batteries, especially when it's cold
outside. you won't get the full 17
minutes. It also shoots in 4K up to 60
frames per second and the image quality
looks great, especially compared to the
original DJI Neo, which the image looked
more processed. It's a little bit bigger
than the DJI Neo, but it's still very
portable. It records everything
internally with 49 GB of built-in
storage, which is great since I do not
need to think about inserting an SD
card. It also includes quick shots modes
where the drone can take off from your
palm and performs [music] automatic
flight patterns.
>> Three, two, one.
>> Pretty awesome. And if I want the drone
to return, I can just hold up my palm
and it will fly [music] to me and land
on my palm. One of the most popular
tracking mode is where the drone follows
you automatically. Tracking doesn't only
apply to humans, but you can also track
objects. [music] I like using the DJI
Fly app for that as it gives me live
preview so I can see exactly what
[music] I'm recording and also adjust
how I want the drone to track me such as
the distance, angle, and altitude. You
also do not have to worry about
collision as it has multiple obstacle
detection sensors. Also, if you're
losing signal, it will return to the
home point, which could happen,
especially if you control the drone with
your phone as you don't get that much
range. And lastly, I'm using the
backpack from Wanderer. This is the 31
L, and they offer it in different
colors, and I got mine in black. The 31
L size [music] is perfect for me,
fitting all my camera gear and
accessories while still leaving room for
other items. [music] The interior is
spacious with a few adjustable dividers
that let me customize the layout to fit
my equipment. [music] You also have
three access points, one to the side,
one from the top, and one from the back.
I really like the adjustable roll top,
[music] which gives me quick access to
personal items or for expanding storage
when needed. It also has a water bottle
pocket, or you can use it as a tripod
holder. The bag is also water resistant,
which is great for traveling. before I
used the Lov Pro Tactic 350 AV2 for
years and I really liked it. I also
think it's a great alternative if you
want something more affordable and
highly functional. I chose this one
mainly because I like the sleek,
minimalistic design and overall look. So
yeah, these are my essential tools that
I use regularly to [music] create
content without needing a heavy or
complicated setup. Everyone has their
own preference, but hopefully this gave
you a good idea of how you can use
similar gear for your own projects and
workflow. Now, let me know which piece
of gear you would add to your setup and
why. If you have any other questions,
feel free to ask below. Thank you so
much for watching, guys. I'm going to
enjoy the rest of the day. Take care and
see you the next time. [music]
>> [music]
[music]
>> Heat.