
10 Cinematic Gimbal Techniques to Master with Hohem iSteady V3!
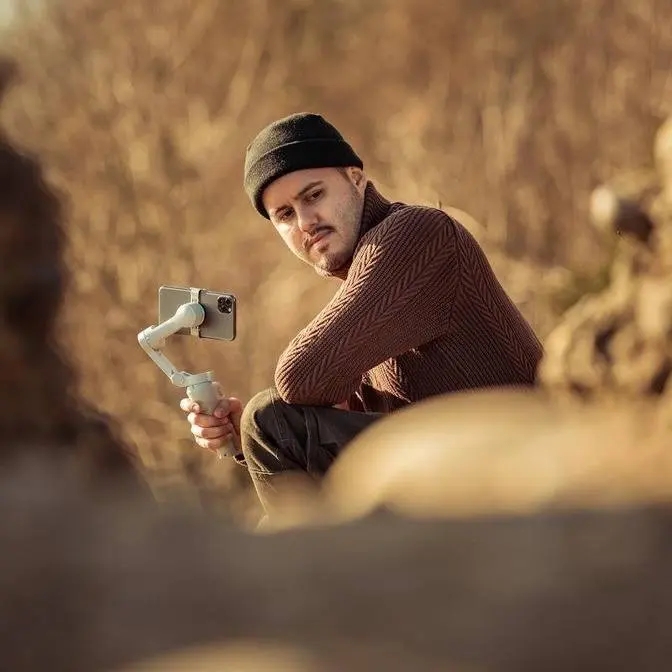
638 Video Views·Aug 26, 2024
oh
[Music]
[Music]
[Music]
so home has launched the I City V3 and
excellent all-in-one smartphone gimbal
designed to help you capture incredibly
smooth professional quality videos just
like the one you saw at the beginning of
this video but how do you actually use
this amazing tool to achieve these
cinematic shots many beginners believe
that Simply Having a gimbal will
magically make their videos look
cinematic but that is not necessarily
true in today's video I'll teach you how
to master 10 cinematic gimbal moves
using the home I cv3 to elevate your
video content additionally at the end of
this video I will compile the shots into
a final edit including the behind
the-scenes footage so that you can see
how the shots were achieved now also a
massive shout out to H for sponsoring
and supporting this channel this video
wouldn't be possible without them now as
for today I will be filming at a ruin
Tada a great location with many
different areas to explore and perfect
for capturing cinematic shots the goal
here is to really make a location like
this come to life so let's have some fun
and get some cinematic shots so first I
want to talk about the camera settings
so I'll be using the default camera app
on my iPhone 15 Pro Max now I could use
the home Joy app which is the dedicated
app that comes with this gimbal to
extend its functionality the reason why
I prefer to stick with the default
camera app is because I don't need the
additional features and many of the
controls that I need are at my
fingertips and I can also make use of
the AI tracker which allows me to use it
with any third-party video application
so we're now inside the default camera
app and the resolution and frame rate I
like to shoot in is 4K 60 frames per
second 4K gives me the highest quality
and allows me to reframe the shot in
case I didn't get the composition right
and 60 frames per second allows me to
slow down the clip to not only create
speed ramps but also to make the shot
look smoother in general what I also
like to do is lower the overall exposure
by tapping on the the arrow I can select
the exposure compensation tool and I set
it to -3 or I could even set it to
0.7 since it very bright outside today
now since the iPhone 15 Pro Max has
three lenses I tried to make use of all
the three focal lengths to get different
perspectives and achieve a more Dynamic
shot in my video now I won't be shooting
in prores log since 4K 60 isn't
supported in it and I don't have an
external SD and want to keep it overall
simple now one rule to keep in mind is
to lock your focus and exposure before
you start recording so what I like to do
is tap hold on the screen until AE AF
lock appears this means that the auto
exposure and autofocus is locked so when
I tilt up and down you'll see that the
exposure as well as the focus doesn't
change but when I unlock it by tapping
on it as soon as I tilt up
you'll notice that the exposure does
change and we don't want that in our
shot now sometimes you can get away with
using the auto exposure and autof focus
but in high contrasty situations if you
don't lock the exposure and focus you'll
notice the DraStic change which doesn't
look nice what I also like to enable is
the rule of third which allows me to
frame myself or the shot more easily and
you can enable that in the settings by
heading over to camera camera and then
enabling grid I would also recommend you
enable level now more importantly when
you head over to record video and scroll
down you want to enable lock wide
balance because this will prevent the
video from having color shifts I'm also
going to enable enhance stabilization as
this will improve the image
stabilization overall also I turn off
HDR video especially if you're a
beginner and don't know how to convert
HDR to SDR then I recommend turning HDR
off and shooting in SDR as it's much
easier to work with and I also find that
the footage just looks more natural so
let's kick things off with some basic
gimbal moves and then gradually move to
more advanced uh gimbal techniques and
the first shot we will be creating is a
reveal shot and this is where locking
the focus and exposure becomes really
important so we have this beautiful
river that guides the viewer's eye
towards this
uh house to the very end so that is
where the focal point will be so this is
going to be the focal point I'm going to
set unlock the focus and exposure on the
house hold the trigger button move
down press the record button and slowly
tilt up the
camera just like that
[Applause]
[Music]
now before I head up to the ruin I want
to capture a shot from further away and
this looks like a nice angle and I'm
going to create a slid shot and use
foreground to add depth now most of the
time I set the gimbal mode to pan tilt
follow this gives me the most Freedom as
it will follow my handle movement in all
Direction while keeping the Horizon
locked so it is quite far away so I'm
going to use the 5x this looks better
I'm also going to lock the focus and
exposure on the flag and then I'm going
to create the slide shot and press the
record button I'm going to slide from
right to left while keeping the flag
centered in the
frame and slide to the
right and slide to the left again
slide to the
right and there we have
[Music]
it all right so the next one will be a
fun one I'm going to use the AI tracker
to tr track myself walking up this path
and I've noticed this dead Branch here
which I will use to place the gimbal on
it and what's cool is that the home IET
V3 comes with built-in tripod legs for
this shot I will be using the ultra wide
angle lens to fit in more in the frame
and I'm going to place it right over
here now since it's going to pan from
right to left I'm actually going to
leave the focus and exposure in Auto I
think the changes won't be as noticeable
and what's really cool with this AI
tracker up here is that I can use the
sign and you'll see that it will start
tracking me and keep me fixed in the
center and if I hold up this sign it
will even start the recording on the
default camera app without me having to
touch the screen and features like this
just make my life way more easier
especially when I'm bu myself filming
myself
[Music]
[Applause]
so now we have a shot of me walking up
the path now I want to capture a shot
sort of from my point of view and this
will be more of an advanced shot where
we have a shot of me walking and as I
move forward slowly tilt up the camera
to reveal parts of the ruin so I'm first
going to lock the focus and exposure on
this ruin and then I'm going to tilt
down the camera so that we first show my
feet I'm going to start walking and then
slowly tilt up the camera as I push
forward just like
[Applause]
[Music]
[Applause]
that so now we're going to create a
selfie Parallax shot and for that I'm
going to use the AI tracker to help me
keep me centered in the frame as I
create that camera movement I will be
switching over to the selfie camera and
I will be extending the pole all the way
and then angle the camera towards me and
then I'm going to activate the AI
tracker by holding up this sign and if I
hold it this way the flag will also be
in the frame so I'm going to create a
sort of low shot and then turn the
gimbal as I look around also important
as I turn the camera to the right I move
with my head to the left this creates
this Parallax effect so I will be
setting and locking the focus on me
okay and then I will start the
[Applause]
[Music]
recording so let's now create an fpv
shot for this I've set the gimbal to fpv
mode this unlocks all Motors and I'm
going to get a little bit creative where
I sort of push forward and then slowly
tilt up the camera and turn it to reveal
the ruin now to better understand this
let me show you what I mean so this will
be my ending shot I'm going to set and
lock focus on it then I'm going to angle
the camera around
170° starting with a reveal shot I'm
going to reveal the
location like that and then sort of tilt
the camera so that we can see parts of
the
[Applause]
[Music]
[Applause]
[Music]
[Applause]
ruin so in my next shot I'm going to
create a jip shot where at the same time
the camera rotates what's cool about the
home IET V3 is that I can press the M
button three times and the camera starts
rotating automatically this way I can
focus on you know lifting the camera up
and pushing forward while it does the
rotation for me so for this shot I will
be using the extension pole I will be
also using the ultra wide angle lens and
I will also flip the camera upside down
so that I can bring the camera as close
as possible to the ground so that we
have foreg ground and can create more
depth in our sh shot and I'm going to
press the record
button and
then push the M button three
times all right and this way it will
start rotating and I can now slowly push
forward there we have it
[Applause]
[Music]
[Applause]
[Music]
so for this shot I'm going to create an
orbit shot and I want to capture some
details as well because uh we have a lot
of wide angled shots I will film this
plant and get close to it this will
create more depth and blur out the
background as well I think this looks
like an interesting shot because we also
have these two windows in uh the
background so I will use the 1X lens and
then I will slowly orbit around it I
will set and lock the focus and exposure
so I'm going to start from here and then
slowly orbit
around these
plants so you can see I'm just really
moving with my body and not with my feet
and I think the shot came out really
nice
[Applause]
what I also want in my shot are these
stairs leading to the top of the tower
so for that I will use the ultra wide
angle lens again I love using the ultra
wide angle lens because I can fit a lot
in the frame and um yeah it just
emphasizes a lot of the movement so this
is the ending position so I will lock
focus and exposure As I push forward I
will slowly sort of tilt up the camera
towards Tower okay and
[Applause]
[Music]
[Applause]
go so this will be the ending shot I've
placed the Hem on a flat surface uh
using the tripod legs and I've extended
the pole a bit so that I can angle this
part part and I'm using the 1X lens I'm
going to set and lock the focus and
exposure over here and that is where I
will reveal myself looking into the
distance I think this will make a great
ending shot so I do have to walk all the
way up but I'm recording this in 4k 25
frames per second so I don't plan on
slowing this down so let's do that and
action
[Music]
[Applause]
[Applause]
okay so let's now compile the shots to
produce the final edit
[Music]
w
[Music]
[Music]
all right folks I hope this has given
you a clear understanding of how to
utilize the home I steady V3 to create
camera movements that result in
professionall looking videos if you're
interested in discovering more about the
home iv3 I've created a comprehensive
tutorial tutorial that you can explore
up here or here now feel free to comment
if you have any questions thank you so
much for watching guys and keep it
mobile
[Music]
sh