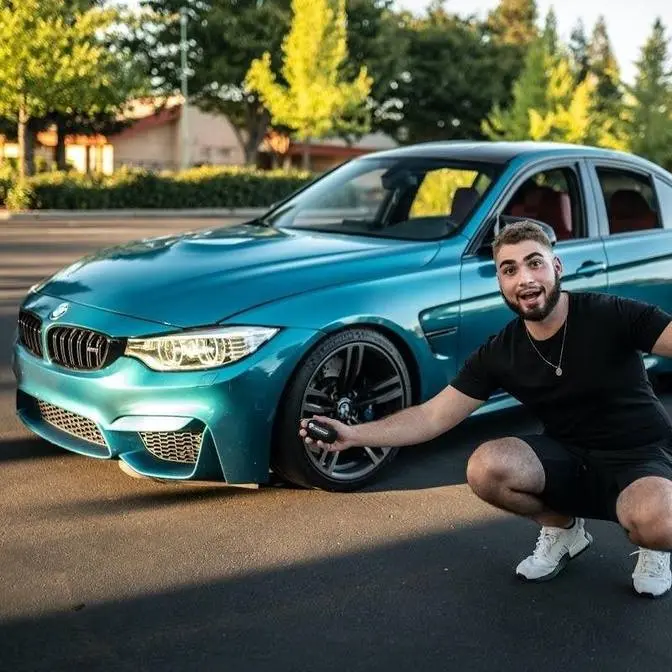
So for those of you guys who have not seen the last couple of episodes on the F-81 M3,
we are building an M3 wagon from the ground up. We got the entire re-rend into the car.
We ended up sourcing an engine and transmission out of a wrecked car from Natty Auto Parts. Also
in the last couple of videos, we fully serviced this engine before actually putting it into this
car to make sure it's as reliable as possible once this thing is running. And we got it on
the subframe and even installed in the last couple of episodes. We weren't able to do any testing,
but that's what today's video is all about. What's up, guys? Welcome back to another video
with the F-81 M3. I am joined with my boy, Nick, back there. I don't know if you guys can see him.
Is he popping out somewhere? He's in the car. And he is. What happened? Nothing cracked.
Not my cheap $2 speaker grill. We got Nick over right now. You guys saw that we actually got a
lot done in the last video. We got the engine in the car. We got the whole rear end in the car.
We actually got the differential mounted up to the engine. So at this point, even the subframe
bolted up, we got all the wiring done over here other than what we have to rewire, which is why
my boy is over here right now. He has an entire bench right over there. I don't know if you guys
can see it in that corner, which we'll show you guys here in a little bit. But this dude is going
to be here for the next week. So I'm thinking we're going to knock out two jam-packed videos
of getting this thing. Our goal is to get it running and driving, right? Engine fired up
tonight. It's currently, what, 530? Yeah. So for those of you guys who don't know,
I own an auto parts business and this came out of one of the cars that was really badly wrecked.
We ended up getting this engine and fully servicing it. As you guys can see over here,
we also have a full exhaust system for the car. We have all the radiators, coolers, fan,
the radiator support, a bunch of coolers there. We actually have a complete interior, which I want
to show you guys in a separate video, what interior we're going with this car. Let's just
say it is probably... Actually, I'm not going to say anything. What do you think of the interior
that we got for this car? It's spicy. It's probably the most expensive spec interior you could
possibly get for a car like this. So anyways, I'll probably show you guys that a little bit later.
We have LCI tails, a bunch of other parts we got to throw in the car, a bunch of other parts over
here, and performance parts and a bunch of other parts right there. And then over here, this is
Nick's whole... This is where he's going to be doing surgery. So yeah. It got real expensive
Southwest. They got rid of their bag policy, but I know that. So all this is here. So let's just say,
I think we have all the resources we need to get this wagon running and driving. I literally think
that this car is going to be running and driving. Our goal is to take it around the block and drive
around. Not ready to take down a Beamer Invasion, but literally ready to run and drive by the end
of this week. So that is our goal. And while Nick honestly works on all the technical stuff, I'm
actually going to keep assembling some more things on the front end of this thing. So once he's ready,
the F81 M3 and actually start taking care of our E91 M3 because that bad boy has been heavily
neglected. So unboxing this bad boy was super exciting for me, mainly because I don't normally
get to wash my cars at home. So getting it out of the box, let me tell you guys a little bit about
this power washer. This power washer has a thousand hour lifespan and it is really cost effective
because it costs you less than a dollar per use. I'll be showing you guys a little bit later how
long the hose is because that's pretty important when it comes to washing your cars. And this hose
got me all the way down my driveway and I could probably even get to my neighbor's house with this
hose because of its long 50 foot hose. Not to mention it's also tangle free. Guys, I just realized
this is their latest model and this one's actually super modular as well. This thing can get mounted
in three different ways. It can literally be portable the way it looks. It can be mounted
against the wall and you can even add an attachment to the back of this thing for those of you guys
who do portable detailing and literally roll it around with you and power wash the cars wherever
you're at. The handle is sold separately but is an attachment for this thing. And honestly guys,
this thing is honestly so tiny. It can literally fit in any car. This thing is so tiny, it can
fit in anyone's custom detailing van which is also pretty sick. I'm seeing a lot of those
on Instagram and YouTube lately. I'm thinking about honestly mounting it right here, kind of
where this ladder is in this corner because of the size of it. I think it'd be literally perfect
right there. We'll see if I mount it there or against the wall right over here. But I'm going
to be leaving a little bit of room so we can also get their vacuum that's also wall mounted. I think
it'd be super sick to have that side by side and having everything I need to clean my cars
right on the wall. Also, I'm not sure if I mentioned it but this is the ultra flow retractable
power washer that has 2.6 GPM. That outputs two times the power with its turbo nozzle for deep
cleaning. Honestly guys, you guys are about to see this thing I was able to clean my car without
even using any rags. Now getting it mounted on the wall is probably one of my least favorite things
but it honestly took me less than 15 minutes to find a stud using this stud finder that I found
on Amazon. Once I actually found the spot that I wanted it to be on, I got the bracket mounted,
just a couple bolts, put it on there, and started assembling this bad boy. Not to mention, look how
good this thing looks in my garage. I cannot wait to also get their vacuum that also mounts to the
wall right next to it to make it the ultimate car detailing bay in my own home garage. Plus,
I'm sure you guys can hear the power washer in the back but the camera is literally right next
to it. When I was actually washing the car, I could barely even hear the power washer because
other power washers I've used in the past were super annoying. So as you guys can see right here,
I'm literally going all around my driveway and I only pulled out this hose pretty much
halfway out of the retractor. I could literally start washing cars on the street if I really
wanted to. And just like that guys, it's been exactly an hour but not to wash one car but two
cars. I'm sure my wife's gonna be happy. I'm definitely happy. My A91 M3 is finally clean.
That thing has honestly been a minute since the last wash and I'm pretty sure I didn't wash my
wife's car for at least a year to be honest with you guys. So shout out to Giraffe Tools guys. If
you guys want to get your power washer, link's gonna be down below. Without further ado, let's
go and hop back into the video. Guys, I don't know if you guys heard that right there but that was
just basically the first time ever putting power to the car. We had a bunch of things click in the
engine bay which is pretty sick to see that this thing potentially has life in it. At this point,
we got pretty much a lot of things hooked up. The oil cooler, the radiators, the power steering. I
mean not the power steering but the transmission. I don't want everything gushing out of fluids.
That being said, not everything's connected but that doesn't matter. Let's get a new filter in the
car, oil, get it primed up and potentially hear this thing turn over. We have the oil cooler,
we have the radiators, we have the transmission cooler. This is gonna be literally our first time
starting this thing up so hopefully the wiring's good, hopefully the engine's good. Moment of truth.
So guys, we are gonna be getting an upgraded heat exchanger and an upgraded oil cooler
and potentially an upgraded radiator but thing is, it might take another week or two. I want to
see this thing running so I'm gonna go ahead and actually assemble the front end. We'll just take
it all back apart when actually those parts come in. I was thinking about it, that is pretty much
counterproductive but at the same time, I need to see this thing running. I am super excited for it.
I just want to make sure all the coolant doesn't start seeping out of the car and whatever coolant
that's currently in the cooling system to just at least have something in the system rather than
nothing. Alright guys, I think we're ready to get this thing primed up. Let's go ahead and hop on
the computer and just click a special button. Alright bro, moment of truth. I hear fuel. It's not gonna work.
Alright guys, so unfortunately we can't get this thing to start up for some reason. I think it has
something to do with actual brake pressure because it's more of like a safety issue. If you have no
brake pressure, it doesn't want you to start up the car and the car would start literally rolling
forward and you can't stop it. So I think that's more of like a newer car thing. So anyways, we're
gonna go ahead. I'm gonna keep working on the front of this car and Nick's probably gonna start
doing some of the wiring that's on the driver side so we can actually install the brake booster and
the DSC pump and then hopefully, hopefully that's what it needs to get started. So yeah, let's just
keep going at it. We're making good progress. Things looking so good. And just like that, you
guys can see you got the rear shocks in the car, the front shocks in the car. Honestly, at this
point, once we actually get our wheels from the other shop, we can actually put it on this car
and potentially even roll this thing out which would be kind of crazy. Getting this thing started
proved to be a bigger mission than we thought but end of the day guys, I mean if it was that easy to
start up, it wouldn't be as meaningful as this actually is. The more time we spend on this car,
the more of a headache we'll get but the more we'll be satisfied in the end when it actually
starts running. I cannot wait to hear this thing turn on. We do need to put the exhaust on there
as well but the crazy thing is guys, you have the full suspension in the rear, the full suspension
in the front. We have all the radiator cools hooked up and everything. The only thing we don't
have hooked up is this guy because it gets in the way of some of the wiring that Nick needs to get
done over here. So we can't mount that just yet. Otherwise, our entire cooling system is hooked up,
our fan is hooked up, our heat exchanger is, our transmission cooler is, all this bracketry is. I
connected also the crash sensors, the horns. Everything's honestly looking so far so good.
There's a few things that we need to wire in. As you guys know, it is what it is. I did realize
as well looking at that F80 donor over there that I forgot to put on these brackets. I don't know
what these are exactly. I think they're just maybe reinforcement plates or something like that. So
we do need to add that on both sides. I think they'll just directly bolt up which would be super
nice. And something we just found out which is actually kind of insane. As you guys can see,
we're trying to retrofit EDC onto this car by putting EDC shocks front and rear. But I was
thinking this is gonna be such a pain of a job to actually route wires because actually for EDC
shocks, there is the lower wire that's on the shock over here and then there is the upper wire right
over here. But what's crazy it turns out and this is why you guys should get a good base of a car
that's fully loaded. This wagon ended up having EDC of its own like F30, regular F30 EDC. I'm
sure it's nothing as good as the M3 but it has the wiring which is kind of crazy. So as far as
the fronts go, this cable actually connects to one of these and then this one if we didn't cut it
would actually connect to one of these which is kind of crazy. The front is automatic. The EDC
is going to work so that's super sick that this car already came with EDC pre-wired. The rears
over here, we have one of the cables that will actually connect for the EDC because this again,
the shocks has one on the bottom, one on the top right over here. We do need to wire in one over
here because the stock shocks, the rear shocks only have one EDC connector, not two like the
F80s do. But again guys, making some insane progress. I think right now me and Nick are
about to head out in a little bit and get some food. I think we've been in here since 8 a.m. It
is 4 p.m. and we are honestly, what has it been like almost, yeah almost 8 hours. So we are hungry.
We are definitely hungry and we're definitely, so let's go grab a little bite to eat and then come
back and I'm going to try to finish up as much drivetrain as possible. So the only thing we have
to worry about is wiring and then aesthetics can come after that. All right, so me and my boy
actually went to In-N-Out first. Didn't really work out. The line was crazy long for some reason
on a Sunday. So we're going to your favorite place. Chipotle. Chipotle. So we're going to get
some Chipotle. It's always a good day when you have Chipotle. I really wanted In-N-Out because
we wanted something light. Whenever you eat something kind of heavy, you just get not as
productive. But anywho, let's get some Chipotle and then head back to the shop. Bro, we did some
damage. That was good. Low-key, would have preferred In-N-Out right now. So I wouldn't
be so heavy. At least feel heavy. I feel heavy right now. Before we can still get some work done.
A daily does not disappoint with that free supercharging dollar. All right, let's go back
to the shop now. And guys, we are back. Let's go ahead and assemble as much more as we can for
this Sunday and then tomorrow we'll probably get back into more wiring. I know you have a lot of
wiring to do, right? Of course. So the next two days, honestly, Nick's going to be pretty much
doing a lot of the wiring behind the scenes and just a bunch that I honestly don't know if I'm
going to be showing on camera. I'm going to show you guys some of it, but I know a lot of you guys
are going to get bored of it. Honestly, if you guys have any questions when it comes to doing
a wagon conversion, because of how deep of a process it is, make sure to reach out to Evan.
Evan's going to be your guy if you guys have any wagon questions and want to pay for his services
to help you guys build your wagons. But yeah, in terms of me showing you guys for content purposes,
I feel like if I show you every little thing, it's going to be so tedious, so boring. It's
just wiring, so it's whatever. I think I just want to show you guys the main things that get
added onto the car because it makes this thing look more and more and more like an M3.
So the next thing we have to add, guys, is this transmission connector. I completely forgot we
actually need one of these bad boys. So let's go ahead and get this thing installed. It has a little
pin as well. And then we can actually put up our transmission bracket and get this thing fully
buttoned up to where we don't have to have a jack underneath the car anymore. Like that, guys. We
got this piece hooked up over here, which is super nice. And then that other piece is literally
clipped in right there. So that is also super nice. We didn't have to fabricate anything. It
went in perfectly. So the other thing is now we're putting on the transmission bracket. Because
this is an all-wheel drive, we're going to be converting it to a rear-wheel drive. So we're
pretty much going to be mounting it from this side only, holding the transmission, which should be
enough as long as we're easily driving it. Yeah, we'll get that done when we get the quarter panels
done. But in the meantime, at least we can get the car running and driving. And guys, welcome
to Monday. I don't know if this camera is going to focus or not. Come on, come on. There you go.
So here with Nick. Nick was honestly trapped in here the last 10 hours? 10 hours, about.
He's been here. I was at Natty Auto Parts taking out a shift. Monday's always our busiest day.
But Nick was over here grinding away on the F81 M3. You guys can kind of see everything that's
kind of going on on the ground. We got a bunch of wires over here. I believe these are for the EDC,
right, for the most part? You're correct, for the electronic shocks. So electronic shocks,
he's pretty much stripped down the entire wiring harness out of that car, grabbed the OEM wiring,
he's pretty much routed and added to the factory wiring to make it as OEM plus as possible,
which is super nice. Everything you guys can see over here is why he's got all the bags
labeled, every single panel that's been removed off this car with the factory screws. Honestly,
bro, you're doing an A, like a grade A work right here. And right over here, you guys can see a lot
is going on. And it looks like you already added in a few things. So you said you did something
over here. Oh, dear God. What did you do here exactly? So we're going to put adaptive
LED headlamp on this car. So you need to add some additional wiring. And what's fun is that
this car is in Mexico, by the way, you can code out the US anti-dazzle. So when you're driving
along, it'll be full high beam and it'll detect a car oncoming car and then it'll just like part
the light like this car is going to do that. Yeah. So you don't blind the oncoming car,
but everything else is full high beam. So it's Mexico car, guys. That's what I'm talking about,
dude. So that is pretty awesome. Looks like he also get this thing wrapped up as well after
adding all the wires. So again, it looks OEM. There's no like wires just dangling around.
This one right here, I'm sure is going to be eventually added on to something.
Still a work in progress. Don't show this bit. Don't judge him just yet. But there's a water
pump that's actually down there that's on the M3 radiator support. That's not on an M20 car. He
actually wired that in as well. So those wires are getting added. He's still working on it. This is
like a huge job. Honestly, you're knocking this out really quickly. I mean, this is something that
honestly would take people months. I know it took me forever to at least get this kind of stuff
stored on the E91. At the end of the day, I couldn't even sort it. So Nick ended up flying
down and helping me out with it. But long story short, this side as well has another water pump
back over here. I don't know if you guys can see that right there. The one, the silver thing right
there with the connector. So he's going to have to add some wiring to that as well and honestly
ride it right back into the car. This is something that I know is going to take a while. Nick is
actually here for the next week. I don't know if we're going to be able to show everything in this
episode because I want to update you guys as we're going on with this build. But I mean,
honestly, I think by tomorrow, you're probably going to get this side done, right? So that's
going to be pretty sick. And then we can put, pretty much I can start assembling everything
on this side of the car, which will be really, really, really nice. And then once he starts
working on that side, we can finally add the finishing touches and eventually add the carbon
brace and the full engine bay stuff. Honestly, guys, wheels will be going on here pretty soon
as well. I don't know if I told you. So unfortunately, we, I got a brand new wheel
from BMW, an M Performance wheel that's going to complete the set of three that I have at the
shop. But unfortunately, the tire that we had, had a bad bead or something like that,
like the inner side wall. Yeah. So that sucks. I have to order a new tire. So anyways, this car
is not going on the ground just yet, but it will soon. So I'll keep you guys posted. And guys,
we are back. This is a third day. I'm literally just literally checking in with you guys days
and days after because Nick, I kind of just left them here and he's been working here nonstop on
the wagon. This is something that honestly is a very tedious process, like I told you guys,
you guys don't care. You probably see the wine, but let me show you guys what he's done so far.
So if you guys look over here, I did actually just throw this randomly on here. We still need
to install this. I'm actually going to drill out the other two holes so we can install all five
bolts onto the strut tower brace. Cause why not? So yeah, we're going to be doing that. But anyways,
you guys can see the EDC is officially wired in. You guys can see the wires are all routed
beautifully connected into the fan right there. Headlights are also pinned out. So those are
working properly as well. Everything is hooked up there. It looks like also the crash sensor's
hooked up. This is my first time seeing it guys, you know, since we got all this stuff wired up
and yeah, look at that. That EDC is hooked up as well. So that is looking pretty awesome. And
then coming around to this side, I think he pretty much, so you knocked out this side today, right?
Yeah. This side is finished now. So all the wiring is ready for me to connect it up in the car
through the firewall. And then this side, what'd you get done so far on this side?
Still a work in progress, but you'll see, cause there's a lot, this is where the engine computer
is. There's a lot more wiring that needs to be done, but this is all beautiful up to about this
point. So I actually got the DME connector. This is all done. And then it's just adding some wires
in for the fuel pressure sensor and then running the wires in the car. So you see how this is all
a mess from finish to... And that's why we didn't put anything in there just yet guys. So we gave
him that access he needs to actually get the wires in the car. But so what about that rear water
pump? Did you forget about that one or? Oh yeah. So if you look, I'm assuming this is the factory
location for it to kind of fit. Oh, you wired that in? Yeah, that's in right now. Heck yeah,
that's what I'm talking about. So other than that, my other question was, there was an air sensor.
Is that wired in now? That's wired in, but you showed me actually, it's supposed to be,
well, this is the cable. So I guess this has to just go there into this. And it's going to be
chilling in there. Oh, it is plugged. This is plugged. I'm just not sure because this one,
maybe you put this in, but, or I don't know if you touch this, but there is a wiring.
A grommet? Maybe this goes reverse like this. We will investigate this on another car and get
back to you. But anyways, that's sorted. Expansion tank wiring, that was sorted as well? Yeah, so
that's your expansion tank right here. Yeah, it looks like it's got plenty of play. There's some
corrosion in there. So I need to disconnect this and clean this out because actually I found the
tank itself was leaking. The tank itself, if you look, it was leaking through there and causing
corrosion on the, it didn't throw a fault or anything. And you were blaming me for leaving
the car outside. I've done that before and it caused some issues. I've done that with the E91
M3, but I was like, I was pretty, I was pretty safe when it came to this car. So yeah, guys,
as you guys can see the wiring on the front is almost complete. As soon as he finishes up that
section right over there, that pretty much gives me the ability to fully assemble this engine bay,
put the carbon strut brace, put the cowl, put all the plastics and see this thing beautifully put
together and then slap some wheels on here and slap on the rest of the panels. This thing,
honestly, guys, it's coming together faster than you guys think. And I think it's going to be ready
for Beamer invasion. As you can see from the external as well, we got the side mirrors on
there, but those are pretty much the only panel pieces from an F80 that are on the car. We need
both fenders, we needed a front bumper, a hood, side skirts that actually need to be fabricated
because this section right here needs to be cut and welded from an F80. You guys will see that in
a different video. If you guys did not see the last episode and these quarter panels and the
rear bumper needs to also be converted at the body shop. So yeah, not really many, uh, F80 panels on
the car, but in terms of drive train, it is fully complete F80 and it is getting wired up. I cannot
wait to hear this thing start up. So yeah, it's been a week now, and I want to give you guys an
update because a lot of you guys are asking me if this thing's going to be ready for Beamer invasion.
And it is hopefully fingers crossed. If as long as the engine's not blown, I think it'll be ready
in time. So that being said, guys, you're going to have to include this video. Hopefully in the next
episode, we're going to get this entire front end together and potentially driving on all four
wheels. If you guys are excited to see that one, make sure to smash that like button for me. But
without further ado guys, I love y'all so much. Remember to stay humble. I'll see you guys in the
next one. Peace out.