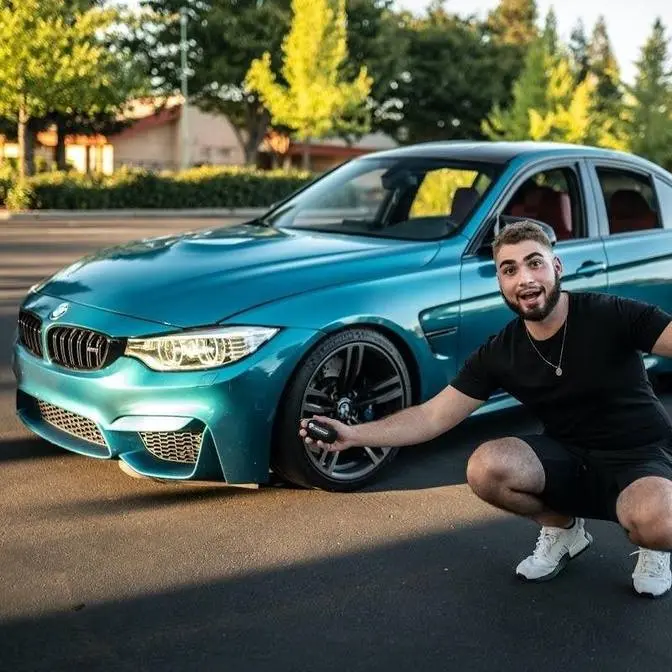
What's up guys, welcome back to another video and in today's video we are back with the
E91 M3 and I'm not going to lie guys, I am super stoked to finally get this thing started
and when I finally say this, I mean legitimately, we got it started the other video and it started
up no problem which was super weird and it ran for a little bit of time, I'm pretty sure
I got that on video and then all of a sudden it just didn't want to start anymore so we
ran the codes, we plugged in everything else, we did everything else we needed to do and
then unfortunately it still didn't want to start so after running the codes we found
out that it had to do with the throttle actuators, the infamous issue with the E91 M3 and when
I mean my infamous for the E91 M3, I primarily mean the S65 engines, I mean unfortunately
S65s you have two major issues, throttle actuators and rod bearings.
So unfortunately in this case our throttle actuators went bad which means that I really
don't trust anything else at this point so I think we need to do rod bearings ASAP as
soon as we get this thing pretty much running and driving, I'm probably going to hit up
my boys at SSR Performance and see if they can actually get this thing sorted out in
terms of the rod bearings, I'm pretty sure it should at least run, it should be, everything's
like gravy in the navy, we're just not going to step on it or go hard on this thing until
the rod bearings are done on this car but hopefully, hopefully guys the throttle actuators
are actually going to fix this thing.
So I actually went to FCP Euro to overnight these throttle actuators, we got brand new
bolts over here, brand new arms, two brand new throttle actuators, I could have just
ordered one but I decided you know what, this is a build when I say I plan to keep it, I
plan to keep it, I want to start some kind of cool collection and you know, there's no
better way to start than an E91 M3 because how sick is this?
And I decided if you're just going to replace one of the throttle actuators there's no point
because there's always a chance the other one might go out just because if the first
one going out, you know, I mean they're pretty much the same thing so there's a possibility
the other one's a ticking time bomb.
So I decided to bite the bullet, it is about $1400 for two throttle actuators but with
a lifetime warranty I mean I just couldn't say no to that.
Plus this is an OE brand and it's cheaper than OEM so I mean it's pretty much the same
thing.
It is the same thing.
So I'm really hoping this is going to fix our issue, if it doesn't fix our issue at
least now we have brand new throttle actuators but if it does fix our issue that is a huge
win.
Now another thing I ended up picking up and it's not from FCP Euro is actually some brake
sensors.
Now FCP Euro when it comes to anything major I do go with them, even my oil I go with FCP
Euro.
But in terms of these brake sensors I mean I got a three pack which this car needs three
of them for I think like $6 on Ebay.
I mean it's just the sensor with like two wires, it's probably the least sophisticated
sensor on this car so I decided you know what just go on Ebay, $6, free shipping, you can't
really lose.
But yeah I don't really care about that right now because the car doesn't drive.
Let's go ahead and install these throttle actuators, this is where we left off.
We need to go ahead and actually move this bad boy and just start moving this thing out
of the way.
The throttle actuators are actually really easy to get to, once you get off the intake
the engine plug them.
Right underneath that you're going to see two bolts over here, I believe there's like
two more bolts back there, two more right there so like six bolts in total.
This thing pretty much just gets lifted up, there's a couple bolts holding the throttle
actuators down, unplug those two connectors and they should theoretically just come out.
So it's pretty easy from what I've seen on videos, let's hope to God it's actually that
easy.
So the easiest way I've found to do throttle actuators is to literally just kind of pry
this whole like wiring thing upwards a little bit and then now we actually have access to
actually get these things out, I mean I hope I can get them out but at least now I know
I have access to them, you just have to disconnect them right over here.
And I can see the bolts that are holding it down, let's just hope to God we don't drop
any bolts and let's just hope to God we can get these actuators out.
Alright guys, so I think I found out the issue, there's actually like a bunch of like silicone
on top of the two screws over here, so that basically means that this actuator was probably
replaced or at least removed for testing.
So yeah, that leads me to believe this is bad, so let me go ahead and just pull this
one out.
When I say it like that, I mean I hope to God I can pull it out.
So when I tried to, when I pulled the second screw out, you guys can see this screw was
stuck on here and I don't know what they did and why they did this, maybe that's the reason
for it, maybe they actually put that gunk in there, maybe they actually put the screw
in there, but definitely, definitely this is not OEM and it was definitely messed with
at one point.
I could be tripping but this is the one I just pulled out and this one looks brand spanking
new so I don't know, it could be that the fact that they actually replaced this one
and the other one was the one that just went out, it's a possibility.
So now that we got both throttle actuators out of the car, you guys can see over here,
this is how they are when they are sitting down.
This sticker looks brand spanking new but I could be wrong so I do need to do some research
and see if this part number is like a newer part number or something because they do have,
like these bottom numbers are a little bit different, I don't know if that means 2017,
no idea.
Honestly, no, I highly doubt that because that would be 2015, I have no idea but both
of them right back here, I don't know if that's the way to test them or anything like that
but they both kind of come back up so I'm going to probably take them both apart and
see what's going on with these two and see if there's anything defective with these two
because if I can sell these, these are going for like used, like 400 a piece so if there's
not actually anything wrong with these, you know, I prefer to just sell and make some
money back but again, if I'm hoping there's something wrong with these because then at
least that is a justifiable purchase so.
Anywho, these have lifetime warranty, these are brand new, let's go ahead and slap these
inside.
We also have some brand new screws and some brand new bars so yeah, this is going to be
really satisfying.
So just like that guys, both of the actuators are in the car, let's go ahead and just reconnect
everything and then I'm probably going to start taking apart the other two.
So now that we got the two arms back on there, the throttle actuator is back on there, everything's
bolted up properly, now before actually installing everything else, I do want to just double
make sure that the throttle actuators are actually the issue so if it's not, we can
actually go ahead and just check all the wires, double check everything but for now, let's
just go ahead and take these two apart and just see like, hey, is there a broken gear
or not because, uh, what's going on here?
Alright, so first things first, as soon as I opened this thing, this little plastic kind
of just came out.
I'm not really sure what this is exactly but let's just go ahead and just turn this upside
down and see if anything falls outside of it.
So looking more into this one, other than this little thing that actually came out of
it which I don't know if that's an actual issue or not, you guys can see right over
here on these two teeth, it looks like something's a little off.
What I mean by a little off, I mean like kind of looks like it's been chipped just a little
bit but putting this gear in here, it is functioning still, I just don't know if that will cause
the car not to fully turn on.
Not really too sure exactly, it does look like it's still working but what I didn't
know is that there's an actual logic board piece of this so this honestly could be damaged
as well, I don't even know how to look at these so for any of you guys who are professionals
at looking at logic boards, you guys can take a screenshot and let me know, this looks perfectly
fine to me, I don't see anything like, you know, super weird or anything but yeah, let's
just go ahead and put this back together and check out the other one.
So the exact same thing came out of this one, I'm not really too sure what this is exactly,
like guys let me know what this is but basically this little thing here came out of both of
them, I don't know if it came out of the outside or the inside but looking inside of this one,
if I go ahead and pop out this gear, right over here you guys can see there's a lot of
wear over here but I feel like that's kind of normal just because of where this kind
of touches with it but honestly guys, like I said, it does look normal and I'm not exactly
too sure what's wrong with these.
Now I mean honestly, getting a rebuild kit for one of these doesn't seem that difficult,
I mean that could have been an option, I thought it was a lot more difficult to get into these
but I mean, I don't know, I don't know, I'm definitely not going to be throwing these
out, definitely do a lot more research, if I can rebuild these, why not, if I can sell
them and they're worth something, why not.
This also right over here looks perfectly normal, I'm not really seeing any issues so
yeah, again, if you guys have any information about actuators and you guys are like professionals,
let me know down below but for now, I'm just going to go ahead and reassemble this.
Now honestly, I don't really like starting up the car without at least the plenum on
there so let's just go ahead and slap on the plenum, I'm not going to go ahead and put
in the intake just yet but as long as we get the plenum in there so we can get everything
connected properly and make sure it doesn't, you know, bog or act weird because something's
unplugged because this is supposed to be plugged into it, this is supposed to be plugged into
it and that hose back there is supposed to be plugged into the plenum so definitely some
things that need to be reconnected so let's just go ahead, put in the plenum, get that
back installed, that's going to be such a pain, I hate working on plenums but once we
actually get that sorted in, I think it should be good to go.
So now that we have everything assembled guys, it is literally the moment of truth, it is
definitely the moment of truth, we got the keys, will it start, oh my god guys, imagine
this doesn't fix it, oh my god, that's so much money.
Alright, now that we're in the inside of the car guys, moment of truth, alright let's just
first see if there's even power to this car, okay there is power, please god, 3, 2, 1,
oh there's just no way, there is just no way, oh, yo I think my throttle actuators were
good guys and that could have been a 2017 and a 2020 throttle actuator, I just went
ahead and bought brand new throttle actuators, at least we have brand new throttle actuators
but I'm not going to lie, what is going on with my car?
It's saying it has a quarter tank, do you guys think it's possibly gas?
Let's just go ahead and put some gas in the car guys and it might just be that, let me
actually see if the fuel pump primes, okay I do hear some clicking going on in the back
so it is saying that we have a quarter tank, I'm going to go ahead and see if I have a
little bit of gas put in the car and that might help.
Now I'm not going to lie, I don't know if I want it to be just gas, but I want it to
be just gas so this thing will start up but if it is gas, like I just dropped $1400 guys
on a situation that would have cost me about $3 to fill up so, okay alright moment of truth
guys, okay still doesn't want to start though, alright, alright let's just go ahead and run
the codes and see what's going on with this car, that's the thing about a special custom
build like this guys, anything custom, you're going to run into issues and I'm wondering
why it doesn't want to start.
Alright guys so after giving it a few start ups, unfortunately it still doesn't want to
start, the only issues that keep coming back is the first off the brake pad wear, plausibility
front axle react immediately, now what I'm thinking, because the car did start up before
we actually did the wheels and brakes, there is a possibility that the brake system is
causing the car not to start up because basically it does not want us to drive off and then
we have no brakes, this is a small chance but it is a possibility because the other
fault is saying caution vehicle may roll back, so the only two red faults we have have to
do with the brake system and coming back to the codes, it's saying it's a brake sensor
right over here, so I think the thing we're going to go ahead and do is that we actually
got the sensors in which is perfect timing, let's go ahead and replace those brake sensors
and see does the brake sensors really prevent a car from starting up if they're completely
shot, maybe, maybe it's a safety thing, I have no idea, guys legit so confused but I'm
going to go ahead and just install this because it really could be a possibility, I mean we
got to get it done anyway so might as well.
Alright guys so I just reset the front sensors, the rear sensors, those actually went through
and I no longer have a brake light or any other lights in terms of brakes on the system
here, if I actually let down the e-brake, the brake light goes away too which is, dang
this e-brake is a tough e-brake, but anyways all that's sorted and that moment of truth,
does the brakes really prevent a car from starting, I swear if it does, I mean I'd be
happy because it's a simple fix but, ah so close guys, so I'm getting something on the
dash right now, start off assistant inactive, so it looks like the car is preventing itself
from turning on, like something is like some kind of fail safe is going on right here,
don't know exactly what it is but hopefully we can figure it out later today, this is
quite upsetting I'm not going to lie, hey but at least we replaced our brake pads, that's
not bad, we replaced our actuators, that's not bad either, so regardless it made us do
things that we need to do, so we got it done, I want to drive, I just want to drive it.
So I read on the forums that someone said there's a possibility there could be a wiring
issue, so I went ahead and just disconnected the DME, reconnected it, started it up and
I'm going to go ahead and try that again but watch what happens.
So the good news is the car is finally started up and all I did was unplug the DME and re-plug
it in, so I don't know what that means exactly and we do have a service engine light, we
do have an increased emissions light which is not really good either, so we need to figure
out what those are but I mean it's running, it's bogging, I mean it's not too shabby.
So I noticed we had a small coolant leak coming from the center and then I accidentally created
a bigger coolant leak by pretty much trying to bleed the system while the car was running
and then I accidentally snapped it right there, so I'm going to go ahead and try to extract
that screw so I don't have to replace this entire expansion tank.
I mean the good news is we got the car started, it wasn't because of the actuators but now
it's like why didn't it start in the first place, was it really just because I need to
unplug it and plug it back in, it's just a little bit weird for me.
I like to know the actual issue so I don't have to like wake up in the morning and try
to start up the car and just won't start, so yeah that's a little weird but hopefully,
hopefully at least all those other codes go away.
If all those codes go away and they're not sitting in the background then I'm not too
worried about it but if the codes are sitting there in the background that means it can
happen in any minute.
But yeah I'm going to go ahead and try to extract this thing first, fingers crossed
it'll come out easy.
So unfortunately we did just lose an expansion tank so let's just go ahead and jack up the
car and see where that second coolant leak is mainly because yeah we want to figure out
where all the coolant leaks are, get that all sorted so we get a new expansion tank,
we can just go ahead and slap that in there.
This is kind of like one of those things that I'm honestly expecting bad things to
start happening mainly because like we got everything together but now is everything
going to work together and work properly?
There's going to be a lot of little things we're going to have to get sorted.
That expansion tank was just a super unfortunate coincidence but I'm pretty sure I can head
to BMA and I'm sure they have an expansion tank for like 45 bucks so this will come up
on eBay and they're going for like $45 all day for those expansion tanks.
Those are pretty cheap for the whole thing so I'm probably just not going to buy just
the bolt from BMW.
I would honestly just get the bolt from BMW but it's not coming out so it is what it is.
And just like that guys we got a new expansion tank from BMA European.
Shout out to them.
I think we got this thing for like $30 so that is a huge cop.
Let's go ahead and head home and get this thing installed.
I was thinking about it on the way back here how I could actually make some money and considering
that the car started before with no issues and then all of a sudden you know we fixed
the issue because of the whole DME situation.
All I did was literally unplug it and plug it back in and all of a sudden now we have
you know it's a working car.
But the good news is like I know for sure for sure now we have brand new actuators at
120,000 miles so like I know for sure for sure we never have to worry about actuators
again even though these are used and one of them looks like it's been literally just replaced
recently.
I'll at least be able to make some of my money on these back.
The OEM ones do cost more than the OE ones so long story short if anyone needs some actuators
hit me up because honestly when I took them apart they look perfectly fine.
You guys saw that I had no metal shards or anything inside of them so yeah I mean let's
go ahead and just redirect our focus make another mess a coolant mess and get this bad
boy installed.
So I pretty much just topped this off with some distilled water now that we're good to
go everything's reconnected I mean moment of truth I even connected the temperature
air sensor so we shouldn't have any lights on the dash in terms of the check engine.
So theoretically no check engine light no airbag light uh no seatbelt light no brake
light I mean we just have a TPMS light at this point which is kind of impressive considering
how this car um doesn't look so good right now.
So without further ado for the moment of truth can we actually start this car put it in gear
put it in reverse and actually back it outside the garage uh that would be pretty insane
because I want to back this thing up a little bit let it run uh jack it up see where that
coolant leak is fix that up real quick and then once we do that I want to start assembling
some of this front end right here because uh I think it's about time we can start slapping
on the fenders the headlights the side skirts I don't know about the front bumper just yet
because I feel like I have to take that off to lower onto the trailer but at least headlights
and fenders I'm going to try to get that done and possibly the side skirts.
So without further ado let's go ahead and start her up hopefully she starts and back her out.
The good thing is it is running but it's making a super weird sound I don't think
the power steering is working because the steering is super heavy so let's go ahead
pop the hood and see if we can get top off the power steering.
All right guys so I did just find a slight coolant leak right over here in this hose
that actually connects to the top of the coolant expansion tank uh so I do need to figure out why
that's leaking it is fully in there maybe it's cracked I need to figure that out real quick
I'll get back to you all in a sec. So after bleeding the expansion tank I'm not actually
seeing any more leaks this is obviously when I actually replaced the expansion tank but
everything looks pretty good right now so we have brake fluids in the car so that is a check
we have coolant we have oil and we have power steering so the last thing we need is honestly
AC to make sure our entire system is working properly before actually assembling the front
end of this car so the thing I want to test now is does our AC work let's go ahead and
slap this inside and see if it works. Guys our entire AC system is gravy the navy it is working
now I mean unfortunately we're going to have to put back on the muffler to get this thing
certified because I want this to become a legal California car which is only going to increase
the value of it even some more I care about what my cars are worth and it's going to make it feel
more of like a like a legal E91 M3 it's going to just add more value to it do not worry guys again
I'm not selling this car I just like my stuff actually having value that's why when you guys
build your guys's cars you don't want it to look janky because that kind of depreciates the value
if your car looks like a million bucks it just feels good it feels amazing and especially if I
can make this thing 100% legal here in California and drive it with no sweats it's going to be
absolutely amazing now I'm not gonna lie everything's in pretty solid here I am still
seeing a little bit of dripping down there I don't know if that's just extra coolant that
went onto the pan and is dripping down that will diagnose later as for now everything does look
really good so I'm not really too worried about it let's go ahead and try to bring one of the
fenders to try to knock it out and then the other fender and then possibly even the headlights we'll
get the headlights done but I think the primary thing is get those two fenders on there
so unfortunately guys I just ran into an issue that uh is kind of a big deal honestly so the
M3 fenders apparently don't just bolt up to a standard wagon or even a standard 325 335 sedan
an M3 fender is only dedicated for M3s I just went to the backyard to take some pictures and
as you guys can see these don't line up exactly so you guys can see that this is kind of like
right there and this one's right over here now it's not that far off but unfortunately it's far
off enough I could honestly just hammer this back more and it could line up with that one but then
the second one right over here we don't even have a second one right over here so we definitely have
to take that off and probably weld it on and this last one down over here is not angled like this
one this one is definitely different and if you guys see from this picture the welds of the door
it's right beneath the welds of the door this one um it's not exactly beneath the welds of the door
unfortunately I'm going to go ahead and do some more research on this see the easiest way to
actually get this fender to go on if there's no easy way you might have to just drill these out
and get them off the M3 it's a good thing I haven't junked the M3 so far and I also found
the two mounting points on the bottom are not even the same so it's supposed to be a little bracket
that comes out over here and over here on the M3 it's not on here I actually went ahead and just
adjusted this one upwards and I actually bent this one backwards to where the fender lines up with
that that screw hole is going to go in that screw hole is going to go in and also these are going to
technically I don't really need those two right there but I kind of want them just to make sure
the fender's on there as sturdy as possible so I'm going to probably go ahead put the wheel back
on the car drive it in the garage get that thing welded up and then as long as I can get it all
sort of perfectly I'll show you guys what I'm going to be doing to the other side I'm just
going to try to just keep mocking on this one until I can get this fender on here perfectly
and welcome back to day two guys now I know I know I should have uploaded yesterday that should be
the schedule especially for December but unfortunately I kept on running into issues
last night and I was like you know what I just need to sleep on it do some research figure out
the best way to do this and long story short we finally got the fender on there with no plays as
you can see when I hit over here it's not moving when I hit in the center it's not moving when I
hit on the bottom it's not moving when I pull on it it's not moving so basically what I went ahead
and did is actually weld the factory bracket right there the factory bracket over here and also the
factory bracket down here the two down here I actually got them both welded in but they didn't
honestly withstand once I actually put the bolts in there just snapped right off so unfortunately
I don't think there's enough metal from the piece that I was able to take off the other car so long
story short I pretty much put a rivet a washer and a nut and it held it in place right over here
perfectly that's not an issue especially for a custom car like this there's going to be at least
a thing or two they're going to have to do that a little bit aftermarket but that honestly is more
than good enough the fender is fully flush to the door which I'm really happy about the only thing
is that absolutely perfect is this line and this line I just have to pretty much raise the fender
a little bit but on this side we have the washer tank and it's such a pain in the butt to get to I
didn't notice that until everything was pretty much bolted up we're gonna have to remove this
anyways for paint when the time comes so uh there's no point to keep playing with this this
is fine at least we're able to kind of check the gaps and everything if you guys look over here
uh where the hood meets the fender it looks really really really good I went ahead and played with
the hood as well everything over here is looking really factory really nice I'm super happy now
everything is kind of lining up the gap from top to bottom is uh it's not perfect but it's really
good it's really good I'm assuming this gap is going to open up a little bit when we actually
bring up the fender a little bit so these lines can actually match up so once you actually bring
this up this should at least open up a little bit and it'll match this gap right over here so
that is not an issue I'm just super happy we finally have a fender on the car here I didn't
really show you guys how I put on this fender because I was pretty much testing a bunch of
different methods and I was just trying to see what works and what doesn't work and I finally
found something so without further ado I'm gonna go ahead and show you guys what I did on this side
to the other side and get that other fender on there so at least the wagon from both sides can
be recognized as an m3 finally also we need to test out the lights once both fenders are on there
hoping both the wiring to the lights are good and everything is going to be working perfectly
and I'm not gonna lie guys these apex wheels check out this fitment we definitely do need to
lower it some more but again I want to keep it as raised up as possible so we can actually get
this thing on the trailer off the trailer on a trailer off the trailer um to take it to the
shop so we need to get everything dialed in like the exhaust the paint stuff like that so for now
this height is fine the fitment is absolutely beautiful super happy the fact that we actually
got to rock some apex wheels on this car some kws and these m3 fenders just look so good with
this girth I know a lot of guys been hitting me up saying nor are you gonna actually replace the
quarter panels yes I definitely plan to do so I'm hoping to do it with another fellow youtuber if
not I'm probably just do it locally which you're trying to figure out the best time for something
like this I can say that I'm able to replace a quarter panel I'll probably do it on like a
cheaper car a car that like you know I don't really care what happens it's a flip or whatever
kind of like if you guys know what I mean like a car to practice on this is not a car to practice
on this is a car I want to take to show events and things like that so I need this car to be
absolutely perfect so that is the reason I'm not doing the quarter panels myself on this one but
without further ado let's just go ahead and hop into the other side and finally get that other
fender installed and before I show you guys the results with the power of editing let me go ahead
and just clean up and moments later guys finally clean up the garage and check out this fender guys
look at this fitment looks absolutely amazing over here um I even got this line perfect right
over here on this side um got pretty much everything that the two things actually welded
on this side ended up being perfect didn't fall off because I cut them a little bigger on this
side I was able to use the factory screws to actually get that in there uh the gap is a little
tight over here um gets a little bit bigger down here so I can't adjust the bottom a little more
uh down the road not a big deal but it looks like this side marker is working and this side marker
is working as well so honestly guys this just looks absolutely crazy I love all the silvers
all really coming together once you get the two headlights on there the front bumper the
wheel guards and everything else to the front of this car the whole front is gonna be completely
silver which is gonna look so so so sick I really want to title this video the first drive with the
e91 m3 but I kind of want to save that title for the day that we actually get the side mirrors on
there the front headlights on there and actually get some moving permits mainly because I don't
want to just drive down the block and be stressed that a cop might be coming down here or even just
like drive anywhere without actual insurance on this car and moving permits or moving tags I do
want to at least get the side mirrors on there and the headlights on this to where we can't
actually get pulled over for something stupid there's actually one more thing I need to get
done to this car to actually be able to drive it without worrying whatsoever with this car and that
is going to have to be the exhaust the exhaust is kind of exiting in the middle of the car right
there and that's going to cause some heat damage to the car if I don't actually get that sorted
properly so other than the mirrors and the front headlights I do want to get the exhaust on there
I'm going to probably try to book an appointment for that in like the next day or two and try to
put like a half conversion bumper on the rear that would probably be in the next video so I'm going
to try to figure out this whole rear end situation put on an m3 style bumper obviously we don't have
quarter panels done but just kind of like a mock-up just so at least the exhaust we can
line it up at the exhaust shop because without a bumper you can't really line up the exhaust the
way you want it so with the bumper at least you can do some test fitting and figure out exactly
where you want the exhaust the exhaust is actually going to help us line up the bumper when we
actually try to combine two bumpers and line everything up so that is actually like knocking
out two birds with one stone not only is it going to help us drive the car and able to like
comfortably drive the car but at the same time help us line up the bumper once we get that fully
converted but yeah guys this thing is looking so so so good this is a real m3 as of this point and
I mean honestly guys there's still so much to do I'm actually going to cut off the video right now
and start working on the rear end of this car so I can get you guys out a video asap so if this
video is kind of shorter than the rest of them it's mainly because I want to start working on
this rear end trying to get the exhaust on you and everything in a separate video and then get
that out to you guys and then honestly I'm going to try to just start knocking things out the next
video after that's probably going to be the headlights the bumper side skirts and just try
to get this thing fully complete and drive them possibly even the side mirrors all that good
stuff so if you guys are excited for the e91 m3 build make sure to smash that like button but
without further ado guys that is gonna have to conclude the video all of y'all so much remember
to stay humble I'll see you on the next one peace out