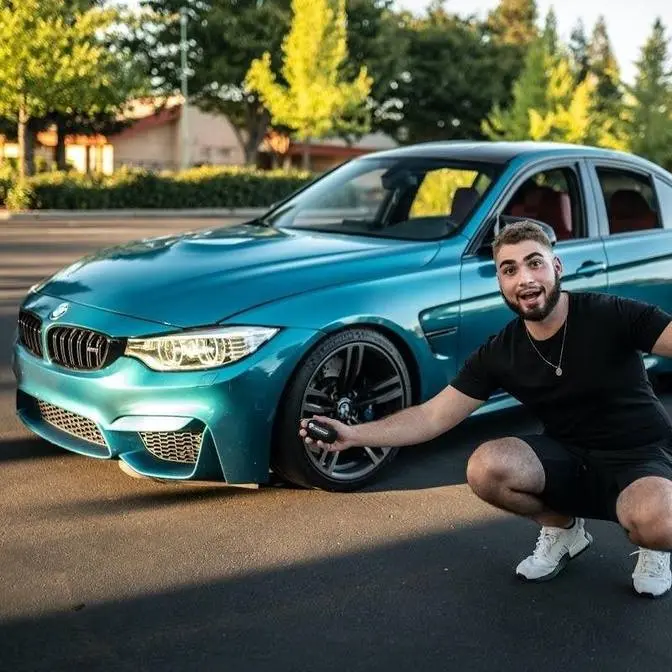
Happy to say that I made a lot of progress on this bad boy in the past 2 weeks. The Mclaren is still at the shop, ill get you all updates on that soon, but lets focus on getting this wagon running and driving in the meantime :)
When is this going to get done? I guess
this car isn't going to finish itself.
Guys, we're back at this shop and after
2 months of not uploading, I have zero
explanation for you guys and zero proper
uh I guess you could say excuse. I
really I don't really know what I've
been doing. I've been working on any
auto parts the last 2 months trying to
expand the business and hiring more
employees and thankfully everything's
engraved in the Navy. But that's been
taking a huge toll on getting this bad
boy ready for Beamer invasion of 2025.
So, that being said, we need to get on
this car cuz Beamer Invasion is 2 months
away. So, this wagon is literally just
been chilling here. I honestly have not
had any time to work on it. And I I
think I've worked on a few clips. Like,
I I'm going to go and just throw in some
of the content that I've actually got
working on, like for example, the
mirrors and some interior pieces. Um,
but for the most part, have not been
able to work on this car because of the
fuel tank situation. And turns out if
you dropped the fuel tank out of that,
we accidentally drilled into it cuz
that's what we drew with every single
one of our cars before junking the cars.
So the boys actually drilled into this
one. So I didn't have a fuel tank for
the longest time. Picked up another M4.
That one unfortunately um was burned. So
the fuel tank was melted and finally
finally finally picked up another M4 in
A parts. We finally got a perfect fuel
tank. So super stoked about that. So
that being said, guys, we have the
suspension right here. the whole rear
end of our F8X M3 that needs to be going
into this wagon today. I'm literally not
leaving the shop until that fuel tank's
in the car installed properly and our
entire rear end. This car currently is
back heavy, so adding more weight to the
rear is not going to really help our
situation and our pretty much our weight
distribution, but it needs to get done
before actually adding the whole front
end things of the car because that stuff
because this area is pretty much where
all the lines and cables get a little
messy and goes into the rear of the
trunk. I need to make sure this entire
situation is situated first before
actually dropping in any front end parts
and again blocking any of those wiring
that goes to the back. So, Beamer
Invasions in literally 2 months. We have
a big countdown um before I mean
September. I think it's like what?
September 17th. So, we need to get on
this build ASAP. So, without further
ado, guys, let's go ahead and get our
new fuel tank installed.
Heat. Heat. N.
[Music]
[Applause]
[Music]
So guys, great news. So we got this part
of the canister of the M3. The actual
canister, the actual sensor from the M20
actually plugs into the canister of the
M3. And the two DMTL lines actually plug
into the canister as well like factory.
So, so far so good. Um, everything is
connected to the fuel tank on from the
bottom side at least on the top of the
fuel tank too. This line connected
thankfully. Easy peasy lemon breezy.
This connector though is not connecting.
So, uh, yeah, we need to figure out how
to actually get it. Looks like this
connector would connect over here, but
as you guys can see, this one has
nothing inside of it and the M3 has a
different connector. So, now we're going
to have to go ahead and figure out how
to transfer this connector over from the
M3 so we can get the fuel tank fully
hooked up. So, yeah, just as I
suspected, the connector is completely
different. And there's actually six
wires, I mean, uh, seven wires compared
to five wires or five, five wires or
seven wires on the M3. So, that is more
of a wiring thing. I'm probably going to
tackle that a little bit later. Again,
my goal is to get the whole rear end
into this car right now. Um, so we have
the everything from the bottom of the
car hooked up. We can always easily
access this and connect the final
connector later. Um, so it's not a big
deal, but so far so good. At this point,
guys, let's go ahead and transfer over
these two things. Connect the E bra. So
then we are ready to actually drop in
our complete F8X rand with only 44,000
mi. This thing is going to be absolutely
beautiful once installed.
[Music]
Heat.
Heat.
[Music]
So, thanks to my boy Eli, who was able
to help me lift this thing up. We got
everything bolted down and torqued down,
and it looks absolutely phenomenal. So,
we finally have the M calipers, the M
suspension, uh the M rotors, the M hubs,
the M diffs. That's all installed with
the M fuel tank. So, we're all graving
the Navy there. Um, so looking at this
right now, we also just connected our
fuel lines. Uh, the sensors thankfully
was a plug-andplay as well right there.
So, so far learning a few things. Let's
go ahead and route our E brake lines.
And then I know there's a ground strap
and there supposed to be a few
connectors to the diff. So, let's see if
anything connects to that stuff on the
underc carriage. And, uh, if they don't
connect, we just need to make sure we
cut the wiring out of our donor car and
then figure out how to wire that later.
[Music]
So, I grounded it basically on a point
that looks like this on the underc
carriage of the car. This should be good
enough hopefully. Um, if I have any
faults obviously for the rear end stuff
or the diff things, then obviously I'll
know to check that ground strap. There's
two connectors that need to go into the
diff that are non-existent on this car.
It's F8X specific, so we're going to
have to add the wiring for that. I have
my boy Nick. I'm going to be flying out
in about 3 weeks from now. Like I said
guys, Beamerfest is about 2 months away.
This car needs to be ready to go in 2
months. I'm putting myself on a time
stretch and a goal because I want to get
this car done and I also really want to
bring it to Beamer Invasion. So follow
along for the journey in the next couple
of videos. Um, and that's pretty much
what's going to be happening with this
car. So my boy Nick is going to be
coming out about 3 weeks to help us do
all the wiring. And he told me when I
come out in 3 weeks, I need the entire
drivetrain to be in the car. So we got
the fuel tank, we got the whole rear end
inside the car, bolted up. So, at this
point, guys, we do need to start working
on the front end section. So, I think
tomorrow, first thing when I get in
here, I'm going to go ahead and start
taking apart the rest of this stuff,
transfer over the rest of the things
from the M3, and then started getting an
entire drivetrain bolted up over here. I
know we have to replace a couple lines,
a couple brackets, the steering rack
connectors, and a few other things that
we need to transfer over. So, that'd be
first thing tomorrow. In the meantime,
guys, I'm pretty happy with the progress
we made today with the fuel tank, and
the whole rear end. Thankfully, most of
the stuff is direct bolt-on, and you
guys can see from this angle. looks so
good with the blue calipers. I cannot
wait to get the M3 quarter panels on
this car. It's going to look so so so
good. And also having both these wagons
side by side is going to be the ultimate
dream. So yeah, I am more motivated than
ever to get this car officially done. So
anyways, I'll catch you guys tomorrow
and starting to work on the front end.
Bro, you better show up tomorrow. You
have literally not been doing anything
the past 2 months and Beamer Invasions
in 2 months. If you don't show up
tomorrow, this thing ain't getting done.
I know, I know, I know. I need it this
time. I need to get this car done. So,
have faith. I'll be here tomorrow
morning. Catch you then. So, as
promised, guys, I got straight to work
the next day. But, I decided to actually
start working on something that's not
mechanical, something that's more
aesthetic, something that actually makes
this thing look more like an F81 M3, but
we actually ran into a little bit of an
issue. Got the proper ones from an F80
donor car, slapped it on the doors, and
that was literally the only difference
in terms of the doors. Thankfully, our
wiring was already pre-wired for
cameras. So, our our camera side mirrors
will fit perfectly. Um, we got
everything wired up and everything ended
up looking perfect. I mean, just check
these mirrors out. They look absolutely
phenomenal.
[Music]
[Music]
Guys, that looks so good. I know that's
one of the few things we put on there,
but the fact that it's already paint
match and it's an F80 mirror shadow line
with our shadow line F-31 window trim
officially makes this thing an F81,
which looks absolutely bizongers. I love
how the Alpine white literally matches
the factory paint. This thing looks so
so so good. Now, unfortunately, we have
to stop with the cosmetics and start
focusing back with the electronic work
because we need to get this thing
running and driving. So, let's go ahead
and install our new ground strap that we
had to try to transfer over from our F80
donor car.
[Music]
And just like that, guys, I got these
two pretty much pulled out from the
battery compartment. So, let's go ahead
pop it all out and get rid of this cable
and bring over our F80 cable.
Now, I'm not going to lie to you guys,
you really don't have to do it the way
I'm doing it. I went ahead and replaced
the entire cable. You could have
honestly cut it from the top of the
engine bay and just pretty much splice
in uh the new connector from the F80,
but I honestly wanted to do everything
like OEM. I really didn't want anything
spliced. I want it to look like it came
from the factory as an F81M3. So, I'm
not doing anything to where we have to
do any cutting, respicing, uh,
soldering, anything like that. I want it
to be as OEM as possible. The only
soldering we have to do is the actual
wiring that we have to do. And guys,
just like that, we got the F80 positive
cable right there. We got it all routed.
And thankfully, all the clip-on points
from the underc carriage of the car went
in the way it's supposed to from
factory. Right. As you guys can see, it
goes right over the fuel tank up there.
And it actually goes right above the
rear subframe right there. And then it
goes all the way around into the battery
compartment right over here and plugged
in just like that. So yeah, this cable's
officially been converted. I'm going to
go ahead and put on that last screw and
then we should be good to go. So now
that we're ready for drivetrain, let me
show you guys our new donor car.
Originally, we had our drivetrain
showing right here next to this
beautiful R8 engine, but our buddy Jake
Schneder needed an engine for his M4
ASAP, and I had to sacrifice my bad boys
and get his M4 on the road ASAP. So, now
that his M4 is gravying the Navy, it is
time to focus on our F81 M34 Beamer
Invasion. So, we finally picked up a
perfect donut car for our build. As you
guys can see right here, this bad boy,
there is no way to bring it back to
life. On this side, it doesn't look too
bad. over here. It's not looking crazy
either. But as soon as you go off to the
other side, you guys can see the fire
damage gets pretty crazy on this side to
the point to where I think it even has
some structural damage. So, we went
ahead and actually got this car for
parts here at Natty Auto Parts. But for
us, we're going to be reusing this
drivetrain. We're going to be pulling
this thing out and making it look brand
new and put in our F81 M3. And uh
because it's only fire damage, I believe
everything including the subframe is
intact with no bends or anything like
that. So, I hope it's going to be good.
But without further ado, let's go ahead
get this thing in the shop, get it
parted out so we can finally have a
drivetrain for our F81 M3.
[Music]
So, a few days later, we finally have
everything we need to get this engine in
our wagon, which again we're doing in
today's video. So, a few things you have
to install onto this engine before
actually getting it in the car because I
don't want to do this job again, which
is new oil pan gaskets, new valve cover
gaskets, new pulley, new belts. We can
do all this kind of stuff inside the
car. It'll just be a whole lot more
money. So, I figured let's go ahead and
do it outside the car. It'll be a whole
lot more satisfying and then get it all
in at the same time. That being said,
shout out to Evan right now. Um, he got
all this stuff programmed for us. We
have a new C keycast DME with the new
G80 keys, which is just super sick for
this build. Like I told you guys, we're
going all out on this build. I'm going
to have his info linked down below. He
does transmission coding, cloning,
programming, anything else you can
possibly think of. New keys for BMWs.
This guy does it. I have his info linked
down below. I know a lot of you guys
always ask me where do I get my stuff
coded, link down below. Um, also shout
out to Gates for sending me out some
belts, um, some pulleys, some other
hoses. Uh, so yeah, let's go ahead and
get this stuff on the engine. I'll show
you guys everything else our engine
needs as well. So, we finally got an
engine. I mean, you guys can see we have
an S55 donor engine that ended up being
bad. We have two right there with its
own issues. We have another one right
there with the spark plug hole issue.
That one's actually getting one up
blasted, fully stripped down. That one
over there, we also have it oneup
blasted, fully stripped down. So, we
actually have a lot of S55s in stock as
of right now. Um, but the first two,
three that we got for the donut car
ended up having a lot of issues. So,
this one right here is a complete
assembly out of this F80. This is
probably the most put together engine
that we have currently, but it still has
a few issues that we need to sort out
before actually dropping it in the car.
So, as you guys can see right here, this
actuator right here unfortunately got
damaged. Um, so we need to remove a few
bolts there and swap that out. So,
that's one issue right there. The next
thing is there's a coolant hose on the
front of this water pump that has a
little gouge in it that needs to get
replaced. There's this harness that we
actually have to replace as well.
Literally, for the only reason that it's
like a little bit damaged right there. I
mean, technically, we could just kind of
run this or just cut a wire here,
re-plice it. But honestly, guys, we have
a harness. So, we're just going to go
and replace the entire harness there. We
need to replace this boot right here. We
need to install the new DME that chills
right over here. We have an AC
compressor over here with a little bit
of damage. So, we have a new AC
compressor. Be swapping that out with.
Um, and then we also have new pulleys
and belts from Gates, uh, which is going
to be super nice as well. Again, just
knocking out all the maintenance. And
speaking of maintenance, we have a new
valve cover gasket and a new oil pan
gasket shown right here. Um, we got a
OEM BMW oil pan gasket. And then this is
like an OE, I believe, replacement. So,
uh, and a new filter, of course. Not to
mention, probably do a compression test
on this as well, just to ensure the fact
that we're actually cranking on the car.
We're not having any compression issues.
So, yeah, all that stuff's getting done
by my boy Earl. He is over right now.
He's going to be helping us out, knock
out everything on this engine. So, I'm
going to go get some lunch. We'll get
back and then we'll see what's going on.
But hopefully, we can get this thing
fully sorted so we can get into our F81
M3.
So, shout out to my boy Arlon for coming
over and helping us do compression test.
Um, helping us with the oil pan, helping
us with a bunch of things on this motor
to make sure it's actually in perfect
running shape before actually installing
it in the car. We got this engine from a
car that we weren't able to start up.
So, we had no guarantees that it was
actually good. But thankfully, after
some testing, we're pretty confident
that this engine is going to run
perfectly fine. So, we decided to do
some extensive maintenance, as you guys
can see, and we're trying to make this
thing as perfect as possible.
So, while our lawn's actually working on
servicing the engine, I decided, you
know what? Let me go ahead and button up
everything we possibly can in the engine
bay. So, as soon as that engine's ready,
we can pretty much slap it inside the
car.
[Music]
Heat. Heat.
[Music]
[Music]
Heat.
[Music]
Heat.
[Music]
So guys, we officially did it. And
honestly, knocking this out made me
realize how easy this build is going to
be. This guy literally took me a year
and a half. And I actually reached out
to a company that also builds wagons in
Los Angeles. And they even told me that
this car took them a long time. But this
car took them little to no time. And
they don't know why I'm not working on
this build. So I went and asked them a
few questions and I started to
understand why it's so easy. So instead
of telling you guys the secrets, let me
show you. So in this video guys, we are
already ready for drivetrain, which is
kind of insane to say. There is some
wiring that we haven't finished yet, but
thankfully it is going into this area
right here behind the dashboard, we can
get that stuff sorted while the engine's
inside the car. But we do want
everything hooked up so when we are
ready to turn on this engine and see if
everything works, the engine's already
in the car. So, I figured let's go ahead
and swap out the last thing I could
possibly think of before actually
slapping in the drivetrain, which is the
side skirt brackets. I'm pretty sure
they are different. So, let's go ahead
and take off those three brackets on
each side and replace them with the M31.
[Music]
[Applause]
[Music]
So guys, I officially got stumped on
this. I actually can't put the full M3
brackets on here without actually
getting some body work and some welding
done right here uh with the quarter
panel. Uh mainly if you guys actually
look at this arrow, it's facing the
front of the car. All three of these,
just like the rest of these, which is
perfectly fine. But these three are
supposed to be facing the opposite
direction on them three. Let me show you
guys. Look on this car. We have all
these arrows facing forward and then
just switches. So I don't know why they
had to do that, but they did it. So now
we're going to probably have to chop off
this section right over here and get
this welded with our M3 quarter panels
on the wagon. So, meantime, let's just
go ahead and remove all the brackets cuz
we need them. They are officially
different. And at least transfer the two
uh front ones and then just save the two
rear brackets for when we are ready for
it. The next thing I want to go ahead
and install because why not? I think
it's the last thing I could possibly do
right now is the fuel pump module. The
question is, will it just plug and play?
Will it just swap out between the nonM3
and the M3? Or will we need to actually
add more wires? Let's go ahead and find
out. See, as you guys can see, the EKP
module unfortunately has different
wiring, but that's not that big of a
deal. We'll make custom wiring from the
EKP module to the fuel pump since those
are also different on this car as well.
So, in the meantime, I decided to
actually just work on the E brake
completely different. Side note, but I
noticed that the E brake was not
connected even though we got our whole
rear end in the car. So, I just kind of
wanted to perfect that section so we can
kind of conclude that the rear end with
the E bra is fully hooked up. Got some
snacks for the boy. I mean, I definitely
do not recommend Red Bull, but that's
just something he loves. And we also got
what we need to clean our submarine. So,
shout out to my boy Erlan once again. I
actually went over to his house cuz he
has a really good power washer. Um, and
I wanted to actually start powerashing
the entire undercarriage. We got all
these parts from another donut car that
had burnt damage, which had a lot of
burnt residue. Um, but the actual
suspension, all the components were
actually in really good shape. So, we're
able to actually take it over to his
house. He had the proper products to get
it cleaned up pretty well. And I think
it actually came out pretty well. Hey,
I'm not going to be the one to judge.
I'll let you guys judge for yourselves.
Let me know down below what you guys
think of the final results on this power
wash.
[Music]
Isn't you?
[Music]
And just like that, guys, we have a
complete subframe for F81 M3. The
subframe cleaned up pretty nice. I've
seen people on YouTube basically once
they get it down to this level. Um, they
actually spray it. So, uh, we're not
actually doing that. I think this is
good enough. More of a natural look. On
the bottom, it actually looks better,
which is what you're seeing when you
jack up the car. Anyways, steering rack
came out beautifully. Uh, engine mounts
seem like in pretty good shape. Control
arms, I might need to replace this one.
Other than that, I need to replace the
sensors and we're good to go on both
sides. So, I'm really happy about that.
At this point, guys, we just need to get
our engine.
And as you guys can see, guys, we
finally have the drivetrain finally
fully put together. The new oil pan
gasket, new valve cover gasket from BMW.
We ended up replacing the front
turbocharger with a low mileage
turbocharger with all new seals because
uh we noticed that there was some issues
with that one. So, we ended up replacing
the front turbocharger as well. We did a
one-up blast. We fixed all the wiring
that's on this engine as well. Replaced
the coolant hose, added brand new belts
from Gates, shout out to them, and brand
new pulleys from Gates as well. Looks
like a little bit of oil actually came
out uh as we were getting this thing
over here, but no big deal. We ended up
replacing the valve cover as well cuz
that was cracked. And like I said, guys,
new harness, new charge pipes, cuz those
are cracked as well. This was also
cracked to replace. So now this thing is
honestly fully serviced. Everything's
replaced. Everything's been honestly
looked through. We did compression
numbers on this engine. It was 150
compression all the way through. So I'm
hoping those are good numbers. Um but
anyways, they're 150 all the way across.
So typically if they're all the same
number all the way across, that's
typically a good sign. So at this point,
guys, we do have the subframe shown
right here. We have the engine and we
have the car. So um I mean I mean
technically I go home around 6:00 from
Natty Auto Parts. It is 4:00 right now,
but I'm definitely not going home. until
this drivetrain is in this car. Because
honestly guys, it's been a long long
long time since I promised you guys this
car is going to be together. And and
like I told you guys, this car has to be
ready for Beamer Invasion. Let's just
turn on grind mode. Now, I've never been
so motivated, guys, to get a car fully
put together, but finally having this
drivetrain looking absolutely pristine
and having the subframe and having the
car right here. I honestly could not go
home until I got this thing in the car.
Um, so we can actually start planning
out and making a list of everything else
we need to get this thing running and
driving. I genuinely believe that it's
gonna be running and driving here in the
near future.
[Music]
I know you
[Music]
Heat. Heat. Heat.
[Music]
Heat. Heat.
[Music]
[Applause]
And you guys can see that we are
officially S55 swaps. We have an F80
transmission, F80 drivetrain, F80 rear
end. So, this ain't honestly an F81 at
this point. I don't know what is. I'm
super stoked on the progress of this car
so far. We still have to deal with a lot
of the wiring, but thankfully a lot of
the things were plug-andplay. There a
few wires over here that are missing
that needs to be connected um and
rewired into this car. We are also
missing a few kill hoses, which is not a
big deal. There's a few wires missing in
this section as well. Um and then as
well as the interior, there's going to
be a lot of rewiring that needs to get
done over here. Nothing too crazy, but
we'll show you guys the process for
that. But honestly guys, the part that's
absolutely insane is that this car is
probably going to be running here in the
next week or two, a running and driving
F81, which is pretty crazy. This build
is definitely going to be a whole lot
faster completing it than the A91 M3,
just because of the wiring in the car
already, and a lot of the parts on this
car already from the N20 matches with
the F80, surprisingly. So, for those of
you guys who have not been following
along on this build since day one, uh
things that we didn't end up taking out
of this car is the entire body harness,
the carpets, the whole cage and
everything, the HVAC system, the
beautiful headliner, thankfully the
panoramic roof, but all of that we did
not have to remove. Not to mention any
of the wiring that goes into the hatch
and all the stuff in the trunk as well.
We're able to leave all this stuff and
not have to tap into it, which saves us
a tremendous amount of time. And for
those of you guys who follow me since
day one of me purchasing this car, I
decided to get a super good spec that
this car literally has every single
option from 360 camera to lane assist um
to Harman Carden uh comfort access. So
this car literally comes with everything
unlike the C91 which we actually had to
retrofit keyless entry and a bunch of
other features. Um so I made sure I got
a good base. This thing is also an M
Sport package. We have the Shadowline
trim, the black headliner, all the
little black accents in the trunk area
as well. Um, so honestly guys, this
build is going to be completed here
really, really, really soon, which I'm
super excited about. My boy Nick is
going to be flying out in a week from
today, and he's actually going to be
coming down to help us with this stuff.
So, I figured in the meantime, let's
just go ahead in the next video and
fully assemble this front end as much as
we possibly can. We do need to fabricate
ourselves a bracket for the transmission
before actually installing our full
exhaust. As you guys can see, I'm going
everything completely stock to get this
thing past California bar emissions.
This car, for those of you guys who
don't know, is officially barred. So, in
the state of California, this thing's
100% legal and identifies as an S65 M3
wagon. That's actually an ' 07 build
date, which is kind of insane. Actually,
technically, the chassis is an '06 build
date. So, this is an 06 build date,
E9XM3
uh wagon. So, super insane. And the
crazy thing about this one as well is
that it's a 2014 F8X M3 wagon, which
again, if you think about it, this is
probably one of the first M3s out there
because of the year, a 2014. And I
believe F80 started in 2015. So, uh,
this is ahead of its game and that is
also ahead of its game, which is pretty
sick. So, stay tuned, guys. In the next
video, going to be trying to assemble as
much of the front end as possible and
the side and the suspension. Potentially
get this thing on all four wheels, which
I'm super stoked about. And then
probably the video after that is getting
this whole interior together after
getting the wiring stuff done. I
honestly think we're going to knock this
out in less than a month. So, stay
tuned, guys. Beamer Invasion is right
around the corner. I want to make sure
you guys see this thing. So, uh, that
being said, uh, we're going full
throttle. So, without further ado, guys,
I love y'all so much. Remember to stay
humble. I'll see you guys in the next
one. Peace out.
Yeah, let's see how you do under
pressure.
Yeah, I've been wanting this forever.
I've been in the field with whatever
they throw at me.