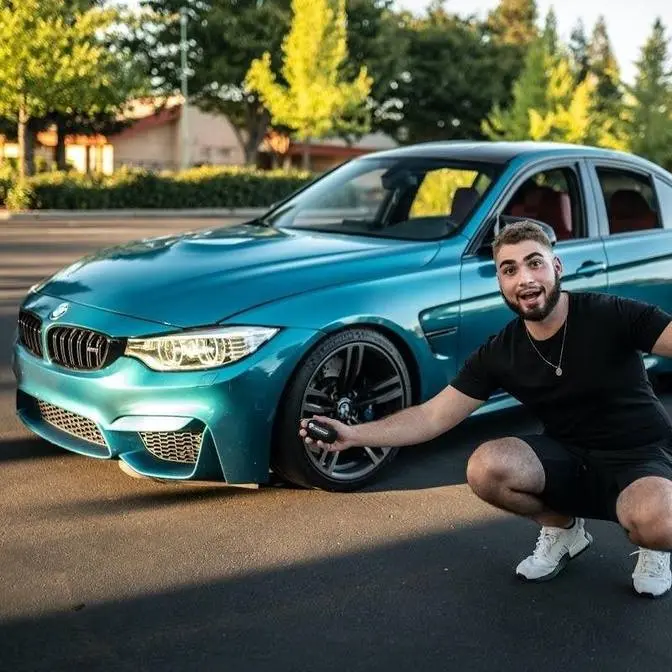
Yes its been 4 years total with this car buy my god this thing came out better then any other car I have ever built! I wanted to keep this build more gem plus completely stock with miner m performance upgrades. But the f81 is going to be crazy modified and going to be an insane build as well as the 1m!
Hey guys, welcome back to a part two of rebuilding the E91 M3.
We got it fully painted. We have the doors.
We have everything at the other shop.
I'm just pretty much bringing panel by panel because it's all fresh new paint.
We even have all the detail pieces like the mirrors,
all these little pieces, all painted, ready to go.
Get it put back right on the car.
And as you guys can see, this thing is super fresh.
I am super excited to get it reassembled.
So let's go ahead and start putting the pieces on here that is currently painted
because also a little update.
We're getting a new shop here in literally the next week.
So as soon as I get this new shop,
all of these cars and everything in this shop is going to the other shop.
It is twice as big as this, which I'm super stoked about,
which means better content.
It actually has a bathroom.
It actually has a sink.
There's actually water in there and the lighting is so much better.
Plus, we got the shop already pre-painted as well.
So it's going to look really good as well.
So a lot of big things coming here.
But right now, let's try to get this thing as much assembled as we can
before taking it over to our new shop, which may be in this video.
We'll see on time frame.
We're just waiting for all the legality stuff and the paperwork to go through.
So I guess the easiest thing to put on right now would be these two pieces.
So let's go in and get them on.
Check that out.
That looks so much better.
Now that looks fantastic.
Let's go ahead and get on our first door on this car.
Believe it's a passenger door.
Let's go in and get that car on so we can also get one of the mirrors on
because I really want to see how that look.
This thing is pretty much only held on by two screws.
I'm going to try to bolt it up to the car right now.
I'm the only guy here with no special tools, so I don't really want to mess this up.
So I'll go ahead and check back with you guys,
which I should get the two bolts right in there
and get the door at least seated on the car.
Check that out, guys.
We got the door on here.
Check it out. Check it out.
Look how beautiful this is looking right now.
You guys actually look at the gaps as well.
This fender is not held on by literally anything, as you guys can see.
But if you look at the gaps,
I can tighten that up and make it look absolutely beautiful.
And before, guys, when I actually had a wrap on here, for some reason,
these are rubbing.
But right now with the paint, thankfully, they are not rubbing.
And when I adjust the fender and the door and everything to be absolutely perfect,
it's not going to be rubbing at all because I don't
I definitely don't want to mess up this expensive paint job.
I finally did.
So this door is officially on.
It is opening and closing without anything.
So I'm going to go ahead and get on this piece right here.
So this door can actually shut.
So we drive it over to the other shop.
Yeah, the doors don't actually fling open, hit another car,
and then bada bing bada bang.
We have an insurance claim and my door is damaged.
So let's just go ahead and get this piece on.
We got the weather stripping in there, and I just got the door as well
aligned. Check that out.
Snaps like butter.
Check it out. Check it out, guys.
This thing's looking so good.
I do have to redo all these seals.
I'm not sure why he popped all those things out.
There's a kind of a pain to put back in place,
especially removing stuff like this.
So we're going to have to end up removing all that stuff and reinstalling the seal.
I think it's literally just peeling up.
Yeah, like that.
We need to redo all of this stuff.
So I'm a quickly try to work on this so I can get on this mirror.
And then after that, we'll go more into time lapse mode
and get the rest of the panels on this car
because the panels are just sitting at the other shop,
which is where all the boys are working and the auto parts.
And I don't want them actually tripping or dropping something
on this fresh new paint that would hurt my soul.
So let's go ahead and knock this door out.
So we can go back and get the rest of the parts.
Yeah, there's absolutely no way this car is looking this good right now.
Oh, my God, this looks incredible.
The car is really coming together, guys.
If I go ahead and close this door,
let's go ahead and go from the back of the car again.
Just check that out.
This thing's looking like an absolute toy right now.
I can't believe this is mine right now.
This was like a dream that I really wanted to accomplish three years ago.
Obviously, now you guys already know that I had the F81 M3
that's complete, just shown like a villain back there.
We still have so much work we got to do on that.
We got it ready for Beamer Invasion, but still a lot of little things
that needs to get done on that car to perfect it.
I just figured before actually finishing up that car,
I need to get this car together because it's been waiting in line for three years.
We're also starting a pretty crazy 1M build this year for Beamer Invasion.
As you guys know, I'm a huge BMW enthusiast and I like to build custom cars.
The BMW dealership has never built for the public.
This has never been released in Germany.
That has never been released in Germany.
And the 1M that we're going to build has never been released in Germany,
which is pretty crazy.
But yeah, this is looking absolutely amazing, guys.
I can't wait to get all the boys to come check this out.
But in the meantime, let's go ahead and put the seal on here,
put all the little things on here and then go get our door.
And just like that, guys, we have both doors on the car looking absolutely amazing.
It looks like there is a little bit of overspray right here.
They did kind of break the mounting point for this trim.
So I need to get a new rubber gasket right over here as well.
It's kind of some of the unfortunate things
that you kind of have to deal with when getting a car painted.
Stuff like that does get damaged.
And like I told you guys before, we got this paint job for a pretty good deal.
It is still a lot of money,
especially considering that I have to strip everything down myself.
And unfortunately, there are some things that I'm not too happy with.
But for the most part, everything by the end is going to be absolutely amazing.
And I'm just super happy and how this is looking on this side right now.
Looks absolutely amazing.
So at this point, let's head back to the shop again and go get the other two doors.
And just like that, we have both mirrors on the car with the original screws
and the original hardware, which looks absolutely amazing.
So I want to go ahead and knock out right now as well.
It's going to be these roof rails.
We're going to get these pieces back on this.
We get this whole headliner in here because a lot of things are sagging.
This whole interior looks terrible.
And we can go ahead and reassemble the entire interior
once we actually pop in the headliner.
That's literally the most annoying thing.
And after that, we have the main thing we have to knock out is going to be the hatch.
So many things to piece back together on this car.
That is a pain in the butt.
We took everything off so everything gets done properly.
And that's exactly what happened, which I'm super stoked about.
So let's go ahead and get our two pieces back on here
and getting our roof rails back on here.
And just like that, guys, we have both roof rails on the car.
This car really needs a good detail.
But as you guys can see, the wagon touches are coming together.
And this orange is absolutely popping.
We definitely put the side skirts on there.
We still have so much to reassemble.
That is the topic of today's video.
So let's go ahead and get to it.
Like I told you guys earlier, I want to go and start working on the interior.
So I got to sit inside, move the car around, get it to the other shop,
get the hood, get the rear bumper from the other shop as well,
and the hatch and all the other parts.
So the final thing I want to do
so not a bunch of things is moving in the interior is getting this headliner
in because it is completely naked right now.
And as you guys remembered, we got a OEM M-Sport black headline
that's going to be going in this car.
This bad boy is not refinished.
I literally had to go buy a factory M-Sport car to pull this headliner out
so we could put it in our wagon.
I literally didn't cut any corners on this E91 M3 build.
And I think I spent around $7,000 for this headliner, technically.
I mean, I took the car, ended up buying, I ended up taking this off
and then I sold the car, broke even end of the day.
But I initially spent $7,000 just to get this headliner, which is kind of crazy.
And of course, all the other little black plastic pieces
that go around the trunk area,
because I wanted this thing to be absolutely as OEM as possible.
So without further ado, let's go and get the headliner,
shove it in the car and get it all bolted up.
Guys, I'm definitely getting older, but the chrome right now is looking so good.
I'm trying to restore this car to be 100% orange.
We're keeping the shadow line trim because it looks amazing.
But I want to keep this thing orange with all the chrome pieces
and all the original parts, as if this thing came from the factory
as OEM plus as possible.
So that being said, we just knocked out this side.
We need to go ahead and unwrap this side.
Thankfully, I thought I plasti dipped these.
They are just wraps.
It should be easy to disassemble this again.
This is another chrome one I had in the past.
You can see the logo slightly faded on that.
So I'm going to sell that one.
This one is in much better shape.
Let's go ahead and knock out this one.
And boom, just like that, guys, looking more like an M3.
This looks so good.
So the next thing I want to go ahead and knock out is going to be the taillights.
Let's go ahead and put on both taillights on the outers.
Just so that stuff's knocked out.
Obviously, the entire trunk section that we have to knock out as well.
That's going to be an entire mission in itself
because a hatch is a pain in the butt to remove.
The glass is a pain in the butt to remove.
And we have to reassemble absolutely everything.
We literally upgraded everything, including all the plastics for the hatch.
This thing is getting an extreme makeover.
But yeah, I think the next thing I want to go ahead and knock out
is the two taillights.
Let's go ahead and get those on.
So let's go ahead and transform this section right here.
One, two, three and four, guys.
Definitely needs to get cleaned up.
But all that's assembled finally, which looks really good.
So I'm going to quickly just throw on this little trim piece
and then we're going to start working on the interior.
All the details matter, guys.
I want to I had to go ahead and source this bumper piece here
because my bumper originally did not have it.
It's a little nice little weather stripping right there.
And then let's hop in the interior and knock out all of this.
All right, guys.
So I went ahead and put on the first plastic piece on this side.
I haven't put it on yet.
And I want to test out the theory on seeing whether or not
because I've seen orange cars with no tint.
If the fishbowl look looks really good.
You guys let me know down below.
Do you prefer the fishbowl look or do you guys prefer it tinted out
where you can barely see inside of it?
I don't know why.
I think I think because the car is orange and it's a wagon,
you'd like to see all the or you'd like to see all the wagon details.
This looks really, really, really good.
I mean, just just looking inside here, seeing the vents looks pretty sick.
And on top of that, because this is a wagon, seeing the sunshade cover
when it's open, when it's up, seeing the dark cover up.
I think that's pretty dope.
So I'm going to go ahead and untint this car.
I had a company that reached out to me that said that they were willing
to tint the car.
So for those of you guys, after I go ahead and untint this entire car,
think that it was a bad idea, I can still get it tinted.
But I figured might as well remove all the tint and see how this thing looks.
So we got all the tint off the car.
The windows still look absolutely terrible because the paint shop literally
they messed up those windows.
We need to get a razor and actually start working on that.
But I don't have any razors on me right now.
So we're going to be doing that a little bit later
when we head to the other shop to grab the hood.
So.
This thing is looking absolutely insane.
We tested the gaps out, we put all the taillights in there.
This color with the red, I don't know what it is.
And the chrome is looking absolutely amazing.
And we have to checking out right over here.
We got everything to work as well.
So I click the button that's opening up.
The lights over here are working as well.
When you close it, it latches up everything perfectly.
I'm super happy with the progress you made on this hatch so far.
We got all the original M Sport black plastics.
These are super rare.
And we have them for this wagon because this is the ultimate wagon.
So that being said, I've been honestly dreading putting this hatch together.
It's honestly not that bad.
It's just a tedious, tedious process.
So at this point, let's just go ahead and put another bolt over here.
Assemble this section right over here.
And then we're just going to go ahead and get the glass on here,
which I think is going to be pretty difficult because this is spring loaded.
We'll cross that bridge once we get there.
Now, as far as the hood goes, as you can see,
unfortunately, is a different shade of orange.
So we're actually going to be going ahead and removing this hood again,
getting it repainted, unfortunately.
And the side skirts are completely different shade of orange
than the rest of the car.
The rest of the car, honestly, is pretty good.
But unfortunately, the hood and the side skirts,
because you painted those at a different time,
they came out looking a lot different than the rest of the car.
And because we're honestly spending this much money on the car,
I want to make sure it's absolutely perfect.
But that is going to be for another day.
In the meantime,
we get this whole front end assembled here in a little bit.
So let's go ahead and pop on our new headlights.
So it's been a few days, guys.
And yeah, we got the bumper on the car.
We have all the grills on here and stuff is looking pretty good.
The side markers, we're sending it off to get repainted.
We're going to get a paint match to the car on this bumper.
Unfortunately, can't mount it to the fenders because for some reason
we sent off these fenders for paint.
They accidentally I don't know if they accidentally
they lost the brackets on the fender that you can mount the bumper to.
Theoretically, we could put zip ties, but that is super jank.
So we're not doing that.
We're getting the OEM part so we can bolt that in.
Unfortunately, each one of those brackets are $50 from the dealer.
So $100 in the garbage
because the paint guy lost those parts, unfortunately.
I do want to go ahead and get the wheels off the car
because now we're going to be taking all these wheels off and getting them redone.
As you can see, it has some really, really bad curb rash all around the wheel.
So get all these wheels refinished, repainted.
It's going to look absolutely amazing.
And then I also got some better condition wheel center caps to slap on here.
The car is coming together, guys, one step at a time.
So without further ado, let's go ahead, get it on four jack stands
so you can remove all four wheels and get them redone.
So now, guys, the car is rolling on cinder blocks.
I'm just kidding.
Some jack stands.
We're going to go ahead and drop off our four wheels and get all of them refinished.
The good thing about the guys I'm using,
they said they're going to be able to finish all four of them tomorrow
if I drop them off today. So it's pretty insane.
So let's go ahead and drop them off and see what happens tomorrow morning.
So after about a week of waiting, unfortunately, the brackets just came in.
As you guys can see, the fitment's looking really, really, really good.
But unfortunately, when trying to mount this bumper to the fender,
I realized that we didn't have the bumper brackets
we needed to get the finishing touch on there.
And just like that, guys, you have all the fender lines in here.
Everything is mounting up absolutely perfectly.
Super stoked about that.
So now I'm going to go and throw in the other side
and then let's go ahead and go get our wheels.
We got our competition wheels back, all refinished.
And you look absolutely amazing.
Fresh new paint, fresh new wheels.
Let's get it on the car.
Guys, let's get this thing on the ground.
So now, guys, let's actually get the car back to paint.
So we get this hood repainted because unfortunately,
it's a different shade of orange and also get the side skirts painted.
So a few weeks have gone by, guys, and check out the hood.
Now we have a perfectly color matching hood.
We got the whole hood resprayed.
We slapped the badge on there.
We got color match side markers right over here.
We have color match vents right over here as well.
So everything's looking absolutely beautiful.
Now, the only thing literally that's left to put on to the car
is going to be the side skirt.
And check that out, guys.
The finishing touch is on the car.
The fitment looks absolutely amazing, guys.
Check that out.
And not to mention the color match.
These were so off.
Now everything's coming together.
This looks absolutely gorgeous on this thing.
And it definitely gives it the M3 aggression
this car has been needing from the side.
So that side is fully complete.
The other side went in easier because I call my boy Brandon
and he was actually telling me, which I have his Instagram linked
right down here.
He actually told me that the rubber grommets on these cars get really old,
which makes sense.
You have to lubricate the grommets to the side skirts slipping easier,
which it did literally just after doing that.
So this side skirt slipped in so much easier.
And I'm super happy about this side.
This one took a lot of frustration, but it's in there as well.
And now we're good to go.
Now, the next part is going to be doing the entire interior.
We have the whole rear seat conversion again done by my boy Brandon.
Huge shout out to him.
If you guys want to do any rear conversions, honestly,
if you guys are doing an E91 M3 build and want some assistance
on some custom work done, he will literally do this conversion.
You just have to mail him your seats.
He will do the complete conversion and mail it back to you.
So then your car can have everything properly.
And as you guys can see, this thing is what proper literally is.
And also not going to lie.
Shout out to Louis for getting me in contact with Brandon.
Both those guys are very educated on doing conversions like this.
And I know I have also my boy Nick,
who is also really good at doing conversions like this.
And he's the one that actually did this one entirely.
He has so much other things going on that he's unable to help you guys.
But Louis and Brandon are the guys that you guys have been asking for.
You guys have been asked for, hey, I need some help.
How do I do this? How do I do that?
Ask these guys. These guys know what's up.
And these guys are going to do you right like they did me.
I am so excited.
I can't believe I just slipped in something so simple.
They have the tips, not to mention the whole rear seat conversion.
Guys, nobody here was willing to do it, especially for a reasonable price.
Everyone here is asking for five thousand.
And this guy did it for a fraction of the price.
And that's not for my price. It's also for you guys.
So you guys will get it for a much better deal.
You just have to send in all your parts
and they will do the full conversion for you.
And you pay shipping both ways.
And everything is gravy in the name.
So that being said, guys, this thing looks absolutely amazing.
Let's go ahead and finally gut our rear seats,
because now the way that Brandon did it, this is direct bolt on.
Now, if you've never actually moved your rear seats before, guys,
this bottom section just lifts up to the bottom bench,
which is this section right over here.
You just lift up, pull out this side pieces right over here,
which is going to look like this.
These pretty much just pull out from here.
Don't break it like I did with this section right over here.
Unfortunately, broke it.
So that kind of sucks.
But anyways, you pretty much just pull on this.
And yeah, that's all there is to it, too. No tools.
And then for this rear section here,
there's just a T45 or T50 right there, singles the other side
and the rear seats come right on out.
So I'm going to go ahead and do that.
And once I do that, I'll go ahead and show you guys the new seats.
And just like that, guys, we have the M3 side bolsters,
the M3 rear seats, as you guys can see right here with this little design piece
is all M3 leather and three cupholders as M3 function slash wagon function.
Needs a good detail, guys.
But for the most part, it's all in there.
I haven't put this in just yet because we need to do our fuel sending unit.
That just literally went out on me.
So I'm going to do that, then snap that back into place.
But it's coming together, guys.
So literally doing that conversion took me probably around 10 minutes.
So as long as you have somebody that actually does the leather again,
a link down below, then you guys can go ahead and get installed into your wagon
and complete your build for as little as 10 minutes swap.
And wow, wow, wow, guys, it's coming together.
I just got this seat sent out and it came back.
I've done with my boy Erline.
We replaced all the cushioning from the headrest to this section
to even this section in this section.
I thought a picture right here of how this seat looked.
But this is looking so much better, which I'm so thankful for,
because that is one of the few things in this interior that was looking really off.
And I also want to show you guys
the new details that we got knocked out in this car as well.
We just got a custom plaque installed.
I've had this plaque for years now, guys, showing it's a one of one
2007 M3 Lime Rock Edition, which is so dope made by your boy, Natty.
So it's the little details like that that really, truly bring a car like this
together that and performance shift knob that is OEM.
There's beautiful AZA steering wheel,
which honestly brings together the OEM and performance look as well.
And then not to mention this full rear seat conversion,
which looks absolutely stunning.
Just got it fully assembled.
We did replace our fuel sending units.
We got that fixed up and then we got everything in the rear situated
coming out over here as well.
Like I told you guys, it's all about the details.
And that looks so good.
Typically, the Lime Rock Edition, the E92 M3s, it'll say Coupe right here.
We got a custom sticker here done.
And it also says Touring, which really brings it together.
We also got the new badges on the wheels.
So that really looks good as well.
And then last but not least, we got the M3 badge perfectly lined up.
I use a template from another hatch I had over there on here,
and we got it sitting the way it should be from factory.
And so in case some of you guys saying, hey, Nori, the badge is a little too low.
That is literally the exact dimensions from a factory hatch
that I have sitting right over there.
I use those dimensions, put it on there.
That's how it is.
Now, it is definitely different than the badge I had originally on.
It was sitting a lot lower, but it still sits kind of low on wagons.
I'll probably try to throw up a picture right over here,
yes, and see that it sits not even on the bottom half,
but on the bottom quarter on the wagons.
Not sure why. That's how BMW did it.
So again, we're just trying to match the OEM BMW specifications.
Well, my oh my guys, this thing is actually insane.
And it's crazy to say that I built this thing from the ground up
to see where it is today is actually just unreal.
Not only does it cosmetically look amazing and now fully is converted,
but we also did the drivetrain.
We did raw bearings, we did throttle actuators.
We did all the gaskets.
We did new valve covers.
This thing, honestly, guys, top to bottom is as if it came from the factory.
Now, obviously, as 120,000 miles on the engine components.
But other than that, literally fresh paint job, fresh wheels.
I got the lowest mile suspension I can find for every single piece on this car.
We have an extended leather dashboard like this thing.
I just literally piecing it together from all the different cars
that I've owned through all the years.
For example, getting this E91 just in for the little detail pieces.
Again, for this wagon,
I don't know how many donor cars I purchased to get this wagon together.
I purchased so many because take off a few pieces on this car,
then we'll send it off to 90 auto parts.
They'll dismantle so they can sell parts to you guys.
And then when I actually need parts again,
once I'm on the next stage of building this wagon, I'll just get another wagon
and we get the parts we need to perfect it.
I think, honestly, this car was probably accumulated from 10 different wagons,
which is pretty insane.
And like two different M3s, which is pretty crazy.
So anyways, at this point, guys,
the only thing this car really needs is going to be the Bimmer-Tech audio
and the door panels.
So I'll probably catch you guys in the next video once that's done.
You guys can really smash that like button for me,
because I know a lot of you guys are like,
nor you quit on the paint job, nor you quit on this build.
I'm not a quitter.
And this thing's officially pretty much complete.
And then now we're going to have to show some love to the F81 M3
and the 1M project here soon.
So I'll catch you guys in the next one once we actually get the whole car
fully assembled, get some b-roll, take the car out.
Enjoy it before we actually put it back in storage
so we can work on the two other builds.
I love you all so much.
Remember to stay humble.
See you guys in the next one. Peace out.