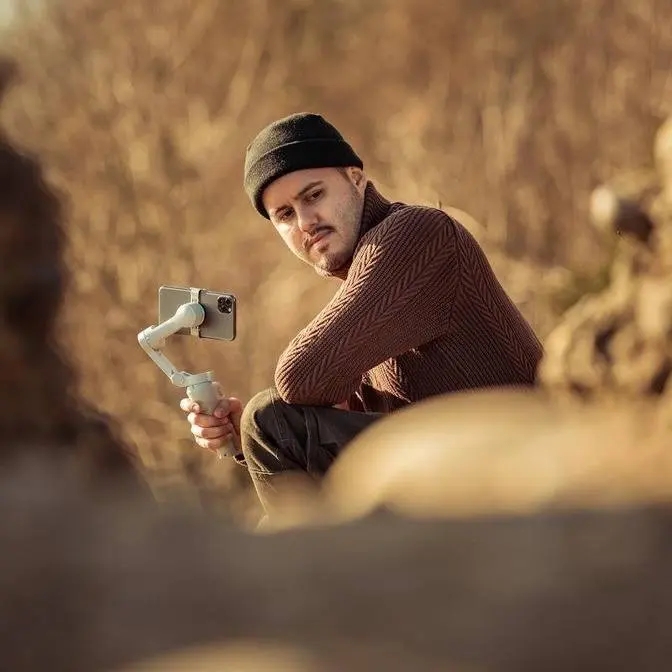
DISCLAIMER Some links are affiliate links, where I earn a small commission if you click on the link and purchase an item. You are not obligated to do so, but it does help support this YouTube channel and allow me to continue making videos for you. I appreciate your support!
TIMESTAMPS: 00:00 - Introduction 00:38 - Why use a mobile gimbal? 01:18 - Overview 02:13 - New Features 03:53 - Multi-Functional Module 04:38 - Ai Tracking 05:37 - Fill Light 06:04 - Audio Recording 07:54 - Power Bank 08:22 - External Lens 08:40 - Mount & Balance 09:11 - Basic Button Function 10:40 - Dji Mimo App 19:05 - Mic Settings 21:14 - Remote Control (Apple Watch) 21:39 - Operating Modes 22:23 - Price 22:52 - Who is it for?
In this video, I'll walk you through everything you need to know about the DJI Osmo Mobile 7
and 7P so that you know how to use it to create stunning videos.
We'll start with a quick overview of the gimbal, talk about its features,
show you how to best mount and balance it, the basic button functions,
and dive into the DJI Nemo app. We'll also explore the shooting modes and when to use them.
Plus, I'll talk about the price and who this gimbal is best suited for.
By the end of this video, you'll be ready to master the DJI Osmo Mobile 7 gimbal like a pro.
Now, I'll be using the iPhone 16 Pro Max throughout this video, but don't worry,
this gimbal, including the DJI Nemo app, is also compatible with Android devices.
Now, you might think with smartphones nowadays having excellent stabilization,
you don't need a gimbal. But trust me, using a mobile gimbal enhances your phone's stabilization
even more and makes it easier to capture great shots.
While I am experienced with handheld shooting, my biggest struggle is keeping the horizon leveled
especially when shooting more complex, longer-moving shots.
A mobile gimbal like the DJI Osmo Mobile 7P solves this problem. It also allows me to use
features to extend the functionality of my phone and achieve more creative shots.
Now that you understand what makes a mobile gimbal worthwhile,
let's look at the DJI Osmo Mobile 7 and 7P and what they can do.
So here is a quick overview of the DJI Osmo Mobile 7P.
It features a 3-axis gimbal. You have the roll, tilt, and pan motor.
Then you have the recording status indicator light.
You've also got the built-in extension pole, a magnetic phone clamp.
Then you've got this awesome multifunctional module which has a microphone indicator to
pair with the DJI Mic Mini, a tracking camera, fill light with a brightness,
and color temperature button. At the front, you have a display.
You've got a side wheel that functions as a zoom and focus wheel, a joystick,
the M button, a shutter record button, switch button, on the back, the trigger button,
a USB-C port, an integrated tripod, and at the bottom, a 1.25-inch screw hole.
The DJI Osmo Mobile 7 has similar features to the 7P,
except it doesn't include the extension pole and the multifunctional module.
And you also don't have the wheel to the side, which is replaced with a slide button.
Let's now explore the DJI Osmo Mobile 7P's features.
Now the design is similar to the Osmo Mobile 4, which I liked for its one-step quick launch.
And it's great that they've brought back this design with the Osmo Mobile 7 and 7P.
I can just unfold it, and it automatically turns on, letting me start shooting immediately.
I also like that I'm able to keep the clamp attached
to the gimbal that wasn't possible with the Osmo Mobile 6.
And what's really cool is that when I turn off the gimbal,
the gimbal will adjust the phone perfectly so that I can fold it and quickly take it off.
Now the magnetic phone clamp design has also been improved.
It also has enough room to be used with a case.
However, with the Osmo Mobile 7, not the 7P, you get the standard clamp.
Now they recently introduced the magnetic phone mount, which is fully MagSafe compatible,
a sleek system for quick setups that won't interfere with the camera button.
And you can also use it as a stand.
However, you can't attach the multifunctional module to the magnetic phone mount.
Now the Osmo Mobile 7 is lightweight at just 324 grams,
compared to the 381 grams of the Osmo Mobile 6.
It's portable, lightweight, and easy to carry as it fits right in your pocket.
Now the integrated tripod is also a new feature that makes the setup compact and pocket-friendly.
And by having an integrated tripod, it really makes it simple and fast to use.
And this is great for setting it up on flat surfaces to record yourself.
Now the most significant improvement is the multifunctional module.
It combines several features, smart tracking, a built-in microphone receiver, and a fill light.
Now to mount the AI module, simply line up the magnetic pins on the module with the phone clamp.
Once connected, the camera light will turn red, showing that the module is ready to use.
You can then use the tracking feature and fill light.
Now by using the USB-C and connecting the module to your phone,
you can use the module like a receiver and pair it with the DJI Mic Mini Transmitter
for easy audio recording.
To remove it, simply press the release button, can attach it in reverse,
allowing you to use smart tracking with both the selfie and rear cameras.
The module doesn't affect the gimbal's balance or the axis arms,
letting you move freely in any direction, even when filming vertically.
When using the cable, you might need to adjust it slightly to avoid blocking the gimbal's movements.
So let's begin by talking about how to use the tracking feature.
The great thing is that you can use the intelligent tracking without needing the DJI Nemo app.
It works great with the native camera app, professional video apps like Blackmagic Camera,
live stream apps like Instagram or YouTube, and many other recording apps,
even for calls or video conferences.
There are three gestures that you have to remember.
The first gesture is the V sign or peace sign,
Then there is the palm gesture, which will start following you or the subject.
The camera indicator then turns solid green.
If you raise your palm again, it will stop following the subject,
and the indicator will turn solid red.
Finally, there is the double L gesture that pauses tracking so you can adjust your composition.
The camera indicator will then turn solid yellow.
After moving to a new position, hold up the gesture again to resume tracking
with the new composition, and the camera indicator will turn solid green.
Next, there is the built-in fill light that's perfect for vlogging and shooting in low light.
You can select from four brightness levels and four color temperatures,
ranging from 2,500 Kelvin to 6,500 Kelvin.
So this is brightness level 1, level 2, level 3, and level 4.
Number 2, 3, and 4, and back to number 1.
The next part I'm really excited about is the ability to record high-quality audio with
the module.
And like I said, it is also a microphone receiver, and you can connect it to the DJI Mic Mini.
Now, you can simply use the power cable to connect the module to your mobile phone.
Now, because I already paired it, it will automatically connect once I turn on the transmitter.
It will be indicated as a solid green color on both devices.
Now, what's cool is that I can also connect two transmitters,
making it perfect to record two people.
The transmitter also has a button to turn on noise reduction.
When activated, the indicator will light a solid yellow.
You can also use the DJI Mic Mini with third-party apps like Blackmagic Camera,
Final Cut Camera, and even the default camera app.
You can change the audio settings using the DJI Mimo app, which we will look at later.
As of making this video, the DJI Mic 2 transmitter is not supported.
So, this is how the audio quality sounds like using the DJI Mic Mini transmitter
that is connected to the multifunctional module on the DJI Osmo Mobile 7P.
As you can see, as I walk away, the audio quality will stay consistent.
Also, if I turn my back, you'll still hear the audio, and it sounds great.
So, I'm now recording the audio through the internal mic on my iPhone 16 Pro Max,
which shouldn't sound that bad.
But as soon as I move further away from the camera, the audio won't be as clear.
And now I have the DJI Mic Mini transmitter connected to the iPhone 16 Pro Max via Bluetooth.
And it won't sound as good as when connecting the transmitter to the multifunctional module,
but still I can walk away from the camera and capture decent audio quality.
Another great feature is the ability to charge your phone with the gimbal.
You can charge your smartphone via the gimbal grip or use the AI module.
This is especially helpful during long shoots or when traveling,
as you might not always have access to a power outlet.
While it may use more battery from the gimbal, it's much better than having a dead phone.
I can use it while it's turned off or while the gimbal is on.
Now, the gimbal can operate up to 10 hours, and it takes about 2.5 hours to charge it fully.
Regarding external lenses, the Osmo Mobile 7 and 7P do not support heavy third-party lenses,
like the 16mm wide-angle lens from Sandmarc, for example.
However, filters such as clipping on a VND will work just fine.
Just keep in mind that the gimbal has a max payload of 300 grams.
Now, the mounting and balancing process is easy.
First, attach the clamp to your phone,
ensuring it lines up with the camera icon based on your phone's camera direction.
Check that it's centered and leveled.
Next, connect your phone to the gimbal.
Align it with the connection points.
Then simply unfold it.
It will then start balancing out your phone, and you don't have to make any manual adjustments.
If you prefer, you can also unfold it first and then mount your phone.
The gimbal features strong magnets, making it hard for the phone to fall off,
even with a good shake.
So let's now move over to the basic button function.
Understanding those can help you shoot more efficiently.
So first up is the M button.
When powered off, press the M button once to check the battery level.
To power it on, press and hold the M button.
Once on, you can press it once to switch between gimbal modes.
Press the M button three times to enter standby mode.
To turn it off, press and hold the power button.
Then you have the joystick, where you can move the phone in any direction.
Then you have the trigger button.
Pressing it once will start or stop the tracking.
Pressing it twice will recenter the gimbal.
Pressing once, then press and hold, will enter fast mode.
To exit it, you can simply release the trigger.
By pressing and holding the trigger button, you will enter lock mode,
which will lock all of the motors.
Then you can press the trigger button three times to rotate it 180 degree
around the pan axis to use the rear camera for vlogging.
Then you have the shutter record button.
Pressing it once will take a photo or start and stop recording.
Press and hold, it will create a burst shooting in photo mode
when using the DJI MIMO app.
Then you've got the switch button.
By pressing it once, you'll switch between the front and rear camera
inside the DJI MIMO app.
Pressing it twice will switch between landscape and portrait mode.
Pressing it three times will switch between photo
and record mode inside the DJI MIMO app.
Then you've got the side wheel on the 7P.
Pressing it once will switch between focus and zoom inside the DJI MIMO app.
You can rotate to control focus or zoom.
So let me now walk you through the DJI MIMO app,
which allows you to access even more features and customization options
with your Osmo Mobile 7 or 7P.
So starting off up here, we have the home button,
which brings us back to the main page.
And if you want to get back to the camera page,
just select the camera icon at the bottom.
Then up here, especially if you're a beginner,
you can access their shooting templates.
For example, if you're hiking in the woods,
you can check out different shots and get ideas on how to capture those.
So for example, you're doing a hike, you can select that.
And if you go down, for example, you want to create this establishing shot,
select apply, and then it will show you exactly how to create it.
So you can see the final result as well as the behind the scene.
And you have other themes available such as park, city, at home to get some ideas.
Then up here, you have your indicators.
So this is the battery life of the gimbal, the battery life of your phone.
And this is the current gimbal mode you're in.
So right now it's set to pan, tilt, follow.
Then over here, you can switch between the front and rear camera.
Then over here, you can access your camera settings.
So by selecting that, currently it's set to auto.
But if you want more control, you can set it to manual.
So you can dial in your ISO and shutter speed.
But for now, we're going to leave it in auto.
So below we have our parameters.
So the shutter speed is currently set to 1 over 50, ISO 69,
and the exposure evaluation at zero.
Then below you have your resolution and frame rate.
So like that, most of the time I shoot in 4K, 25 frames per second.
This gives me the highest quality possible.
And when I don't plan on slowing down the footage, I shoot in 25 frames per second.
However, if I do want slow motion in my video, I can choose 60 frames per second
and then slow the video down in the edit.
Then below you have your glamour effects.
You can choose from different options.
For example, if I want a slimmer face, I can have that.
But usually I don't use this feature.
Now, a quick way to lock your focus and exposure is to tap hold on the screen
until this lock icon over here appears.
So this way, when I hold my hand in front of the camera,
you'll see the focus and exposure won't change.
And as soon as I set it back to auto,
and when I now put my hand in front of the camera,
you'll see that it focuses on my hand and also adjusts the exposure.
Now, when we switch back to the rear camera,
we can select between the ultra wide, wide and telephoto lens.
And you can also do that with the zoom wheel.
So let's now select these three dots at the bottom left.
So first up, we have white balance.
Let's select that.
And I recommend not leaving it in auto.
You can use one of these presets.
I like to choose custom and then dial it in myself to make it look as natural as possible.
So I think around here looks about right.
But for now, I'm going to leave it in auto.
Then we have a grid, which I leave on and set to grid lines.
This way we get the rule of thirds, which helps me set my composition.
Then over here, we have selfie flip.
When recording a video with the selfie camera, it will flip that video afterwards.
Then we have face track selfie once enabled.
When I switch over to the selfie camera, it will start automatically tracking me.
So if you do a lot of vlogging, this might be a feature that you would leave on.
So just to show you, I'm going to enable it, switch to the front camera
and then switch back to the rear camera.
You'll see that it will start tracking my face.
Then over here, you can also switch to Dolby Vision to shoot in HDR.
Usually I leave that off as I prefer to shoot in SDR
and it's also a much easier process when color grading.
Then below you have the auto shot guides, which we looked at before.
What it does is it will automatically be recommended when a suitable scenario is identified.
So when you're out hiking in the forest, it will then suggest you the hiking template.
So below we have the multifunctional module.
And up here you can set the follow speed.
I usually keep it at default, which is 20.
Then over here we have gesture settings.
Up here you can see that by holding up my palm, the tracker will start following me.
And to stop it, I just hold up my hand again.
Then I can also hold up the peace sign, which will then start a countdown and record a video.
And to stop it, I can just hold up the peace sign again.
Let's move on to the gimbal.
So up here you have your gimbal quick start guide,
which I recommend you go through if you're new to using the Osmo Mobile 7P.
Then you have the gimbal mode.
Usually I keep it at pan, tilt, follow.
But you also have other modes such as pan, follow, FEV and spin shot.
Then over here you have gimbal auto calibration.
So if you're experiencing problems with your gimbal,
maybe it's not balancing correctly, then you can do a calibration.
But before you do this, I recommend you check if the clamp is properly mounted.
Then over here you can adjust the gimbal's horizon.
Again, it tells you to first check if the magnetic phone clamp is properly mounted.
If so, you can select okay, and then you can adjust the horizon to your liking.
Then over here, side wheeled mode.
You can select between zoom or manual focus.
I usually leave that off as I don't use it that often.
Then over here, once I press the switch button three times,
it will either select the video or photo.
You can also set the joystick speed, joystick control,
invert the joystick direction and invert side wheel direction.
Then you have extended tilt mode.
In this part, the angle will be larger
and you will be able to only control the tilt with the joystick.
Then you also have the sound, which I leave enabled
and the recording status indicator, which I recommend you leave enabled.
This way you can see when you're recording on the DJI Mimo app.
There's a recording indicator on the back of the roll motor.
Then in the active track settings, you have the option to keep your composition.
So when enabled, the gimbal follows the subject and keeps the composition unchanged.
And by pressing the trigger button twice, you can return it to the default composition.
Then you have tilt follow, in which the gimbal will only follow the subject in tilt direction.
All the other motors are locked.
Then in the general settings, you have additional information,
sleep time I set to three minutes.
Then there's also the beginner tutorial, which I recommend if you're new to using this gimbal.
Then you have the quick launch feature.
So once you connect your phone to the Osmo Mobile 7P,
the DJI Mimo app will appear as a notification,
which allows you to quickly access the DJI Mimo app.
And at the very bottom, you can restore your gimbal parameters.
Then over here, you can enable tracking.
So over here, you've got a smart capture.
So if you have a group of people, it will identify those with boxes.
And then you can select one of the subjects to be the primary subject,
which the gimbal will follow.
Then below we have gesture control.
So right now it's set to follow and shoot.
So when I hold up my palm, it will start tracking me and record a video.
And to stop it, I just hold up my palm again and it will stop.
But you can also select shoot only, which will only start recording a video.
And below you have your media.
And of course, you also have your record button.
And over here, you have different shooting parameters.
So you can choose between dynamic zoom, time lapse, hyperlapse, video, photo, pano.
You also have parents and kids modes.
And over here, you also have a story,
which is also a great way to capture dynamic shots if you're not experienced.
And you can select one of these, for example,
modern city, and it will guide you through each of the shot.
So let me show you the settings that I use on the DJI mic mini.
Now, right now I have the DJI mic mini receiver connected to the iPhone 16 Pro Max.
And a pop-up will appear once you open up the DJI Mimo app,
telling you if you want to record only or go to the settings of the DJI mic mini.
And the settings are pretty much the same also when using the multifunctional module.
So let's head over to the settings.
Now, you can also access these settings inside the DJI Mimo app
once you have the multifunctional module connected to your phone.
So you see the audio meter.
And when we go down, we have our receiver settings.
Now, most of these settings are also available on the multifunctional module.
So starting with the first one, we have noise cancellation.
So depending on the environment you're recording your video,
if there's a lot of noise, you want to choose strong.
But in most cases, basic will do the job.
Then you have audio channel.
You can choose between mono, which will record two separate tracks,
or stereo, which will combine both of the tracks.
Now, I like to record mine in a mono.
This way, I'm able to also make use of the safety track,
which will record one track at a lower decibel.
Then you also have low cut, which will remove unwanted frequencies.
You also have auto off, which applies to the receiver
and will automatically power off in 15 minutes
if not being connected to safe power.
Then you have auto on off with camera, which also applies to the receiver.
When you enable this, the mic and camera will
simultaneously power on or off.
So this is quite convenient.
Then you have clipping control, which will automatically
adjust the volume limit to avoid clipping.
Below, we have our transmitter settings.
So I leave auto off on, and this will automatically power off
in 15 minutes if not being connected to safe power.
I also leave power button for noise cancellation on
just in case I want to use it.
And you also have the mic LED, which I also leave enabled.
Below, you can find more information about your device.
So there you have it.
That was a basic walkthrough the DJI Mimo app.
Another great feature is the ability to control the gimbal with your Apple Watch.
I even created a full tutorial using the DJI Osmo Mobile 6
in which the same principle applied.
I'll be sure to link it below.
By connecting your Apple Watch to the DJI Mimo app,
you can see the camera feed, adjust the gimbal direction,
and change the composition.
You can also enable active track, making it easier to shoot videos,
especially when filming yourself.
Let's now talk about the operating modes.
Knowing how they work will help you take the perfect shot
and get the results you want.
And there are four basic operating modes that you should know.
The first and most commonly used mode is the upright mode.
This is ideal for eye level shots, for example, if you need to follow a subject.
Then there's underslung mode where the gimbal is flipped upside down
to capture lower shots.
This can also be used with the built-in extension rod
if you need to get lower.
Next, there is the side grip mode,
which is great for creating reveal shots or crane shots
in which the gimbal is held to the side.
Next is the low position mode where you extend the rod and tilt the camera.
This setup is perfect for vlogging since it keeps the camera further away,
allowing you to capture more in the frame.
Regarding price, DJI offers two versions,
the Osmo Mobile 7 and the Osmo Mobile 7P.
The standard version is available for $89.
That does not include the built-in extension rod,
the multifunctional module, and the knob to the left side.
Instead, you only have a lever allowing you only to zoom.
For the premium version, you get all the features for $149.
And if you want the DJI mic mini transmitter,
you can go for the vlogging combo for $208.
Now, choosing between the standard and the premium version
depends on your shooting needs and budget.
The good news is that if you start with the standard version
and later want the multifunctional module,
you can easily purchase it separately for $49.
If I had to pick one, I'd choose the premium version with the vlog combo
because it has the built-in extension pole, the DJI mic mini transmitter,
and the multifunctional module that fit my shooting needs.
And the module makes it super convenient to connect the DJI mic mini
for high quality audio recordings,
and I can track easily without needing to use the dedicated DJI Mimo app.
However, if you don't need all the extra features
and just want steady footage for basic shots,
the standard version will definitely do the job.
Now, if you need more help, I have a smartphone filmmaking course
that covers everything you need to know about
filming professionally with your phone.
You can find the link in the video description below.
If you have any questions, feel free to leave a comment.
Thank you so much for watching, guys.
Have fun shooting and see you in the next one.