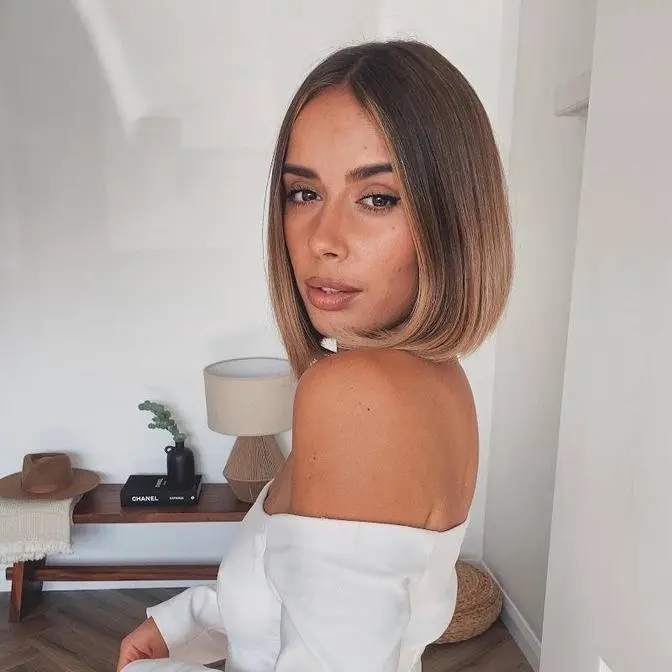
Estée Edit Radiance Activator Dr Jart Water Fuse BB Cream NARS Soft Matte Complete Concealer YSL Touche Eclat RMS Living Luminizer RMS Lip2Cheek Charlotte Tilbury Look In a Palette Huda Beauty Textured Shadows Palette Rose Gold Edition
Estée Lauder Little Black Primer Benefit ka-BROW Eyebrow Cream-Gel L’Oreal Perfection Brow Artist Plumber MAC Pro Longwear Lip Pencil Mariah Carey Bite Beauty Amuse Bouche Lipstick Meringue
DISCLAIMER: I've been a beauty fashion blogger and vlogger since 2011 so I regularly get sent products to test out, I don't ask for them and I'm under no obligation to give a good review. As a result, products in these videos have been purchased by myself or are PR samples. Any paid for content will be disclosed in description boxes and blog posts. "rstyle.me" links are affiliate links. For more information on this please click here: http://goo.gl/SIUqDN
------------------------------------------------------------------------------------------------------------------------------------------------------------------------------------------------------------- Thanks for watching! x
Hi everyone, welcome back to my channel.
So today I am going to be talking you through
my current minimal makeup routine,
which is also very Emma Watson inspired.
And I thought seeing as though I'm going to see
Beauty and the Beast this weekend,
that I would do this tutorial now.
I really hope you guys enjoy this and let's get into it.
So I've done all of my skincare routine
and I'm going to start off my base
by using the Estee Edit Radiance Activator.
This is a new primer that I've been using a lot recently
and I just use a small amount and it's very glowy.
I'm really perfecting on the skin
and it makes such a great base,
especially when I'm using something very lightweight on top.
It kind of helps to make things look
a little bit more perfect,
even though you don't have the most coverage.
So I'm just pumping one pump of that
onto the back of my hand.
The pump that comes out is huge.
I would say you maybe only need half of that.
And then I just use my ring finger
just to smooth that over my skin.
And this just gives like the most glowy,
radiant as the name would suggest, look to your skin.
Love it.
Can you see that?
Oh my gosh.
So that's primer all nicely blended in.
And now I'm going to be going in
with the Dr. Jart Waterfuse BB Cream.
This is a really old favourite of mine.
If you have been around on this channel long enough
to remember back when I used to use this in like 2013,
please let me know in the comments
because I'd be really interested to know
if you are still here.
But this is a really gorgeous, lightweight BB cream
and it adds a really lovely glow to the skin.
It's kind of dewy, but it's not too dewy.
And the coverage is great given the fact
that it is so lightweight.
And I am just a long time fan of this.
I picked this up when I was in the States
because I can't seem to find it in the UK at the moment.
So if you know anywhere that does stock this in the UK,
please do let me know.
But just like with the primer,
I squeeze a small blob of that onto the back of my hands.
You really don't need very much with this at all.
And then again, I just use my ring finger
and I start from my nose and cheek area
and then just blend out because I need less coverage
towards the edge of my face.
And this just helps to correct a lot of redness,
add a nice little amount of coverage.
If I have like blemish free skin,
then I will use this and I don't even need to use concealer.
And then it also adds a really beautiful kind of dewiness
to the skin as well.
So I've popped the majority of it all over my face.
And then I usually just add a little bit more around my nose
just so my concealer has less work to do
and I use less concealer.
And I also just pop a little bit over my eyes
just to neutralise any grey or redness.
And then I also just pop a little bit down my neck as well
just to make sure everything is nicely blended
and there are no lines, just in case.
So that is my BB cream done.
And BB creams are a really nice one
if you are going for that kind of Emma Watson vibe
because she does always have very, very glowy skin.
But at the same time, it's always very natural.
She lets a lot of like her freckles show through
and things like that.
I unfortunately have a grand total of one freckle
that can show through.
I'm not even sure it's a freckle, it may be a mole.
It's also a really nice way to let your skin breathe
if you are normally a fan of heavier foundations
or anything like that.
I love the YSL Touche Eclat foundation,
but I do like to use this the majority of the week
just to let my skin breathe a little bit more.
But just if I want some makeup,
it's just like a really lovely base.
I do have a few blemishes,
so I'm going to go in and conceal those.
And then I also am just gonna conceal underneath my eyes
and I'm gonna be using the NARS.
What is this called?
I just got this.
This is the Soft Matte Complete Concealer
in the shade Creme Brulee, which is 2.5.
I picked this up in the States
and I think it's just come out over here as well now.
And this is the most amazing,
like creamy kind of pop concealer.
It's so high coverage.
And I know a lot of people don't,
I've read that a lot of people
don't like using this underneath their eyes.
I love using this under my eyes
because I have such dark circles.
But I do feel like when I'm wearing a BB cream,
because it's so glow,
it can sometimes highlight imperfections.
I just go for a little bit more coverage
on any kind of darkness or redness.
And hopefully you can see
that I don't really use very much of this concealer.
It is super, super covering,
so you really don't need a lot.
A little bit really does go a long way,
but it's just so, so good
for covering those under eye blemishes.
I'm also just covering blemishes on my forehead.
And this is where I use a little bit more product.
And I just use my, what brush is this?
This is the Asoeva Concealer Buffer Brush,
the one, two, four brush,
just to press the product into my skin.
And then I blend around the edges.
I tend not to blend too much on top of the actual scar,
just because then I find you tend to rub away
a lot of the product.
And then just use the excess
to take care of the redness between my eyebrows
and around my nose.
I think I'm gonna need a bit more around my nose today,
because for some reason it's super red.
Oh my God, I love that concealer so much.
I would highly recommend this,
especially if you're into creamier consistencies of concealer.
So before we move on to eyes,
I'm actually going to do a little bit
of highlighting and illuminating,
even though we are looking quite glowy already.
So I'm going to be using the YSL Touche Eclat
underneath my eyes.
Kind of as always, this is a staple of mine,
especially when I'm doing minimal makeup.
I find it really helps to brighten this under eye area.
And especially if I'm not doing too much on my overall eye,
like I'm not doing liquid liner or anything
that like really makes my eyes pop and looks bright.
I find that this is an essential for me.
I'm just blending in the YSL Touche Eclat
using the Sephora airbrush concealer brush.
And then I'm also gonna be using the RMS Living Luminizer.
And RMS Beauty is a brand that I know Emma Watson uses
and really likes a lot.
I've actually seen a lot of interviews with her recently
about like her clothing preferences and beauty routines.
I'll link them in the info box
because I really enjoy reading them
as like an all time Emma Watson fangirl.
So RMS is a brand that she really loves.
She uses like green, natural beauty,
kind of like, I think it's like 80% of the time
or something like that.
And this is a really beautiful highlighter.
It's perfect over the cheekbones
and down the bridge of the nose.
It does take a little bit of warming up,
but I've been using it a lot recently
and I really like that.
And then I'm also gonna add a bit of the RMS Beauty,
what is this, Lipte Cheek in the shade Demule
onto my cheeks.
I haven't used this yet,
but I'm really, really excited to use this.
So you can use that as the name would suggest
on your lips and cheeks.
And it's just a really beautiful rosy pink colour.
So now that that is done,
I'm going to be adding a tiny bit of definition to my face.
And I'm gonna be using the Charlotte Tilbury
Look in a Palette.
This is the original one.
And you might be able to see that it is very,
very well loved by me.
I use the bronzer in this every single day.
It doesn't look like anything special,
but it works really well for me.
And it's super subtle,
which makes doing minimal makeup with this
really nice and easy because I can't really go over the top.
I use a tiny amount.
It blends out really well.
It doesn't look too orange,
but it doesn't look too ashy and brown.
I've literally dipped my brush in once
and I sweep it around my cheekbones
and then I take it all the way up through my temples.
And I don't really need to use too much more than that
for like my minimal daytime look.
So I just added a little bit of definition
to my cheeks and temples.
And then I also run this just on my neck
and underneath my jawline,
just to add a little bit of definition under there.
And then as always,
I'm going to add a little bit of definition
to my nose as well.
Also, I will link in the info box
or I will try and find the photos
that I've been using as a reference recently
for this look so that you guys can go
and have a look for yourself.
So next I'm gonna be working on my eyes, just a tiny bit.
I'm going to be using a new palette,
which you won't have seen me use before.
This is the Huda Beauty,
I can't remember what this is called,
textured eyeshadow palette, the rose gold edition,
something like that, that's what it says on the back.
I just picked this up a few weeks ago
and I've been really enjoying using the matte shades of this.
I haven't used the super metallic-y shades yet
and I'm very, very excited to finally use them
at some point.
I've been using the shade Bay a lot,
just all over my eyelid with a little bit of Sandalwood,
which is this top brown colour up here,
just through the crease.
And I've really been enjoying that look.
And I also add a little bit of Black Truffle in there
just to thicken up my lash line as well.
And this is just a really nice, easy eyeshadow look.
It doesn't really look like there's any eyeshadow there,
so it's all very minimal and just perfect
for an everyday look.
Even though there is a colour going in the crease,
it's just nothing too harsh, it's very, very subtle.
Barely looks like there's anything there
once you're done blending it out.
It's just very, very soft and natural
and all of the Emma Watson looks I've seen recently,
you can barely tell that there's any kind of eyeshadow
going on, but you can just tell
there's a little bit of something there.
And this is a really nice one
if you're not really too into eyeshadow.
So I'm just using an angled brush
to apply Black Truffle just to my upper lash line.
And I always make sure I get this as close
to the lash line as I can,
because we don't want things to look too smoky.
Although sometimes if I have more time
and I'm not feeling like having a super minimal look,
I will go in and blend the outer corners
of this bit of eyeshadow out
with another kind of warm chocolatey brown
and it looks really, really good.
So we're nearly done for eyes.
Now I'm just gonna be curling my lashes,
which is something that I've got back into recently
as part of my kind of everyday minimal makeup routine.
I find that it just looks so much better
if I curl my lashes.
And then I use a layer of the Estee Lauder
Little Black Primer over the top,
which is waterproof and it helps to hold a curl.
I'm just using my Kevin Aucoin Eyelash Curlers.
I'm just pumping away at my lashes.
This is just how I find they work best.
I don't know if you can see it,
it just makes such a difference.
This is why I came in closer by the way,
because I wanted you to see how different my lashes look
from one eye to the other.
And then I'm just applying a layer of the Estee Lauder
Little Black Primer.
This is a really nice one as well
if you don't need a lot of length
or want a lot of volume either,
but you just need a tint to your lashes
and you want them to stay curled.
And I'm also just adding a tiny bit of that
to my bottom lashes.
So now we are moving on to brows.
I'm going to be using my usual Benefit Cabrao Brow Gel.
I have just fallen in love with this
because it is the exact shade of my eyebrows
and it's really hard to find an actual match for my eyebrows
because they're very, very gray toned.
And I'm not really going to be filling them in too much.
I'm just going to be filling in a few sparse gaps
and evening up some of the edges
that aren't really so neat.
The underside of my brows are just a total mess
at all times.
And then just neatening up the tail as well,
but not really too much other than that.
Then I'm just combing that product out using a spoolie
just to make sure nothing's looking too harsh.
And now I'm going to set my eyebrows
using the L'Oreal Brow Artist Plumper.
And I've noticed a lot recently
that Emma Watson has her eyebrows brushed up all the time,
which I really like because I just think
it makes every makeup look look really soft.
And I think it's a really pretty brow look.
I know it's not for everyone,
but I personally really like it.
So I'm going to be brushing my brows upwards.
And a little tip, if you're a bit too scared
to brush your eyebrows like fully upwards,
I do it at the front of my brow
where I know that I've trimmed my brow hairs to be shorter.
And then as we get towards the outer part of the brow
where things can get a bit crazy,
I brush more outward than upward.
And it just helps to keep things a little bit more in place.
So that is pretty much the whole look.
And we are finally on to lip product.
I have a new favourite lip liner at the moment,
and it's the Mac Mariah Carey Lip Liner in the shade.
I'm not sure what shade this is.
It's the So Dramatic Pro Longwear Lip Pencil.
And this is like a tan brown coloured lip liner.
But I find for me,
it matches my lip colour really, really well.
And I basically just really lightly trace
my lip line using this, and it looks so natural.
And I don't do much to the bottom lip line
just because my bottom lip
doesn't ever really need filling out.
Just needs a little bit of lining.
My top lip is quite uneven,
and it gets really pale towards the edges,
so it just kind of fades out.
Then I blend that in.
And then I'm going to be using this lipstick
from Bite Beauty, which is the Mousse Bouche Lipstick
in the shade Meringue.
And it's a really, I've got hair on my lip.
And it's a really lovely, natural, pinky colour.
And I've been looking at the different colours
that Emma Watson wears recently.
And I really love the fact that she loves an orange lipstick,
which I also love as well.
But for a minimal everyday look,
she tends to lean towards like a nudey pink.
And this is my current favourite, nudey pink.
I got this from Sephora, if anyone is wondering.
I'm not sure if you can get these in the UK yet.
I'm just dabbing that into my lips.
It's quite matte.
And very, very pigmented.
So I don't want to go too full on.
And then blend again.
And that is it for this Emma Watson
inspired minimal makeup look.
I love doing this makeup at the moment.
It's really quick when you're not talking
through it on camera, really easy.
And it feels really lightweight as well.
I hope you guys have enjoyed this.
Please let me know if you recreate it.
Tweet me or tag me on Instagram.
I would love to see you guys recreate this look.
I will leave previous videos here
and a subscribe button somewhere here on the screen for you.
If you are new and you would love to subscribe,
I would love to have you back for more videos.
I hope you're all having the best day
and I will see you guys in my next video, bye.