
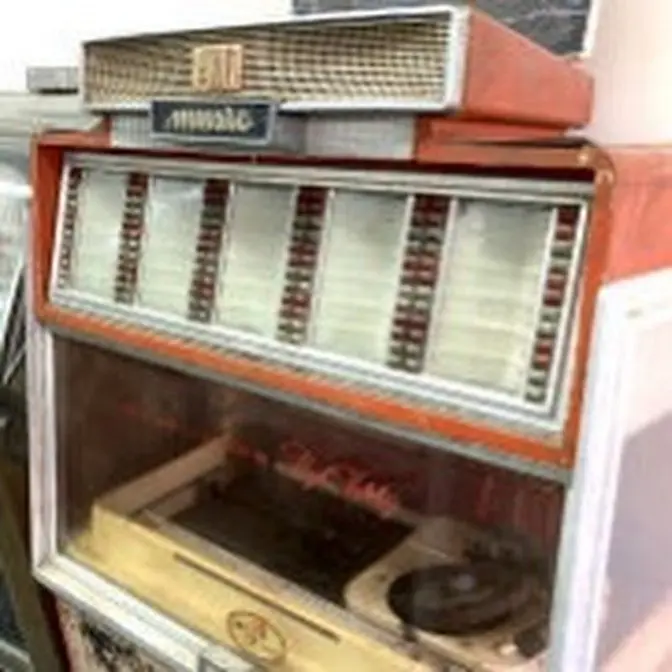
Repairing Selection Problems On A Rowe AMI JBM 1964 Tropicana Jukebox
835 Video Views·Mar 3, 2025
Joe's Jukeboxes is our channel sharing all the repairs we've recorded videos of over the years. If you've got a jukebox that needs repair, if you watch our videos you may be able to fix it yourself. There are playlists here on the channel of each manufacturer, keep in mind that the boxes usually used similar if not exact mechanisms from year to year, so if you can fix one Rock-Ola, others will be very similar.
This channel is a subchannel of our main channel @JoesVideoGames !
ladies and gentlemen this is Joe's
classic video games back with another
cool jukebox repair video for you
today we bought this box several years
ago locally here in beautiful Rock Hill
South Carolina from uh some people that
were selling
it um we're kind of suckers for Juke
boxes I'm if I see a good deal on one I
pick them up all the time because
they're all so cool man but usually
they're broke too so this one's broke
and we're going to fix it I've had
people tell me that I shouldn't say
broke I should say
broken I think it's
broke
um when we bought it it's kind of the
same story you get a lot of times people
will say oh everything works except for
blah blah blah fill in the the uh blank
so the fill in the blank
was except
for the arm that grab grabs the record
is broken off so the gripper arm is
completely missing from this machine
this is a row Ami I believe it's an mm2
we'll look here in a
minute uh the gripper arm's been
completely broken off you can see a
little piece of it left
there but it's gone so they had
saved God bless them the original
arm right so whenever we first got it I
thought you know what while I'm thinking
about it I ought to order that so I
ordered
one but I ordered the wrong part it's
slightly different it looks like it's
the same and I looked at the pictures
boy it looks the
same that's not the same so when it came
in it was the wrong one and I thought ah
let me keep looking I looked and I
looked and I looked and I looked and I
looked and finally I found this
what appears to be the exact arm this is
a used one that's fine
um so we're going to try to swap this in
that's what this video is going to uh
detail but let's check this thing out a
little
bit let's see what model it is let me
let me slide it out just a little bit so
we can look at the plate on the back and
see uh see what model this is it is a
model
jbm
okay and of course 115 volts because
it's here in the United States 60 hertz
uh uh 330 watt amp I guess I
suppose amplifier inside of it I mean
not amp like amps um so it's in pretty
decent shape it's a goodlook little
box it has these speakers kind of built
into the side which is cool
it's also missing the coin door that's
pretty common and it says
warning this machine is protected by
Burglar Alarm if you burgle this machine
an alarm will go
off um the Chrome is not in the greatest
shape so we'll have to do something
about that but that's
okay and I'll show you the records that
they originally had in here but they
kept all their records now the people
that had it your
host John and
Sue presents blah blah blah that was a
thing they were doing for a while where
you could put the name of the
location uh on the machine I've seen
pinball machines like that there were
some some of the Williams pinball
machines from
about I think it was late
60s had a little spot in the back where
you could put the name of the location
on the
machine
okay but it's in fairly decent shape
that some of that Chrome needs a little
work this isn't one I would be
interested in restoring to make look
brand new but I definitely want to make
it look nice and clean and presentable
and attractive so we may end up painting
that we'll have to decide I'll see what
Joe feels like doing
okay so there's some kind of torsion
system to hold up the door it doesn't
really work all that great
um so maybe look into I'll maybe look
into to see how that uh is supposed
to uh
happen uh it's a f25 T12 bulb it looks
like sometimes those are 33 in bulbs it
looks like that might be
correct kind of a weird one like an
appliance bulb they call
it but that arm being broken it's going
going to cause us some problems so there
is a some kind of thing here I wonder if
there's any kind of movement Behind
These there may be like a light show of
some sort that goes on I don't know if
there's any lights behind there but
we'll figure all that out look I've got
some bare wires dangling
here and one of the things that I
noticed is that the latch solenoid or I
think it's the latch solenoid behind
this keyboard is missing but also some
of the coin mechanism stuff is missing
[Music]
so they were under the impression that
the thing was still working but uh I'm
not trying to call him a liar I'm just
saying that sometimes people remember
things differently than
reality um but this is what we're kind
of starting with here so um I'll read a
few of these I'll show you a few of
these records that were in here none of
them are still in in here right this is
all old school good stuff the platter
Smoke Gets In Your Eyes and Harbor
Lights Twilight time and For the First
Time Elvis crying in the chapel I
believe in the man in the sky Elvis Are
You Lonesome Tonight Elvis Love Me
Tender tender Heartbreak
Hotel hey Paula by Paul and
Paula and then hey Baby by Bruce Channel
on the
back Little Richard she's got it in the
heebie jeebies Little Richard keeping
knocking but you can't come
in Randy uh Little Little Richard ready
Teddy and rip it up boy they were
rocking and rolling weren't
they the cordet lollipop and Mr
Sandman I can see why they kept all
these come
on I don't know either one of those oh a
million to one I believe I do know
actually a million to one it's an old
old old old ballad Dion Abraham Martin
and
John Sam Cook another another Saturday
night uh Another Saturday Night the Big
Bopper chantily lace and the Big Bopper
wedding Palisades Park by Freddy Boom
Boom Cannon Way Down Yonder in New
Orleans too uh Joey D and the starliners
the peppermint twist
well they got a new dance and it goes
like this if you don't know that one
you're missing it buddy Knox party doll
wow the Diamonds the stroll the Four
Season Sherry and walk like a wow this
is like the best stuff
ever Jan and Dean Surf City written by
the great Brian Wilson you know that
right ride the wild surf the Supreme
Stop in the Name of Love I'm back in my
arms again the Chantel's maybe I think
those girls were like 16 when they
recorded that
crazy uh the Bob ETS Mr Lee there was a
place we're here on calwell Street in
Rock Hill there was a place three or
four doors down I found an old picture
from the ' 80s it was called Mr Le and
it was a u like a little
restaurant Dion a lonely
teenager uh The Five Satins In the Still
of the Night The Fifth Dimension one
less bell to
answer Sam Cook only
16 The Beach Boys California Girls and
let them run
wild uh do you want to dance mcfaden and
Whitehead and Ain't No Stopping Us Now
that's a
[Music]
good
these I can't read as so
dirty the Four Seasons Big Girls Don't
Cry and Candy
Girl Bob and Earl G whiz I don't know
that
one every beat of my heart don't know
that one The Drifters There goes my baby
and drip
drop uh there's a moon out tonight the
Capri it's a famous
one oh I guess I could just wipe the
dust off
don't know that one
uh Barbara Lynn you'll lose a good thing
that's a good one the Duke of erl
by Jean Chandler I believe did that one
right and then uh D Clark
raindrops Paul Anka put your head on my
shoulder uh lonely boy puppy
love Ricky Nelson hello Mary Lou Mickey
and Sylvia Love is
Strange Ricky Nelson Lonesome town and
traveling
man so it had some good stuff in it
people but time has turned and they kept
their records so I don't know it's kind
of just teasing you reading through all
those but there you go so they were you
can see this thing has a good history to
it that was in their house and they were
uh they were having some good times with
this so let's see if there's any way we
can get it to work again I think the
first thing I'll
do um
is plug it up and see if anything
happens why don't we just do that and
then if we can get it to kind of act
right I'll put that new bow in it okay
on the back of the box there is a door
down at the bottom that can open up and
uh this is the power it appears coming
in to the amp and then there is a
connector
here that comes from the amp over to
this which is uh look like looks like
more of the amp basically so I've U I've
unplugged all of that power because you
want to be careful when you bring these
up if they've just been sitting a long
time old tube amps you know if you're
running power through those when they've
been sitting for 20 25 years without
being rebuilt you can cause more
damage um than if you go through them
and recap them before you have it do its
thing so I've unplugged the power to the
amplifiers there is a big old woofer in
there too maybe about a 10 it looks like
okay so I think we're ready to plug it
in and just see if we get any kind of
response from the uh coin Mech or the um
the selection buttons okay folks so I've
plugged it up and I'm getting nothing if
I hit the power
switch nothing so uh I've actually got
some schematics that I'm going to check
out to make sure that I'm thinking about
this properly but I believe that the
power goes
up inside to like a junction box they
call it
so I've got some schematics let's check
out the manual and see what it says so
it looks like that uh box is the one
from 1964 and the Diplomat it looks like
is the next year the one from 1965 and I
actually have a diplomat manual and it
looks like uh this a lot of it is
similar um so it's got this junction box
so our wire comes in from the
wall there's four receptacles that says
there's a
fuse
um there is a power switch on the back
of course I hit the power switch nothing
happened uh you're basically turning on
the Transformer with the power
switch okay so we got a bunch of stuff
here going on so I got to check through
some of this and just see if I'm even
getting power into this junction box it
could just be something as simple as the
the uh plug on the cable is screwed up
it's been replaced by somebody so I'll
look at that and I got to make sure that
I'm getting 120 volts on these
receptacles here on the jukebox I mean
on the junction box inside the uh the
cabinet well it's technical issues
people I had the breaker turned off on
the cord
going I should have known that I never
plug things in over here okay so uh it
lights right up let's see if we can get
it to select anything what do you
think yeah see I don't know how it's
going to latch without the
I don't understand how they're uh doing
this because these aren't going
to you have to hit both of them at the
same
time H I guess you walk up and you hold
both buttons down
and I think I hit R1 or something like
that
yeah it went all the way around I did
not try to play
[Applause]
anything this is not the ideal setup
without a u without that lat coil in
there
let's try that again I may be letting go
of it too
[Applause]
soon H that's not working as it should
let's into
that okay so if I hold two a letter and
a number down uh it won't lock in place
uh because the coil is
missing right now why did they do that
it's because that coil some of these
coils will burn up if it's uh left
energized for a long time so we'll have
to figure out a better way to do that
but if you hold down both buttons it
spins around and selects here and then
the carriage starts moving around right
but it looks like it's never writing
in uh like they do on rockolas it's
never selecting the actual uh um
selection that you just made however you
can see there's a little pin bank here
on the
side see those little pins well there is
an arm that rotates see that coil down
there and it knocks in the little pin of
whichever song has been requested so I
just pushed a couple of them in with my
finger and whenever you pick one then
and it starts turning around it finds
them so what it's doing is it's not
writing it in so it's actually playing
one right now if I hang it
up it thinks it's hanging it up but the
arm is broke and missing it'll moved to
the next one which is the little pin
that I pushed out it thinks it's laying
it down it's trying to play it remember
we've got the the amp
disconnected let let's see if it plays
the two or three that I've
selected
just trying to play the next
selection hanging it
up on to our next
one it should eventually run out of
stuff that I pushed
in there it goes now let's see if it was
able to reset those pins that we were
just looking at
it was see how they've all been pushed
back
out so our read out is working once the
pen is
selected it will make it happen but it's
the pins are not being selected so the
right end is not working it's not able
to tell that encoder disc or whatever
that's called on our row um which song
has been selected so that could be a
problem with dirty contacts on the um
keyboard it could be a dirty connection
it could be a problem with the coil on
the Right End side um so we'll have to
figure all of that out that's that's
next okay so I'm going to show you how
you can use the manuals to figure out
how to fix these with the manuals now if
you don't have the manuals bite the
bullet and get the manual it's going to
help you
immensely I like to save money I don't
want to buy the manual that's why I'm
using the one for the year after it
right I understand you don't want to pay
for the freaking manuals I get it
but you're shooting yourself in the foot
it's it's I don't sell the manual I'm
not going to make any money off of it
I'm just giving you a word to the wise
buy the freaking
manual okay and here's one of the
reasons why now this is an Ami I usually
work on rockolas but I like all of them
so I'm decided to start messing with a
couple of my Amis that I have I've got
about 30 Juke
boxes maybe more than that I don't know
if I see them cheap and they're cool I
get them why not I got got the I got the
room to store them I store
them but most of your manuals have these
cycle of operation Parts in here so what
what is that they show you exactly what
happens the whole way through look at
that somebody was doing
something so it tells you how the thing
actually
works so here's what you do you see
what's not working on yours and then you
you follow through the manual by reading
the manual to to the point where yours
isn't
working and then you check what it's
talking about and that's how you fix it
so one standby machine is plugged in
mechanism service switch is on the
amplifier mute relay the amplifier power
supply and the tube filaments are the
only things operating the amplifier mute
relay keeps the amplifier quiet during
the record transfer cycle so it's
showing you okay there's power coming
in right there's just a little bit of
stuff going on and it's showing you
what's happening here here okay so it's
in standby okay and then it goes to
customer inserts a dime when the dime
trips the 10cent coin switch both the
fixed credit stop coil and the credit
coil which are in the Credit Unit are
energized the credit wiper arm advances
One Step well it looks like mine's been
rigged up so that the credit wiper arm
never uh goes back right I think that's
what's going on so it shows you here
that you know a dime goes in hits that
little switch which connects power
through the credit
coil and the credit step coil etc etc
etc and then what happens the dime falls
off the
switch so that's not getting power
anymore credit established when the
credit wiper arm advances the 10-cent
credit ring is connected to the 30 volt
ring so the little wiper moves on the in
the credit unit and it connects a couple
things it it connects the 10-cent credit
ring to the 30 volt ring and the
standard price light ring is connected
to the common ring so the Common's
ground so it lights up the standard
price light the 10 cent credit ring
turns on the select pulse and latch
relay R1 in the
selector okay the 10-cent credit ring
turns on the select pulse and latch
relay R1 in the selector contact seven
and8 on R1 energize the latch coil
that's what's missing on ours when the
latch coil is pulled in the push buttons
will latch when they are depressed see
mine's not doing that because I don't
have that so if I hit a it comes right
back
up if that latch coil was in it pulls in
it moves a bar so that whenever you hit
a it stays down the only way to get that
to pop back up is once that that latch
coil lets loose it'll let that pop back
up right so you hit a and then you hit
one one and they stay down and it starts
doing its thing and whenever it gets
done the latch coil pulls back out and
it resets both of those buttons mine
can't do that because I don't have the
latch coil but for for what we're doing
now we don't necessarily use it to test
it we just have to hold both of our
buttons down at the same time which is a
lot easier for me to do when I'm not
holding a camera in one hand so I'm
making it look like it's a big deal but
if you're standing there in front of it
you hit a and one and just hold it down
until you stop hearing the the thing
move it works right but it's not optimal
I kind of want it to go back how it was
okay when the latch coil is pulled in
the push buttons will lch when air to
press contacts one and two on R1 are in
the select coil circuit and must be
closed before a pen can be selected oh
wait a minute wait a minute what is that
what is
that contacts one and two on relay one
are in the select coil circuit and must
be closed before a pin can be selected
right so it's showing you how the the
voltage travels right and so you see
here that it's turning on the latch coil
power is running through the latch
coil right and how is it getting
that the mechanism service switch has to
be in the on position to throw the 30
volts to it mine is on the on
position okay and then uh let's see what
else we got here's the R1 relay
select pulse and latch relay so that's
R1
there okay so where is R1 in the actual
machine well again this is the wrong
setup but it's similar so this is the
keyboard we're looking at it from the
back so you're standing up here on the
front of the machine and this one's
slightly
different because it's the next year but
right here is the big re latch relay
that we're
missing right and then over on this side
there's two little relays and then
there's a big connector so this is the
left side of the machine and then
there's two relays so this one number
17 is our select pulse and latch relay
so what I need to do is make sure that
that is in because without that
in contacts one and two on r one are in
the select coil circuit and must be
closed before a pen can be
selected okay so that has to be pulled
in let's go see if that's pulled in so
the latch relay is missing over here
here's the R1 relay and if you
look if you're not familiar with these
because you haven't messed with pinball
machines maybe you're just trying to fix
yours you know and you're not really all
that familiar with pinball machines you
may have not messed with these relays
much but this relay is open it hasn't
pulled in and this relay in fact is
pulled
in so energy is running through that
electricity is running through that and
it has pulled that bar down which is
disconnected switches and connected
other
switches okay and so it's kind of stuck
down this one is
not if I hit this
[Music]
one it's actually
making the arm in there move okay so
here's what I'm gonna do I'm going to
turn the machine off and then I'm going
to clean the contacts on that R1 relay
because it they said that a couple of
those are used to knock our little pin
down that we need to knock down for the
record to be selected that's not
happening so it could be uh dirty
contacts these things get filthy so you
can use like a business card to go
through there I use a little tiny file
that's not like really aggressive
because you don't want to eat up the
contacts you just want to clean them um
just something to clean those little
metal rivets at the end of the switch
blades so I'm going to clean that but do
it with the power off there's a bunch of
voltage running through this it'll shock
the beep out of you so be very careful
okay so that's part that part is working
so let's move along customer mix a
selection for example he pushed buttons
V and 8 I've been pushing buttons V and
one push button switch V makes a connect
a connection to segment UV on the search
unit commutator the side circuit and
push butt push button switch 8 makes a
connection to segment
8 in addition the V push button opens
the circuit to the outside row select
coil and closes the circuit to the
inside row select coil also push buttons
8 and V close the circuit to operate the
start relay now this sounds also
confusing this is where you're going to
get lost but if you think about it it's
really not all that complicated so I'm
going to show you why okay so you push
in two buttons now they have it drawn
here on the schematic right so we uh the
first thing we hit is the
V so when we push in the v it makes a
couple different things
happen one of the contacts in there
whenever you push that button down
there's like two or three little blades
that slide and basically change where
this metal is touching this metal
instead of this metal touching this
metal it slides the connections around
when you push V it moves a little lever
in there with a bunch of little blades
on it and it slides along a switch okay
it's a vertical switch so normally if
you're not pressing V that little line
there is connected to U like U is
connected to T like T is connected to S
right so all of those are connected
together but you pushed it in so you
moved that little
wire there the little blade inside over
to this
line okay so
now uh uh the
power that comes down through this
whatever is now connected to this wire
so you have connected this wire to this
wire okay so let's say that you pressed
L instead well you would connect this
wire through all of these that are
closed to this wire V is just the
easiest one because it's right at the
end so it looks like it's made that way
but like if you
pressed B
right it would connect this top wire all
the way down through all of these that
would be closed to this wire so it's
very important that all of the
connections in the selector unit on the
keyboard be real clean because if I if I
hit B it's not going to work if B is not
properly connected to C C to d d to e e
to F all the way through so if one of
those is dirty that connection is broke
and that won't work so dirt on the
keyboard is a big problem luckily you
can clean that pretty good with contact
cleaner you can literally spray it in
there and just push the buttons a bunch
and it'll clean it up so we're going to
try that here in a minute um so that's
one thing that it's doing but at the
same time there's other contacts on it
right so this V let me show you on this
one since they don't have the stuff
drawn on it so when you press it it
connects that and then it also connects
this over here now normally this would
be connected up this way
to what it says is the outside coil the
outside outside row select coil it's a
little blurry right but since you pushed
it now the power is connected over to
this line which says the inside row
select coil now why would it do that
well if you look there's only one on
every other one so if you press V it
does that now what happens if you press
U that doesn't transfer which means that
all of these stay
connected so it's still connected to the
outside row select
coil so certain letters every other
letter wants to use the inside row
select coil and every other letter wants
to use the outside row select coil
that's how they choose that's how they
determine if
on say this one that says A and B that's
what that one
line that one spot on the little disc
that moves around that's how they
termine they determine the the
difference depending on which buttons
pressed it fires one coil to knock in a
pin or the other coil to knock in a pin
and as that thing spins around that disc
uh they have it all lined up and
everything these things are works of art
where it's either going to hit the aide
or the B
side or in our case the U side or the V
side so let me show you a little bit in
the machine so it makes a little more
sense
okay so there's this little wheel in
there that turns around to hit those
pins and if I hit this little relay here
I could get it to spin around you can
kind of see so it it goes around it
eventually finds where it's supposed to
be and then that little plunger is
supposed to pull
in and you know bam that little plunger
right there is Bam hit the pin and
there's two of them so there's one for
the outside row I believe that's that
one and one for the inside row that
one and it spins around until it finds
where it's supposed to
be when it gets to the right spot on
this circuit
board the wires on the circuit board
connect through to those coils and when
it gets to just the right spot bam it
fires so it just depends on which button
you've got pressed so if you've got this
button pressed and this number pressed
but there's actually a letter on the
back so there's a letter on the back and
a number on the front whenever it lines
up to whichever two you've got pressed
it stops right
there because it connects power to the
coil that stops IT whichever one it is
and then the power connects through the
contacts through these little blades and
Bam fires that little coil so ours is
doing all of that but it's not firing
the little
coil right so the way it the way it
connect like that is through all of
these buttons and letters on the
keyboard so these are the numbers over
here and these are the letters over here
so on this particular one and you can
look it up on yours and figure it out
but on this particular one those two
little lines we were just looking at
that controls if it's the inside coil or
the outside coil is this row here and
this row here so whenever you press the
switch see the little blade thing moving
in there
it's
changing what's
connected right so it's maybe maybe
these two are connected and then you
push it now these two are connected and
then these two are connected and you
push it and now it's not connected and
then this one's connected and you push
it now these two are connected or
something right so there's one for each
button let me see if it if you can look
up in there I'm not taking the thing out
unless I have
to I don't know if you can see it
I guess you can see some of
it so there's like a
little a little lever that
moves and it's moving these little
blades through these contacts on the top
and depending on where it it it moves it
connects
different little metal things together
so whenever we're looking at that one
where it connects power
over that's right
here
so this is kind of hard to understand
but if I push in the first one
V okay I just connected this power to
this
line by pushing that
in but since I did that it no longer
jumps
across to this T over
here so it's no longer connected through
T and through this and through this and
you see it jumps every
two and then down at the end it connects
out to a wire so that's the one coil on
the one
side the other one's the one coil on the
other
side so I know it's confusing but
everything just needs to be clean you
got to make it where all of those
switches are connecting okay now the way
I do it the best way to do it take the
whole thing apart and clean it most of
you aren't going to do
that so you can
try uh spraying some uh cleaner on it
looks like I bought this stuff at Ace
Hardware for $7.49 right you want stuff
that leaves no
residue electronic
equipment plastic safe right cleans and
protects sensitive electronic equipment
you want something just for electronics
QD formula just means that dri pretty
quick so you don't have to sit around
waiting on it okay now go get you some
of that
stuff if you don't want to go to the
store because you're lazy or because
you're too busy working on your jukebox
I understand you can go to our website
go to Lions arcade.com I've got a link
to it up on my uh website if you click
it you can buy it on Amazon
inexpensively the stuff that we use and
it gives me a tip so it gives me like 20
cents if you buy it so we appreciate
everybody that does that on our website
lines arcade.com we've got a whole bunch
of our supplies and parts and stuff that
we use in our videos go check it out um
okay so I'm going to spray spray spray
that stuff and what you do is you spray
it on one of them now turn it off when
you do it but you spray it on one of
them and then you push that freaking
button and what you're doing is you're
with friction you're moving the contact
across the blades and cleaning it up now
when that's done the way you can test to
see if it worked is you can check
continuity so this one that has the
little short jumpers that's that one we
were just looking at where if this one
breaks this is no longer connected to
here right it connects at each other
each every other switch so if that's
clean power should be con connecting
between all of this right so you can
check it with a multimeter so once you
get it where they're all
clean and you can check resistance from
here all the way down that line to there
all of those switches are clean and you
can check it a little along the way
until you figure out which one's not
clean um oh another
thing on this particular model there are
two little switches here these are one
of these is for the 50 Cent bonus relay
it's goes right there in that socket if
you put a a relay in there it makes it
where you have to pay 50 cents to get a
selection okay if that switches up the
label's missing if that switches up it
routes it through that relay which means
you can't make
any uh you can't put any credits on the
machine because the relay is not in
there so if the relay is missing you're
in trouble this other one is to hook up
a wall box I believe the wall box plugs
in right there or parts of it do right
so a wall box is another little selector
that could sit on a table you know at
the uh at the um the candy shop or
whatever y'all know you were there more
of you were there than I was uh but if
it's turned on you can't select anything
either because of the these
uh uh because the wall box isn't plugged
in so that has to be turned off if your
wall box isn't plugged in and this is on
an Ami they're it's probably different
on every
single uh manufacturer but you get the
gist of it a minute ago that was turned
on but then I tried to make a selection
and it still didn't work but I started
looking and we're not having a good
connection on all of this stuff so I'm
going to sprout these down and then I'll
check them with a multimeter and
whenever I think I've got it r
we'll try it again okay folks I sprayed
them all down now if you watch I can hit
this and this little that's the read
in so that one is going to spin
around and we're hoping that it knocks
down one of the pins right I'm I've got
one selected that is in this area so you
can see it okay and then back here is
the read out see if we can see that
too yeah so see how that spins around
and F the record
okay so once the pin gets knocked in if
it gets knocked in that will spin around
and find the pen and then play the
record so and it'll find the pen that's
knocked in so if the if we knock in a
pen here you'll see it go for the other
side too so it appears that the whole
problem was dirty contacts on the
keyboard after I sprayed them down I
checked it with a multimeter and as it
jumped through each switch there was a
little bit of resistance there was like
seven eight ohms of resistance from one
end to the other and remember if you hit
V the last number it only has to jump
through one switch to do that the V
switch if you hit a it's all the way at
the other
end it's got to go through every one of
those switches so it's got to go through
uh Vu T SRQ p n m l k j h g f e d c b
and then a right right so it's harder
you if if uh it would be easy to get
this screwed up
where the the letters at the end work
but the letters at the front don't okay
and it seems like b d g h k m p r and
T or I got that all wrong anyway it
seems like the other ones don't actually
need to do that because they run through
the other side so anyway you saw it on
the schematics all right so we're going
to try one so I'm going to try
A8 hopefully that will fire and hit the
pin and then it will spin around and
find
it okay did it get
it I couldn't
tell it got it and so that watch keep
watching okay did you see it move that
was it resetting the
pin okay so I'll do it one more time
where you can see it a little better by
watching the whole
thing okay so it's in the middle of
playing we'll hang it
up now I kind of need to try like I said
A and B that it kind of does it odd and
even let's try B
eight and see if that works or B7 just
to make it random let's just get crazy
with it
B7 it may not landed where you could see
it fire let's see if that got
anything show enough it is on B7
according to the rack back here there's
little letters and it says
B7 all right so if you have problems
with your selector clean your
keyboard okay so I'm going to show you
why that worked when we clean those
switches okay so let's keep reading
through and see what it does next
because by this point all we've done is
we we connected the buttons okay uh and
so uh uh the buttons close the circuit
to operate the start relay which is R5
okay when R5 pulls in contacts one and
two on R5 turn on the search unit
motor which drives the search wipers and
select
coils so the select coils are where that
what wasn't working contacts three and
four connect the common side of the
number push button switches to the hot
side of the selection circuit okay so
this is our uh common this is ground
down here and so it's
connected through S2 through this relay
all the way up through here blah BL blah
blah blah and then down through the
number
to whichever number is
pressed over to here which gives power
to this side which energizes the start
relay okay the start relay is energized
through the side of all of the
letters through the one letter that's
pressed to
ground now why do they do it that way
they do it like that so that the start
relay doesn't start unless a letter and
a number push down because that's the
only way I can get its voltage
but um as you can
see see how they're
normally show you on a different one
where it's not they haven't scribbled
over it so you can see it a little
better see how they all have to be
connected to each
other for that for the power to go
through well if one one of those is
dirty the power doesn't go through and
it doesn't work so if one of those
connections was
bad your search wouldn't work right what
are they call it the search
unit
right where are we the search unit motor
would never turn on because one of those
is bad so the power would just stop
right there because there's not a good
connection between those
two
all right moving right on when the
number search wiper the outside circuit
runs onto segment 8 a circuit is
completed to spray relay
S1 the sprag tooth on S1 stops the
rotation of the search wipers and select
coils okay so on that little on that
little circuit board on the
front let's find it
here let's just find it so you can see
what I'm talking
about
here we
go okay so there's the little circuit
board that's looking at us on the front
of the machine there is a there's also
little uh printed circuits on the back
of this board so this little wheel that
turns there's another wheel on the back
that's turning at the same time and then
that is what's turning uh the
arm with the two canc coils on
it which of course they don't show
here here we go now we got it now we're
cooking with
butter okay so this is spinning
around there's the one that's on the
back and it is
spinning this is our arm so we were
wanting these coils to pull in and push
a pin in and we finally got it to work
finally after all of this time right we
got it to work
okay uh when the outside circuit so they
mean the outside circuit board the one
you can see runs on the segment 8 a
circuit is completed to spray relay S1
the sprag tooth on S1 stops the rotation
of the search wipers and select
coils
okay
let's see where it shows that
one come on now all right we're getting
there it's number seven which
is
Bam so there is a coil so this little
arm has a little lever here and whenever
this pulls down when the coil turns on
it pulls this down it pushes these two
little blades up against some terminals
but this part falls down in a little uh
like a bracket so that it can't move
anymore now why do they do
that see the little holes why do they do
that it's so it stops right on that
letter or that number it's doing the
number first so it's going to number
eight right so it turns around as soon
as that wiper gets on number eight well
now it has electricity blowing through
the little circuit board through that
wiper and it turns on that coil and that
coil instantly comes on and that little
hook goes right into this thing and it
won't turn anymore bam it stops right
there
right so let's see what's next boy isn't
this wonderful isn't this wonderful a
circuit is completed to spray relay S1
the sprag tooth on S1 stops the rotation
of the search wipers and select coils
one set of contacts three and four on S1
open and shut off the search unit motor
the other contacts one and two on S1
close and turn on the search unit relay
R2
okay so it's showing you as it finds you
know the one that it's looking for bam
it throws power through it comes down
here uh this has been connected that's
how it gets its ground all of that good
stuff okay on to the next
one the search resumes now why would the
search resume when it just stopped
because it found the number it didn't
find the letter yet so it knows that you
pressed eight but it doesn't know if you
pressed a b CDE e f g all of that search
resumes when R2 pulls in one set of
contacts 11 3 and seven transfer the
common side of the circuit from S1 to
S2 sprag one to sprag to I think they
call that
right S1 returns to its normal
condition and S1 contacts three and four
close starting the search unit
motor okay the same motor right a second
set of R2 contacts 124 and 8 transfers
establishing a holding circuit for R2
itself a third set of R2 contacts 91 and
five
transfers the hot side of the selection
circuit from the number push button
switches to the letter push buttons okay
so we were all through here and all this
and we connected through here but it's
now switched over down to here all right
we already looked at all that
okay now this is on the inside uh
circuit that you can't see that good at
the instant the letter wiper runs onto
the u and v segment so you pressed eight
right you pressed V8 onto the u and v
segment the sprag relay S2 is energized
so now they pull S2
in so
S2 is this one on this side so the same
thing this relay pulls in and pulls this
down so now what's that
do selection is registered credit is
removed and record changer scan control
is operated sprag relay S2 pulls in and
locks the search wipers and select coils
in place with the select coils aligned
with the pins representing selection u8
and V8 here we are we've made it to u8
and V8 right so they're their uh u8 is
on this side and V8 is on this side so
one coil is over V8 and one coil is over
u8 now if it turns just a little bit now
it might be it's over A1 and uh B one or
whatever right so as that turns it's
constantly over two
pins which shall it be what will
determine which one it is one set of S2
contacts number one and two open and
shut
off the search motor okay so since that
since that open bam the power's killed
immediately so it can't keep moving
because you want those you want those
coils to stay right where they're at now
all of this was working just fine right
you saw it doing it
a second set of S2 contacts number six
and number seven close and set up a
holding circuit for S2 itself so
basically it holds itself on through
that right a third set of S2 contacts
three four and five transfer which shuts
off relay
R1 and energizes the scan coil in the
record changer the credit cancel coil
and the credit cancel stop coil in the
Credit Unit the the inside row select
coil and the total play counter so this
is what didn't work for ours our inside
row select coil didn't work now if it
picks the inside Row one it's going to
make it a u if it picks the outside one
it's going to make it a v okay now how
do we know
that or I'm I got that backwards I
think yeah okay so like we were saying
earlier if V is pressed the the ground
connects through here through here and
grounds
the inside
coin
or coil select inside I can't read
that inside row select coil the inside
select row coil so what if you didn't
hit V you hit U which is the other side
of the same
record right so 45 there's an A and A B
side so you didn't hit V you hit U well
nothing changed over here so V is still
connected cuz you you didn't hit it and
you doesn't there's not you doesn't do
anything so power the ground then
connects through all of these
switches and turns on the outside row
select coil so that's what picks which
one of those coils fires and ultimately
if the a or the B side's fired so does
it pick u8 or V8 since we were ping V8
it did supposed to do V8 but it wouldn't
work no matter what I pressed so since
it wouldn't work no matter what I
pressed it very well could could be this
switch on V you know or it could
be
[Music]
um either of these switches right but if
either of these switches was dirty and
not working none of this other stuff
that it Powers up would work like the
scan coil so the scan coil ultimately is
responsible for making the motor scan
the basket move so it was reading in and
only thing that wasn't happening was it
wasn't firing either one of these little
coils but everything else was working
after that it would scan around around
looking to see if anything had been
tripped because that had been tripped
because all of this was working fine so
the ground was coming through
here to here and making everything work
but if this if any of these switches on
this side are dirty on that what we just
sprayed and cleaned up then the ground
wouldn't get through all of them to turn
on the outside row select coil so we
were using V if this particular switch
here this one little contact was dirty
then ground wouldn't get through to here
to make it work so if you hit uh
F right then ground has to get all the
way through all of these
connections and then threw the
connection on F to here to ground the
coil so no matter what we did we didn't
get any grounded the coils would never
fire because the ground was not making
it through all of these connections once
we got all of those connections cleaned
where everything is clean when it's
touching so that electricity can pass
through then we're good now you you kind
of need to go through and check each one
though to make sure that everything
plays and if you get one that doesn't
you need to look at the context on that
particular button but basically that was
our main problem so we still got tons of
stuff left to work on on it though but
if you have a problem with the right end
so the right end is when it's selecting
that pin that's where you want to look
to see if your problem is on the right
end
or the read out you can test it by just
pushing one of the pins in
yourself and then making another
selection and if it gets through and
then it tries to select something and
then the readout starts it'll find that
pin that you
pressed
um once it starts
moving okay and so you can test to see
if you've got a problem on the right in
or the read out and so ours was on the
right end but it was at the very last
stage of it the only thing that wasn't
happening was the coil firing now I'll I
want to make make another point I know
this video has been going on forever
another Point people always replace
parts that do not need replaced so I'll
bet some of you thought the coils
bad they usually don't go bad on on
stuff like that now the latch coil
probably went bad because they had it
energized the whole time but we'll talk
about that in a later video
but if if a coil is not firing it's
hardly ever the coil It's usually the
power going to the coil right so our
ground wasn't getting through that was
the problem both of these coils are
working fine and firing fine once we got
the power to them literally the problem
was a bad connection 90% of your
problems on an arcade game a pinball
machine a jukebox are going to be a bad
connection it's just finding the bad
connection so that's why like whenever I
do pinball machines I clean every switch
I'm making sure there's no bad
connections right doesn't cost anything
just cost you a little time like this
video did
so we appreciate you watching us so far
we've got it selecting now we still have
to do the the bow we still have to
rebuild the amplifier we still have to
there's a million other little minor
things we're going to have to do we got
to see what we should do about that that
uh latch relay uh there's a little flap
on the thing that identifies what record
you're on that's missing I might make
one or something I don't know uh we got
to we got to work on um of course
prettying it up do the Cosmetic stuff
putting the records in it we have to uh
make that Chrome that's all screwed up
look a little better um so we still got
plenty of stuff to do so we'll do some
other videos on it people love these
jukebox videos because everybody has the
ability to find one inexpensively
they're all over the place and nobody
nobody really works on them so we've had
a lot of success with our videos on
jukeboxes so I wanted to do one on an
ami Jukebox just to uh show where um
that even they can be fixed him can be
fixed there's snobs out there too that
only like certain types of Juke boxes
and I say shame on you shame on you
that's not
right I like the Amis I also like the
rockas I love the riters boy those
seabergs are nice let me tell
you so uh get you a jukebox and start
working on it but if you do the secret
is make sure you fix all the bad
connections and get the manual it'll
help you a lot so we appreciate
everybody watching make sure to give us
a thumbs up for taking the trouble to
film it for you I hope you enjoyed it
I'll enjoy working on this toor some
more tomorrow to try to get it a little
further along and we'll film another
video whenever I upload these usually I
have the other videos ready to go so if
you're seeing this one we've probably
already got it all fixed and doing its
thing but uh we'll see you on the next
one I hope that helps you with your
machine it's not just on Amis that's
specific Ami stuff but if you've got
another jukebox the theory is the same
the rockolas work very similar um they
were all a little bit different because
they were suing the hell out of each
other uh over patent reasons
they they copyrighted and patented stuff
and then sued each other for um copying
their patent um but they're all worth
saving um I could tell you my least
favorite era of jukebox but I won't get
into all of that but most of them are
made to be Fairly reliable because they
had to be on location turned on 24 hours
a day 365 days a year with people
playing them constantly and if they
didn't work that good The Operators
would complain so they made most of them
pretty reliable so if you find one and
it's inexpensive you can probably fix it
especially these old ones like this that
don't have circuit boards in them it's
all mechanical you've got relays and
switches and Little Motors and stuff
like that they can be fixed and there's
tons and tons of used parts out there
all over eBay just go search for uh your
model number uh and the couple model
numbers before and after that and you'll
find tons of parts for whatever you're
missing on yours or whatever you need so
I hope you enjoyed it leave your
comments down below and let us know what
you think and by the way people before I
leave don't forget to check out my
brother Donnie I have a brother he has a
channel here on YouTube my brother
Donnie if you like watching us work on
these old jukeboxes pinball machines um
arcade games lately I've been doing some
clocks I don't know if I uploaded any of
those lately but got some clock videos
that I've been messing with if you like
that kind of stuff my brother Donnie
works on Old vehicles and he's got a um
we've got a couple buildings in a small
town near here that we're trying to fix
up to rent out and kind of help
Revitalize the downtown area fix them up
and get them back to how they're
supposed to be so that's kind of fun I'm
usually over there on his Channel with
them filming stuff and uh we will see
you here or there or maybe everywhere