
Leonardo's Technique: The Sfumato & GLAZING - Oil Painting Tutorial
8 Video Views·Sep 5, 2025
Hi everyone, welcome back to my channel. In today's video, I'm going to show you how to
mix glazing mixtures and use them to replicate incredible paintings of Lady with an Ermine
by Leonardo da Vinci. Leonardo often worked on oil paintings using panels made from walnut wood.
I'm using a special type of the plywood that is very similar to those materials as my base.
This panel consists of about 12 layers that mix with a rubbed skin glue and chalk,
which creates a highly absorbent surface. This allows the layers to dry quickly.
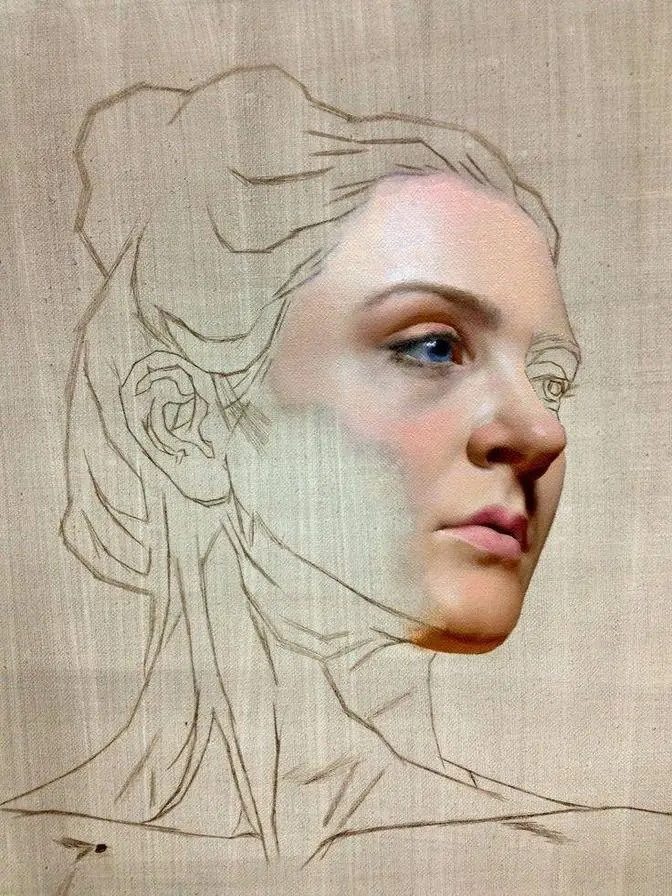
Now, the first step involves applying techniques using wet frescoes. I start with watercolors
to sketch out the light and dark areas, what we call cariscaro. Because it's watercolors,
it dries fast. Then I move on to using ivory black and raw umber to create an imprimatur layer.
A lot of actual research has shown you that Leonardo used various imprimatur layers
to enrich the base color, but specific steps haven't been well documented. Unfortunately,
a lot of modern artists just don't pay much attention to this layer, and I'm still digging
into it myself. So once that layer is completely dry, I start applying my first dead-on layer.
I want to point out that mixing ivory black with white creates a nice bluish tone,
which works perfectly as a base skin color. I typically establish about 5 tonal values,
as 3 values are primarily used to tone down the colors repeatedly,
ensuring they blend in well together. I call it monosoft metal. A lot of experiments told me that
if you want to add subtle gradations without lines or borders, it should happen at your dead-on layer.
Now, about soft metal, it gets translated into many different things in English, like misty,
toned down, dissolving, and softened. But honestly, I think smoky is the most
convincing. That means all the colors and tones evaporate like smoke. Leonardo once wrote that
light and shade should blend without lines or borders in the manner of the smoke.
While exploring Leonardo's writings, I noted that he emphasized that how white light interacts with
objects. He pointed out that under certain conditions, such as during the evening hours,
the white light can cast shadows on white walls that appear blue. This idea influenced his color
palette and explains why many of his underlayers have those bluish tones. Similarly, this phenomenon
gray value in this transparent moist box. It's super handy because I can see the state of my
paint inside. I would like to put a paper towel on top and add one or two drops of globe oil. Trust
me, this helps preserve the paint for over a month. Now, when it comes to multi-layer painting,
the biggest challenge we face is making sure that when we glaze over color layers,
we don't mess up the light and dark values of that gray underlayer we established earlier.
So I developed a method to solve this problem. I created three different skin tones based on
the gray mixture that we used in the dead underlayer. The first tone of use is a light
shade, which I refer to as a bone color, because it resembles the tone of bone that shows just
beneath the skin's surface. This crew color has a slight yellowish hue. The second tone is a light
half tone that represents the thinner areas of skin, where the blood beneath the surface creates
a subtle reddish tint. The third tone is a warmer dark shade that I applied for shadows, adding
depth to the character. In the shadow areas, I make each layer darker and more vibrant than the
one before it. By following this method, you can create many layers of underlayer color. The great
benefit is that the colors I add don't change the previous layer values, they just enhance the
richness of the hues. There are some principles to apply when using color on the dead underlayer.
We aim to leave as much of the dead underlayer open as possible, especially in half tone areas.
In the lightest areas, we need to achieve the thickest paint layer. As we move towards the
dark tone, the paint layer should become much thinner, almost transparent. By following this
just use this color directly for painting. It's important to know that oil paints have a transparent
and translucent qualities, so even when mixed, they are not completely opaque. Additionally,
when exposed to air, they can darken over time, which could lead to an undesirable final effect
on your piece. By laying colors, I can maintain control over the outcome and ensure that colors
stay vibrant. Only after each layer has dried completely can you observe the color changes
and determine which areas of the next layer need improvement. Regarding drying time, it may vary
depending on the structure of your support. I often apply the more absorbent ground to the canvas,
which allows me to start glazing after a couple of days or up to one week.