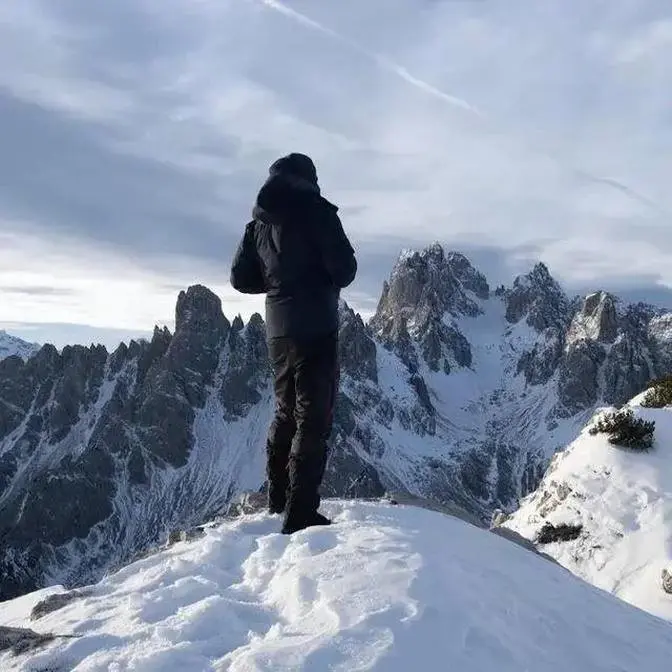
I'm heading back to Patagonia, which means long treks and lots of time with my pack on my back. This is a great reason to get back to just taking the absolute essential gear for photography and trekking, and packing as light as possible. 0:00 Intro 1:53 Why Take Less 3:20 The Pack 6:40 The Gear 8:07 Camera & Lenses 12:16 Filters 13:44 Tripod & Ballhead 15:01 Clothing (weather protection) 16:56 Conclusion
If you’d like to join me for a landscape photography workshop, my 2026 trips are just about to open. Check my website for more information https://www.andymumford.com/workshops/
If you're interested in purchasing any of the gear I use in this video, and you enjoy my videos, please support my work by clicking on the affiliate links below.
So back when I started with landscape
photography, I had this philosophy about
only taking the essentials and going as
light as possible. But over time and
over the years, those kind of essentials
seem to they seem to keep growing. First
there was things like drones and then
the spare batteries for drones. And then
there's all the film making kit I need
for making videos. And then longer
telephotos for things like wildlife
shooting or some of the different
locations that I've been visiting. And
then I use the GFX system. So, what used
to be a very lightweight kit has just
got bigger and bigger and bigger. And I
feel that I've kind of lost that
philosophy of just going as light as
possible, just taking the absolute
essentials. But recently, I did a trip
to Patagonia. And uh when I've been to
Patagonia before, we've done lots and
lots of hiking, kind of being out all
day, 12 hours a day with your backpack
on your back, 20k hikes, getting up
really early in the morning. And so that
felt like a good reason to go back to
basics and just take the absolute
essentials for what I was going to need
on that
trip. So when weight isn't really a
priority and I'm not really concerned
about taking the essentials, this is the
kind of thing that I will probably take
with me. And it's the kind of thing that
I've talked about in previous videos.
I've talked about packing and stuff like
that. So, this is what's going to go
with me on a trip to Namibia next month.
It's got pretty much all of my gear in
there. There's long lenses for wildlife.
There's a drone in there for if we get
an opportunity to shoot drone. There's a
couple of bodies, multiple lenses.
There's film making stuff for the videos
that I'm going to make. But this is just
a really, really heavy backpack and it's
not the kind of thing that I want to be
carrying for hours when I'm out hiking.
But in this video, I want to look at
what I take when I'm just going to go
with the essentials when weight is a
priority. Now, the thing about
photographers is we're we're quite a
weird bunch. If you go to somewhere like
Patagonia or the Doommites, the vast
majority of people who go to those
places are hikers and they hike for the
fun of doing the hike. That's their
reason. But landscape photographers,
we're a little bit different. When we go
hiking, it's usually because at the end
of the hike, there's a photograph that
we want to take. And that means that the
stuff that you take with you to do the
photography has to be combined with the
comfort of carrying it on a trekking
trail. Now, why is that important? Well,
for me, it's not just about carrying the
weight. It's about how you feel about
doing the hike. I really want to enjoy
the hikes anyway. And the lighter I can
go, the more pleasure I'm going to get
out of it. And when you're out all day,
when you're out 12 hours with all of
this on your back, by the end of the
hike, you're usually tired. You know,
you your legs are aching a little bit.
you've been out all day and you start to
really feel the weight that you're
carrying. What that means is over the
course of a trip when you're getting
over and doing this every day, you get
up the next day, you do another hike, it
starts to get very easy to say, well,
I'm maybe going to skip the hike today
or we won't go as far today. Or you
start to leave stuff at home because you
want to lighten up your pack a little
bit. So, it's really about making sure
that you've got the pack as light as
possible so you can take the essentials
with you and you're not going to get
worn out when you get to the location.
You're not going to be so tired that you
need to have a sit down and you miss the
good light and just making the hike as
fun as possible. So, first let's have a
look at the pack itself. Now, this here
on my left is a is an F-stop pack. This
is a specially designed camera backpack,
which is great for carrying loads and
loads of gear. But when I'm trekking, I
prefer to use something like this. This
is a Douta Futura. Uh it's a track very
lightweight trekking pack. It's designed
for trekking. Now, both of these packs
are about 32 L. They're very similar in
size, but you can see they've got a very
different shape and a very different way
of distributing the weight. The F-Stop
pack here, this has got an ICU in it, a
big square ICU, which is designed for
carrying the maximum amount of camera
gear. And the way that that's designed
is it it makes the bag very wide and
very deep to fit the camera gear in.
Because it's wide and deep, it's
actually relatively short. Whereas this
pack, it's not actually designed for
camera gear. So, it's much taller, much
thinner, which fits along someone like
I've got quite a long torso. I'm quite
tall. So, a pack like this, which is
much longer and fits along my torso, is
just much more comfortable to carry.
Now, the biggest difference is when we
look at the back of the packs. Camera
backpacks like the F-Stop are designed
to give you really easy access to your
gear. So the whole of the back is
unzippable and it opens out so you can
get at all your gear and it's all laid
out really nicely. But the downside of
this means that the backpack has to be
flat along the back because it has to
fit around the ICU. It has to it has to
have a lid that's easy to open. Whereas
you can see that this backpack it's
actually curved to fit around the shape
of my back. And also the backpack has to
rest along the but along your back. You
can't have a kind of trampoline that
you've got here and it's lifted away
from the backpack. So there's a big gap
here which allows the air to circulate
and just makes it a lot more
comfortable, a lot more nice to carry.
You don't get like a really sweaty back
like you do with one of these. And the
other thing about this is that when
you're carrying a backpack, when you're
carrying weight in a backpack, you
should always be carrying the weight in
your hips. So you fasten up the hip
straps and you put all the weight
through the hips there. So the actual
shoulder straps aren't taking that much.
So on a pack like this where it's very
flat against the back, when you've got
these hips pulled tight, all the weight
is coming through this flat area at the
back and just into the lower part of
your back. And you look at the the hip
straps here, how thin they are, it it
doesn't really do much to carry the
weight. But on a trekking backpack like
this, because you don't have that rear
entry, so there's no need to have the
zips, you have this much thicker, much
more comfortable hip straps, which take
the weight. The part of the backpack
that rests against your spine is really
cushioned here. So, it's just much more
comfortable. If you're carrying it for
an hour or two hours, it doesn't really
make a difference. But after 5, 6, 7, 8
hours, you really start to notice a
difference in your lower back. And the
fact that you almost don't feel like
you're carrying anything at all with
this backpack. The weight is just so
comfortable. Now, the downside of it
being more comfortable and not having
that access on the back means that it
does take a little bit longer. The
camera gear is a little bit less
accessible. But I personally don't
really mind that as a landscape
photographer. What I usually find is
that I'm walking to a place, putting my
camera backpack down, taking my time to
walk around, and then getting my camera
gear out. So, if it takes me 30 seconds
longer to get out my camera gear, that's
not something that I I really mind that
much. But let's have a look at what I
take and how I can carry it in this
pack. So you can see on the sides you've
got these elasticated pockets. So
there's always a water bottle there.
That's something essential. Whenever I
go on a hike, there's going to be a
water bottle. On the other side, I use
this pocket for the tripod. And then you
can see there's this elasticated thing
here and here, which I use for the
trekking poles when I'm not actually
using them. On the front, there's a big
pocket. This is where I put my shell
trousers so I can get out of them very
quickly if it starts raining. And then
on the front there are two really big
hip pockets which again it's where I
keep stuff that I need to get out
relatively quickly. So there's a protein
bar here and then a a multi-tool which
is used for things like tightening the
tripod, things like that. Just one of
these useful things that you always want
to have with you. And then in the other
one I've got my uh spare batteries for
the head torch and the the head torch.
These go in the hip pocket so I can get
at them really quickly so I don't have
to take the backpack off and rumage
around to find the torch or the
multi-tool and I can get them out while
I'm walking. Now in the top there's a
really big lip pocket which I use for
things that I need to get out quickly.
So there are things like my gloves, the
buff, my beanie, and sunglasses. And
then access to the camera gear is also
at the top. Now, as I said, it does take
a little bit longer to get under my
camera gear than it does with a with a
photo backpack, but it really doesn't
take long. You just pop them open the
straps and then we go in here and
there's the camera. Now, if you look in
here, you can see that at the top of the
pack, I do actually have an internal
camera unit. And this is actually made
by Douta, the same people who make the
packback for their hiking backpacks.
It's quite a bit smaller and slimmer
than the than the f-stop one, but it's
big enough to fit a camera with three
lenses. So, you can see that I've got my
XT5 with the Sigma 10 to8 lens on there.
And then at the side here, I can just
pull out my telephoto. This is the 55 to
200. And then a mid-range, which is my
16-
250. And then also in here, there's room
for the spare batteries for the camera.
And then at the front down here in this
pocket, we've got all of the filters
that I might need. In the back, kind of
underneath the ledge, you can see
there's another zipped pocket where I've
got a few more bits and pieces. So, this
is this is just a small bag where I keep
things like cleaning cloth. And then
there's a cover that I can use with my
camera if it
rains. I've got a wallet with all of my
spare SD
cards. And then there's a small uh first
aid kit here. And now this is just the
kind of stuff that you should always
take with you on the trail. So I've got
things like antiseptic for cuts,
grazers, or or insect stings, things
like that, and a few sticking plasters.
Now, there is actually room in this
camera storage for more than that, but
the point is to go as light as possible,
and I don't really need anything else
other than those three lenses for what
I'm going to be doing. I can fit a spare
body in here, but I prefer to save
weight and not take that with me when
I'm hiking. So, I take a spare body with
me on trips, but it generally stays in
the safe in the hotel room. And if I do
want to do some film making, I can also
fit something like an action camera in
there with a grip and something like the
DJI Mic 2 if I want to record a video.
But generally, that's not going with me
because I'm trying to go as light as
possible. Now, in terms of the camera
gear that I'm taking with me, let me
just go through it. So, here we've got
the XT5, which is my primary body. It's
a camera I've been using for since it
came out. Two and a half, three years
now. And I really, really do like this
camera. And then what I've got here is
the Sigma 10 to 18 ultra wideangle zoom.
Now I've reviewed this before about a
year ago. It's a lens that I really
really like. It's f/2.8 all the way
through the focal range which means I
can use it at a pinch for things like
shooting astro or shooting the aurora.
It's really quite sharp and it's
significantly smaller and lighter than
the uh than the 10 to 24 that Fuji
makes. So it's really good if you want
to go really light. Then here I've got
the 16 to 50 kit lens for my mid-range
zoom. Again, I've reviewed this very
recently. It's an incredibly light lens.
It's weather sealed. It's got an
internal zoom. It performs really
nicely. F2.8 at the wide end, but it
does go down to f4.8 at the long end.
But again, I can use this for astro or
for aurora in a pinch. And again, it's
very very light. It weighs like 250 260
g. So, this combined with the with the
with the Sigma 10 to 18, they're about
half a kilogram together. And then for
my telephoto lens, I've got the old
faithful, the 55 to 200, which is my
oldest lens on the Fuji system. I bought
this 10 years ago. I've been using it
for 10 years. It's been around the world
with me multiple times. It's been used
and abused in some horrific weather, in
snow, in dust, in rain, and it's still
functioning perfectly well. It's a
little bit scratched and mark now, but
those are just uh those are just signs
of wear. I really do like this lens.
It's not perfect. It does get a little
bit soft after around about 150 mm, but
from 55 up to about 150, it's perfectly
acceptably sharp. It's not particularly
fast, so it's not going to compete with
something like the 50 to 140, but it
weighs considerably less. So, all of my
camera gear together, the body and the
three lenses, weigh in at about 1.6 6 kg
and I've got coverage from 10 mm all the
way to 200 which is 15 to 300 in
fullframe equivalent. I've got f/2.8 for
astro or aurora. So it's a really nice
lightweight kit which just covers all of
the essentials and everything that I
might need. So the filters that I'm
taking with me are these case magnetic
filters that I've been using for a
couple of years now. Talked about these
in videos before. I've got four filters.
I've got a three- stop filter, which is
really good if you're shooting at the
ocean or if you're shooting waterfalls.
If you want to slow the water down, you
want to slow the movement down just a
little bit and get things like a quarter
of a second, or half a second, then a
three stop's really good for that. I've
got a six stop filter, which is nice in
the blue hour. If you want to get longer
exposures of things like 30 seconds, a
minute, or 2 minutes. And then I've got
a 10- stop filter for if I really want
to really blur things out, get very long
exposures, two minutes, four minutes to
give that kind of misty effect that you
get in water. And then the final filter
that I've got here is a polarizer, which
is great for removing reflections or
specular highlights and waterfalls or
cutting through haze when I'm using the
telephoto lens in the mountains. Now,
one of the things that I like about this
system is that it is incredibly easy to
use. It's magnetic, so you can just put
the filter on, take it off again when
you're wearing gloves. That's really
useful rather than having to screw
filters in or kind of put them down in
slots. And another thing I like about
these is how easy it is to carry them
around. You can see that I've got a a
magnetic cap on the front, but they also
sell a magnetic cap that you can put on
the back. Now, it's different to the one
on the front. You kind of have to look
through the website for it, but it just
means you don't need a case for these.
You can just drop them in your pocket.
It makes them incredibly easy and
convenient to carry. Now, the tripod
that I use, I've talked about this
before in videos. I've been using this
for a while now. It's a really good
tripod. It's very lightweight, but also
reaches up quite tall. It reaches all
the way up to here, so I don't have to
kind of bend down when I'm using it. It
doesn't have a center column. It reaches
this high without a center column.
Center columns basically adds
instability to your tripod. If you're
using a tripod and then extending the
center column, that center column is
going to move in wind. So, it kind of
negates the uh the point of using a
tripod in the first place. So, I don't
like center columns. This is great.
Reaches all the way up to my chin and
yet it's lightweight. One of the things
that I find with tripod manufacturers is
that the lightweight tripods tend to
always be travel tripods. And then
travel tripods, they have this idea that
they need to fold down really small and
be really compact. I don't really care
about how compact a tripod is. This will
easily fit in my luggage and fits fine
just on the side of my backpack. So the
it being shorter doesn't really add any
benefit. It weighs very little. I think
with the ball head it's about 1.5 kg
which is very nice. I've got a a really
right stuff BH 30 I think on ball head
which is a ball head I've been using for
a good five or six years now and it is
really really nice. So, the camera gear
is all in the main section of the
backpack, accessed through the top of
the backpack, but there's also a zip in
the bottom of the pack. And from this is
where I keep all of the stuff for being
warm, getting warm, and shells, things
like that. So, if we open the zip, this
is a lightweight insulated jacket. I
wear this kind of like a fleece. It's
got synthetic insulation in it. It's
very, very breathable. I often do start
without this. If we're starting in the
daytime when the sun's out, then this is
going to be a little bit warm. So, this
goes in the back in the bottom of the
backpack where I can put it on if I drop
a little bit cold. Then we've got a very
lightweight shell. This is super
important if it gets windy or if it
starts raining to put on to keep dry or
to cut the wind. Wind will really,
really make you cold. Can make hiking
very uncomfortable. So, I've got this
shell which is very easily accessible.
And then the last thing is my down
jacket. Now, this is right in the bottom
of the pack in the middle, the hardest
one to get to. I will never wear a down
jacket while I'm actually hiking. You
will overheat if you wear a down jacket.
You're going to get really warm very
quickly, start to sweat, and it's very
unpleasant trekking in a down jacket.
But as soon as you arrive on location,
you'll be warm, but your body
temperature will very quickly start to
go down. And that's when you need the
down jacket. And this fits over the
synthetically insulated jacket, but
underneath the fleece. So, with those
three jackets on, with the beanie, with
the buff, with the gloves, you can stay
really nice and toasty, even if it's
cold and below freezing. So, this is the
pack with everything in it. Just curious
to see how much it weighs with the
tripod strapped on the side. Let's just
weigh it with these scales.
That is 8
kilos, 35 36 grams, which is really not
that bad considering that there's all
the body, three lenses, tripod, all
those jackets, everything that I'm going
to need in there for pretty much an
entire day out hiking. And that's it for
this video. I hope it's been useful and
I hope it's been interesting. If you've
got any questions or comments, just
please drop them down below and I will
get back to you. And if you've enjoyed
the video, please like and subscribe
because it really does help the channel.
And if you enjoy my photography and
you'd like to join me on a workshop,
I've got trips coming up to some really
fascinating places. We're going to be in
Azor and Madera and Utah at the end of
this year. And then 2026, we've got
trips to Hokkaido and Japan, to
Batswana, to Namibia, and possibly to
Alaska. So if you're interested in
joining me, you can find full
information on all those trips on my
website. So please check that out. And
as ever, thanks so much for watching.
Good luck with all your photography and
I'll see you next time. Take care. See
you.