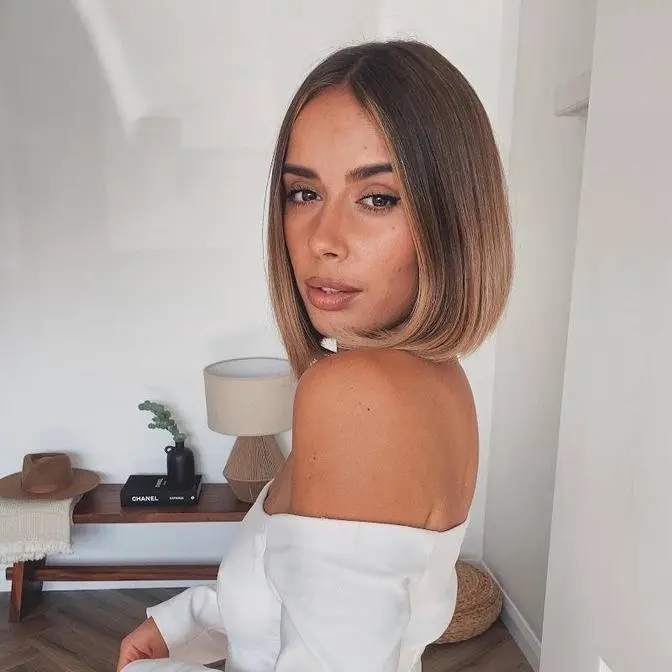
✨ DISCLAIMER ✨ Any video that has been sponsored or paid for will be clearly marked with AD in the title and in the info box. Gifted items that are featured will have ** next to it. Any links that are ‘rstyle.me' or ‘amzn.to’ are affiliate links.
Thanks for watching!
Welcome back, how are you doing? It has been a long time since we have sat down like this.
Today I'm going to be talking you through the festive glam makeup that I'm going to be wearing
tonight. So this is like a perfect one for Christmas and New Year. It's not going to be
particularly crazy or out there or editorial, so it's just the perfect lovely soft glam for
celebrating with your family and friends this festive season. That is actually what I am doing
tonight, so I thought this was the festive glam that was worth filming. A little side note,
tonight's party includes a dinner, which is why we are doing a noodle. It's going to be nice
and long lasting, but very glitzy and perfect for photos as well. So I hope you enjoy this
and find it useful. Let me know in the comments or by giving this video a thumbs up if you would
like to see more of these in future. I would love to get back into doing more beauty videos for you
all, but I really just want to know that you enjoy them. So do let me know if you would like to see
more of these, but without further ado, here's the festive glam. So I'm going to start off by using a
primer. I'm using the Rare Beauty primer. I'll find out what this is called in a second because I've
actually forgotten the name. I love using this because not only does it make my makeup last so
well, but it also has this gorgeous smoothing property. It is so beautiful. My makeup looks
incredible in photos when I use this. Like even if there's no flash, flash always makes you look
really, really good. But yeah, even if there's no flash, it still looks so good. It's a great one
for long wear, but also blurring. And like, if you're going to be on camera, it's the
Pore Diffusing Primer. It's in the name really, isn't it? I don't wear it every day, but for
evenings like this evening, it is my go-to. I know my mom is going to be around with a camera,
the original vlogger and photo taker in the family. You can always trust her to be on hand
with a camera, always ready to snap photos of her babies. And next up, I'm going to be taking a pump
and a half of the Giorgio Armani Luminous Silk Foundation. And I'm just going to buff this in,
in small amounts using a brush. This is from LAMCOM. It's a new brush, so it's nice and clean.
Makes a difference to all of the others. I'm using the shade 5.5, and it's a really great
match for my skin. And the reason I'm just working it in, in little bits, is because
I've been finding recently I've been applying way too much product. So I like to pump it onto the
back of my hands at the moment, and then just blend it in, in small amounts. And if I feel like
I can stop, then I stop. You can also pump just smaller amounts onto your brush if you're worried
about wasting product as well. I'm just, it's second nature to pump things onto the back of my
hand. And the reason I am using this foundation is because it doesn't have any SPF in it. Also,
I think anyway, but it's one that is known for being amazing for being photographed. And it's
also very, very long wearing. It's a lovely satin, like natural foundation. So perfect for evening
wear. Lots of people wear it for weddings. Lots of makeup artists use it for shoots as well. I
think it's like 21 years old now. It's just an OG in the beauty industry. And it always makes my
skin look so good. I find it to be such a reliable foundation. And the coverage is lovely too. It's
very buildable. So I just apply a little bit more sometimes, especially on my cheek areas where the
scarring is. But luckily, not so much of that around as there used to be. I was looking back
through old vlog footage this morning, just deleting things, getting ready to film as you do.
And I was just amazed by how much the Skin and Me treatment has helped my skin, my scarring. I haven't
had a spot apart from this one. There's one like right by my ear, which was kind of weird, but I
haven't had a spot on my actual face in like three months. And that is the longest I've gone without
a spot in probably about five years. I'm amazed by that. If my code still works, by the way,
I'll leave it in the info box for you guys, but I'm not sure if it does. Next, I'm taking the
Bobbi Brown Corrector Stick in the shade Light Peach. I'm just using that under my eyes because
they always sit quite dark. Like you can see now I've put it on how dark the skin around my eye
eyeballs. Why do I get to say eyeballs? That's so weird. You can see how much darker the skin
around my eye is. And I find this helps to make me look a lot more fresh eyed and awake. Normally,
I like to spray a bit of the Rare Beauty Mist all over my face, but also under my eyes when I
am blending this because it's quite a thick product. I don't actually want to make my skin too
dewy this evening just in terms of like lasting power and stuff. So I am going without tonight
and just really lightly taking my time to blend it in. However, you can blend in with your fingers
and it is much quicker. I just really after having bad skin, I really got used to not blending
anything in with my fingers, like not touching my face ever. So it's kind of second nature to
use brushes now and just take any excess over my eyelid. I don't like to apply too much concealer
to them because again, lasting power. I want my eyeshadows to last as well. Next, I am taking a
pump of the Armani Fluid Sheer. To be honest, a whole pump is probably too much, but I'm just
using this to add a little bit of glow where I want it. I love tapping this. Oh, I love tapping
this over my cheekbones. I just think it is so, so pretty. It's just stunning. And then I take the
excess onto the high points of my temples. I don't know why there's something about when the light
hits here on my temples. I just absolutely love it. So I'm just mainly concentrating that onto
the high points of my cheekbones. This really helps to define them and give a lot of lift in
that area. And then we're going to add a tiny amount to the end of my nose and bridge of my
nose and a little bit to my chin. I always put my highlighter right on the bottom because I actually
don't have a chin, like a very chiseled jaw and like chin. So I like to kind of exaggerate the
shape here. So I don't put it here where most people put their highlight. I actually put it a
little bit lower and then you can take the rest and just pop it on your collarbone and it really
makes it pop, which is just stunning. I'm not sure if you can see that. We love a little shoulder
highlight. You obviously don't have to do that, but it's a great way to make sure you don't waste
your excess product. Just realised my light is up a little bit high. Oh, okay. We can see skin now.
Great. I was literally like, why can I not get the hang of filming when it's darker? I've just realised.
Next, my favourite concealer. This is the Hourglass Concealer in the shade Beach. It is so creamy,
but the coverage is just incredible as well. I like to use this for extra coverage where I need it,
but because of the creaminess, it's also very smoothing. So sometimes I use it in areas that are
not necessarily like scarred or blemishy, but slightly uneven in their texture and it just
smooths it out so beautifully. Big, big fan of this concealer. I almost had a little bit of an SOS
moment because I couldn't find this concealer, but this is my Giorgio Armani Luminous Silk Concealer.
I know this is a lot of concealing, but I kind of use this one more to highlight. It's the shade 4.5,
but it works so beautifully. It's like a natural highlight on my skin. So I apply it in the centre
of my forehead, underneath my eyes, and then at the outer corner of my eye, and I find this like
gives a lovely lift to the eye. It also works beautifully over the corrector as well and makes
my under eyes look super gorgeous and bright. Take any excess around my nose, and then I've also
added a little bit to the back part of my jaw, which might seem like a really strange place to
highlight, and maybe somewhere not everyone wants to highlight, but I have a very strange shaped jaw.
Sometimes I feel like there's absolutely zero definition to it at all. So in addition to
contouring the underneath, I actually like to add a little bit to the back part of my jaw to
accentuate this area here, and that is my complete personal preference. You do not have to do that.
And then again, I also add a little bit just to the bottom of my chin as well, just to give me that
chiseled shape. I'm just going to bronze quickly using my YSL All Hours Foundation in the shade B70.
Take it down my neck as well, because my neck is just so, so, so fair. And then I'm just going to
blend that out using my It Cosmetics foundation brush. I can't remember what this is called,
but I will link it in the info box for you guys. And then I'm blending out my cheek contour.
I like to, when I have time, I like to take it upwards towards my hairline. I just find it helps
to give you a little bit more lift. I apply a little bit to my nose, not so much as contour.
I use something else to contour, but I just really like to add a little bit more definition
back into my face after having applied concealer and foundation. Just gives a little bit of a
sun-kissed look, which I am very sadly missing at the moment. And then I just blend this in,
in circular motions all across my temple and my hairline. This girl's got a big forehead, so
it is very much needed. I'm going to add blush a little bit later once I've done the eyes,
and I can see how much it needs, and maybe what tone I'd like. Also, maybe once I've decided on
my lip as well, just to make sure they really marry up nicely. But now we are going to move
on to eyes. I'm scared, guys. I feel like I said recently, I am very out of practice with doing
eyes, and it was very sweet. Everyone the other day at the Victor and Rolf event really complimented
my eye makeup, but I felt like it was a shambles. But I'm going to do my best today. I left myself
more than enough time so that I can really take my time with this. That is my best advice. If you
are trying something new as well, if this is new to you too, because it definitely feels new to me,
give yourself a good amount of time to just slowly work it in. So I'm starting off by taking the
Bobbi Brown Longwear Cream Shadow Stick in the shade Golden Amber all over my eyelids. This is
going to act as my base. We're not actually going to be going this gold. I'm just using a Veve
Eyeshadow Packer brush to pat that in, but then I'm also taking it up to my brow bone and just
making sure that edge is like blended out nicely. And then I'm taking this Charlotte Tilbury Liner
Duo. I'm not sure exactly what this is called, but I'm going to be using the Magic Enhancer
part of the Liner Duo. I'm just taking this across my lash line. And this is a really gorgeous
dark brown that almost looks black, but it's not quite black. And I thought this would look lovely
with the golden browny tones that I'm going for tonight. I'm just taking a tiny little
spectrum brush. If you watch my videos all the time, you'll know this very well.
And using it to blend out this liner. And now I'm just taking a Veve Eyeshadow Smudger
and just using that to work that eyeshadow into the Bobbi Brown Golden Amber shadow. Just taking
it out a little bit as well. I have quite round eyes that are like set into the centre of my face,
so I always like to take my eyeshadow out a little bit. Just wing it out that tiny bit.
And then when you add lashes as well, it gives that gorgeous like cat eye effect.
We've got a nice amount of definition there. It's going to look a bit mad right now, but
once you add your lashes, it's just going to look beautiful. And once we've got the rest of
the eyeshadow on as well. You just wait, she says. Praying her vision comes to life. I'm now praying
I'm able to do what I just did on my left eye or my right eye. I'm going to leave the eyeliner there
for now. However, I may also add some to my waterline a little bit later, but we'll see.
Next, I'm going to be using a palette, which is an oldie but a goodie. This is by Buda Beauty
and I want to take this golden brownie shade here, which is called Blessed. I'm going to take that
onto my Veve eyeshadow packer brush and I'm just going to pat that all over my eyelid. And I'm also
taking a shade called Sandalwood from the same palette and just blending that through my crease
and out towards my brow bone. And I'm not just keeping this to the outer corner. I'm taking this
quite far in to the inner corner of my brow bone as well, just so we get this lovely brown wash
all over the eyelid. I'm going to try this on the other eye before I pack the shadow on. I feel like
I should have done that the other way around. Just going through my crease, up towards the tail of my
brow and bringing that into the inner corner of my brow bone as well. And that just gives a really
lovely lift to the face and it kind of mimics the cheekbone line as well. I really like doing
makeup like that. Yeah, definitely would recommend doing the crease first. I much prefer that. I'm
just going in again with another layer of the Blessed eyeshadow shade. I love that. Okay, then I'm
taking another Veve brush. This is the Precision eyeshadow packer and I'm just using it to take the
Sandalwood eyeshadow underneath my lower lash line and then I'm just going to blend that out just to
add a little bit more smokiness. I think I'm going to add this darker liner to the waterline. Have I
gone mad? Maybe. Oh my god, obsessed. I haven't done this in years. I'm just going to do this
same to my upper lash line. This always makes my eyes water. I don't know if you'll be able to see a
difference on camera but it just adds a lovely fullness to your lashes. I haven't done eyes like
this in so long but it's so pretty. In this palette is the Black eyeshadow that I use for most makeup
looks. So I'm going to take some of this onto my tiny little angled brush again and I'm just using
that to add a little bit more definition to my lash line without adding a big wing. One of the
ways I really like to blend out liner across my lash line is I turn the brush vertically instead
of horizontally and just wipe it across and it doesn't give you a wing but it gives you this
thickness, the outer corner. I only do it like that here. I never do it at the top of my eye but if you
have quite round eyes like me and you want to give them more of an almond shape and you don't
want to use like a bajillion brushes to be blending out a bit of eyeshadow, just turn your tiny smudger
brush vertically and it works beautifully at blending out like a black eyeshadow across the
lash line and making it really like smoky and smudgy and gorgeous. Next I'm taking some duo
lash adhesive onto the back of my hand and I'm just going to leave it there whilst I do my brows so
the glue can go a little bit tacky. I'm using the Anastasia Beverly Hills Brow Definer through my
brows just quite lightly and I don't take too long doing my brows. I just follow their natural
shape now so it doesn't take me very long but it's the perfect thing to be doing whilst I wait for
my lash glue to dry because I am the most impatient person and I hate waiting for it to dry. Oh and
this is in the shade Ash Brown by the way, like my go-to shade. You really don't have to use
too much but it's not too dark either and because I use a brow gel, this is the Hourglass
brow gel, I never really put too much actual brow pencil through the front of my brows because
otherwise they just end up looking a bit too blocky and too much. I like to keep the inner part of my
brow very soft because my brows are so dark it just adds a nice little bit of softness to them
to keep this bit a little bit wispy. I think I'm also going to do my lip whilst we wait for this
to dry because it's taking a little while. I do have a couple of options and I'm going to kind of
test both. I have the Estee Lauder Pure Colour Whipped Matte Lip Colour in the shade 921 Air Kiss
and this looks really pretty, like a soft matte pink nude. That's so nice and then I also have
this Urban Decay lipstick in the shade Uptight and this is a matte lip. Very similar but I'm going to
for the Estee Lauder. So we're just going to add that all over and then I'll blend it in with my
finger and then I'm going to take a little bit of my Tom Ford lip pencil. I started using this again
recently, I remembered how much I love it and for some reason I really like to add my lip liner
after I've done my lip product. I just find it doesn't get lost as easily, you can add more
definition and more depth. I'm going to just blend the edges of it out a little bit, hopefully it's
not too bright, it's fine because I'm going to add a gloss anyway. But back to the lip liner, this is
the shade 04 Extort and it also has this little brush on the end if you don't like blending in
your lip product with your finger, you can blend your lip liner in with the little brush. I love
this lip, this is gorgeous. Okay we'll come back to lips in a second because my glue is starting to
dry so I'm going to take the Suede Individual Lashes because I don't want crazy lashes today
but I do want like a lovely little bit of fullness and flutter. Got my tweezers, thankfully
Ryan did not take them with him when he packed his stuff this morning because he normally steals
them. Hairy couple problems, you know. I like to take a lot of medium lashes, I'm a medium lash
kind of girl. It's just so pretty, it's so subtle, I don't know if it'll show. These are just so
natural, they're so stunning, perfect I think as well if you're doing like something festive with
family and you don't, sometimes I don't really want all of the comments on like, oh and you're
wearing lashes and you're wearing makeup, sometimes you just want to look glam but without like
feeling a bit too extra, you know. And I think a few little individuals like this are like perfect
for that kind of occasion where you don't want people being like, oh wow okay you're trying to
impress, you know the vibe. I don't think my family have ever done that but I just get really awkward
when people pay me compliments as well so. Okay I'm gonna add some mascara, this is the Glossier
Lash Slick because what else would there be? For anyone that doesn't know, I love this mascara and
I use it literally every day. It is my, probably my all-time favourite mascara and that really is
high price. I've used a lot of mascaras you know, you can build it up or you can just add a tiny
amount and it looks like real lashes, like the amount of times people ask me if I am wearing
false lashes or lash extensions is crazy but I think it's even like marketed as like lashes without
the extensions or something like that on the website and I didn't even know that when I tried
it. I actually just saw it the other day. Just adding a little bit to the lower lash line as
well. I hate it when you get a wispy that hangs too low, makes me very sad. I'd rather move you
than pull you out, please move. Listen dude you need to point forward a bit more, not outwards
because this is not how we're doing things here hun. This is why I can never be a lash extension
girlie. One point's in the wrong way and I want to chop it off. I think this might be the best
eyeshadow look I've done in a very long time. I was about to say that's saying something but
it's not because my eye looks lately have been so, so dead. I'm going to add a little bit of gloss.
I have two really cool glosses. One is from Charlotte Tilbury, it's Champagne Diamonds. I'm
not sure what the actual lip gloss is called but I'll try and link it. And then the other one is
the Fenty Beauty, what are these? Gloss Bombs? Gloss Bomb in the shade, Gloss Bomb Heat in the
shade Lemon Lava. I feel like this one will go really well with the lip colour but will it go
too well and then it's just not impactful? Or do I go Lemon Lava which is a bit more of a goldy
colour? I'm gonna go Lemon Lava. I'll just undo it if I don't like it. Oh my god I forgot
how gorgeous these are and this smells incredible. I love how we've got like the super glossy eye
and then a really glossy lip. Also if you wanted to I feel like a bit of like eye gloss, this is
by YSL, this is the Eye Gloss Smudger. I'm not sure if they still do this but lots of brands do it or
you can use actual lip gloss. I've seen a lot of people on TikTok do that but I can't account for
how well it lasts or whether it moves things about but a little bit of this Eye Gloss Smudger would
be incredible like just if you wanted to really like mess it up as well. I don't know if I'll do
that because I wanted to do uh individual lashes and I'm scared that it will like upset the glue
but if you weren't doing that and you were doing like really thick kind of like spider type lashes
I think this would look so cool. We're gonna add a little bit of blush just to the high points of
my cheeks. This is by Rare Beauty and it's the shade Bliss. I just realised that the Fenty Gloss
Bomb Heats obviously are called Heat because they make your lips like fully tingle so if anyone
thinks like if anyone has seen the photos from this like night out and thinks I look extra pouty
I haven't done anything to my lips, they're just on fire. Like they actually do feel like they're
on fire, wow. Oh I really like that, it works so nicely with the pink lip tone with a little bit of
the Dior blush. I'm gonna take the Precision Powder Brush from Veve just because I can't
remember what brush I'm meant to be blushing with. I'm just gonna swirl that in a little bit here.
For a day look I don't like blush here but there's something about like a night outlook when you've
got a when you've got a smoky eye that really does work so beautifully with like cheek blush.
Do I know where my powder is? No. So I'm going to be using my Bare Minerals Bare Pro powder
with a Veve 125 highlight brush. Might be a weird choice but I really like being able to control
where the powder is going especially for a look like this where we've added a highlighter. So I
like to press this everywhere I need it. Pressing definitely helps it stay for longer. So that is it
for my festive glam. I'll give you all the close-ups and everything like that. I'm so happy
with how it turned out. The only thing I did do was take my blending brush that I used for my
foundation and concealer and everything like that and just tap it over the tops of my cheekbones
just to make sure the blush was really beautifully blended. When I work with artificial light versus
daylight it's so hard to tell where the blush is going and you don't know until you're in very like
strong bright light. So thank you so much for watching if you made it to the end. Thank you
for joining me for what feels like my first makeup tutorial in forever. In fact this may or may not be
my first of 2022. Better late than never. Thank you so much for joining me. I really hope you
enjoyed this. Let me know if you recreate it. Please tag me. I would absolutely love that. I
am obsessed with how this came out. I know it's not like super in-your-face festive but it's so
glitzy and really gorgeous but without feeling like too over the top and I love that. The only
thing I would say is I would love to do this look but with the Veve lip liner in Rumour which is like
a dark kind of like burgundy brownie tone. It is absolutely gorgeous. It's a really good dupe for
Nars Mandor if any of you remember that lip shade that I used to wear all the time back in the day.
It's a really good dupe for that. I think it suits my skin tone really well and it's a really
nice ruddy brownie tone and I would love to do this lip with that. It's probably if you see me
wearing a similar look with a reddish lip over the Christmas season then that will be it. If I
were actually just filming this to like sit around in my house I would definitely do the red lip for
you but because I'm actually needing to leave the house very very soon I won't be doing that today
but I really hope you guys have enjoyed this video. Thank you so much for watching and I'll
see you guys again very very soon. Love you, bye.