
-18 Essential Knife and Bushcraft Skills_ The Try Stick
4 Video Views·Nov 20, 2022
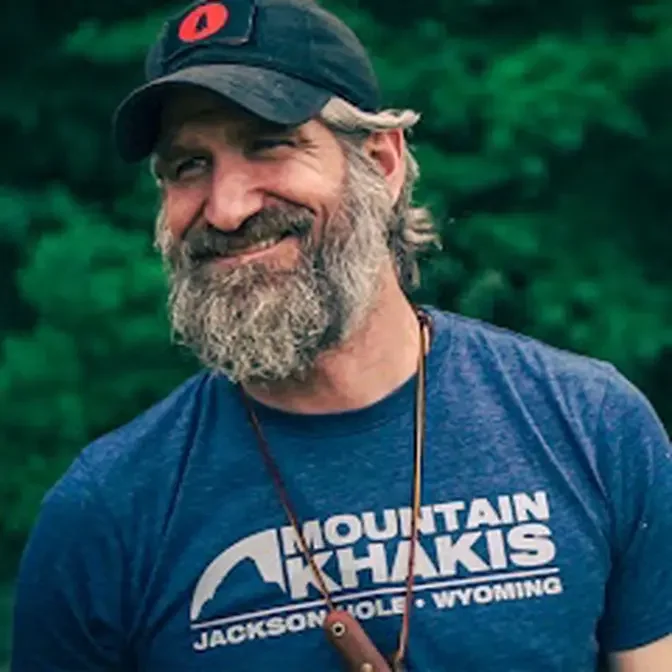
Hey everybody, this is Josh here, the Graybeard of Green Beret. I got a new knife from Northern
Knives and like I do with every new knife I get, I like to see how it works, kind of get used to it,
see how it's going to perform in a field. And you know, even if I don't have a new knife,
sometimes I don't have time to get out in the field like probably a lot of you have that same
issue. You know, we want to be in the field all the time, but we can't always make that happen.
So there is a good way to practice knife skills as well as practice knife skills that are directly
applicable to bushcraft and survival in your backyard, by the campfire, wherever you are. You
know, if you can't make it out to the field, that doesn't mean you can't practice your skills. So
this is called a tri-stick. And I first learned about this by reading an article from Morris
Kohanski. And I think that it's a really valuable way to practice. And also if you get a new knife,
this is always, every time I get a new knife, this is the first thing that I do to kind of
get used to it, kind of get used to the feel, how it handles, how it performs, and see if it's
something that I'm going to like using in the field. When I'm starting, I like to select a
willow or tulip poplar or something that's reasonably soft, that's going to be fairly
easy to carve. This time I selected willow, and I've gone quite a bit longer than I expect to
actually need. I've left probably an additional six to eight inches on that to act as a handle.
I leave that extra length on there because when I'm carving the notch closest to the top, what
I want to be able to do is carve here, flip it, and still have a handle and be able to carve the
notch. If I start my notch way up here, what happens is I'll be able to carve this way, and
when I need to flip it over, I don't have anything to hold on to. A lot of times what you'll end up
doing is carving towards yourself rather than being able to hold it up here and carve away
from yourself. So I like to start with a little bit extra length. Now one of the inherent risks
of using a knife for anything is that you could possibly cut yourself. So whenever you're carving,
make sure you're observing all the rules of knife safety. The main thing is watch your triangle of
death. Make sure that you're not carving inside your thighs. Make sure that you're not using
yourself as part of the backstop. Make sure there's nobody in your follow-through, including
yourself. So check that blood circle and be safe when you're carving. It doesn't do any good to
practice knife skills if you're not practicing them safely. Alright, so I've selected my piece
of will that I'm going to use, leaving that extra length on there so I have a handle, and what I've
done is just kind of scored the top here. The first thing that I want to do is get this bark
peeled off, and I want to try to keep the integrity of that bark to get as long of a strip as I can
each time I'm peeling it off. What that allows me to do is have longer strips to use whenever I start
making my natural cordage. Every once in a while you're going to hit a knot, and it's going to rip,
and that's okay. You just want to maintain as long a strip as possible. That piece ran off on me after
I hit a couple of knots, but I've still got a 12-inch strip that I can use for my cordage. After
I've got the bark stripped off of this, I'm going to take those strips of bark and I'm going to set
them to the side because I'm not going to be able to strip that down to make cordage until I finish
with the root stripper. I'm going to use that root stripper to further process this to get it ready
to make into cordage, so I'm just going to set that to the side. While it still has length on it is when
I want to start doing my reductions and practicing my feathers. I'm going to do on this end, I'm going
to do a square reduction, and I'm going to create coarse feathers. On this end, sort of towards this
side, I'm going to be doing a round reduction, and on that I'm going to be trying to create medium
and fine curls to add to that tender bundle so that I can light it with a ferro rod at the end.
Whenever you're doing it, it's best to have some sort of an anvil to put it up against,
and you're using different parts of the knife. So, for the coarse feathers on the square reduction,
you want to keep your wrist sort of locked, and when I'm making the coarse feathers, I'm using
the first inch or two of the belly of the knife here. Keeping my wrist locked, I decide where I
want to start those curls, and it's a gentle touch and control of the knife. I'm not pushing the
knife so much as I am slicing the knife down through as I'm creating that flat plane. I've
started to make some what I would consider coarse curls, and I'm going to come to the other side
and trim those off, staying on that same flat plane. I've created a flat plane on one side,
and I'm going to continue that all the way around. So, what I'll do is normally go 180 degrees over
and continue that same process. Once I've got my curls, come to the other side and just trim those
off. Now, I'll rotate it 90 degrees in the other direction and do the same thing. Rotate it again.
So, now what I've created is a square reduction. I've got four 90 degree edges, and I'm left with
some nice coarse curls for my tender bundle. Now, because I want to create these feathers with my
arm locked out, when I go to do the round reduction, I'm actually going to flip it over
to where it's upside down, and when I'm doing a round reduction, I'm using a different part of the
knife. When I'm doing my coarse feathers, I'm kind of using the first one or two inches here. When I
go for the round reduction and I'm trying to create more medium and fine feathers, I'm going
to go up towards the front of this curve, and that's what we're going to use primarily to create those.
But, I'll slightly change the angle of the knife. As I create these curls, I'm going to rotate.
I'm going to rotate this as I'm creating the curls. Once I start getting these fine curls,
just to get them out of the way, I'll come to the other side and I'll trim those off,
and I'll take those fine curls and put them in my tender bundle. I'm just going to continue that
all the way around until I've reduced this to the diameter that I want it. The pot hanger
notch or the bale notch. So, to do that, what I want to do is first create an X, and it's helpful
to have some sort of anvil for that. I'm going to leave myself enough of a handle, and essentially,
I'm making a stop cut in the shape of an X. If I were using a fixed blade knife, I could easily
take a billet or a baton, whatever you want to call it, and I could make those stop cuts deeper,
and it would make this notch go a lot quicker. But, because this is this particular knife that
I'm using, this Boker Kwaiken, is a folder, I'm not going to baton that. It's just not something
that I'm interested in doing. Once I've got that X, I'm going to start carving that out
towards the X. I'll take small shavings towards that point, and I want to preserve that point.
It's usually, you know, three to five shavings, and then what I'll do is I'll leave it in place
using that point as an anvil, and I'll turn the knife until it connects with the upper portion
of that X, and the same thing on the other side. Using that point as an anvil, I'll rotate the
knife around to the other point of that X, and my pot hanger notch is starting to take shape.
So, I'll continue carving on that, take a few slices in, using it as an anvil, turn one way,
turn the other way, then I can flip it over and trim those off. So, this is why I like to leave
a little bit of a handle on there. As you can see, if I didn't have that, if I started this
notch way up here, I wouldn't have anything to hold on to when I'm actually trimming,
and it just makes it that much more challenging. So, I do it in this order because I can come back
later and actually trim that off and practice my rose cut slash beaver chew, as well as my pommel
end that you would use for your tent stakes and for your bow drill spindle at the bottom portion
where it meets the hearth board. So, for the depth of the notches, I want to go until I can see the
center pith or the center heartwood, depending on what I'm using, and that's about as far as I want
to go. If you go any further than that, it tends to have a, it has a tendency to break. So, if I'm
actually practicing these skills to apply them later to bushcraft and survival tasks,
then I want to practice them correctly. So, I'm going to continue trimming this down,
and then I'll come back in and we'll undercut this. Now, incidentally, when you get good
and proficient with a knife, and this is a new knife, which is why I'm doing this,
as well as I'm teaching this to you on camera, so it takes a little longer, but
your notches and each notch and skill of the tri-stick, a good goal to shoot for,
is one minute per notch. So, this tri-stick would take, you know, 15 to 20 minutes at the most,
once you get proficient with the knife that you're using and your knife skills develop.
Now, having said that, if this is your first one, don't push yourself past the point of safety
to meet some arbitrary goal that doesn't really mean much. It just gives you a gauge of how well
your knife skills are doing. So, good goal to shoot for, but don't put that kind of pressure
on yourself in the beginning and do something unsafe and cut yourself. The whole point of this
is to be able to practice your knife skills and have that practice apply directly to bushcraft
and survival skills in the field. Once I've got the basic shape of that, including the hook,
I'm going to use the very end of my knife and I'm going to do some fine carving and shaping skills,
and I'm going to undercut, sort of a scooping motion like this and like this, so I can get
an undercut on that bale notch, that pot hanger notch, so that when I set a bale inside there,
it'll stay and won't fall off the hook. So, I'm just going to come in and just shape that,
being careful not to split it and being careful not to knock off that point. Now, you can see
I've got a nice undercut that a bale would sit in. The wind could blow it and it still wouldn't
come off. So, the pot hanger notch, also known as the bale notch, is for setting on a bale so that
you can set your bush pot over the campfire. You want that undercut so that it doesn't fall off
and dump everything that you're cooking down into your fire. This is also handy for the front
portion, the front part of your bow, for a bow drill. If you watch my videos on bow drill,
I do this on the front to kind of capture that bowline and keep it from slipping,
kind of along the same lines of using a fork stick to capture that bowline towards the front,
so it works really well for that. I could also take this platform that I created here and I could
extend that out to leave myself more room, and this is the same notch that I would use for a
quickie atlatl in the field. Of all the notches that we're going to do, this is probably one of
the most difficult to get proficient with, so it's definitely worth practicing any chance you get.
When I'm carving the notches, I'm trying to stay at least the width of my knife because I need to
get the knife inside that notch to maneuver, so you don't want to make it too skinny and you don't
want to make it too long because then you're going to run out of real estate to actually practice
your other notches on, so a good rule of thumb is about the width of your knife. Then when I start
another notch, I'm going to start it at least that far away because I don't want these to break as
I'm carving it. I'm going to rotate it between each notch 180 degrees so that the notches are
actually on opposing sides of the stick as they're going down. This is another thing really
that just gives you more room to work with and keeps your tri-stick from breaking.
So from the edge of that, rotate it 180 degrees and that's about the width I want between them.
I'll score a light mark there. I want it to be about as wide as my blade so I've got room to
create the notch, score a mark there. The next notch that I'm going to carve is a square notch.
Now the square notch, as you might suspect, is a 90 degree at the top, drops down, 90 degree
comes across, 90 degree comes up, 90 degree goes over, and it's really good for improvised
pack frame construction as well as trap triggers like the figure 4 deadfall. So when I'm creating
this, I'm going to start with stop cuts where I scored those marks, where I want the notches
to end. Now remember whenever you're making stop cuts or you're carving, watch your follow-through.
Don't use your body as a backstop. Use an anvil anytime you can. So I've created those stop cuts.
Now what I'm going to do is I'm going to carve towards those stop cuts and reduce that material
in the center. After I've done a couple, I'll trim that off, flip it over, and go towards the other
stop cut. Trim that off and it's starting to take shape, but just to make the point again, you know,
you can use a billet or a baton if you're using a fixed blade knife and that would speed up this
process quite a bit. So I'm going to make my stop cuts a little bit deeper on both sides and I'm
maintaining that 90 degree there. Then I'm just going to trim towards those.
And this is why I say it's important to have your notch at least as wide as your knife is,
because once you get past this 90 degrees, I need to create another 90 degree plane
perpendicular to that. It's difficult for me to create that if I can't get the knife
flat on the inside of that notch. And just like the other notch, I'm going to
reduce this material down until I can see the heartwood or the pith in the center,
which I can just now see on this side. So that tells me I need to trim more this way
to keep it square. Now I'll come back in and I'll make sure my edges are square,
make sure I've got a nice flat plane in the middle, and I've created my square notch.
And the next notch that I'm going to create is a saddle notch. And a saddle notch
is basically looks like a log cabin notch, kind of how you would stack the ends of two
logs together in a log cabin. And that kind of has a little bit of a scooping shape
on both sides. So I'll start on one side and I'll begin creating that, usually two or three passes.
Then I'll move to the other side of the notch and do that same thing towards those. Flip it over
again and I'll just continue that until I create my saddle notch. And once I can see the pith or
the center, I know that I'm done and I'll move on to the next notch. The next notch that I'm going
to create is the v-notch. And the v-notch is useful for a hearth board, for either a bow drill
or the hand drill or the bamboo fire saw, even though the bamboo fire saw is a little more
exaggerated. But I want that to come down to a point in the very center, so I'm actually going
to put my stop cut in the center between those two marks that I just scored. And I'm going to trim
towards that stop cut on one side, flip it over and connect the two. So I'll continue to do that
until I get to the center. There's my v-notch. The next notch that I'm going to show you is
the latch notch, also sometimes referred to as a number seven notch or a stake notch. I've heard it
called. It's a recess that you would put in a tent stake that you push crafted
so that you can actually tie cordage around it. So it goes by many names. The latch notch is what
I know it as, or 90 degree latch notch, because this corresponds with a square notch on a figure
four dead ball. So whenever you're creating this, you want the stop cut to be at the top.
You're going to carve towards that at an angle. You started creating that number seven, that latch
notch. So this, I want to stay at 90 degrees, so I just keep coming back up using my anvil
and trimming that off. And I'll continue carving towards that at an angle until I get to where I
can see the center pith or the heartwood, about right there. This by itself is the actual stake
notch or the number seven notch. This would be where you tie your cordage around when you're
staking something out, if you're using this for a tent stake. And this is also something that you
would use for some of your trap triggers. So in order to use this as a 90 degree latch notch,
which corresponds with this square notch up here on trap triggers like the figure four,
I actually need at least that far of a flat plane in there before I start angling down towards it.
I'm going to elongate that out so that I have that at least that much of a flat surface before
I start tapering it out. Now I've got a nice flat surface right here that would correspond
with a square notch and I'm tapering down into that. That is a 90 degree latch notch.
The next skill that I want to practice is the hole through. What I'm doing is creating a hole
that passes from this side all the way through to the other side, sort of like a sort of like
a mortise that you would use a through tendon for. This is also what I do on the back side
of my bow for my bow drill to help keep the cordage in place so I don't have to spend a
lot of time retying it. It's also useful as a trap trigger like the Ojibwe bird pull uses this
style. So it's a good skill to have using the anvil instead of your body as a backstop. If you
look at your blade, your blade tapers. It's wider at the top and it tapers down so we're going to
use that to our advantage. Find a spot and I'm just going to score a spot that I want to put
this hole through. Now I'm going to flip the knife over the opposite direction, taking advantage of
the shape of the actual grind of the knife, and mark the other side. Do that on four corners
and across. Now that I've got sort of my hole through scored out, I'll use the tip of my knife
and just pop that out. Now I'm going to transfer those marks around to the back side by lightly
scoring with my blade and do the same thing on the back side. This time I'm going towards the
hole that I've already created on the other side. Once it's all scored, use the tip of my knife to
pop that out and continue that process on each side until I push through. Once I'm through,
I want to put a little sliver in there of something. In this case, I'm just going to use a
off of the actual tri-stick itself and I'll push that through. That is your hole through right
through the middle of your square reduction. Now once we get down to the end, there are two tasks
that I actually want to complete with the end. The two tasks that I want to practice. One of them is
just creating a point, which is what I would do for the end of a tent stake that I was driving
into a ground, some other sort of tool or weapon, or the top portion of my bow drill spindle that
goes up into my bearing block. So I'm just going to create a point really quick. Remember,
it's not pushing the knife, it's slicing the knife. As I'm removing material, I'm rotating
this around. I've created my point. The other thing that I need to practice down here, once
I've created that, is a root stripper. I can use it to strip off bark off of roots whenever I'm
natural cordage. So to do that, I need to flatten this into a taper on both sides. So I'll just
slice one direction, flip it over 180 degrees, and taper the other side. Once I get to the point
where I can see that center pith, I'm going to use the tip of my knife and carve that center out
and create a groove much like you would, much like the claw of a hammer. Now that I've got
that groove created, I can pull roots through that slot that I created. That'll actually strip
the bark off of the roots and I can use that for cordage. That is the root stripper. Another task
that I want to practice is the rose cut or the beaver chew. So for the rose cut or the beaver
chew, this is a cutting technique to where you can reduce the size of a limb or a branch that
you're using. All I'm going to do is slice as I'm rotating the branch around. Once I get all the way
around, I'm going to slice a little bit deeper in the same area. Go around a third time and I'll
continue that until it breaks clean. You can tell by looking at it, what I'm left with looks like a
rose. Then I'll come back to the top of the tri-stick and I'll actually do what's called a
pommel end, which is useful for the top of a tent stake. It's useful for the bottom portion of your
spindle for your bow drill where it meets the hardboard. Essentially, you're putting a pommel
end or a crown on the end of the stick. That's another skill that we use after we do the rose cut
beaver chew technique. Once you've got your tri-stick created all the way up to that point,
the last two skills to do are to make natural cordage using a reverse wrap, you know, two to
three feet of cordage is about the most useful length that you can get out of one tri-stick.
If you haven't seen that video, I'll put a link up in the one of these sides. I'll put a link up to
that so that you can see how to take that and make natural cordage with it. The final task that you
want to practice is using a ferro rod to light the feathers that you created. The only way to really
know if those feathers are adequate enough or if you still need a lot of practice, which, you know,
we all do, if the feathers you created while creating your reductions won't take a spark very
readily, then your feathers are too coarse and you need more practice creating those fine feathers,
most likely. So, the particular knife that I'm using for this tri-stick video is a folder. It's
kind of a gentleman's folder. It's not really made for bushcraft at all, but I'm going to be carrying
it in my pocket and that's what I'm typically doing. So, I wanted to know how it would perform
creating a tri-stick. I wanted to get used to how the knife handled, kind of the dexterity of it,
and how it how well it retained an edge. So, having said that, it doesn't have a 90 degree
spine that I can test this particular knife for its ability to strike a ferro rod. It does have
a 90 degree up here towards the very end, but when you're using a ferrocerium rod, you know,
if you're if you're using the very end of your knife, you don't really have a really, you don't
really have very good leverage. I like to use closer to the pivot point, closer to where I'm
gripping to get better leverage, and this just doesn't have that 90 degree spine there. So, I'm
actually going to test my feathers that I created with this knife with a different knife. I'm going
to use the Mac to do that, but to prove the concept of whether or not the feathers that this created
were adequate enough. And granted, if you have a ferrocerium rod, you can use the striker that
comes with it, but when I'm testing a knife for myself, I like to use the spine of the knife to
make sure that it will throw sparks. So, that's different than what I normally do, but this time
I'm going to have to do that because this particular knife is not designed for that.
Right, the knife that I was using for this video is the Boger Kwaken, and Kwaken is, from what I
understand, a traditional Japanese dagger. And while this one isn't technically a dagger, it's a
folder. It's a really cool take on that. It's got a really nice, unique, Japanese-inspired profile
with this flat back and this really swooping blade right here. It's Ausate steel. Coming on
down, we've got a pocket clip, a lanyard hole, and the scales on this are a rough micarta. They're
not polished. They're not smooth. They actually have some grip to them, and I like that because
a lot of times when you get micarta and it's polished, it gets slick when you're using it
in the field, in the rain. So, I like that this has a rough micarta on it, and of course,
OD Green doesn't hurt my feelings at all either. It's got a really good, positive liner lock on
the inside, and that comes over a lot farther than a lot of liner locks that I've used in the past,
and that just kind of gives you that feeling of security that it does have that blade
locked in position. So, really good liner lock. It has a thumb stud, so you can do one-handed
opening, and it actually opens extremely well, really smooth, to the point that you can actually
just momentum open it. Overall, the craftsmanship on this knife is actually pretty good,
and it performed well. I actually had several technical difficulties with camera equipment,
microphones, wind, weather, you name it, in making this video. So, this actually went through
probably about four or five different tri-sticks trying to capture all that footage for this video,
and it didn't take anything more than a strop, and the edge retention on it has been great. So,
it's still ready to go for the field. I don't really consider this a bushcraft blade, but,
you know, for my pocket knife, it's kind of more of a gentleman's folder, and it actually is a
really, really good carver, which is what I use my pocket knife for most of the time anyway. So, that
is the Boker Quaken. Now, I was sent this knife from Northern Knives to field test it for a while,
and I'm going to keep rotating it in with my tracker and my a couple of case knives that I
have, my Trapper and my Hunter. Northern Knives loves this channel, so they're giving you a special
deal, and keep in mind, again, I don't make anything off of these sales. That's not what this is about.
This is about them extending an offer to you. You can go to Northern Knives. I'll put the link down
in the description. The code, the coupon code that you'll use is GBGB underscore Boker. That code will
get you free shipping, plus it'll get you a GB squared logo dog tag that they're making, plus
you'll be able to pick out your own personalized dog tag that they'll send you with your order. So,
again, I don't make anything off of those. They're just extending that offer to you guys,
and I'll put those links down in the description, as well as that code,
and if you want to get one for yourself, you can get it there at Northern Knives.
All right, thanks for watching, guys. We appreciate your views. We appreciate your likes. We appreciate
your shares. We appreciate your comments and your questions. If you have any questions, put those
down below. I will get to them. We'll answer them, and until next time, hope to see you in the woods.