
43 How To Paint A Tree In Oil | Oil Painting Tutorial
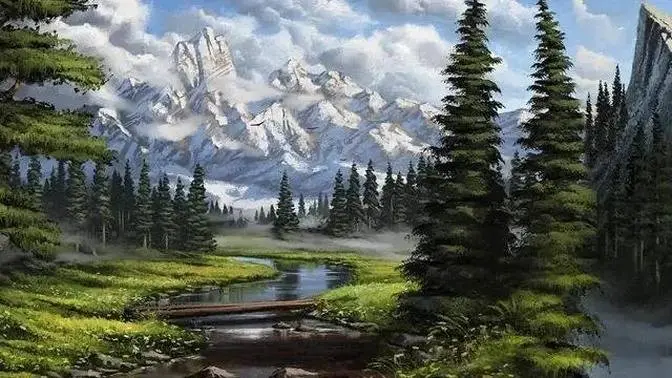
217 Video Views·Oct 18, 2022
43 How To Paint A Tree In Oil | Oil Painting Tutorial
Okay so once again something a little bit different.
Is that even focusing on me? It might help if I turn the autofocus on.
So I'm doing something much much smaller than I would normally do. I've been asked for two
small panels five by seven inches and I've been putting them off and putting them off
but I've got to get them done now because they're for an exhibition which is coming up soon.
So I found a scene I'm going to block it in now. It's going to be a little bit different this one
in style but also in the way I paint it because of the size. Let's get going.
1.39pm and all is well. Well we've got to the blocked in stage here so now
it's just a case of introducing some oil. I think what I'm going to show you in this video
is mainly the painting this tree in here. I mean that's the that's the feature for this picture.
There's a lot going on around it but the contrast between these hills and this tree
really I think is uh makes it a nice subject to paint. So we'll zip through this bit and
when we get to here I'll show you how I'm going to do that.
Righty-o lie so I'm at the stage now where I've finished or pretty much finished the background
area. The foreground I'll do after I've done the tree. I'm going to do the tree
now and I'm going to show you how we do that. So the tree is still in its blocked in state
so what we're going to do is cover it with oil and I'm going to show you and
the techniques are actually very similar to how we do a bigger tree on a bigger panel
but just in a smaller smaller form. So let's show you how we're going to do it.
Let's zoom in a bit. Okay so I would say this tree is probably about two inches tall by two
inches wide so just to give you an idea of the scale of it. So it's quite tricky to get it right
but first of all I'm going to work on the trunk and the branches. So I'm mixing in a little bit
of burnt umber with that black there and I'm just it's not not jet black it's uh
it's got a bit of lightness to it but it is probably the darkest bit in the whole
in the whole picture so I'll put in the trunk here first comes down to around that area there.
So it's quite diluted the with white spirit colour it's really really quite quite wet
there's no thickness to it at all. So let's get these branches in now they're not they're not um
I'm going to do it all the way through some of these canopies here just kind of just uh
um sort of suggesting the branches really and I'm just using the very point of this
Rosemary & Co rigger brush. For those of you that are interested it's the one I use
for most of the small detailed work it's a series 771 and it's a size one. Okay I think that'll do
for the time being so now that's in and although those branches need highlights on I'm just going
to start working on the foliage now. So it's blocked in in um pretty much middle tone I would
say I'm just going to now put in some darker areas and I'm going to just to begin with I'm
just going to try this brush here which is I know I'm going to get people asking what brush it is
but it's just in fact probably at one time looked something like see if I can find I haven't got
one like it but it's it was just a it was just a flat soft brush and over the years of using it
it's just I mean it's almost completely mackered now it's coming to the end of its life but
we'll use that and we'll just dab on the darker areas. So I'm going to mix in some of the sap
green that I've got there with a little bit of that ivory black and maybe a bit of burnt umber
let's just see how that looks you can see that that's just giving you a slightly um sort of a
spotty a spotty look and just just doing that is really bringing the tree to life.
So I've mixed in a little bit of liquid with that and what that does is it makes it look a
so on the right hand side of the tree we can be a little bit darker
because that's where the shade is the light's obviously coming in from the left
and then on the left hand side I can probably add a little bit of the
yellow maybe a touch of that cerulean blue still quite dark more of that let's try that
okay so that's that stage done now I'm going to put in some of the darker canopies that are
filling up this gap here I'll just put those in quickly and then I'll put in the lighter
canopies over the top and then that should pretty much it so I'm just mixing some some of that
ivory black in with the green that I'd already mixed put in some of these darker areas
still adding white spirit just to keep the flow there
definitely drawing in the darker areas as we go
okay now ready for the highlights ready for the fun bit so it needs to be quite bright
I'm going to use that Windsor lemon but it's it's a bit warmer than that so I'm mixing some of the
cadmium yellow and a fair amount of that titanium white just to get that nice and strong and also
plenty of the white spirit in with it get a nice flow see how that looks
yeah I think we could probably go a bit thicker get it to stand out more
quite as strong as I would like it I think one way we can make that a bit stronger a bit more
punchy that is to put it on a little bit thicker again so what I'm going to do move over to a
which is a flat fine bristle Winton brush number one
it's more like half a million miles away
the thing is just to keep building up on this tree just putting on the canopies here
until we are done and I think we'll be there just a few highlights on the branches
slightly darker green just to fill in the shaded area
it looks balanced
all the detail is just on one side that's pretty good
but this tree to make it stand out from the background it's got a lot more saturation
and it is a lot warmer than the colors behind and that really helps it stand forward
so it's also a little bit more contrasty than the trees behind or the background in general
and that gives you the illusion that it's standing standing forward standing in front of what's
what's in the background there
it's pretty much there I'm just going to put in a few just a few more darker areas on this
bit here just to make it look a bit less solid and then I'll put the I'll put some more holes
extra work
so there we have it that is the tree tree demonstration it's quite a nice little picture
this but it is a very very small so obviously I've got the foreground to finish now which I'm going
to do fly has been buzzing around all all cloudy afternoon so there you go that is how I painted
that tree now I'm going to get on with the rest of it hope you enjoyed that if you did please
subscribe if you haven't already or give it a thumbs up or please comment if there's anything
else you want me to show you and I'll see you in the next video