
How to make your PAINTINGS SMOOTHER and MORE REFINED
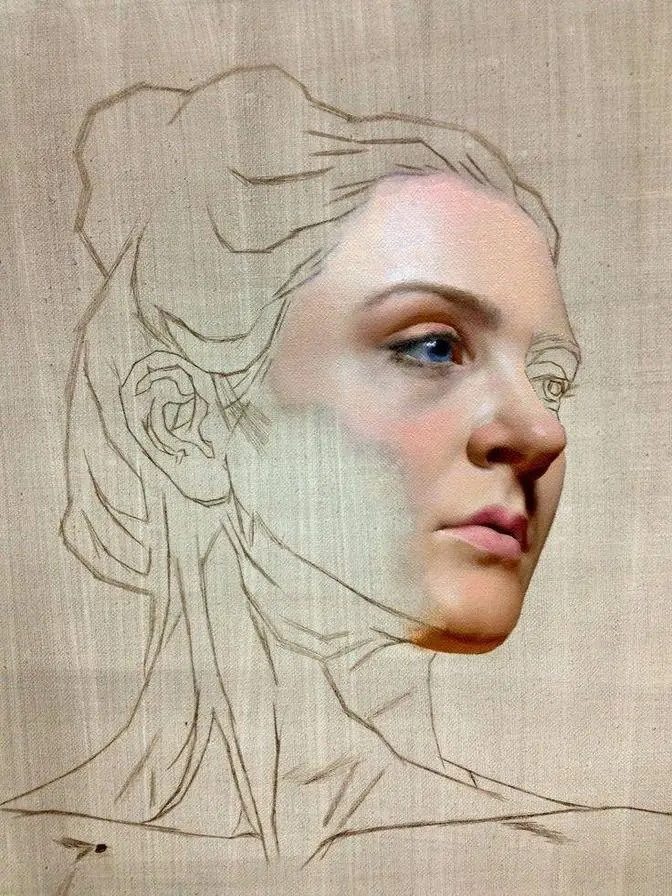
#GJWart #portraitpainting #portraitart #oilpainting #oilpaint #potrait #painting #drawing #art #arts #traditionalart
AI GeneratedMay contain errors
Welcome to this new YouTube video.
Now in this video, I'm going to talk about how it is
I get that smooth, refined surface in my oil paintings.
Now this quality is in direct relationship
to a problem that comes up all the time.
It's a problem I used to have all the time years ago.
It's much better now.
And it's something I discuss with my online students
in my online mentoring program all the time.
In fact, I just had a conversation like two days ago
with someone about this particular issue
and that's why I'm making this video.
Now, if you're interested in my online mentoring program,
you can check out that link down below.
It's a one-on-one program where I work with you
on your own projects to push your skill
further than ever before.
Again, check that link out down below.
Now, the issues that come up all the time
that fight against this continuous even smooth surface
are high contrast values
or a lot of contrast between your tones generally
that can include chroma, it can include hue
and also edge quality and just erroneous, harsh brushwork.
And if you're looking for that continuous even surface,
that classical aesthetic sensibility,
there are some tips in this video
that you might find very, very useful.
Now, these particular issues, these harsh transitions,
these high contrast tones
that are butted up against each other
in a way that destroys the overall continuous form
happen in two particular parts of the process
and sometimes they overlap a little bit.
It can happen in the initial form pass
when you first fully paint your painting
and it might just so happen
that by the end of that session,
you just made some mistakes
or you misjudged some relationships
or you worked in a way, jumped around a lot
such that there are harsh transitions
or a lot of contrast between local tones
that breaks apart the integrity of that continuous surface.
It might also happen that your painting is going okay
but you come back to do revisions in a subsequent layer
and you start to work through things
and even in that session,
it's possible that things look okay
but then you come back a day later,
two days later when it's dry and things are more harsh,
they dried more harshly than you remember or you intended
and that is obviously extremely frustrating.
So if this applies to you in any way
and you have harsh transitions,
if you have contrast that you don't intend
or artifacts that emerge in your painting
later on when it's dry,
then there might be some ideas,
little adjustments that you can take out of this video
and apply it to however you work.
So let's talk through it in a couple of ways right now.
Okay, now the first part of this
might actually sound like common sense.
The continuity of your surface
or the continuity of your gradation
and the smoothness, the evenness
and the sort of coherence
can sometimes come down to how continuously you paint it
and how that form evolves to begin with.
Now, there is a slightly different version of this
that I'll cover in a moment
but let's do it in the most direct way possible
which is largely how I paint
and how you'll see me paint a lot of my videos
and that begins like this.
Let's say I'm beginning a gradation here
and we can just sort of abstract this into,
oh my gosh, I'm getting a little orange on that brush there,
didn't mean to do that.
Using some of the pale rose blush and white here,
doesn't really matter the colors on the palette
for this particular example
since we're just doing a hypothetical
but it's titanium white, yellow ochre,
cad orange, pale rose blush,
alizarin crimson, raw umber, ivory black,
colors I talk about in all my videos, downloads
here on YouTube, Patreon, so on and so forth.
In any event, we're doing a hypothetical mixture here
and let's just start with a particular tone.
This could be anything,
it could be a part of a cheek or anything
and let's say I paint this initial part right here
and I know there was about 1,000 brushstrokes
that just went down there but on some level,
I think about this as my initial brushstroke.
It might take a few to put them in there
but I'm thinking of this as a facet of form.
Let's say an upper portion of a cheek
or forehead or nose or whatever it might be.
Now, what I tend to do
and this is in some of my other videos,
you can even find them here on YouTube
if you search my name, Scott Waddell,
in blending and things like that.
You'll find videos where I talk about
these different aspects even here on YouTube for free.
If you want more depth,
you can find more on Patreon and so forth
but honestly, you can find it here on YouTube.
One of the key things I do
is my next brushstroke is the next part of form.
So if I'm thinking sculpturally,
if I'm thinking in terms of form,
meaning I'm transcending this flat canvas here
and I'm imagining myself touching
the three-dimensional surface
that I'm attempting to model here,
the next part of form is around that curve
and so it's very, very close
both in proximity and tonally,
meaning that form is curving
and this next portion right here
is just turning a little bit from the light
so my tonal change or my change in value,
my change in hue, my change in chroma
is going to be very, very slight.
So that is actually an important point here
in that at any given moment,
I'm only moving a little bit across the form,
meaning my transitions, my gradation,
my change in hue, value and chroma
is not going to be substantial
and so my mixing is always very conservative.
It's always small degrees of change
so I'm much less likely just inherently
because I'm working so sequentially,
I'm so much less likely to overreact
and put something down that's too light,
too dark or whatever it is
but also it relates to edge quality
because I slightly overlap my brushstroke.
Now this is very technical
so the next one, the next series of brushstrokes
or large facet I'm going to put down
is going to be right here
and let's imagine the light's coming from above
so it's going to get a little darker
as we turn around here and drop in chroma a little bit
so we're going to take the color I was mixing here,
add a little bit of raw umber,
the raw umber brings down the chroma too far
so I have to add a little bit of cad orange
which is one of the utilities of cad orange
is it will play chromatically off that raw umber
to keep that a little bit more colorful
than the raw umber allows it
and so then I get a little bit darker here
and I put this in
and I'm still kind of thinking about
this is the next big brushstroke
even though I'm doing several of them to build it up
and notice this, right here where I'm outlining
is an overlap between the previous brushstrokes I put down
and the new brushstrokes and the transition I put down
so that is an area of wet paint working into wet paint.
Now, I can wipe my brush clean a little bit,
I could go to a dedicated blending brush
if you're having a lot of trouble with muddying colors,
that's a different topic,
but whatever the case is,
I kind of wipe my brush clean
so that there isn't as much pigment on it anymore
and then I go in and I slowly blend those together
right there
and this is in a lot of my blending content
or videos I made about it,
the key here is that you still think about the form.
What I mean by that is,
it can happen very often to the best of us
where we start to blend on the surface
and because it's a flat surface
and because part of us thinks that we ought to blend
because the paint looks too choppy or harsh
and we want it just to look superficially smooth
on the canvas,
we can turn our brain off
and we can stop thinking about the form
in three-dimensional space
because look, this is a flat surface,
it's there to remind you that this is fake
so you have to fight against it and say,
no, it's real, this is three-dimensional
and so what I'll do is,
while I'm blending,
I'll kind of remind myself of that arc
and that curve in three-dimensional space
so that my blending follows that curvature in space
and in that way,
blending can actually strengthen form
and not work against it
and sort of flatten out the illusion.
So there you go.
I have a much more integrated passage to begin with
and I blend it out and I can keep going on here
and adding a little bit more raw umber here to darken,
a little bit of cad orange
to keep the chroma from plummeting too much off of a cliff
and I can lay in the next one,
you can see it slightly overlaps in that same sized area,
I bring that down,
I'm painting opaquely,
I'm not adding medium or solvent,
I used a little solvent
just to get the shape of my brush how I wanted it
but beyond that,
I'm not adding it to thin the paint,
it overlaps,
I wipe the brush clean
and then I smooth it out following the form still
or more than ever
and I integrate that in.
So inherently,
this passage is built in a very integrated,
continuous way
so by working continuously,
you will have a more continuous surface,
just remember that,
it's common sense
but it's not a surprise
when the surface itself isn't continuous
if you aren't working continuously.
Now, there are other ways
that you can sort of work around this
if you're not ready to fully commit,
you may never be fully ready to commit
to the process that I teach,
I know it's not for everyone
but if you wanna sort of solve this in another way
but work in a more general way,
you can work a little bit more in a couch
and if you're working into wet paint,
it largely solves this problem as well
and a couch is when you couch in a larger area of value,
let's say,
you wanna lay in a larger part of the cheek,
I'm gonna add a little bit of solvent to the brush
just to speed things up here
in this demonstration
but it's not typically what I do
and so let's say I couch in a larger part of the cheek,
meaning it's not as confined or limited
to a small area,
a strip of form
as you see me do here
and so we have this whole cheek
and you kind of mass it in
and then now you want transitions
to where this darkens around like this
and the way that this does,
you can then work back into it
in the same exact way,
adding that umber in there,
let's say,
and then you wanna get a little bit of,
let's say tonal variety in there
so it's not too monochromatic
so you have a little bit of alizarin in with your orange
and pale rose blush
so it gets a little bit redder there
and then I wipe the brush clean
and then I go in there and I integrate
but you can see that even though I couched it in,
worked in a larger area all at once
in a way that might be a little bit more comforting
and sort of identifiable for some of you
who feel like when you paint like this,
it's just so disorienting
because you lack context for so long,
this might be a nice little middle ground
and because the paint is all being painted wet into wet,
you get these continuous gradations.
The risk here is overgeneralizing,
the risk there is spreading yourself too thinly,
I don't mean thinness of paint
but just in terms of the number of problems
you're trying to solve at once,
you spread yourself over such a large area
that ultimately you can't account for
all the little issues and loose ends
by the end of that session
and so that it ends up drying
with a lot of those things unresolved
whereas here, you're working so moment by moment
that you're largely resolving them.
The blind spot here is that you lack context
for a long time,
the longer you work on that method, which I have,
the more, I guess, calm you are about that
because you can predict things into the future
and sort of know how to expect certain problems
but there are those blind spots there.
When you work in this method,
you risk being generalized and having more problems
than you can solve by the end of the session
because you work more quickly over a broader area
so it can be unrealistic to solve all of those problems
and tie them up
but nevertheless, you're working into wet paint
by slightly overlapping here those few millimeters
and here, you're working into a larger wet area
and so the paint ends up being continuous
and easily blended
and again, with blending,
make sure that you stay on the form.
Very easy to turn your brain off,
stay on the form,
make that blending reinforce the curvature
or a three-dimensional illusion in space
and your form will be better off for it
and your paint will be far more consistent.
So keep these things in mind
when you're building your form,
if you're doing anything that you think
just logically plays against this,
jumping around, making faceted shapes of form
that butt up against each other
but don't slightly overlap,
that your boundaries between brushstrokes
aren't wet into wet
but just sort of these staccato visual moments in time,
then you might wanna slightly adjust that,
have your brushstrokes overlap more,
work more into a couch,
try some of these things
if you're having that trouble
with a continuous surface,
work more continuously.
Okay, now let's talk about the second scenario
when you go back in and you rework a painting.
Now, this is where it happens for a lot of people
and in my online mentoring program,
this is when it comes up most often.
Someone will go back in and they wanna do revisions.
Now, here's the tricky thing with revisions
and this is an older painting of mine,
and it's long, dry,
and I actually have to go back in and rework it.
So I put it on the easel
so I could begin doing that with this video.
Now, something that happens is
someone will go through the painting
and want to address any number of things
that they think are wrong from the initial form pass.
They might think,
hey, this value here doesn't turn enough
and this needs to become darker here
to describe the form more,
or this needs to be lighter,
or I need a better edge quality here.
Whatever it might be,
there are any number of problems
that we wanna correct for.
And what happens is,
compared to when we're first painting it,
it's very obvious where we have
and haven't been in the painting yet,
you can jump around in your revision layer
and not even really realize it.
You can do a little bit of scumbling there.
You can do a little bit of glazing here.
And because there's that full layer already down,
it's kind of hard to track where you have and haven't been.
So that tendency we all have to kind of jump around,
set a lot of fires across the whole painting
without putting any one of them out by the end
is much easier to do when you're in this revision layer.
And so I try to adopt the same continuous mentality
that I have in that first layer.
At the same time, I want to have the flexibility
to be able to surgically specifically change some things
and not have to repaint things
that I don't wanna repaint
or that I think are working just fine.
And so I wanna find that balance
between having to repaint the whole thing,
but also not just picking at little areas
such that the brushstrokes will dry more harshly later on
and create any number of other problems.
And I see this in work that I help people with all the time
where all of a sudden things look too harsh on the face.
And very commonly, a thing that comes up
or a way of describing it comes up
where the person I'm working with
says that they've aged the model that they're trying to paint.
If they're painting someone younger,
they're like, I've added 10 years, 15 years to them.
And that's usually because they might go
to a crease under nine, a lower eyelid,
or they might go to some other subform
and they just put in a darker value there
because they thought that's what they needed,
but they went too far.
But more importantly,
they didn't integrate it into a continuous surface.
Now, here's one part of that.
And this seems a little bit off topic,
but it's very, very important.
One of the main things I always do,
and this builds in mixing practice all the time.
So this is kind of another little bonus tip
here in this video.
And I've talked about this in many other videos
is whenever I start correcting anything,
even if I want a different color there,
I start by mixing and matching the color there
perfectly first.
I say this all the time, I know.
And then, and only then,
do I mix the different color that I want.
Or if I think that it needs to be darker,
I mix the color that's there first,
match it exactly, and then make it slightly darker
on the palette from there.
And that keeps it very close and integrated to begin with.
So that's the best way to start and set yourself up
so that this problem is minimized from the outset.
So if I wanted to attach right here
and make a little facet right there a little bit darker,
I'd first mix and match this tone right here.
And I can go a little darker.
I don't know if you can even see that on camera,
but it was a little bit too light.
So I mixed a little darker with a little cad orange,
alizarin, and pale rose blush.
And now that basically matches.
So this right here matches.
Now I did that in two attempts.
If it takes you seven, eight, nine, 10 attempts
to mix and match, fine, fine.
That's a good indicator that you need more mixing practice.
There's no shame in that.
I remember counting this back when I became very aware
of the potential of this habit
where I remix and match every color
before I go in and mix a change.
That built in a lot of mixing practice
into every painting I did.
And it took me seven, eight, nine times
to get that color right.
And I'd been painting for years,
like a decade at that point in a serious way.
And it was still taking me that much
to get pitch perfect mixtures.
Now it takes me like maybe two, three times.
So it's a lot better, but very rarely am I exactly right
the first time I attempt to mix and match.
So it's normal.
If you don't get it, you'd go back to your palette,
make it a little bit more red, orange, yellow, dark, light,
whatever it might be,
tap down another little dot like I did there.
Oh, it's still a little bit too dark.
Add a little bit of white.
Oh, too neutral.
Add a little bit of cad orange until you get it.
And that's fine.
And that mixing practice
will just make you better at mixing.
Don't be shy with the mixing.
So mix, match exactly,
tap down little dots until it's exact
and your palette is calibrated to the painting.
And then you can mix the change.
Now, here's the other key part.
Let's say, for example,
I was going to make this a little bit darker here,
which I don't even really know I want to do,
but it's a hypothetical.
I started out here.
So I started outside the zone in which I wanted to change.
And this is where the key advice is.
Now, I'm not going to go and repaint the entire eye socket.
I'm not going to repaint everything because keep in mind,
I want to avoid repainting more than I intend to
or that needs to be changed.
But I start outside of the area that I want to change.
So if I wanted to make this crease a little bit darker,
I start here at the beginning of the value progression,
and then I work back around into that crease.
So I earn my way or turn three-dimensionally
my way to that change.
So I mix and match exactly.
I start outside of the change
and I turn my way to that change.
Like if I wanted to turn this form more,
which I don't really,
I would start up here, mix and match,
and then I would return around that edge
and turn it more by the time I got there.
What I wouldn't do is just jump to the problem area
and make it darker or lighter or sharper.
I return my way to it.
You start a little bit outside of it, you mix and match.
And the other thing you can do,
and I'll do that right here,
I have a little bit right here next to my solvent,
is I add a little bit of oil on the brush
so it's a little bit more translucent.
That's a bigger topic.
How much medium you use in subsequent layers,
which just generally increases for a fat-over-lean process
is something that I would like to focus on
in a different video.
But I'm adding a little bit of refined linseed oil
so it's a little bit smoother.
Now, this demonstration isn't gonna fully show this
because it's more of a hypothetical discussion,
but as I turn back around there,
I can get a little bit darker now.
I have a little bit of oil on the brush.
I grab a little bit of alizarin.
It's starting out of this gradation here
or this mixture here.
And then I can turn it a little bit darker.
Now, this is gonna be harsher
than I actually wanted in this painting,
so I'm probably gonna fix this
and go back in the other direction after this video.
But, you know, sometimes you have to sacrifice a painting
for a demonstration here on YouTube.
And so I have this darker value here,
more articulate edge here,
but it was born out of a gradation,
out of a continuous gradation,
rather than being this miscellaneous, erroneous mark
that I just made later on.
And what happens is, and I see this when I work with people,
is I'll just look around their painting with them,
you know, and they see it, we all see it.
We all see the flaws when we come back to the painting
a day or two later.
But I'll say, this tone inside this shadow,
it's all sort of coagulated and hard-edged.
It looks like a blotch,
because when it dries, the paint contracts
and it just sort of stands out from the surface down below.
And I can see it's not attached
or integrated to any passage of paint.
It wasn't born out of that.
So you have to contrive that gradation again.
So even if it's small,
even if it's like, you know,
half a centimeter in width here, like we did here,
at least that change was born out of a gradation,
out of you going back into the form.
What I wouldn't do is just go in
and make that darker suddenly.
Go in and suddenly make that darker,
go in and pop that.
Oh, that's a big one that happens on the other end.
We're talking about getting darker.
Right here, the big thing is people come over
to that little wedge of light
on the far side of a three-quarter lighting,
and they'll go pop out this side lighter all of a sudden.
And then it'll feel very satisfying in that moment,
because contrast always feels satisfying.
That's the thing.
It feels satisfying in the moment, right?
We're sort of tantalized by it.
But then you come back later
and it breaks down the global light effect.
It breaks down the continuity of surface,
unless it's a shimmery highlight.
There are exceptions.
And that can be the other side of it,
the thing that can be very frustrating.
And so what I would do here is I would,
if I wanted to make this lighter
because of a specular highlight
or lighter diffuse reflection or form light,
I would first start right here, mix and match that.
I would basically begin in an area
where the tone is essentially the same
as I want it in my painting right now,
meaning I want this to be the same,
but I want this lighter.
So I start here, I mix and match,
and then I turn my way
with a little bit of refined linseed oil
towards that lighter area,
adding a little bit of white paint,
a little bit more cad orange, alizarin crimson,
depending on the results here,
and I get a little bit lighter
so that when I paint that lighter,
it's integrated, it's continuous,
it's attached to the last correct area of the painting,
and it's based on mixtures that were mixed and matched
to what's there first so that the change isn't so big
that it heralds in the need for a complete repainting.
So that is how you get continuous gradations
from the outset in your first form pass
and then later on when you correct.
And you can take this
and you can apply it to any number of ways of working.
Again, you can use that couch method in your initial lay-in,
and for anyone, painting in any method
can go back and apply this same mentality
when they go back and correct in subsequent layers.
So I hope this was useful,
and I hope you can take some of these ideas
and put them into your own paintings
and kind of solve that choppy look
that we all end up with sometimes,
particularly after we revise in subsequent layers.
Now, if you like this video
and you wanna support this channel,
make sure you subscribe, hit the like button,
and you can check out longer tutorials,
like countless tutorials on patreon.com slash scottwedell.
$12 a month, cancel anytime.
You can go to my website, scottwedellfineart.com
and check out my downloadable tutorials.
No subscription.
You buy them, you download them, they're yours.
If you have any trouble with the downloads,
you email me to my website,
and I can send you streaming links that do not expire.
Those videos are yours to keep.
And if you wanna study with me online, one-on-one,
and work on your own projects,
check out my online mentoring program.
All those links are in the description down below.
I'll see you in the next video.