
Master Oil Painting Portraits: Essential Blocking Techniques
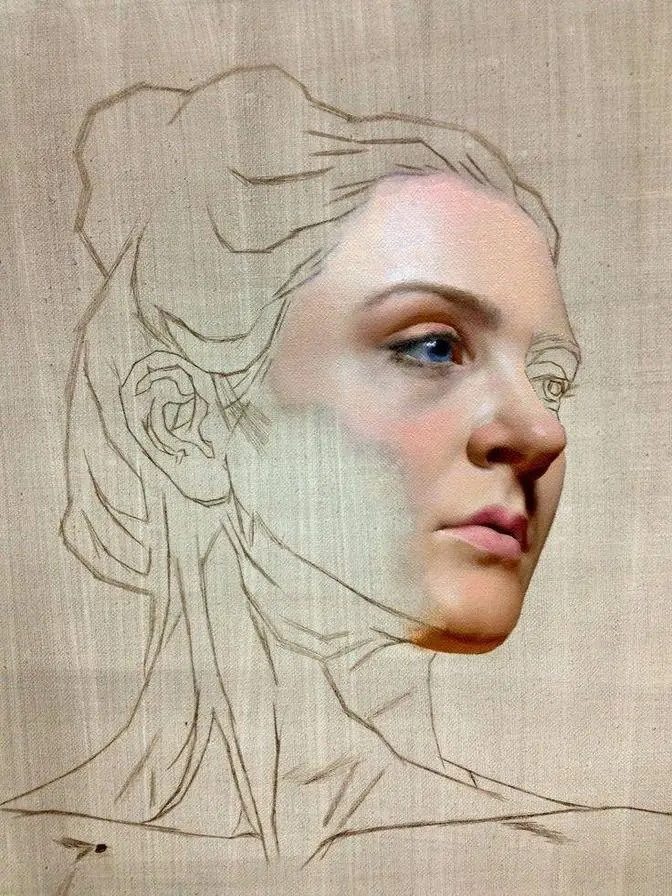
1 Video View·Mar 12, 2026
I hope you already have the reference printed or prepared on your screens.
Today we are going to practice something a bit more difficult,
because as you can see on the reference, so let's have a look, there are not so many
shadows in the face. What we perceive as darks are mostly
the local color, so the beard and the hair, they are just local color, so the values,
they don't represent the shadows, only in the neck, but we will not touch the neck probably today,
so we will block things mostly using the, yeah, we will work in the face and in the head.
So when you have to paint, when your subject is lit with such light like today, when there are
not so many shadows, you have to be more precise with the drawing, so we will use a line and we
will use change of values in the lines. So before it was easier somehow, because we had strong
shadows and halftones, so we've been shifting from shadows to halftones, like building the form.
Now we have to build the form, to create three-dimensional illusion of the form
using halftones in the lines. I hope it is clear, so let's begin.
And by the way, before we start, let's just talk about the reference here.
So you see like the plane to the left, the planes on the left of the head, they are darker,
planes on the center, they are slightly lighter, and the planes which are facing us in this case,
because we are just situated just below the light source, so the planes which are facing the light,
they are lightest. And also there is certain symmetry, the center line and the parallel lines
of the construction of the head. We can clearly see how these planes of the head structure can
be dissected into halves, which are going to be totally symmetrical. Here we can see the skull
with the same tilt, under the same light. And we can also notice that some crucial corners of the
head, of the planes of the head, they correspond with the bone structure in the skull. Let me show
you an example. By the way, I highly recommend to have a skull replica. It can be big, it can be
small, it doesn't really matter. So these corners here, these two bony corners, they are extremely
important. You can see them on the reference. It is where the cheekbone structure is turning over.
So you can look for these corners on your models, and also these two corners, and here two corners
slightly higher, they are also, if you draw the line between them, they will be parallel to each
other, and they will be perpendicular to the center line. So you see, for me, not even the
corners, normally I think about this turning of the bone here, and a clear definition of the corners,
we can say it is here. So this is, I think it's most important for the portraiture to see these
corners all the time. I also have this, the planes of the head, and it is slightly more sophisticated
than what I was using for the rendering, but also we can see the nose, which is like a wedge
shape. You see, this side now is most perpendicular to the light, so this is slightly darker, and this
is in the shadow. And here, again, this corner corresponds to that bone structure of the skull.
So we will look for such, we will look for such landmarks of the face, and we will
we will use them in our construction. So, raw umber with the ivory black mixture,
with a bit of gulkit light, so I will just use a bit of gulkit light mixed with
mineral spirits. If you don't have gulkit, just use mineral spirits, it is totally fine.
The guy's head, as usual, top of the head quickly here, the bottom of the beard is quickly there.
So, again, if we draw the center line, it is going to be something like that,
somewhere here. If we draw the line between the eye sockets, between the corners of the eye
sockets, it will be somewhere here, most likely. So first, we need to quickly outline
the silhouette of the head, and we are trying to be as accurate as possible, but
we shall keep in mind that we are going to lose the drawing anyways, so only crucial part,
only important part. So, you see, I am immediately starting to look for this
structure, and I am not using curves, I am using straight lines, and I am using
corners, because corners are going to, you see, again, on the right, or maybe we just go here,
in the zygomatic arch, in the eye socket, the corners are showing the changes of the planes.
So, let's say, this corner here will have corresponding bone structure there.
This corner and, let's say, this corner here, they will have also symmetrical counterparts
on opposite side. We've been talking about it last week, but today we go deeper into it,
and we will also talk about the edges today. So, you see, we are increasing the difficulty level
with each lesson. Yeah, by the way, if you are painting also like bigger size, like I do today,
I'm working on 12 by 16 inches. If you work the same way,
we will continue this painting next week. So, I will explain what we have to do in order to
prepare for the second application, because before we start painting from live, and before
we will start doing a la primus from live, we want to test and to try different ways of
paint application and building up the painting. So, again, like quickly with darts,
I'm just thinking about the big shape of the beard, and the mustache here is just helping me
to find the boundaries of this shape. We can use the dark value of the muzzle of the mouth and of
the beard just as a foundation for our skin tones, for our halftones in the lights. So, the idea is
we are going to paint this, you see, what is inside here, and we are using the darks
of the local color, we are using them as just a separation and just solid foundation for illusion,
because it's very difficult to paint light over light or light over mid-tone, but if we have
something dark just next to it, it will be easier for us to paint the halftones. You see a lot of
similarities to charcoal and graphite sketching with this. Yeah, exactly. So, we're working in the
same way, and today I will show you how to work using, you know, just masses of
color and value, and we will start with very blurry, let's say, application first, some sort of,
you know, just like the head is going to emerge out of the void here. So, again, I'm thinking about
this, about this line here, and I'm thinking about, already I'm thinking about, let's say, the planes
of the forehead exactly the same way as we've seen on the slide how planes of the head are different,
in value. So, I'm quickly blocking in this. So, for the beard and the chin and
everything, you know, in the lower parts of the head, bearded men are easier to paint,
because we can just think about the beard as the box. So, let's say, we can just
paint it. Yeah, let's just use this idea of the box here, like that, and now with the hair and the
beard, I'm just refining the shape of the lights quickly, and this is really helpful, because
we can, again, the same way as before, we can just use darks to create the boundaries for our
lights, and we'll start working inside of the light family of lighters.
This reminds me of how forensic artists will start with a skull, and they're mapping the
pinpoints for the highest and lowest features of the face when they're doing reconstructions.
Yes, it makes a lot of sense, and the same when you do sculpture, you also need to find
the most extreme parts somehow first. So, I'm squinting my eyes, and I'm just,
yeah, I'm just scrambling the darks into the canvas.
If I want to get rid of these construction lines, I can just quickly add a bit of mineral spirits,
and we can, so you see, we can use solvent for, just to erase things a bit.
So, this, let's say it is initial drawing, quick blocking of the head. So, what is next? Next,
we need to find actually this, the placement and the design of the nose, which is going outside.
So, it is more like a wedge. I've been talking about it a lot during critiques with the feedback
students, that it is very important to simplify the nose in at least our understanding, our
vision of it, because it will help us to see where we should place the planes of it. And,
you see, with a paper towel, I can just, I can just adjust the shape. Okay, so, we have this.
Looks very basic. So, what do I do next? I'm just smudging it a bit,
because I don't want the edges to be too sharp.
And, you see, I just want to, it is some sort of underpainting now, the base,
the base of the head here. Since there are no shadows in the, in the face, I don't really
need to, to look for, for core shadow or for shadow lines. So, for me, it's mostly
like just initial stain, initial. And, even at this stage, if you're,
to like self-checking your construction, do you find it helpful to use like the,
just hold a brush out to check your lines? Yeah, exactly. But, yeah, not even at this stage,
now it's more like I am preparing the base. So, again, as I, as I said before, we don't have to be
extremely correct at this stage. Just, just something, just a bit closer to, to what we see.
Just to have, to have something to start working on top of it. So, now, with, with a paper towel,
you see, I'm just smudging the rubber and I'm trying to, yeah, even here, I'm trying to, just
to sculpt the, the changes of the planes, like three-dimensional structure, even before I start
painting. Like here, the temple area can be, can be darker. And here, in this area, it's quite
unorthodox way of starting the painting, because normally we want, we want to create precise
drawing first, but you see what, what I'm doing here? I'm just creating some sort of the ghost
image of, of the head here, because we don't want to work all the time with the same approach.
Such, such application, when, when you just make the head appear out of nothing, can also
be, yeah, can also look like quite artistic.