
How to SIMPLIFY Oil Portrait Painting for Beginners?
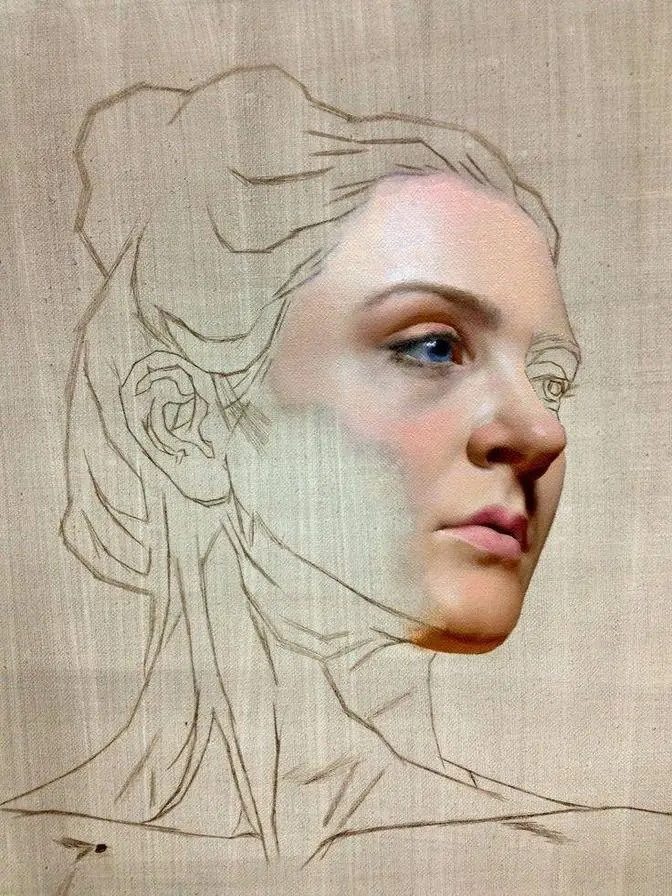
1 Video View·Mar 10, 2026
Portrait painting in oil can feel overwhelming.
There is so much to think about.
Drawing, likeness, composition, tonal structure, values, mixing, skin tones, textures.
It's easy to get stuck and lose confidence.
The key is to simplify the process.
Instead of trying to solve everything at once, I break the process down to three simple steps.
This way we can focus on one challenge at a time, making confident decisions along the way.
First, the blocking.
This is where we establish the composition, big shapes and structure.
No details yet, just setting the foundation.
Next, rendering.
This is about refining form, building depth and controlling edges.
We bring the portrait to life here.
Finally, concluding stage.
This is where we make final adjustments, add details and decide when to stop.
The first stage is the blocking, where our main priorities are drawing, likeness,
composition and value relationships.
At this point, we focus on the overall tonal structure rather than color mixing or refining form.
The goal is to identify and block in the essential big shapes using an approximate shadow mixture.
To simplify this process, squint your eyes while looking at the reference or model.
This helps in recognizing the most important shapes.
As shown in this sketch, I use a generic shadow mixture to establish the foundation.
Typically, this stage takes about the first half hour of a three-hour session,
though it can take longer.
I recommend working slowly and deliberately.
If you feel more comfortable, start with charcoal or pencil before transitioning to paint.
This approach is completely fine and can make the process easier.
To help with accuracy, I printed my reference at the exact same size as my painting.
This allows me to use a simplified side size method,
where vertical and horizontal guidelines help with placement.
Since the sizes match, I can also use my brush or another tool to measure widths and angles quickly.
Additionally, rapidly shifting my gaze between the reference and the painting
helps with comparison, almost like a stereoscopic effect.
There are various techniques for achieving better proportions,
which are particularly useful when likeness is a priority.
In some cases, strict accuracy is not necessary.
Sometimes, focusing on painterly qualities is more beneficial for learning or just for having fun.
I used softer flat brushes to establish transitions and locate core shadows.
Shadows should not have sharp edges at this stage,
as I soften them and blend the initial mixture into the canvas.
This also helps the surface dry faster, preparing it for the next layer of paint.
At this stage, it is best to set aside concerns about color and form.
Instead, concentrate on drawing, placement and composition,
while ensuring the surface is ready for the next stage,
which may require adjusting the paint application for faster drying.
I avoid using whites or opaque light pigments,
making the application similar to working with dry media like charcoal.
This approach allows me to erase or adjust the paint without creating a mess,
while also preserving the transparency of the shadows,
an essential factor for the next stages of the painting.
I believe it is important to solve problems step by step,
gradually refining the work while always considering what comes next.
At the end of stage 1, I recommend evaluating the piece and deciding on the next steps.
If the drawing and composition are not solid enough,
no amount of detail will make it work,
so there is no point in investing time and effort prematurely.
It is always better to refine the foundation before committing to the rest of the painting.
If the piece is developing well, it is time to transition to stage 2.
In this case, I leave the lights in the skin and shirt untouched,
as the canvas tone is already close in value.
Instead, I block in the background, hair and costume
to bring the tonal structure closer to the reference.
The final steps of stage 1 involve marking the darkest shadows and indicating cast shadows,
expanding the value range of the piece.
At this point, I also decide which dark is going to be the darkest
and which edge is going to be the sharpest.
Now that the value structure is established
and there are no major drawing or construction issues,
I can move on to stage 2.
This shift in focus brings attention to modeling the form,
mixing skin tones and rendering the smaller planes of the head.
It is important to note that the transition between stages is not a strict separation,
but rather a shift in priorities.
This is why it is crucial to resolve all issues from the previous stage.
Ensuring that our decisions are solid allows for a more productive workflow
and helps minimize stress.
Here, I begin rendering the form by working on the hair and suit,
aiming to softly integrate the head into the background.
I keep in mind that as painting progresses,
I will increase the paint thickness and add more detail
near the focal point, the area around the eyes.
Stage 2 is dedicated to rendering the form
and is typically the longest of the three stages.
The primary goal at this point is to bring the painting close to a finished look
without relying on fine details or additional textures.
Instead, the emphasis is on refining the overall structure
and ensuring the forms read clearly before adding finer details.
Apart from mixing colors, there are two key priorities in this stage.
The first is capturing the different planes of the head
by carefully adjusting values and colors
to create a sense of volume and three-dimensionality.
The second is refining the drawing by making subtle corrections
to smaller shapes as the painting develops.
This stage requires patience and careful observation
as it bridges the initial blocking with the final refinements.
By taking the time to model the form properly
and resolve any lingering issues,
the painting will be well prepared for the final stage,
where details and textures can be introduced with confidence.
I like to think of this method as similar to looking through a camera viewfinder
and gradually adjusting the focus.
At first, everything appears softly and blurry,
capturing just the overall structure and major tonal relationships.
As the process continues, the image becomes sharper and more defined,
revealing more information with each refinement.
Even in its early blurred state,
the painting remains true to my original intention.
It represents what I aim to depict, just with fewer details.
This approach allows me to build the image gradually,
ensuring that the foundation is solid
before committing to smaller shapes and textures.
By working in this way, I maintain control over the composition
and avoid unnecessary corrections later in the process.
As I approach the end of the second stage,
I begin introducing local color into specific areas of the painting.
This includes adding subtle reds to the cheeks,
defining the natural hue of the eyes,
and emphasizing the most noticeable temperature shifts across the face.
These adjustments help enrich the skin tones,
preventing the colors from feeling flat or monotonous.
By gradually layering these variations,
I create a more lifelike and dynamic impression of the subject.
At this point, I also refine the modeling of key facial features,
focusing on the eyes, nose, and cheeks.
These areas play a crucial role in capturing the likeness and expression,
so I take the time to carefully adjust values, edges, and transitions.
Throughout the process, I continuously step back to assess the painting as a whole,
identifying any areas that still need further refinement.
By fine-tuning these elements,
I ensure that the painting is well-structured and ready for the final stage.
Now that the drawing, likeness, and composition are solid,
and the three-dimensional form is established,
I can move on to adding the details.
The first step is to enhance the three-dimensional effect of the head
by introducing the lightest light and the highlights,
which helps bring more depth and completeness to the piece.
Next, I focus on adding the darkest darks,
extending the value range of the painting.
This is done on top of the foundation laid in the previous stages.
With the major drawing and structural issues already resolved,
I can paint more freely,
focusing on the individual brushstrokes and textures.
By layering paint and adding thicker strokes in certain areas,
I create richer textures and a more dynamic surface,
giving the painting a sense of movement and life.
I also aim to apply some strokes deliberately,
as a few of them will remain visible in the final result.
These intentional brushstrokes contribute to the effortless look of the portrait,
adding a sense of spontaneity and naturalness to the overall composition.
In the final minutes of the process,
I add the highlights in the eyes, hair, and skin,
using a thick mixture of opaque paint to enhance the luminosity of the skin.
Switching to a small round brush,
I apply lighter accents to the mustache and beard,
with a color complementary to the brown-orange tones I used in the previous stage.
This helps the facial hair look realistic while maintaining a painterly and loose quality,
preventing it from competing with the focal point.
The last area to receive paint is the light shapes of the shirt.
I use a cool, almost greenish mixture to contrast with the warm tones of the skin,
which enhances the warmth without introducing unnecessary reds and oranges.
This keeps the entire piece balanced.
The entire process took 3 hours, and the painting measures 9 by 12 inches.
I hope this video was helpful, and I wish you happy painting.