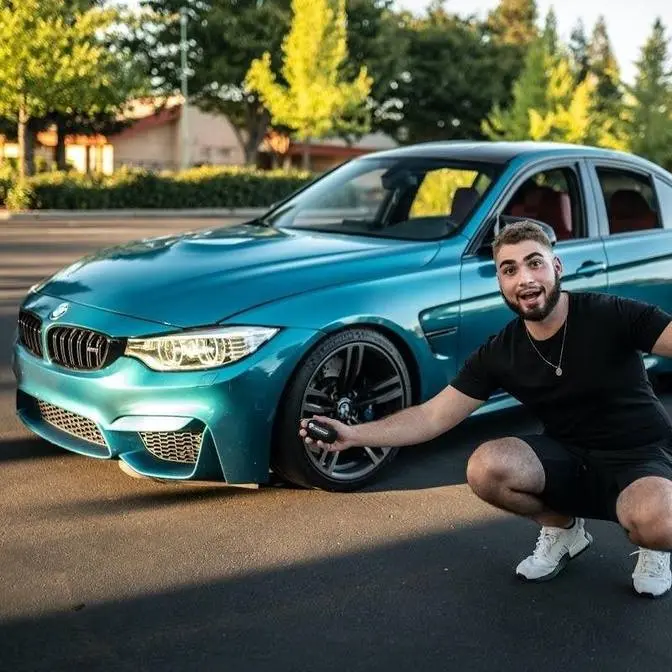
So sorry for not uploading in months, I've been trying to find a build worthy enough to start a new project on. Or at least make a jam packed video because didn't want to make a video just talking haha. The plans I have for this might top my last 2 Bimmer Invasion builds!! Im so happy with this purchase that I have already ordered a bunch of parts for the next part of this project! Smash that like button for me if you guys wanna see more content and to see where I'm taking this build. Lets just say its gonna require deep pockets like the f81 m3 build haha.
Guys, not that we need another build,
the Beamer Invasion's coming up in about 10 months.
And we're already preparing for it.
So this year, I wanted to build something special
for Beamer Invasion.
You guys know the last two years,
we built an E90 1M3, built an F81 M3,
which has been great, I love it,
and I was thinking about what we're gonna be doing
this year, I think a wagon is awesome,
but we need to try something new.
So this right here, I was looking for a 135
to start our base 1M build,
and we're gonna one-up the 1M build,
which I don't wanna say just yet,
because every time I say something,
someone ends up copying me before Beamer Invasion.
So we're gonna be starting a 1M build on this channel,
but we're gonna be taking it the extra mile
and completely converting it to something else
that's very special.
But that being said, there is a one series
on Copart right now that's gonna help us
kinda get a kickstart to this 1M project,
and I'll show you guys why.
So this one in particular looks like your typical 135
for the most part, but then you start paying attention,
and yeah, that is not a one series 135 fender.
That is a 1M fender.
These are actual 1M mirrors on here as well.
These are 1M side skirts, 1M quarter panels
already welded and bonded to the car.
We have the 1M rear bumper already installed,
the exhaust already done.
This thing's pretty much fully dialed in.
It is in a front end accident,
so the 1M bumper is destroyed,
and this section over here is destroyed as well.
This example actually only has 54,000 miles,
and it's currently, people know what this thing is, guys.
People currently know what it is.
I have no budget on this,
because Fever Invasion needs to have something special.
So yeah, do you have a budget in mind?
I have no idea how much to go on this.
We're gonna bid for the win.
I think, yeah, that's probably the way to go about it.
So about four minutes, imagine we missed it.
No, bro, holy crap.
So we're about four minutes away, guys.
Let's just go ahead and close this out
and just prioritize this.
It's our car.
This guy in Idaho wants it, but it's our car, bro.
This doesn't make any sense for a normal 135.
He knows what's on this car.
It is so much money.
Stop, bro!
Oh, there's only a California now!
No way!
I think people have 10K in mind.
Yeah.
It's worth 10K to me,
because the amount of work
that's been put into this car already
is pretty substantial.
This is all I got from California now.
Who is this, bro?
Are we winning it?
Yes.
Says, I told you, 10K, bro.
They're thinking about it now.
They're thinking about it.
This is so much.
We're winning this much on a 135, bro.
Make it make sense, bro.
Why am I winning this much on a 135, bro?
Am I crazy, bro?
Let me have it!
Yes!
We're crazy, dude.
We just spent $12,000 after fees for a 135.
That's the price we can get an F8.
And we literally passed up on a F82 on fourth last week.
We did.
Red comp.
With a red interior manual.
And we passed on it.
And I bought, we just got a 135.
Well, we're committed now.
We're committed.
I'll come back to you as we actually get this car.
Hey, guys.
Finally, it's been two months,
but I actually have a video you guys probably want to watch.
The past couple of weeks,
I've been working on cars that are non-BMWs,
and I honestly did not want to upload it
just because I know a lot of you guys
are waiting for some BMW content.
This right here is a new project
that I want to do for this year
and BMW Invasion of this year.
So say hello to my new-to-me BMW 1M.
Now, for those of you guys who watch Thick Whips,
this does kind of look like his car
before we actually got it wrapped.
Same color and everything with the beautiful 1M look.
What's crazy is that I picked this thing up
from Copart for $10,000 with only 53,000 miles.
I purchased a BMW M Performance.
For those of you guys who follow me on Instagram,
you guys probably would have saw it,
that I was actually gonna start my Bimmer Invasion build
on that one and do the whole 1M kit on there.
But the other one, as you guys know,
was an N55, and the N54 is what the 1Ms actually came with.
And this one right here is as mint as one possibly gets
in terms of drivetrain with only 53,000 miles, guys.
As you guys can see over here,
there is a little bit of damage.
But let me go ahead and give you guys
the background on this car.
So this car started its life as a normal 2008 BMW 135i.
This car hasn't been really driven much
with only 53,000 miles on the clock,
and somebody else took on this project themselves
and turned it into a 1M clone.
They did the rear bumper on this car,
the rear exhaust, the carbon fiber diffuser,
the quarter panels, which unfortunately has some cracking,
the side skirts, the 1M mirrors with the 1M caps,
and the 1M housing, which is very expensive,
the 1M fenders, the 1M bumper, the 1M headlight brackets.
This thing currently has thousands of dollars put into it,
and we got this thing for an absolute steal
at only $10,000.
So now just kind of looking at a surface level, guys,
as you guys can see, it looks like we need a headlight,
a fender, a hood, a bumper.
I'm hoping there's no radiator support
or any frame damage that happened to this car.
It does look very minimal, so fingers crossed there.
It looks like the quarter panels
are gonna have to get redone,
but at least the base is there.
The bumper's lined up, the car is together,
the side skirt looking.
It looks like it's missing the rear bracket for that,
for that to mount properly.
But the exhaust work is done, the actual quad tip,
for those of you guys who don't know,
you need a few pieces to make this conversion happen,
plus the labor.
The carbon fiber diffuser, the rear bumper, like I said.
I already called the dealership, we ordered the part,
and it should be coming in later today.
So look at it from the front.
This thing already has the 1M air duct on this side.
Hopefully it's not cracked.
I guess we'll find out when we take off the bumper.
This side is destroyed.
We need a brand new 1M front bumper.
We need another 1M fender.
Thankfully, this 1M piece is probably reusable.
And then we need a regular 135 hood,
or we might actually get a 1M hood.
Let me know down below, guys,
if we should go with a 1M style hood,
because the regular hoods are the same as this.
Some people, like my boy Thick Whips,
actually installed an E92 M3 with a hump on there.
From factory, they just come with a normal 135 hood,
but the one with the hump looks so, so, so good.
It definitely brings that more of an M look to the car.
But let me know down below, guys,
if we should go with that route.
As far as the interior goes,
this thing's a pretty good shape,
but it is the vinyl interior.
It does have the navigation like the 1M.
Even though this is a pre-LCI car,
surprisingly, it has the LCI navigation unit.
Maybe this thing was honestly retrofitted,
which is pretty sick,
because as far as I know,
pre-LCI N54 cars only come with the flip-up screen.
This one has the CIC screen, which is pretty sick.
I love whoever they already committed on this build already,
because they made my life so much easier.
And this car is so sick.
And it has the M Performance pedals down there as well.
It has the P3 gauges, as you guys can see.
And like I said, guys,
it's in really, really, really good shape.
Now, something else you guys
would probably get super stoked about.
It actually came with some modifications.
So the first thing I can see right off the get-go
is these AFE intakes, which I absolutely love.
It has this strut brace there as well.
It does have a charge pipe and blow-up valve.
That sounds absolutely amazing.
Bro, this is crazy.
I'm hoping it has index 12s,
and I'm also hoping it has upgraded turbos.
It feels like it has upgraded turbos,
but I guess we're gonna have to find that out here
in a second.
It looks like it also has an upgraded intercooler,
and it's got some pretty nice Forgestars on there.
Let me know if we should keep these wheels on here
or go with a different wrap.
But in the meantime,
they do have the aggressive 1M fitment,
which looks really, really, really good,
wrapped around with some Michelin cup tires,
which are super sick.
BMW delivered,
and we have all the original 1M parts for this 1M build.
We have an OEM 1M front bumper, guys, from the dealership.
As you guys can see here with the BMW logo,
everything here is from the dealership.
As you guys can see,
this is gonna be absolutely amazing, an OEM build.
Honestly, haven't done anything like this ever,
using all original parts from dealer.
I typically like to do,
especially when doing the E91 and the F81 M3,
getting a donor car,
I am using original parts,
but they're all typically used.
On this car,
it is nearly impossible to find a 1M donor.
And if I ever got a 1M,
I'm rebuilding that.
I'm not actually gonna part it out ever,
even if the frame is cut in half.
So that being said,
my paint guy just literally pulled up,
as you guys saw,
I dropped my camera.
My paint guy literally pulled up,
because there's a few units down there,
and he looked at me,
he's like,
are you gonna put these panels on the car?
And I was like, yeah.
And he's like,
do not put them on until we get them painted.
So that being said,
let's go ahead,
remove all the broken panels on our car,
put all the stuff we can,
for example,
like the headlight,
the air ducts,
the fender grills,
all that kind of good stuff.
And then once these get painted,
we can slap them on the car,
and get it perfectly paint match.
And in terms of the hood,
we're just gonna find the exact same colored hood,
because I think that'll make life a whole lot easier.
Guys, look at the shame.
Brand new 1M parts are put on this car.
As you guys can see,
this guy did it proper.
He got the OEM fender liners,
OEM headlight brackets.
And unfortunately,
both these got toasted,
but we got the new parts right over there.
So we're chilling like a villain.
Oh guys,
this $10,000 investment's already paying off guys.
We got KWs,
and it looks like it has the Swift Springs,
as well as an add-on,
which looks super dope.
No wonder this thing performed so well,
like it handled so great.
And also back there guys,
it looks like we have a Dinan sway bar.
It's blue,
it's the dark blue.
Typically that's the Dinan one.
I'm honestly pretty hyped right now.
Again,
I spent a lot of money on this car,
and considering those quarter panels need to get redone,
sometimes I was kind of thinking,
did I do the right move?
But this coin is 53,000 miles.
One of the lowest mileage N54s I've ever seen.
And it's already halfway done.
So I think when we add our touch to it,
this thing's gonna be an absolute dream.
And just seeing that,
these are like $2,500, $3,000 cool overs right now,
$500 sway bar.
So I'm happy,
I'm happy.
Let's go ahead and remove the rest of this fender liner.
It looks like that's also original M3 in the back here.
We're gonna reuse the one in the back,
but the front one is completely toast.
So guys,
looks like only the front was damaged,
the front right,
not the front right rear.
And it looks like I ordered the wrong one.
So that's kind of unfortunate,
cause this is perfectly reusable.
I might try to see if I can return that one
and exchange it for another one.
We will see about that.
Meantime,
I was going to the trunk to start putting some parts
away in here until the stuff gets painted.
And if you guys look in here,
we got a new mod.
This is pretty sick.
So for those of you guys who've ever seen this before,
I'm assuming that's just more stability,
but that is pretty sick.
I just love seeing goodies on a car,
especially when it wasn't factored into the price.
So without further ado,
I'm gonna go ahead and put everything back in the trunk.
I might put on the headlight for now,
but everything else is going back in the trunk.
So just like that guys,
I got the bumper just kind of on there.
Cause I don't really know where else to put it
without damaging it.
The oil cooler is significantly damaged.
I'm not sure if you guys can see that,
but yeah,
I mean,
it's holding oil,
but it's so crooked that I'm sure I'm going to line up
everything like OEM.
Thankfully,
this piece was not damaged.
The radiator support is not damaged.
This is a pretty easy repair.
We have all the parts.
Once everything gets painted,
we can put everything back together.
We just need now an oil cooler and a front fender liner,
and then a hood.
And this thing can get fully reassembled.
And then obviously you have to deal with the quarter panels,
but I have some other plans for this engine bay.
This engine bay is modified,
but not in the way that I like to do it.
So we're going to do it a little bit differently.
We'll see if we can get those mods in today's video.
But meantime,
I'll check back to you guys.
The paint guy gives me an update on these panels.
And a few days later,
guys,
we got the bumper and the fender painted,
paint matched to the car,
OEM parts with beautiful paint.
I was going to wrap the car cause the car originally is
black,
but because it is going to be a super sick,
rare build,
because even though,
even though it's not a real 1M,
a 1M clone still goes for a lot of money.
I want to make sure that this build is as proper as we could
possibly do it.
So we did go ahead and paint the panels,
which means that these panels need time to cure.
So I'm probably not going to wrap these panels,
honestly,
even this year,
just because I want the paint to adhere to the bumper as
much as possible.
So yeah,
the 1M fender is fully paint matched.
We painted the panels off the car.
So everything,
including the jams of all the pieces are fully painted and
now they're ready to get thrown on the car.
So let's go ahead and get the 1M pulled around and then
let's go ahead and start putting on the fender and then the
front bumper.
Please do not get in my way.
You can not drive in my lane.
Tires is burning the paint.
You don't have nothing to say.
This is how legends are made.
I know I got what it takes and I'm not popping the brakes
and I'm not popping the brakes.
I'm too competitive.
I like the narrative that I'm the best in the league.
Who you comparing with?
That is infinitive.
Top of the throne and it's me.
How you move is up on the speed.
Guys,
these are absolutely glistening in the sun right now.
I don't want to get on the bumper just yet because we do
have a few things we have to get repaired.
We do have to put on the headlight.
Unfortunately,
it looks like he swapped out halogen headlights on a xenon
car, which makes no sense,
honestly,
especially when doing a 1M build.
So for those of you guys,
you know,
the previous owner of that car,
please let me know because I'm going to be like,
what's going on there?
Cause he did an absolutely amazing job with everything else
on this car,
including the bolt-ons.
I'm just not understanding the situation with the headlights.
So without further ado,
let's go ahead and get the 1M up and go ahead and get that
wheel off and get the fender on.
♪ I've been making moves and it ain't hard to tell. ♪
♪ Acting how I did it, I don't kiss and tell. ♪
♪ Any day and I'mma wish him well. ♪
♪ Got it out the mud, but I never dwelled off. ♪
♪ She ran away, I don't want her back. ♪
♪ I'mma call her one time and no phone text. ♪
♪ Cause she try to waste my time, it's a f***ing rap. ♪
♪ Shawty moving like a clown and a maniac. ♪
♪ Where my d*** at? Where my d*** at? ♪
♪ I think she trying to take me home, then I feel her peck. ♪
♪ I look shawty through the chief and I just need a glass. ♪
♪ I'm just trying to keep a balance like my Zodiac. ♪
♪ All the old friends, trying to make friends. ♪
So now that we pretty much got the gap situated guys,
the fender looks absolutely amazing on this car.
The next thing I had to knock out is going to go ahead and be this oil cooler.
And I could probably try to bend this oil cooler up, it's not leaking.
I know some people can hammer this straight,
but at the end of the day guys, this is a pretty bad bend.
And yeah, at the end of the day, this is going to be a 1M conversion.
I'm not rebuilding a 128 right here,
or a normal 135 with 200,000 miles.
This is a 50,000 mile 1M clone.
So here at Natty Auto Parts, we actually have this part in stock thankfully,
which is literally the entire conversion with the air duct.
But we don't need this air duct because we're going with a 1M bumper.
But this bracket, we're probably going to end up using this oil cooler.
It also comes with this little piece here that allows us to put it right in that hole.
I don't know if you guys can see that little hole right here,
but this hole should have this piece in it,
but it normally breaks in an accident.
Normally here at Natty Auto Parts,
we actually keep these pieces in case you're swapping yours
or you're converting your car, this piece is required.
So thankfully, we did have this taped up to this.
We are ready to use it.
So without further ado, guys, I'm going to go ahead and just get this area prepped up
because as soon as I take out that line, oil is going to be coming down
and I'm going to swap out this oil cooler as fast as we can.
So we went ahead and removed the 135 one that came with the new intercooler.
And here is the 1M one.
You guys can see it's much bigger OEM part number.
Let's go and put this on the new intercooler and then swap out the whole cooler assembly.
And just like that, guys, we have the air duct mounted to the car,
brand new cooler with the bracket, professionally done OEM.
So we got the headlight mounted on the OEM 1M headlight bracket.
As you guys can see, that's the part number there.
So let's go ahead and put on that headlight onto here
so we can go ahead and mount our front bumper.
Check out that fitment, guys.
That looks amazing.
This headlight over here as well looks terrible.
So it needs to get polished.
But anyways, now it's time to put on the front bumper that we just got freshly painted.
We do need to put in the lower grill right here and the two upper grills.
And then this one doesn't have the washer system.
I just went ahead and deleted it and actually deleted it from the car as well.
Basically, just unplug the connector for the front washer system.
So then we don't have to deal with that because it just literally ruins
the whole front and I don't like the way it looks whatsoever.
So this is what we got right here.
These are all the original things we need for the front bumper.
So let's go ahead and get it mounted up.
I do want the original chrome kidney grills,
so we might have to try to locate that.
But for now, these will work.
So the power of editing, you guys will see this thing fully complete.
And just like that, guys, it looks amazing.
Let's go ahead and get it on our 1M clone.
And now that it's fully assembled, guys, it's officially time
to do the oil change, which probably should have done that first.
But I noticed when I replaced the oil cooler,
there was literally barely any oil that came out of that cooler.
And I just realized also we have an oil light
and I did some shenanigans stuff with this car, too.
So fingers crossed we didn't damage our 50,000 mile N54
because that would absolutely suck.
So let's go ahead and drain the oil, do a fresh oil change
and hope to God there is no metal flakes.
So far, looking pretty good.
The oil actually looks like it's been recently changed,
but let's see how much oil was in this car because it's not
not looking pretty.
So, guys, as you can see from the oil, this container was really dirty,
but the oil was very, very, very clean.
Obviously, I can't tell if there's any metal shards in here
because of how dirty this container was.
But the oil was seeping out really clean, which was super nice.
It looks like it was freshly changed.
Let's go and take out the filter, open that up and make sure we didn't
cause any damage.
Well, as a first time, I didn't get any of the rags around the filter dirty.
You already know, guys, this thing was low on oil.
I ain't going to lie to you guys.
I just took off both these gaskets and the one up here just literally cracked.
It comes to show you guys that not everyone always changes
the filter in the gaskets.
Make sure you guys do.
That is a very important step or your car will fog.
The E9X platform, if you don't have the proper o-rings and proper filter,
it will literally misfire and actually not even run right,
which is kind of crazy.
I've gotten check engine lights just from not putting in the right filter,
which is crazy.
So now we got the new filter, the new o-rings on here looking absolutely amazing.
Let's go ahead and clean up the rest of this, put this in here
and then check out our old filter.
You guys are probably wondering the condition of this 2008 335
and check this out, guys.
I don't know if you guys ever seen anything more silver.
Looks amazing.
I'm super happy that whoever that started this project
started on such a low mileage 135i because this thing only has 50,000
original miles.
It literally drives like it too.
And seeing that silver in there, just kind of like re...
How do you say that words? Like reconfirms?
I don't know what it is, but there's a term for that.
That I made the right decision spending as much money as I spent on this car
because a lot of people in the comments of the post I made on Instagram
were like, bro, you overpaid for this car.
But I don't think so.
I think it's worth every penny of it.
And so far, guys, we got this thing pretty much fully assembled
and literally a day.
Shout out to my paint guy for knocking this out super quick.
Now, the moment that most of you guys are waiting for is to see this filter.
So let's go ahead and just rip open this filter and see if there's anything weird
in there. All right.
So I think I did it right this time.
So if we go ahead and look through here, guys,
that looks amazing.
Oh, yeah. Definitely worth getting my hands dirty.
Looks great, guys.
And just like that, guys, that is how you build a 1M clone.
And what, like two days, one day?
We're killing it with these one or two day projects.
This thing is fully assembled.
We're looking for a hood right now.
We're looking for some LCI adaptive headlights, because honestly,
the pre-LCI's are kind of garbage and the LCI's look absolutely amazing.
Plus, the 1M, I believe, actually came with the LCI's.
No N54's come with LCI's.
But again, we're doing the 1M clone build.
So if you guys are excited to see the way this thing comes out.
Yes, we got the front end together, but this thing still needs so much more work.
I'm going to make a part two to this build.
But in the meantime, we got most of the car together.
And it's been a few days.
I need to get you guys a video.
Well, for you guys, it's been a few months.
I'm going to give you a little update on the E91.
That's it. That's it.
So much things happen behind the scenes.
I can't really show you guys.
But in the next episode, I do have something I've been working on on the side,
which is a truck project.
And then after that, I'm going to show you guys the E91,
which is getting done right now.
Second shot.
All the bodywork's been done to the car.
And now it just needs paint, which I'm super stoked about.
So literally, the time frame goes.
It's going to be the 1M, then the truck build, and then the E91 M3.
And then guys, we got a crazy Porsche, which I'll be showing you guys as well.
It's better than the Cayman S.
So stay tuned for that as well.
So without further ado, guys, I'm sorry for the late uploads,
but I'm getting back into it.
If you guys want updates on my day-to-day life,
make sure to follow my Instagram, linked right over here.
Without further ado, guys, love y'all so much.
Peace out.