
How Scotland Produces Millions of Liters of Whisky Each Year | Whisky Factory Process
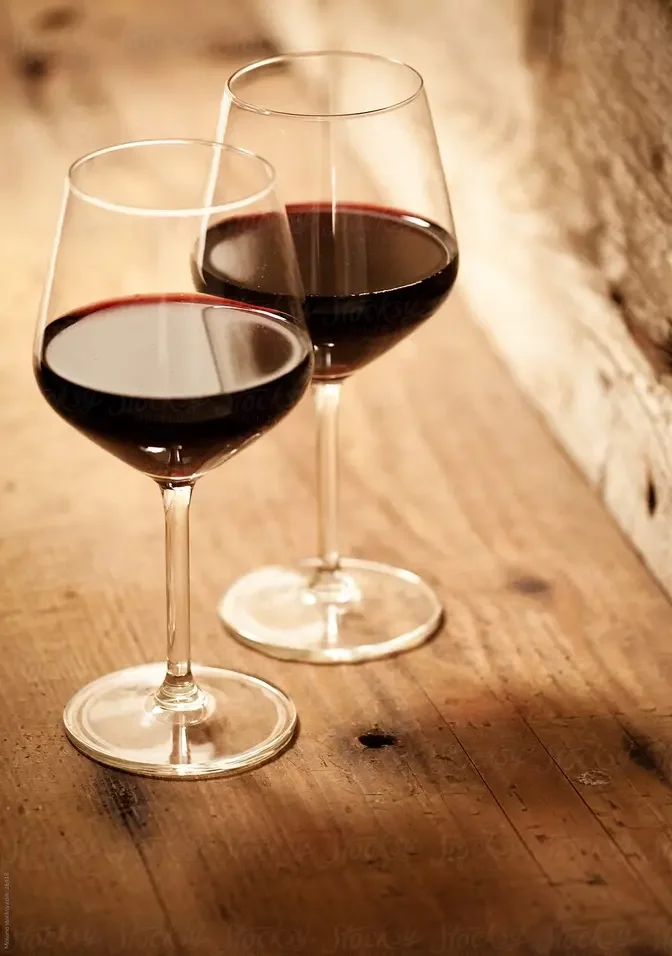
#wine #winetasting
Ever wondered how your favorite whisky is made? In this video, we take you inside a whisky factory to show you the entire process, from selecting the finest grains to distillation, aging in oak barrels, and finally, bottling. Learn the science, craftsmanship, and secrets behind whisky production that give each bottle its unique flavor and character.
Whether you’re a whisky enthusiast or just curious about how it’s made, this behind-the-scenes tour will give you a new appreciation for this timeless spirit. Don’t forget to like, subscribe, and hit the bell icon for more fascinating videos!
It all begins in the fields. From most whiskey, the star ingredient is barley,
but sometimes other grains like rye, corn, or wheat make an appearance. These crops are
carefully cultivated on farms, where farmers have to monitor everything, sunshine, rainfall,
temperature, because growing the perfect grain takes time and patience.
Barley is planted in the cooler months, and as it matures, the barley grains develop,
getting that perfect golden hue. But it's not just about pretty grains. It's about creating
the right balance of starch, enzymes, and sugars that are needed for fermentation.
Farmers use traditional knowledge and modern technology to track soil conditions,
weather patterns, and even genetics to ensure the highest quality crop.
Once the barley reaches peak ripeness, it's harvested using advanced machinery that ensures
efficiency while preserving grain integrity. Harvested grains are then carefully cleaned
to remove any unwanted debris before being transported to the distillery.
But before we dive into the distillery process, make sure to like and subscribe to our channel
to never miss out on any new food discovery tours. And by the way, what is your favorite way of
enjoying whiskey? Just pure, on ice, or maybe mixed with a splash of coke? Comment below the video,
I'm curious to know. Now that we have our carefully
grown and harvested barley, it's time to start the real transformation, beginning with malting.
This is where the barley grain is tricked into thinking it's about to grow into a plant, but then
we stop it right in its tracks. First, the barley gets a long soak in water for about two to three
days. This wakes up the grain and kickstarts germination, the natural process where the barley
starts converting its stored starches into sugars. Once soaked, the barley is spread out across
malting floors, where it's carefully turned every few hours to prevent the roots from tangling.
This part of the process can take up to five to seven days, and during this time,
the grain releases enzymes that are crucial for converting starch into fermentable sugars.
Of course, in large whiskey factories, this process is automated using huge rotating drums,
but traditional distilleries still do it the old school way.
Now comes the game changer, drying. To stop germination at just the right moment, the
malted barley is dried using hot air. Some distilleries use peat fires, which add a smoky
flavor to the whiskey. The more peat smoke, the smokier the whiskey. This is what gives scotch
whiskey that famous smoky character. Once dried, the barley is now officially called malted barley,
and it's stored until it's ready for the next step, mashing. Before we get to the alcohol
making, we need to extract all those precious sugars. The dried malted barley is ground down
into a rough flour called grist. Not too fine, not too coarse, just the right texture to allow
water to float through and pull out all the goodness. Next, the grist is mixed with hot
water in these enormous containers called mash tuns. Think of this like making a giant barley
tea. The hot water helps dissolve the sugars, creating a sweet liquid called wort. The wort
is drawn off in stages. The first wash uses the hottest water to extract the most sugars.
Then more water is added at lower temperatures to pull out every last bit of fermentable goodness.
The final result? A rich sugary liquid that looks a lot like unfermented beer.
We add yeast to our sugary liquid and let nature do its thing. The yeast feasts on the sugars,
creating alcohol and CO2 in a process called fermentation. Think of it as the yeast throwing
the wildest party ever. Fermentation typically lasts between 48 to 120 hours, depending on the
distillery style. The longer it ferments, the more complex the flavors that develop.
Some distilleries use wooden washbacks, which add a little extra character, while others prefer
stainless steel for consistency. During this process, the yeast converts sugars into alcohol,
bringing the liquid's alcohol content up to around 6 to 8 percent ABV. It's basically like
making beer at this stage, just without the hops. Once fermentation is complete, we're left with
something called wash, a beer-like liquid that smells slightly sweet, a little fruity, and even
a bit bready. But don't get too excited yet. It's not whiskey just yet. Now comes the heart of whiskey
making, distillation. Our fermented liquid, or wash, is transferred into these magnificent
copper pot stills, where it's heated to separate alcohol from water and unwanted impurities.
Distillation is all about precision. Alcohol boils at a lower temperature than water,
so as we heat the wash, the alcohol evaporates first, rising up into the swan neck of the still
before being cooled back down into liquid form. This is known as the spirit run.
Whiskey is typically distilled twice, first in the wash still, where the alcohol concentration
rises, and then again in the spirit still to refine and purify it even more. Some distilleries
even go for a third distillation to create an even smoother spirit. Not all alcohols are created
equal, though. The first part of the distillation, known as the four shots, is too harsh and volatile,
so it's discarded. The middle section, or the heart cut, is what we keep. This is the good
stuff that will become whiskey. The final part, the fence, is also removed, though some of it may
be recycled into the next batch. What we're left with is the new make spirit, a strong,
clear liquid that smells fruity and fiery. It's not quite whiskey yet, but it's getting there.
Next, we move on to the most crucial step, maturation. Time for patience. The whiskey is
now poured into oak barrels where it rests, matures, and absorbs all the deep, rich flavors
from the wood. This is where the real transformation happens. Different barrels mean different flavors.
American oak gives notes of vanilla and caramel, while European oak imparts spicier, fruitier tones.
Some whiskey even gets extra aging in sherry, port, or wine casks for added complexity.
Whiskey must age for at least three years by law, but many are matured for much longer.
As it rests, the liquid interacts with the wood, picking up rich flavors and a deep amber color.
And yes, some of it evaporates over time, what distilleries call the angel's share.
Master blenders carefully sample barrels over the years, deciding when the whiskey has reached
perfection. Once it's ready, it's time for the final step, bottling. Finally,
after years of patience, the whiskey is ready. It's filtered, bottled, and sent off to shelves
worldwide. And that, my friends, is how whiskey makes its way to your glass. And now the best
part, tasting. Whether you like it neat, on the rocks, or in a cocktail, there's no wrong way to
enjoy a great whiskey. And that's it for today's episode. If you enjoyed this behind-the-scenes
look, don't forget to hit that like button, subscribe to the channel, and ring the notification
bell so you don't miss out on more foodie adventures. And just in case you have missed some
of the older episodes, we have covered you. We have attached a special selection of past Fact
Review episodes to this video. So stay with us and enjoy more fascinating food discoveries here
with Fact Review. Thanks for watching and see you in the next episode. So imagine this, you're
sitting at lunch, about to take a spoonful of your hot mac and cheese that you just pulled out of the
Have you ever wondered where that delicious cheese that creates that crispy golden crust
came from? Before we get into all the savory details, make sure to hit that subscribe button
and ring the bell so you don't miss out on our behind-the-scenes tours of the most iconic foods.
Let's go over the basics. Cheese starts with milk, preferably from a cow,
but sometimes a goat, sheep, or even a buffalo, if you're feeling fancy. The milk is heated,
then rennet and starter cultures are added, which causes the milk to separate into curds and whey.
The type of cheese you end up with depends on several factors, like the type of milk,
the bacteria used, how long it's aged, and whether or not it's been smoked,
salted, or sprinkled with unicorn dust. Okay, not the unicorn dust part. Let's dive in and
explore how all these ingredients come together to create the cheese we know and love.
There are obviously a whole lot of different cheeses out there, but today,
let's look closer at the cheese that you need for a good grilled cheese sandwich or a pizza
that just melts perfectly in the oven. And it all starts with something pretty amazing,
happy cows. Yep, it's said that happy cows make the best milk, and some farmers are going the
extra mile to make sure their cows are really happy. And when I say happy, I don't just mean
giving them a nice cage to sit in and calling it a day. No, no, no, we're talking about the full
VIP treatment. Picture this, a cow out in the sun, chewing grass like it's got no worries in the
world. It's the life, right? These happy cows are free to roam and graze, which means they're
producing some of the freshest, creamiest milk possible. Now, when it's time to get that milk,
it's all about technique and care. Some farms still do it the old-fashioned way, by hand,
if you can believe it. But most farms now use milking machines that gently extract the milk
without stressing the cows. Once that milk is fresh and ready, it's time for a quick ride to
the dairy factory, where milk gets its glow up and transforms into something we all know and love,
cheese. First things first, before we can make cheese, we need to make sure that milk is top
quality. So, milk is tested to make sure it's fresh and free of any unwanted bacteria. Once
everything's approved, we can move on to the next step. Next up, pasteurization. Now, this is a big
word, but it's really just a fancy way of saying, let's heat the milk to kill any bad bacteria,
but not so hot that we ruin the good stuff. The milk is heated to about 161 degrees Fahrenheit
for around 15 seconds, killing off any harmful bacteria without losing the flavor and nutrients
we want. But we're not done yet. We've got some special ingredients to add. To turn our milk into
cheese, we need to add two key ingredients, rennet and starter cultures. The rennet is a special
enzyme that helps the milk curdle. Think of it like a magic spell that turns liquid milk into
solid curds. And the starter cultures are responsible for giving the cheese its flavor.
These are like the little yeasty helpers that say, all right, it's time to start working.
As the rennet does its thing, the milk begins to curdle and separate into curds and whey.
And just like that, the liquid milk we started with is starting to look more like cheese.
Now that the milk's turned into curds, it's time to cut them, but we're not cutting them
willy-nilly. Oh no, we've got precision here. The curds are sliced into small uniform pieces,
which will help them release the remaining liquid, the whey, and set the stage for that delicious,
creamy texture we love. If you've ever seen a giant block of cheese,
you can thank this step for that. Next, it's time to cook those curds and give them a gentle stir.
The next step is all about getting the perfect texture. The curds are heated up just right to
help them firm up and become, well, cheese-like. This is where that smooth, creamy texture starts
to come together. It's a delicate balance. Too hot, and you get dry cheese. Too cool,
and you're left with a soupy mess. Now it's time for the curds to take center stage,
and the whey, well, it's gotta go. Whey is the liquid that's left after the curds have formed.
Some of it is used in other products, like protein powders, or even livestock feed,
but most of it is separated and drained away. So long, whey. You had a good run.
At this point, the curds are getting pretty solid, so they're gently pressed into molds
to remove any leftover whey. And voila, what was once liquid milk is now starting to look
a lot more like the cheese we know and love. Ah, the final step before the cheese is ready to age,
salting. Salt does two important things. It adds flavor, and it helps preserve the cheese.
This is the step where the cheese gets its signature tang. Whether you're making cheddar,
mozzarella, or gouda, the amount of salt you add will determine how bold and delicious your
cheese will be. Too much salt, and it's like you accidentally grabbed the wrong shaker.
Too little, and well, it's just not the same. But when it's done, right? You've got that
flavor-packed bite that makes your mac and cheese pop.
Now, if you're making the cheese that we all like on our grilled sandwich,
we are getting into the big leagues. The semi-hard and hard cheeses.
These are the workhorses of the cheese world. Aging is like the cheese is climbing up the
career ladder, getting even better with time. The aging process can take weeks or even months,
depending on the type of cheese you're making. This is where all those complex flavors develop.
It's like a cheese getting its PhD in tastiness. Now, let's take cheddar. It's probably the most
famous cheese on the planet. The older cheddar gets, the sharper it becomes. A six-month cheddar,
smooth and mild. A five-year-old cheddar, sharp and full of character.
But now, over to the final step before your favorite cheese hits the grocery store shelf.
Once the cheese has matured, it's time to package it up and ship it out. And voila,
that's how milk from a happy cow becomes the cheese you love in your mac and cheese.
So, the next time you dive into a cheesy meal, just remember, it all started with a happy cow,
some science, and a little bit of patience. And now, you're a cheese-making expert too.
Did you know that over 800 million liters of cider are consumed each year in the UK alone?
That's enough cider to fill 320 Olympic-sized swimming pools. And here's another fun fact.
Cider has been around since ancient times, with records of apple-based drinks dating back to 55
BC. Ever wondered how this crisp, refreshing drink goes from orchard to bottle? Stick around,
because today, we're taking you behind the scenes to see exactly how cider is made in a factory,
step by step. Every great cider starts with the perfect apple, and that means planting the right
kind of tree. Cider makers carefully choose apple varieties based on flavor. Some are sweet,
some are tart, and some are downright bitter. These are known as cider apples,
and they're a whole different league from the ones you munch on. Once the trees are planted,
they'll need a few years to grow before they start producing fruit. Patience is key. Folks,
good cider takes time. Fast forward to spring, and these trees are putting on a show. Apple
blossoms bloom, and the orchard is buzzing, literally. Bees swoop in to pollinate the
flowers, transferring pollen from bloom to bloom. This step is crucial because no pollination
means no apples. Once the flowers are pollinated, tiny apples start to grow.
Over the summer, they soak up the sunshine and nutrients, swelling into those juicy fruits we
all love. It's like watching nature work its magic. Farmers play a big role here, too. They
prune the trees to make sure the apples get enough sunlight and airflow. Healthy trees
equals better apples equals tastier cider. It's science.
And here we are. The moment we've all been waiting for. Harvest season. Most cider apples
are picked in the fall, when they're perfectly ripe and packed with flavor. And believe me,
this is where the action happens. Some orchards still pick apples the old-fashioned way,
by hand. It's hard work, but it ensures only the best apples make the cut.
Look at these beauties. They're ready to shine. Then there's this, mechanized harvesting. This
machine gives the tree a gentle shake, and the apples fall into waiting bins. Efficient and fun
to watch. Once the apples are picked, they're sorted and graded. Not all the apples are destined
for cider greatness. Some might go to grocery stores, but the special cider apples, with their
bold, tannic flavors, are separated out for juicing. These cider apples might not look pretty,
but don't judge a book by its cover. Their intense flavors and high tannins are exactly what we need
for that rich, complex cider taste. Once sorted, the apples are loaded into trucks and sent off
to the cider house. From here, they'll be washed, crushed, and pressed to create the cider you know
and love. But before we continue with the factory production, I'd kindly ask you for a favor. We are
putting our utmost efforts into the videos for you, and your support is crucial for the growth
of our channel. We would love to create more fascinating food discovery videos for you,
so please like our videos and subscribe to our channel. It all starts here. Apples.
Tons and tons of apples. At this factory, we use a mix of sweet and tart apple varieties for
that perfect balance of flavor. First, they're given a nice bubble bath to wash away any dirt
or debris. We don't want anything but pure apple goodness. Once the apples are squeaky clean,
it's time for some tough love. Crushing. The apples are fed into this giant machine, which
chops them into tiny bits, creating what we call pomace. See that? It's like an apple smoothie.
This crushed mixture is loaded with juice and it smells amazing. Next up, squeezing out every last
drop of delicious apple juice. This hydraulic press does all the heavy lifting. The pomace is
placed between layers of mesh or cloth, stacked like a sandwich, and then squished under massive
pressure. Check this out. Pure, fresh apple juice. The pressing process is like getting the toothpaste
out of the tube, but on a mega scale. This juice is the foundation of cider, but it's not ready
to drink just yet. And what about the leftover pomace? Well, nothing goes to waste here. It's
often sent to farms to feed animals or turned into compost. Talk about sustainable cider making.
This is where the magic happens. Fermentation. The fresh apple juice is pumped into these massive
tanks, where it's transformed into cider. Let me explain how. Here's the star of the show. Yeast.
This little microorganism eats the natural sugars in the apple juice and turns them into alcohol.
Over the next few weeks, these tanks will be bubbling away as the yeast does its thing.
It's like a party for microbes. Can you hear that? That's the sound of fermentation,
a symphony of bubbles and fizz. The cider develops its flavor and character during this process.
Depending on the type of cider, the fermentation time can vary from a few weeks to even months for
the fancy stuff. Once fermentation is complete, it's time to refine the cider. Straight out of
the tank, the cider can still have some solids or leftover yeast floating around. That's where
filtering comes in. This machine removes any unwanted bits, leaving us with crystal clear cider.
Look at that. It's already looking delicious. Some ciders are kept simple and dry, while others
get a little something extra, like fruit flavors, spices, or even honey. The cider is blended with
these ingredients to create unique varieties. And let's not forget the bubbles. This is where the
sparkle comes in. Carbonation. Most ciders get a dose of CO2 to make them nice and fizzy.
But let's be real. What's cider without those tiny joyful bubbles? Before any cider leaves the
factory, it goes through rigorous quality checks. This is where the experts, also known as lucky
taste testers, make sure everything is just right. They're not just tasting for fun. They're checking
alcohol content, sweetness, acidity, and overall balance. Every batch has to meet strict standards
before it's ready to be bottled. Only the best makes it through. Hmm, yes, I think this batch
passes my professional taste test. Now it's time for the final step, bottling. This is where the
cider gets packaged up and ready to head to stores, bars, and your fridge. Check out this assembly line.
It's a blur of precision. Each bottle is filled, capped, and labeled in seconds. These machines are
like the superheroes of cider production. Once bottled, the cider is packed into boxes and shipped
off to its next destination. Whether it's heading to a local bar or across the country, it's ready
to bring joy to cider lovers everywhere. Before we wrap up, let us break down the three most popular
cider types for you. Number one, dry cider. It contains little to no residual sugar, offering a
crisp and tart flavor. It's ideal for those who prefer less sweetness and more of the natural
apple character. Number two, semi-dry or medium cider. This type of cider balances sweetness and
tartness. It's slightly sweeter than dry cider, but not overly sugary. Number three, sweet cider.
It has a higher sugar content, either from added sugar or by stopping fermentation early.
It's popular for its dessert-like quality and easy drinkability. Sometimes it's even infused with
other fruits like berries, cherries, pears, or mango. It adds a burst of fruity flavors. Yum!
What type of cider is your favorite? Do you like it sweet and fruity or rather elegantly crisp and
dry? Let me know in the comments below. And that's it for today, guys. From the orchard to the factory
and now to your glass, cider brings the crisp, refreshing taste of apples to life.
Whether you're sipping it straight or pairing it with a meal, you've got a drink that's a perfect
balance of tradition and technology. If you enjoyed this behind-the-scenes look, don't forget
to hit that like button, subscribe to the channel, and ring the notification
bell so you don't miss out on more foodie adventures.