
How to make and preserve soy milk drink from cuddling / upgrade class
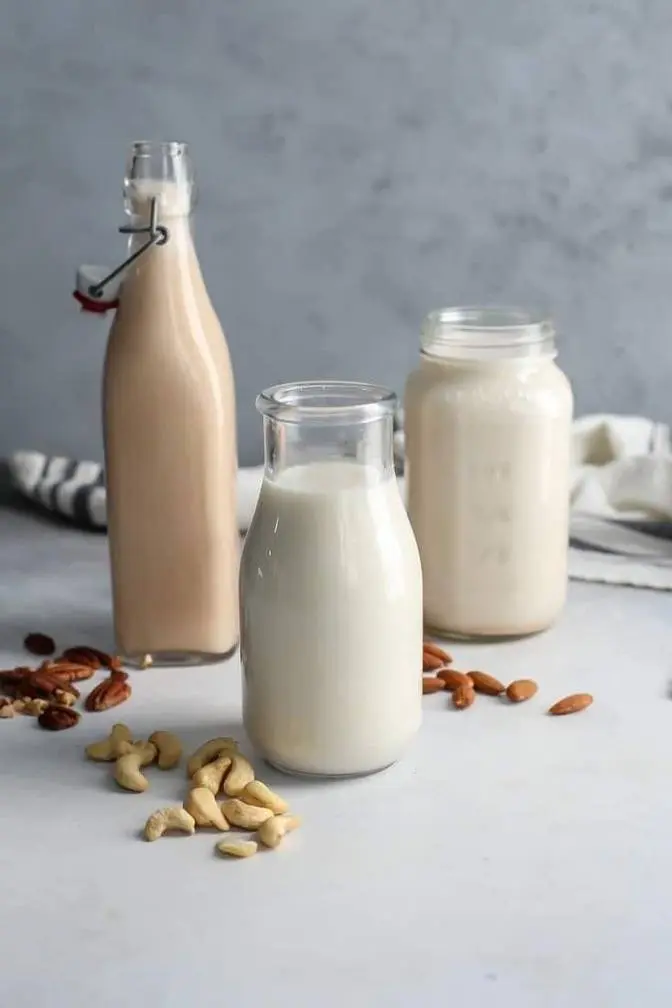
Do you know why you experience easy milk spoilage after preparing soy milk? Are you also aware of
certain mistakes you make from the beginning of the preparation that makes your soy milk to
curdle up faster even after you preserve it? Okay, I know you might have seen the other of my video
on soy milk but this is the rebirth of that one. This is different and every question was pulled
out to make sure that this is well detailed straight to the point and I assure you that
at the end of this video you're going to learn how to make the best soy milk, different method
and many more. So if you love enjoying soy milk with your family, you want to use it as business
or you're just lactose intolerant, you're looking for the most natural milk you can pair with your
cereals, then this is the most detailed video you will find on the internet right now. Make sure you
do not skip any part of it, okay? So let us get started. So the first step will be to pick our
soybeans and here I have half custard paint of soybeans. I'm going to pick out every single dirt
or stones that are in here. So with my last video on soy milk that I complained of having to see
too much unwanted object on my soybeans during picking and I felt and still feels like they
intentionally add all those things to just increase the quantity. So many people in the
comment section were saying that oh it is normal, it's not intentional. In fact they had to say a
whole lot but let me tell you for a fact that if you're buying soybeans from a particular vendor
and you're always seeing so many stones on it, please just change your vendor because I did. And
since that day, if I'm picking out dirt from my soybeans, it's usually very minimal like this. So
please if you've been having some experience, just change your vendor. These people know what they
are doing. Okay so let's get back into business. I am done picking and this is the time to soak
this up. I'm going to add into a bowl. Make sure you're using a very big bowl so that you're going
to have space because once you get this soaked up, it's going to swell up and increase in sizes.
So add enough water and soak this overnight. It mustn't be overnight. You can soak it up in the
morning and start processing it in the night. For this one, I got it sitting for about 14 hours
before I started. So this is 14 hours later, that is the next day. I had to change into these bigger
pots because it doubled so much in sizes and I needed space to wash it. So I added some water
and it is time to wash it. As we proceed, I just want to say one welcome to everyone that just
stumbled on my video for the very first time. This is Kelsey Kitchen and trust me, you're going
to enjoy every single video coming from me on this channel. So make sure you click on that subscribe
button in front of you. It is absolutely free. With that, you get to see amazing content on healthy
living, healthy recipes, lifestyle, kitchen hacks, and to my returning subscribers, thank you for
always coming back to watch. And please, I want to say that if you want to recreate this particular
video, do not skip any part of it because I noticed that a lot of people do not even watch
videos to the very end. They skip so many parts and they end up asking you questions
that you must have discussed in the video. So let's get back into washing of the soybeans. Please,
absolute hygiene will be required. Make sure the water you're using for this preparation
is clean water. So wash as many times as you want. For me, I washed this twice and it is
already okay for me to start preparing it. Once you are done washing, transfer it into
another bowl that will enable you to peel the bark. This method centers around peeling off
the barks of the soybeans. There are two methods to doing this. This particular method and the one
you can use your blender, the pause button in your blender to peel off the bark. That one is
very simple and very easy to do. You can do that in the space of a minute to a minute and you're
done. I'm gonna leave a link on how you can peel your beans within a minute or two so you can watch
the video if you want to adopt that particular method. For me, I love making use of this
traditional method so I use my hand to squeeze until the barks are well peeled. This doesn't
take too much time. If the other one takes you about two minutes, this is just going to take
you five minutes. So if you don't want to use your blender, you don't have a very good blender,
please just adopt this traditional method. It's still very quick. And for this video not to be
very lengthy, I had to do some part of this step behind the scenes so that I don't get to waste too
much of your time. So but just watch as I'm doing it. You can even reuse the water like I'm doing
here to wash until you're done completely. And one good advantage of peeling the soybeans before
blending is that the color of the milk becomes very whitish after processing unlike when you
blend it together with the bark. So if you don't really have much problem or much concerns on the
color of your milk, you can skip this part and just blend it together, okay? But personally,
I love the vibrant color I usually get once I go through this process of peeling off. So
I'm going to stick to this any day, any time. After peeling, this is what I have here. You can
see the chaff is already separated and this is my beans, very clean. So the next step will be to
transfer into a pot and add water that will just be above the soybeans and get it to boil. The
in large quantities so boiling helps to deactivate this compound making the milk
very safe to consume. Secondly, boiling soybeans helps to soften the beans for easier blending.
Thirdly, research also shows that raw soybeans contains enzymes that can create strong unpleasant
flavor and odor in soy milk. I know a lot of people can relate to this if you don't boil your
soy milk. So boiling helps to deactivate those enzymes thereby resulting in more palatable
taste. And lastly, boiling helps to reduce phytic acid which can inhibit the absorption of certain
minerals like zinc and iron. So all these that I just listed are going to help to make this milk
last very very long as well. So just allow it to boil over. There is no time frame to how long it
can boil. Once it is boiling, like once it boils over, bring it down and sieve it. After straining
out the hot water, you need to allow it to cool down before you go ahead and start blending.
Please allow this to cool down for at least 15 to 20 minutes or you can just run cold water on top
of it before you go ahead and blend it. For the blender, any strong capacity of blender can blend
this. Any blender that can blend your beans, your tiger nuts can also blend this because boiling it
has made it very much easier for you. I am using 3000 watts capacity of blender. If you don't have
a very strong blender, please you can visit your local market or people that blend grains like this
at the market near you. Okay it is very very easy, it is not hard. So blend it, add water and blend
but for the quantity of water, you do not need too much water and for blending this you don't
need cold water, you don't need warm water. What you need is basically room temperature water. So
make sure that you have much control of your water so that this doesn't get too watery.
Add any quantity of water that will just be enough to blend this. When it gets very thick,
when you're done processing it, you can still add water to loosen it but for this stage, do not add
too much water. I just hope you're following because I'm trying to make this video, this recipe
very very detailed, like as detailed as possible. So I just hope that you're following. So the next
thing is to get your mesh cloth, some people call it chiffon cloth, muslin cloth, whatever you call
it. Please just get it and wash your hand properly. Please wash your hand properly or you can wear a
For people that do not have this mesh cloth, you can make use of your straining sieve but I would
advise you that if you want to prepare soy milk, please get this. It is very cheap, it is not
expensive. I feel like this is a must-have and that is the best straining material I've ever used.
Like after straining my soy milk, it becomes very clear, zero particles inside. Some of those
straining sieves, you see that after straining your milk, you see having a lot of particles inside it.
So for me, this is a must-have if you want to get a very very clear soy milk. So you're going to blend
this batch by patch until you're done completely and if the volume of the soybeans is much, please
do not add everything at once into your mesh cloth. You can just divide it and also if you're
going to be doing this straining process all by yourself, please try to divide this whole thing
before you start straining. For me, I'm going to be doing this with somebody so it's going to be
easier for you. If you pack everything on the mesh cloth, it will be very hard for you. Not just hard,
it's going to be very stressful for you. So if you know you don't have anybody at home that is
going to help you to strain this, please like I already said, divide it into different parts
and strain it one after another.
Hello, I hope you're still there. I hope you're still following and I'm very hopeful that this
is not going to be a very hard recipe for you. Just create out that little time for this and
also this is the right time for you to hit on that subscribe button. If you've been watching
this video and you're not subscribed to my channel, click on that subscribe button. It is absolutely
free and you can also share this video to your family members, to your friends that wants to
learn how to make soy milk, that wants natural replacement to so many milks. I don't think you're
going to have any questions after watching this video. I don't know but if at any point you're
confused, you have questions, just drop on the comment section as I'm going to attend to every
single question one by one. Also, tell us where you're watching us from as that will mean so much
to me. So, I am done straining and this is the volume that I have. Can you see that? Yeah, this
is so nice. Do you even see the color of this? This is so so good, free of particles and look at the
chaff that I have. A lot of people suggested what I can do with this chaff. Anyways, I'm going to
implement that and tell you guys how it is. For now, I've not even implemented anything that has
to do with the chaff. Some people said I can use it to make soup, some people say I can use it to
swallow, some people say I can use it to feed livestock. I know the one for livestock but
I've not actually tried other ways of you know making use of the chaff. So, the next thing I
have to do is to transfer into a pot and get it into boiling. And guys, after about 30 minutes,
it started boiling and this is what I have. Please do not cover your pot when it starts boiling
because it boils over and splashes everywhere. So, do not cover the pot, just leave it open.
And once you start forming all this, so you boil until you start forming these curls by the side
and you know that it is absolutely done. For me, I boiled this for a period of 40 minutes and it is
okay. So, make sure that you keep stirring as you're boiling. Keep stirring, do not leave it
go so that it doesn't start getting very sticky and burning.
So, 40 minutes later, I had to turn up the heat and allow it to cool down
for about three to four hours. Allow this to cool down before you can strain it because
it's going to be very hot for you. So, after about three to four hours, I'm just going to
strain it for the last time.
So, this is the final stage for it. I'm already done guys. This is the milk we're having. I
decided not to add any water to loosen it because I'm very much comfortable with the consistency.
And the last thing for this processing is to add my sweetener and for this, I just added half a cup
of sugar. Please, you can add other flavors of your choice. For me, I prefer sugar and if you don't
want to have a sweetened soy milk, skip this part, okay? But also understand that adding sweeteners
to this makes it very easy for you to consume it. So, if you don't want to add sugar, you can add
other sweeteners like dates, tiger nuts or some milk flavors but I prefer sugar for me. So, this is
the time to bottle it up. For people that usually ask, okay, how do you bottle it or where do you
get your containers? I'm going to answer it right now. So, you can use a funnel or any other material
that can make the milk to pass through the containers very easily. And for the containers, you can get it
from any packaging store around you. To be precise, I think you should just make an inquiry on where
they sell packaging containers around you. People that sell packaging containers for Zobo, soy milk,
tiger nuts or even people that sell containers for creams, soaps and the rest of them. If you ask
around and you cannot see, you can just google it. Just type vendors that sell packaging containers
around my location. Put your location and you're going to see a lot of them close to you, okay?
And let me also add that if you're making soy milk for business purposes, make sure that the containers
you're getting are cheap containers. Beautiful and cheap containers. The reason is that you wouldn't
want to waste your money buying expensive containers and at the end of the day, your soy milk comes out
very expensive. So, just get beautiful containers that are cheap. This one is plastic. It is beautiful.
It is also cheap. I can't remember how much I got this because it is more than a year now. But I
think as at that time, it wasn't up to three thousand or two thousand five for a dozen of it. That's 12
So, when you go to their stores or if you're buying online, you're going to see a lot of
beautiful cheap containers. It comes in 50 ml. It comes in 100 ml. It comes in 250 ml. So, whatever
size you want, make sure they are not very expensive so that you can at least get a little
bit of profit from making soy milk. So, the next question I'm going to ask is what brand of blender
do I use? I use Reluxe Bazooka Blender. You can also make use of any blender of your choice that
This is for people that have been asking me, what blender do you use for your soybeans? What
blender do you use for your tiger nuts? I use Reluxe Bazooka. So, the last question I'm going
to be attending to today will be the preservation of this. I got loads of questions on the preservation
of soy milk and that is what I'm going to be discussing right now. So, the first preservation
will be making sure that your containers are airtight. Airtight container please. The second
preservative measure will be getting food grade preservative. I keep mentioning this in all my
milk drinks but a lot of people are asking me to mention the kind of food grade preservatives
they need. So, the commonly used food grade preservatives for milk drinks includes potassium
sorbate, sodium benzonate, and citric acid. You can make use of any of this. They help to prevent
the growth of bacteria, yeast, and mold. And for the quantity of the preservative needed, it depends
on the quantity of soy milk you are making. For this particular one I just made now, I can add
100 ml of sodium benzonate and that will be enough. And I'll get to preserve this on room
temperature for 7 weeks and under refrigeration for 14 weeks. Then another effective method of
preserving this milk drink is by freezing method. But with freezing method, you need to have constant
power so that this milk drink can get iced up in your freezer and trust me it can stay as
long as 14 weeks in your freezer and it's not going to go bad or curdled up. Number one rule
to freezing method is once you're ready to consume a particular quantity, like if you're bringing
out two bottles of the soy milk from your freezer, once it has defrosted, please do not add it back
to your freezer. Make sure that once it has defrosted, consume everything and do not add it
back. If you live in an area where there is no constant power supply, you don't need to try out
the freezing method because it is going to get curdled up and your soy milk will go bad. Then
the final way of preserving this milk drink is to consume within the space of 24 hours.
If you're just making this for your family and friends, for get together for yourself or your
family, just consume within the next 24 hours without adding anything, without freezing, it is
still going to be very okay. I don't know if there are things I did not touch with regards to making
soy milk but if you have any question, just ask. If there is anything that is making you go confused,
ask me in the comment section and I will gladly answer you. And guys, soy milk is so nutritious,
it is very very healthy, it is natural, so you can enjoy it alone, pair with your beverages,
pair with your cereal. Guys, you're going to love it. If you start making soy milk,
I don't think you're going to go back to the normal milks that we have in the market.
Soy milk is so so so good once you learn how to make it right. Thank you so much for watching
this video. See you on my next video. Bye!