
Easiest Mooncake Recipe (No Baking)
213 Video Views·Sep 27, 2025
Hi everyone, welcome to Souped Up Recipes. I'm Mandy.
Mooncake is a ceremonial dessert that is served during Mid-Autumn Festival.
It has many different shapes and fillings.
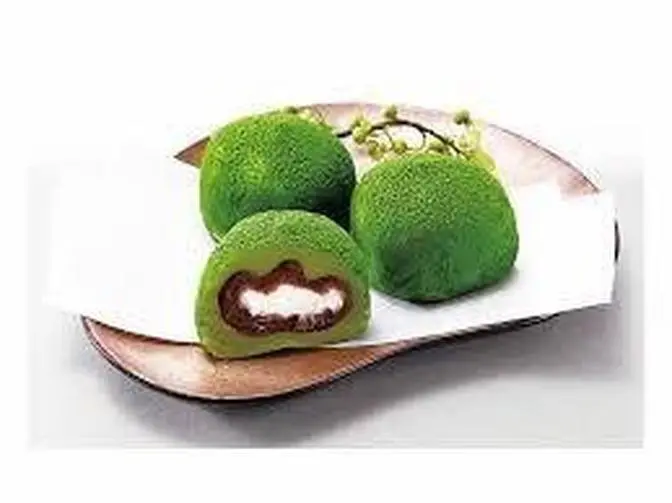
What we are making today is the easiest snowy style with a coconut filling.
You will need 2 whole eggs. Crack them into a non-stick pot.
If a shell fell in by accident, just pick it out.
200 ml of coconut milk, about 190 grams.
Shake it well because the fat tends to float to the top.
You want to incorporate it before using.
Continue by adding some sugar and some cake flour.
If you don't have cake flour, you can use all-purpose flour.
Get a silicone whisk to stir everything.
I see there are some lumps,
so I'm going to let the mixture go through a sieve to get rid of those stubborn bits.
Pour it back into the pot.
Then add 4.5 tbsp of butter and 95 grams of shredded coconut.
You want to use these fine coconut shreds so the filling will come out with a better texture.
If yours is not fine enough, you can grind it with a food processor for about 20 seconds.
Turn the heat to low.
Use a spatula to stir constantly.
The butter will melt and the coconut shreds will absorb the moisture.
Just keep mixing until it becomes a bit solid, like that.
This process will take about 10 minutes.
Remove it to the side and give it 5 minutes to cool to lukewarm so your hands can handle it.
Next, we're going to portion out the filling.
Each one should be 30 grams.
I like to use a scale to be precise.
Roll it in between your hands into a round ball.
Right now, the filling is too soft to wrap.
Let it chill in the fridge for 1 hour or until cold.
While waiting, we can make the wrapper.
In a glass or ceramic bowl, combine all the wrapper ingredients.
50 grams of sugar.
50 grams of glutinous rice flour.
This will give the mooncake that gooey, stretchy texture.
But we don't want it to be too sticky.
So I will add 50 grams of rice flour to balance the texture.
35 grams of wheat starch.
This is very important because it gives the wrapper that translucent appearance
and make the mooncake the snowy style.
Pour in the rest of the coconut milk.
I made this recipe with the perfect calculation so you can use the whole can.
Mix until there are no lumps.
Usually, when you make snowy mooncakes,
you should add some oil to prevent the wrapper from cracking.
But coconut milk contains quite a lot of fat, so we're not adding any extra today.
I'm going to cook this in a microwave because it only takes 3 minutes.
If you don't have a microwave, you can place this bowl in a steamer and steam for 30 minutes.
For the microwave method, you have to cover the bowl with a heatproof but not airtight lid.
Microwave it on full power for 1.5 minutes.
Check the consistency.
It is partially solidified.
Use a silicone spatula and mix it well.
Put it back into the microwave for 1 minute.
Take it out.
Mix again.
Put it back into the microwave for 30 more seconds.
I cooked it for 3 minutes in total.
Depending on the power of your microwave, the cooking time may vary.
That's why you want to do it gradually to check the texture and be able to control the doneness.
Once you see there is no more running liquid, you're good to go.
Spread it out so it can cool down faster.
Cover this and we're going to stick it into the fridge for only 15 minutes
or until it is lukewarm so your hand can handle it.
I find that if you cool it down completely, it becomes a little bit harder to knead until smooth.
I'm going to use matcha powder to color the wrapper.
This is totally optional.
You can use any food coloring you want or just leave it plain.
Knead it until well combined.
I like to wear gloves because it is sticky in the beginning,
but the more you work with it, the smoother it will be.
Within 5 minutes of kneading, it should be elastic and nonstick.
Now we're going to portion it out by using a scale.
Each one should be 20 grams.
Roll it in between your hands until it becomes a smooth ball.
Cover them so they don't dry out.
Now you can take the filling out of the fridge.
You can feel they are very firm because the butter has solidified.
Let's assemble the mooncakes.
It's a little bit tricky to roll the wrapper
because it likes to stick to the working surface and to the rolling pin.
I find it is very helpful to put the dough in between two pieces of parchment papers
and just flatten it with your hand.
Use a rolling pin to even it out.
The wrapper doesn't need to be perfectly round unless you have OCD.
I like to press the edge to thin it a little bit
so when we pinch the end, there won't be a big pile of dough at one spot.
Place the filling in the middle of the wrapper.
Use your fingers to squeeze around to push out the air.
When you get to the very end, pinch to close it.
Set it aside and continue to wrap the rest.
If you don't have a mooncake presser, you can just eat them like this.
The taste is the same, but who doesn't like pretty looking dessert?
So before we do that, let's microwave 2 tbsp of glutinous rice flour on full power for 30 seconds.
If you don't have a microwave, you can just toast the glutinous rice flour
in a nonstick pan over low heat for a couple of minutes.
We're going to use it as a dusting powder to prevent the mooncakes from sticking to the mold.
Put the mooncake pattern in the presser and clip it on.
I'll link this product in the description. You can check it out later if you want.
Dust the mooncake ball with a little bit of cooked glutinous rice flour.
You don't want to use raw flour as there is no further baking involved.
Shape it into a cube oiled.
Carefully place it into the mold.
Press the bottom so it doesn't bulge up.
Push it down onto a clean cutting board with steady pressure.
Stay there for a few seconds to establish the shape.
Then release it.
Look at that! So pretty.
I love molding mooncakes.
There is something about it so satisfying.
It's sweet, creamy, and coconutty.
The wrapper is soft and gooey with a little hint of matcha flavor.
Very unique.
I hope you give this a try soon.
As always, the printable recipe is in the description.
Go check it out.
Happy Mid-Autumn Festival!
May the round moon bring you a happy family and a successful future.
Thank you for watching and I'll see you next time.
Bye!