
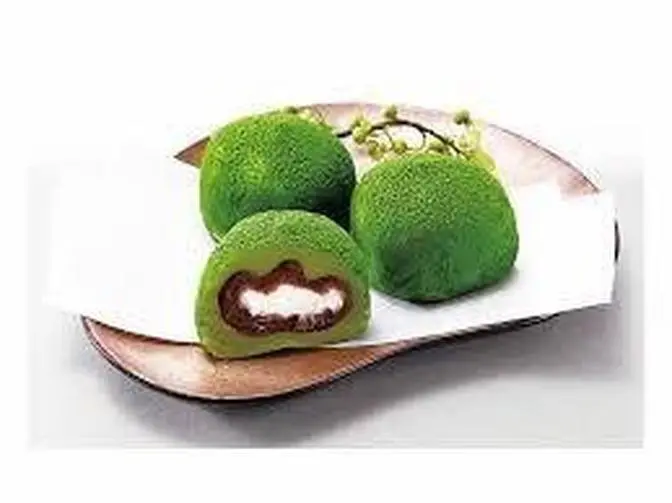
DIY香港冰皮月餅 制作簡單口感軟糯 Icy mooncake
625 Video Views·Sep 27, 2025
Do ba dee ba dee ba do ba dee
Doom ba da dee da dum
Do ba dee ba dee ba doom ba da dee dum
Do ba dee ba dee ba do ba dee
Doom ba dee ba do ba dee
Hi everyone, I'm Timmy.
Today we're going to make ice mooncakes.
Ice mooncakes are very different from traditional mooncakes in terms of taste.
But it's much easier to make than traditional mooncakes.
And you don't need an oven.
Let's take a look at the ingredients.
To make an ice mooncake, it's divided into three parts.
The first part is the ice.
It's made of glutinous rice flour, rice flour, starch, sugar, milk, corn oil, and condensed milk.
And then we're going to prepare some cake flour for non-stick use.
Cake flour is actually cooked glutinous rice flour.
And then we're going to prepare the filling.
Today we're going to make custard filling.
Its ingredients are unsalted butter, caster sugar, eggs, milk powder, and starch.
And some seasonal chestnuts.
Finally, we're going to prepare a mold for mooncakes.
Let's make the crust first.
First, we're going to boil a pot of hot water.
When the water is boiling, we're going to mix all the ingredients for the crust together.
First, pour all the flour into a large bowl.
After pouring all the flour into the large bowl, pour all the milk into it.
And then we're going to use a hand mixer to mix the flour and milk well.
When we mix it, we'll see the lumps in the flour.
As long as we keep stirring, the lumps will fall apart.
And then there will be a lot of small bubbles.
It's okay, it will fall apart slowly.
Okay, the flour has been completely mixed with the milk.
Next, we're going to add the corn oil and condensed milk.
We're going to pour the condensed milk in.
After pouring the condensed milk in, we're going to use a hand mixer to mix the corn oil and milk well.
When we stir it, the oil will float on the surface.
The hand mixer should be hollow.
Don't touch the bottom of the bowl.
It should be half hollow.
Then the corn oil will be mixed with the milk soon.
Okay, the flour has been mixed well with the corn oil.
We can't see the corn oil on the surface.
It's completely mixed in.
Then the batter is done.
At this time, we're going to pour the batter into the steamer and steam it.
Okay, the water is boiling.
Next, we're going to put the batter in the pot and steam it on high heat for 25 minutes until the batter is completely cooked.
When the batter is steaming, don't pour too much water into the batter.
Otherwise, the batter will be too sticky because of too much water.
If your pot is not breathable, you can prepare a piece of cloth and cover it with a lid.
Let the lid tilt so that the water will not flow into the batter.
After the dough is steamed, there will be a layer of oil on the surface.
This is normal.
We're going to put this oil back into the dough later.
Now we're going to use chopsticks to make a small piece of the dough and let it cool down quickly.
Now you can see that the dough is very rough.
It's okay.
After it cools down a little bit, we'll rub the corn oil into the dough and it'll be more delicate.
We're going to scrape the edges and hide them all.
It's easier to hide when it's hot.
If it's cold, it'll stick to the bowl.
Okay, after we rub it into small pieces, we're going to put it on a plate and let it cool down a little bit.
As long as the dough is cooled down, you can start kneading it without burning your hands.
We have to wear gloves.
Gloves are sticky.
If you don't wear it, it will stick to your hands.
There's no way.
The purpose of kneading the dough is to rub the oil into the dough.
It depends on how long we knead the dough.
The longer we knead the dough, the more delicate it will be.
The very rough dough has been very smoothed by us.
And the oil has been rubbed into the dough.
It's just that it doesn't have a very obvious oil glow.
Put it in a bowl and cover it with a layer of plastic wrap.
Put it aside.
Next, we're going to make the cake flour.
This is 50 grams of glutinous rice flour.
We pour it into a non-stick pan.
This is 50 grams of glutinous rice flour.
Stir-fry over medium heat until slightly yellowish.
The cake flour is ready.
You can also put the glutinous rice flour on a plate.
Put it in a microwave oven and heat it for three minutes.
It's okay to stick.
Can you see it?
It's slightly yellowish.
At this time, we need to stir the glutinous rice flour quickly.
Stir-fry until slightly yellowish.
At this time, we need to turn off the heat.
Pour the cake flour into a bowl and set aside.
The cake flour is ready.
Next, we're going to make the filling.
First, we pour the butter into a large bowl.
The butter has been softened in advance.
Use an electric whisk to beat the butter.
After the butter is smooth and slightly bulging,
add the caster sugar in one go.
Use an electric whisk to mix the caster sugar first and then beat it.
Otherwise, the caster sugar will fly everywhere.
When it's almost done,
use a spatula to stir in the butter.
The butter has been completely mixed with the caster sugar.
The volume of the butter is twice as large as before.
At this time, we need to boil a pot of hot water.
Turn on the heat first.
After the water is boiling, let's move on to the next step.
At this time, we need to add the eggs to the butter.
There are four eggs in total.
We only need to add one at a time.
Then continue to use the electric whisk to mix the eggs with the butter.
When we can't see the egg mixture at all,
we can add the second egg.
At this time, we need to stir in the butter and egg mixture.
The whole process of stirring the butter
is that when you see that there is too much butter,
you need to stir it in.
After the second egg is completely mixed in,
add the third egg.
The butter will become thinner and thinner.
It's still solid now.
It will slowly become thick.
After adding the third egg,
you will feel that the egg mixture
can't be mixed with the butter.
It's a little separated.
It doesn't matter. This is normal.
After adding the third egg,
add the fourth egg.
After all four eggs are added,
you can see the butter.
It was still solid just now.
Now that all four eggs are added,
it has become thick.
And it looks a little separated.
At this time,
we need to add the milk powder and starch.
Starch.
At this time,
we don't need to use the electric whisk.
We can use the manual one.
We just need to stir it evenly.
You have to keep stirring it
until there are no particles at all.
After the milk powder and starch are added,
and we stir it evenly,
it will become a thick batter.
And the state of oil and water separation
will basically disappear.
It doesn't matter.
Stir it evenly like this.
At this time,
we need to pour it into the stainless steel pot
and steam it.
If you are at home,
you can use a stainless steel pot directly.
After we pour it all in,
the water here has boiled.
Next, we put it in
and do the next step.
After the water boils,
we need to turn the heat back to medium-low heat.
When we put the milk paste
into the pot and heat it with water,
the butter on the side
will start to melt slowly.
At this time, we need to keep stirring it evenly
until the batter becomes
very fine and thick.
At this time,
we need to take out
the hand mixer
and cover the lid.
We steam it for five minutes for the first time,
and then do the next step.
Five minutes have passed.
At this time, we need to open the lid
and prepare a scraper.
Then use the scraper
to remove the milk paste
that has solidified on the side.
This step is mainly
to mix the batter evenly.
After we stir it evenly,
cover the lid
and steam it for five minutes.
The second five minutes have passed.
At this time,
we still need to open the lid.
After we steam it for two minutes,
we need to keep
stirring it like this.
Don't turn on the high heat.
If you turn on the high heat,
I'm afraid that everyone's movements won't be so fast.
Stir it until
it doesn't stick to the scraper.
At this state,
it doesn't stick to the scraper at all,
and it has a certain hardness.
If we gently press it with the scraper,
we can feel its hardness.
In this way,
the ice mooncake will be soft and hard.
The milk paste filling is ready.
At this time,
we need to take it out
and put it on a plate
to cool it down a little bit.
Next, we need to cut
the ripe chestnuts into small pieces.
The size of the chestnut
depends on your preference.
Don't cut it too big.
If you cut it too big,
when you wrap it in the mooncake,
it will easily show up
After we cut all the chestnuts
into small pieces,
put the milk paste filling on it
and put all the chestnuts in it.
I use 100 grams of chestnuts.
If you like more chestnuts,
you can put more chestnuts.
Next, we use the scraper
to mix the milk paste filling
with the chestnuts.
After the milk paste filling
is completely mixed with the chestnuts,
the filling is ready.
We have just made the ice mooncake.
Now we are going to combine the filling
with the ice skin to make the ice mooncake.
The mold I use
is for making 50 grams of mooncake.
The ratio of the filling and the skin
is 1 to 1,
so we need to measure
25 grams of filling and skin for each small piece.
Take out the scale
and cover it with a layer of plastic wrap
to prevent it from sticking to the scale.
Then put on the gloves.
Let's measure the filling first.
For each piece of filling,
we take 25 grams of filling
and round it.
Put it on the plate.
For this mold,
if it is for making 50 grams of mooncake,
we can make about 18 mooncakes.
If the mold
is for making 100 grams of mooncake,
the filling and the skin
will be 50 grams plus 50 grams.
After the filling is done,
we take out the skin
and open the plastic wrap.
We need to measure 25 grams of filling
for each mooncake.
Why do I need to measure
the filling and the skin?
Because the mold I use
is for making 50 grams of mooncake,
so the filling and the skin
can't be more than 50 grams.
Otherwise,
the mold won't fit.
After dividing the filling and the skin
into small pieces,
we need to wrap it up.
Take out the skin,
round it and flatten it.
After that,
we start from the edge
of the skin.
The edge should be thinner
and the middle should be thicker.
It's about twice the size
of the round mooncake.
Then we take another piece of filling
and put it in the skin.
Cover it.
Then it will have a curve.
Put it in the hole
of the hand and move it up.
Then it will have a seal.
Put the seal
on the mooncake
and rub it.
Then it will
completely seal the hole.
After sealing,
put it here.
After wrapping it up,
we need to cover it with cake flour.
If you don't have a kneading pad,
you can use a plastic wrap
to cover the table.
Then we need to prepare a mold.
Choose the pattern you like
and put it in.
When you cover it with cake flour,
you need to cover it evenly.
Don't cover it too thickly.
After pressing it,
the bottom will be flat.
Then we put the mooncake
into the beautiful plate.
The ice mooncake is done.
We can eat it now.
But we need to put it in the fridge
for 2 hours
before eating it.
Put it in the fridge
and cover it with plastic wrap
or seal it.
It can prevent the skin from hardening.
But if you put it in the freezer,
it doesn't matter if it doesn't seal.
How long does it last?
Because it doesn't have additives,
it will last about 3 days.
If you put it in the freezer,
it will last about 7 days.
So you need to eat it as soon as possible.
Have you learned how to make
the ice mooncake?
If you have any questions,
you can leave a message on my website.
I will reply to you as soon as possible.
If you make the ice mooncake,
remember to add your homework on my Weibo.