
Spinach Growing Masterclass: Grow Super-Fast Leaves
5 Video Views·Apr 6, 2025
What's your favorite spinach dish? There are so many it's hard to choose! That's why having a plentiful supply of spinach leaves to hand is a must when it comes to choosing what to grow in the garden.
In this week's episode, Ben walks us through the whole process from sowing to harvest and everything in between to successfully grow a lot of luscious leaves.
Spinach is a winner thanks to its speedy growth, long list of health benefits, and of course its
plentiful harvests. Spinach can be tricky to grow unless you know the tips I'm about to reveal,
but get it right and you could be harvesting bowlfuls of delicious leaves all year long.
Let's go. I can't think of many vegetables with as many strings to its culinary bow as spinach.
Fresh in salads, whizzed up into smoothies, lightly steamed or folded into soups and curries,
spinach is up for it, which means growing a few rows of it is well worthwhile. Spinach is one of
those very handy crops that will tolerate a little bit of shade, partial shade, so somewhere like this
that gets a bit of sun and shade is just perfect. And if you are in a hotter climate, then seeking
out somewhere that is mostly shaded, especially during the hottest parts of the year, is a good
idea. Now, very extreme heat can cause spinach to flower prematurely or bolt, which means fewer
smaller leaves, so obviously we want to avoid that. If you're in a hot climate, you could try
locating your spinach in the shade of a taller crop, something like corn, climbing beans, or
beneath a cucumber trellis for example. I improved the soil here a few months ago with a nice
barrow load of well-rotted manure. Now if you haven't done that yet, please don't worry, you can
still add it now before planting, no problem. I could get on and plant as things are now, but I
think I might as well give this an extra boost with a few handfuls of general purpose organic
fertilizer, so on go a few light handfuls of bloodfish and bone. Spinach is very easy to
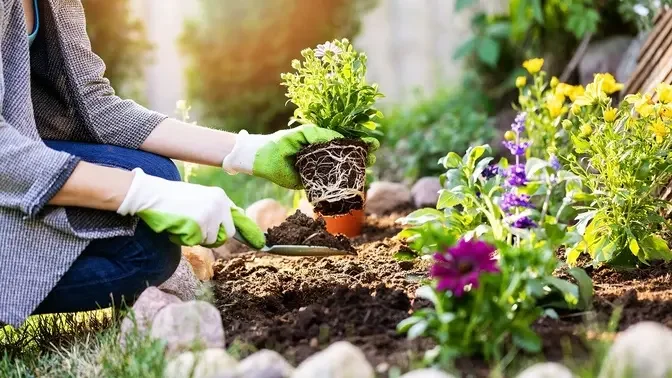
sow direct, and I'll show you how to do that shortly, but first let's get these guys in, which I started
in plug trays right at the start of the season to get myself a bit of a head start. I'm an impatient
sort. I'm going to space them about eight inches or 20 centimeters apart in a block formation,
both ways. I'm going to lay them out first on the soil surface so I can just tweak things around to
get the spacing just so, and then to plant just use your fingers or an improvised dipper like this
to make a hole and then pop your seedling in and lightly firm it in. If it's still a little bit on
the chillier side, what you can do is make a hole just a touch deeper and then pop your seedling in
and firm it in so you've got kind of like a cup of raised soil around it to somewhat shield it,
or of course just use a row cover like fleece. And now for a good drink of water. Now you might
be tempted to think that we're done here now, but not so fast. Spinach is one of those plants that's
a real treat of pigeons, and I can hear them cooing in the background mocking me, so we're
going to have to cover them up. You could use a pop over cloche or netting like this one here,
cover with some sort of row cover like this fleece here, maybe removing it on warm days
so it doesn't get too hot, or my favorite, simply use lots of twiggy branchy bits to create a kind
of pigeon-proof cage. We'll also need to protect against slugs and snails, and more on that in a
moment. I like to make my earlier sowing of spinach late in winter to get a really early start. In
fact, the plants we've just planted just now were started off in winter sowing jugs like these,
then transplanted into the plugs to grow on ready for planting, and I'll link to a video on what
this is all about in the description below. A more conventional way to get an early start is just to
sow direct into the plug trays using sieved or screen potting mix. So fill up your plugs and
make little depressions with your fingers, and then we're going to sow two to three seeds into
each little plug, and then just cover them over with a little bit more of the potting mix. The
advantage of sowing into plug trays is that there's minimal root disturbance. Just grow the seedlings
on in their plugs and then plant them outside once the time arrives, and there's no need to thin
out the seedlings as well. If you get two or three seedlings that germinate, well just plant them out
as a mini clump. Now, as well as getting a head start on the growing season by starting plugs of
seedlings off in the greenhouse or, say, a cold frame, you're also going to be protecting seedlings
like this from slugs and pigeons, which are much more of a nuisance early on in the season. And it
means that you can get your spinach started while the earlier crop is still finishing off in the
ground. But as spring progresses it makes good sense to sow direct because there's no
transplanting needed. Now I make sowings from about mid-spring as soon as the soil warms up
and drains out a bit. I've got a lovely flat piece of ground here and the first job is to mark out
the rows, so you can use something like a bit of bamboo cane to get that nice and straight,
or use something like a string line for longer rows. So I just like to make impressions in the
soil like that and then mark out the little trenches to sow into. Now I'm aiming for a
depth of around half an inch or so, or one to one and a half centimeters deep like that, and the
rows are eight inches which is, what's that, 20 centimeters, that's right, distance apart.
And then to sow I'm going to drop one seed every inch or three centimeters or so,
spacing them out individually, taking the time to do so. Now this is lovely kind of sowing and
growing weather, it's not too warm and, well it's warm enough, but it's not too hot and there's
plenty of little rain showers in between. But if it is quite hot or you're sowing in the middle
of summer for example, then I would suggest watering along the little trenches you've made
before sowing to create a nice cool microclimate around the seeds. And then we're just going to
cover the seeds over and then pat everything down with the back of the rake like that,
then we'll give everything a good old drink. Once the seedlings have popped up I will thin them in
stages until the little plants are about six inches or 15 centimeters apart within the row.
Now please do not throw away those thinnings, they can of course be eaten as microgreens and
to think you pay a small fortune for pretty little microgreens in a restaurant when you could be
growing them yourself. Spinach also makes a fantastic container crop. Now I would go for a
container that's at least a foot in diameter and then fill it with an all-purpose potting mix.
And now I'm going to space the seeds about three inches or seven centimeters apart across the
surface like this. Now this is a little bit closer than the seedlings we're growing in the
ground, but these will be grown on to harvest a bit smaller as kind of baby leaves, perfect for
salads. These can now just be grown on as they are and harvested regularly for a lovely supply of
fresh leaves. Spinach isn't a fussy crop, just keep it well weeded and well watered and you should
have good steady growth all the way to harvest. Now consistent soil moisture is really important
if you're going to reduce the chance of crops bolting, so check the soil regularly and if in
doubt just give it a little bit of extra water. And water in the morning if possible, so plants
have plenty of soil moisture to draw on throughout the course of the day. Those luscious leaves won't
go unnoticed by slugs and snails for long, so pick off any that you find or set little ramekins or
other dishes into the ground like this to make your own beer traps, and then just fill it with
beer or any kind of yeasty liquid would be fine and empty these out regularly. Now I'll be doing
a full video about slug and snail control in a few weeks, so if you don't want to miss that do make
sure you're subscribed and have turned on notifications. Early in the season it's well worth seeking
out bolt resistant varieties which will continue to produce leaves for longer before they stretch
to flower. Now here's a little list of suitable varieties that you might want to try. Bolt
resistant varieties combined with plentiful watering and shade from the hotter sun will see
you right. In very warm and humid conditions plants can become susceptible to mildew, a disease that
turns the leaves pale before eventually killing them off. Now proper spacing combined with regular
harvesting to ensure good airflow between plants will really help, and try to, when you do water,
try to aim the water so that it doesn't wet the leaves as much as you can. We'll get on to
harvesting those sumptuous leaves shortly, but first I thought I'd like to share a few spinach
alternatives just in case you do find spinach a bit tricky to grow with, for example, heat. Now all
of these have the words spinach in the name but are botanically unrelated. First up is New Zealand
spinach. Now this tender plant with equally soft leaves is much better for hotter climates and
thrives where spinach might struggle in really sunny spots, so if you do have particularly hot
summers then this could be one for you. Then there's the really rather remarkable clambering
and sprawling Malabar or Indian spinach. This has thick and fleshy, almost succulent leaves,
and is another solid choice for warmer climates. Tree spinach is a taller plant with pink to red
leaves, while perpetual spinach is a fantastic choice for poorer soils and will crop for pretty
much all the year. Perpetual spinach is in fact more closely related to chard and grown in much
the same way, so if you'd like more tips on growing chard and perpetual spinach, please do check out
my recent chard growing masterclass which I will also link to in the video description below.
As I mentioned at the top of the video, speed is one of the major selling points of spinach, as if
it needed one. You can make the very first pickings for salads as soon as a month after sowing, or wait
a few more weeks for bigger leaves for cooking. Now I like to pass over my rows of spinach every
couple of days, taking just two or three leaves from each plant at a time and then letting the
plants grow on. That way I can enjoy several harvests over a month or more before plants
inevitably bolt. Bolting is what finishes play eventually. Plants will bolt no matter how much
you coddle them, and for this reason it's worth making repeat sowings every month or so because
this is quite a short-lived plant. Once plants do bolt, just lift them up and of course add them to
the compost heap. Keep sowing throughout the growing season if your summers aren't too hot,
making a final sowing in late summer using a winter hardy variety that should give a few
leaves to enjoy in the autumn, and then again from early spring. Spinach is one of those fantastic
follow-on or succession crops. Now if you're using our garden planner you can set your in-ground
dates and then view your plan in a particular month to see when and where gaps appear, and then
we can select our spinach, drop it in, and then expand it out. Easy! If you would like a planting
schedule for spinach, or indeed any vegetable, then please do check out the garden planner.
Now you can tinker with it to your heart's content by taking full advantage of our free,
no-obligation, seven-day trial. Just follow the link over here or scan the QR code to get started.
I'll catch you next time.