
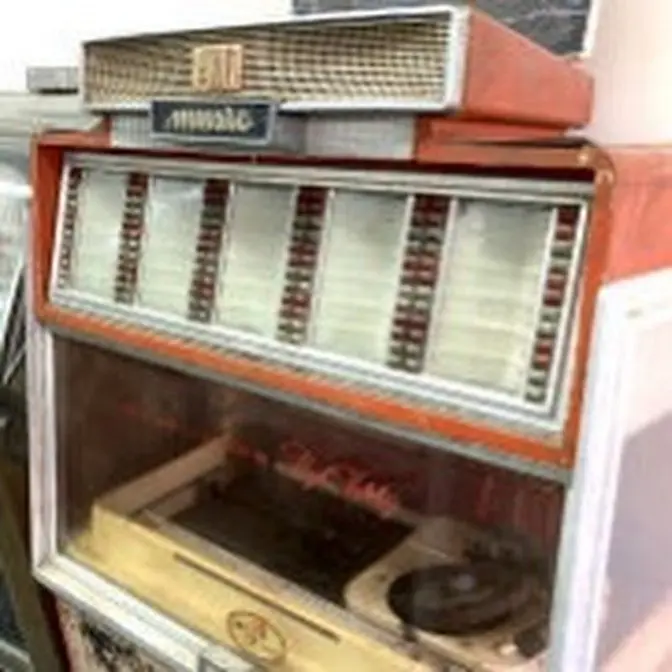
Rebuilding The Old Buzzing Tube Amplifier On This 1964 Rowe AMI Tropicana Jukebox
198 Video Views·Mar 17, 2025
Thank you to everyone who has been supporting our channel! If you use the link below before you purchase anything on Amazon, we get a royalty for sending you there, thank you!
This is our USA Amazon Link: https://amzn.to/3qwgVQU
This is our UK Amazon Link: https://amzn.to/31aKGaC
This is our Canadian Amazon Link: https://amzn.to/2Ycu5RQ
This is our Australian Amazon Link: https://amzn.to/34UvvVl
This is our German Amazon Link: https://amzn.to/3hh2QgI
----------------------------------------------------------------------------
We can be reached at this email address: [email protected]
Get Merchandise, T-Shirts, Mugs, and links to all the tools and parts we suggest for repairs on our website at http://www.LyonsArcade.com/Parts.html
ladies and gentlemen this is Joe's
classic video games back with another
cool jukebox repair video for you we've
been working on this
1964 row Ami Tropicana jukebox I believe
it's the jbm we'll look here in a minute
to make
sure um and we did a video where we we
uh worked on the selector the keyboard
there we did a video where we worked on
the gripper bow or the transfer
arm and uh also this solenoid here that
selects A and
B and we are now up to the part where we
need to work on the amp so this thing
plays and selects and then hangs the
record back up it's got all of that
going for it but the amp we haven't even
tested yet because it's been sitting for
years so this was one of the last tube
amps that uh Ami put out so it still has
tubes uh and like I said it was was
1964 so I don't know when the last time
it was serviced is or was
um and I have no doubt that the thing
doesn't work right okay so the the first
thing I'm going to do though just just
for the video I'm going to turn it on
with the amp plugged in we've got it
unplugged right now uh I'm going to turn
it on with the amp plugged in just so
you can see kind of what they sound like
whenever they're not acting right
okay the best advice though is if the
thing's old and you know it's not going
to work right don't even turn it on till
it's serviced because you're just the
potential of you damaging something is
pretty high burn up
resistors uh there's a little bit of
um I believe there's some transistors
and stuff in there too you're you're
going to well I know they are there is
you're going to uh cause more problems
you know plugging the thing in whenever
there's no real reason for you to plug
it in if you know that it's not going to
play right but I think most people
they're not going to be able to resist
at least trying it to see if they can if
the amp works so I realize that most
people are going to in fact plug it in
just do it for a little while though
okay don't you don't want to let that
thing sit there for 20 minutes it's
going to cook some stuff but we're going
to do it on this video just so you can
see kind of what you're starting with um
so let's look at this one it's on
there's a door on the back that you can
lower uh to get to the preamp and the
regular amp
okay so there's a little door that pops
down on this particular model this is
the jbm
model but most of them are going to be
similar of this
vintage it's the r 2620 amp I
guess uh and I believe that's the preamp
over there and this is considered the
main amp I may be wrong about that but I
think that's what we've got going on
here um which I kind of like because
that way I can
work on it half and half what do you
think and of course all the old tubes
are
filthy this thing has been sitting
forever now who knows if any of these
tubes are good I have a little
issue
with testing the tubes um I don't have a
tube tester now you can get the little
when I say tube tester most people that
were around back in the day and worked
on these you remember the little box
with a light on it and you plug the tube
into it and if the light comes on it's
good or whatever that's not really a
tube tester that's a short tester it's
basically testing like the filament in
the tube or something it's not really
testing if the tube is any
good you know um
so but uh so I I don't really have a a
way to check all of
these if a if if you want to properly
test a tube you need this real expensive
equipment that you know tests loads and
voltages and stuff on it and it's just
not practical for me to get one whenever
um I only do a little bit of this two
amp repair now the uh even if you do get
one the thing needs to be calibrated
they're very expensive it's just not
really a good option one of your other
options is you could just buy all new
tubes it's not crazy expensive there may
be some of these that are more expensive
than others but so that's going to be
our weakness if the tubes are bad I'm
not really going to have a way of
knowing that um I do have a bunch of
tubes but I don't know if I have these
particular ones
so um what I'm going to do is I'm going
to go ahe and plug it in and then we'll
turn it on and I'll show you what it
sounds like I don't believe it's going
to work though but we'll try it okay so
the way this one uh is plugged in is
there's just a little extension cord
here like a little power cord and that
sends power
to over here which sends power again
through this
weird power
connector over to the preamp the actual
uh stylus uh the the tone arm is plugged
in down there okay so let me power this
up okay we're going to turn it on and
look for
explosions might get some hum here
yep
we're loud
people again not necessarily the best
thing to do but we're going to do it
just to
illustrate okay let's see what record
we've got we can
try there's one in
in8 if I can hold them both
down
not
easily
okay so there is a
[Music]
stylus
so I've got
nothing major problems with the
amplifier okay do you agree with
[Music]
me do you agree with me that we have
major problem s with our amplifier or
our pre-amplifier or probably both okay
so the first thing I'm going to do just
to help us troubleshoot a little
bit the tone
arm plugs in up here phono input Left
Channel right channel well we don't
really
know how much of that problem is the
actual tone arm and how much of that
problem is the
um the amps now I imagine
it's all the amps but just to make sure
that it's not just a really bad tone arm
problem we're going to unplug that and
then I'm going to plug something in on
those Jacks those are basically just RCA
jacks so you can plug anything that you
have that creates sound on RCA jacks
into that and we've got a video game
store here that we own so I've got some
of those little things that plug into
the TV and I'm going to go get one of
those and we'll use it to test the audio
okay so I've got it playing a record
right now so that the you know it's not
trying to mute it it mutes it between
records I've got this little toy plugged
into
it getting nothing on the Left
Channel and nothing on the right channel
so got serious issues with the amp and
the PRM
okay we'll hang her
up all right so I'm going to go ahead
and pull that
out and uh we'll look at it on the
bench okay folks so this they're calling
at not the preamp but the stereo control
amplifier um so we're going to take a
look at this first we're going to have
to order some
parts and uh get them in now we're in
South Carolina so we usually order stuff
from Newark and it gets here within a
day or two so it's not too big of a deal
I'll edit it into the video Don't don't
worry you won't have to wait a day or
two uh but luckily we have our
schematics here now this is for the
Diplomat which was the year the year uh
before I believe this is the Tropic
canana so this is the J ours is the
jbm a a in 63 B in 64 I believe I may
have that all
wrong maybe I'm backwards maybe ours was
the year before this yeah I think ours
was the year before this so ours was the
M this is the n j an ours was the
jbm okay so anyway so this is what we're
looking at they kind of illustrate it
for you and then it's going to tell you
a lot of the parts so what we're going
to do is we're going to order a lot of
these caps that need replaced now the
ceramic ones we don't have to worry
about
um we'll check out the milar see what
those look like but we'll see what we
need to order and then the the resistors
you kind of want to go through and check
some of them overheat burn
up um we're going to clean the
tubes and put them back in and then if
we don't see any you can I need to get
something that I can at least test for
shorts and stuff but if we find any
problem areas like if we find a resistor
that's all screwed up then you know that
hey let's look on the schematic see what
that's near and we can check out the
things around that and see why it's
causing that right um but we may end up
you know just ordering New tubes and
stuff too so we'll see but uh I I could
just send this out and have it rebuilt
but if I keep doing that I'm never going
to learn how to fix them
myself right so I've got to eventually
start breaking them apart and uh working
on them myself
the we're going to check the in the uh
other the power amplifier we're going to
check the Transformers and see if we can
see if there's any shorts on those
that's the problem if you got a shorted
Transformer you're
screwed
um but uh we'll work through a little
bit so let me pop the back off of this
and see if it seems to line up with the
schematics that I've got okay folks so
it's all original nothing has been
changed so what I'm doing is I'm making
a list of the capacitors that need
replac like look at this G you don't
necessarily have to worry about the disc
ones but the the wax ones need to go
these are just little electrolytics even
um and so I've made a list of all of the
ones that are in it there's not many and
then I'm going around and I'm checking
the resistors a lot of them you can
check in circuit just where they are and
I came across one here that is a 1meg
resistor that tested shorted now if you
know about resistors they usually don't
short and so when I looked I cut it
Loose just to make sure when I looked
the pin on that socket was touching the
pin next to it so that was probably
causing all kinds of freaking problems
so I've got some schematics here I've
been looking at and it is the 7025
socket I removed the um I removed the
tube just to make sure that the tube
wasn't shorted together inside or
something
um so this is the area that we're
talking
of uh it's this one Meg resistor here on
pin
7 see how
pin8 is right next to it a couple of it
was just
touching literally the thing was just
bent over touching the socket now I
don't know maybe I did that after I took
it out but uh that could have been a big
problem so I'm going around and I'm
checking the the resistors I've got my
handy little chart here look at this now
I know most of you have it memorized but
I like to look at the chart just to make
sure I'm doing it right and what you'll
find a lot of times is a lot of these
resist after they're 60 years old have
drifted out of spec so if you get one is
way off you need to replace it now if
it's pretty close ah you can use your
own discretion but it'll tell you like
it's got a silver band it should be
within 10% if you got one that's like
22% off just replace it they're cheap
anyway you know and if you're going to
be ordering capacitors wherever you
order capacitors from you can order
resistors for a penny so it's not it's
not that big of a deal it just it's a
little more work to replace it so I'm
going around I'm finding the ones that
are wildly out of spec and writing them
down too uh and then I'll put together a
little order and we'll get some stuff in
but finding that one that was touching
um that very well may have been a huge
problem but it probably would have only
messed up one
channel the other channel would have
probably still worked but you can I mean
come on come on PE people that ain't
going to work come on people let me show
you something else
too packaged electron elic
circuit that is a packaged electronic
circuit who knows what's inside of it
probably dodes or resistors or something
hope none of them are
bad but I don't even know what's
supposed to be in them I guess
it I guess on the schematics maybe it
shows
you I don't
know
it's another thing to think about all
right so I'm going to keep working
through my resistors and make a list of
all of the ones that I think need a
little
help okay folks so I finished up my list
for
the control amp and now we're up to the
regular Power Amp which is the more
traditional uh amplifier I believe you
could
probably use just this you probably only
need the other part well I don't know I
was going to say maybe you only need the
other part if it's in an actual jukebox
but who
knows so
uh same situation I'm going to go
through and make a list I'm going to see
if maybe I can check the Transformers
with a
multimeter and see if any of them are
shorted there's
three Transformers so maybe we can look
at the
schematics and figure out a way to test
across the primaries or
something okay so uh
looks like it's actually around the same
amount of components that were in the
other
part of course it's not powered up I'm
not powering it
up boy there's a lot of dust in there
though it appeared to me that this has
never been removed from the uh
machine whenever I was taking it
Loose
interesting okay so let me start looking
through it if I'm running anything
strange I'll come
back okay so I worked through it a
little bit just testing stuff um let me
show you kind of what I did on this one
I didn't have as many resistors that
were way out of Speck on the on both
parts there were no resistors that were
like way way out of
spec but there were a lot of them that
were like um they're supposed to be
3,300 ohms and they're 3900
ohms and it's a 10% resistor so really
it should be like 36 30 at the top you
know but it's 39 so you can tell it
hasn't really burnt up or anything it's
just it's old and it's
drifted so instead of it being like 10%
off maybe it's 20%
off you know and it's that's a little
it's kind of borderline but if they're
that far off you probably ought to
replace them so after after they're like
more than 10% off and they're marked
with the with the uh tolerance band you
know
but I didn't have any that were supposed
to be 4 Ohms and now it's you know two
two Megs because it's burned up it's
nothing like that they're all just
they've drifted a little bit or they
were never all that in all that uh close
to begin with but you know and also I'm
measuring them in
circuit which can cause you a little bit
of problems I found two on this one that
in circuit you could tell that they were
um um you know they were supposed to be
100K or whatever but in circuit there
were 200
um they were um you know
2.5k right so you would think oh would
that resistors shorted well resistors
don't usually short and it's in circuit
so there's something else in that part
of the circuit that's making it test
lower now here's one thing you can do
that I do a lot on pinball machines and
arcade games and
stuff this is a stereo amp so if there's
a reading over here that's weird all you
got to do is go find the one on the
other side and see if it's weird too too
so both of them got pretty much matched
so it's just in circuit that's what they
measure and you can of course take it
out of circuit and measure it again but
if nothing's damaged you're probably
looking at it's fine right if nothing
looks damaged um so I couldn't find any
resistors I found a few that were out of
spec but I couldn't find any resistors
that were completely burned up tubes we
don't know about yet of course and then
something that you kind of need to do is
you want to check
out your prime your
uh this is I think this is called the
audio it may be called the audio input
output Transformer I think it's just the
audio output Transformer again I am not
an expert don't listen to a thing I say
we're just here for entertainment
purposes okay but what happens to these
a lot is that the Transformer gets
burned up why because you're running the
thing with bad caps and bad tubes and
all of that right which is why I didn't
really want to turn it on earlier so on
the on the Transformers you have the
primary side where the voltage comes in
so this is it's coming from the amp
right and then you have the secondary
side where the voltage is going out so
this is goes out to the
speakers right
so it's usually the primary that burns
up I believe the secondary could too I
guess but usually it's a
primary um and I've just I've dealt with
Transformers and other things right so
you can actually measure this if you can
find these wires down there so on this
particular one one of the sockets for
one of the tubes pin
N9 is connected through a 10 Ohm
resistor to the black wire at one end of
the primary and
then pin nine on the other socket is
connected to the brown wire so if you
measure between
here and this
resistor you get about 190
ohms now is that what it's supposed to
be if only I had another one that I
could
check how would I know if it's supposed
to be 190 ohms it's not marked on the
schematics oh wait a minute there's a
whole other channel so if you do the
same thing on the other side and check
from here to here it's also around 190
190 ohms so one of them is this one and
one of them is that one they both test
about the same people so either they're
both fried or they're both good I don't
know now another thing you can do is
test resistance between either one of
those wires and ground because as you
can see there's no connection to the to
ground it should it shouldn't be
grounded right now when I get that I get
a real high resistance to ground so it's
like two Megs to ground let's make sure
that that one line doesn't go over and
do something
funky
okay yeah so see the line this is like a
center tap and it does go up here and
across and across here and it
connects through a
capacitor to ground but you know it's
basically through the one of the big can
capacitors on
it so I'm getting like 1.3 Megs that's
fine and then when when you test it on
the other one same so I don't believe
either one of those is shorted to ground
or burnt up so we might get lucky we may
get
lucky okay so I'm going to order uh our
parts and wait for them to come in and
then we'll slowly start putting them in
and uh I think I'm going to have to bite
the bullet and get something to test
these tubes
with why not heck let's just do it let's
get a tube tester now I'm not going to
get a big crazy expensive one but I got
to get something that'll test these a
little bit maybe a little emission
tester or something like look at that
one you think that works I don't know
man I don't know man that's kind of H I
don't know about that one
but I hate to just buy all new tubes
these might be fine and they might they
might sound better than the new ones I
don't know how would I know I need a
tester don't you understand I have to
spend money I got to do it I don't know
why you're trying to talk me out of it
so we all agree now that I have to
buy all right so um so let me order the
stuff and whenever it comes in we'll
start putting it in so hopefully on the
next part of the video you'll see a nice
big cardboard box full of
crap did you expect anything last people
look it's a cardboard box full of
stuff yeah I got my stuff
in all right so I'm going to take
carefully take the tubes out so I don't
break anything and then um I'm going to
take it back take the bottom back off
and we'll do this one first basically uh
we're testing resistors if one's out of
spec put in a replacement resistor and
uh replace capacitors but get this I
have a capacitance meter I'm going to
check the bad the Caps that I take out
and see if they really are bad just to
make it interesting so I'm going to
start swapping some stuff out and then
we'll check some caps and uh see what we
come up
with all right folks so I'm starting to
swap them out now look at this look what
we got in the mail
there's a letter involved it
says with all respect to your fluke they
are awesome here is a meter with a
capacitor
Checker TRX lab Channel reviewed and
like this model take care and enjoy from
viewer Neil H well Neil H thank you very
much you know what we don't have a
capacitor Checker and you know what I
could actually use a capacitor Checker
so you you met passed around and sent me
something that I actually needed I
appreciate it if y'all don't know people
send us little stuff like that all the
time we really appreciate it thank you
Neil that's awesome CU I I have an
instant thing I we got this in about a
week ago and then I instantly started
working on this jukebox and thought ah
you know what it'd be neat to know if
any of those caps are good or not I
think it may save me a little bit of
time on this one and I'll show you why
here in a second so we appreciate it
yeah this thing does look pretty good
Kats um one of the things that goes on
whenever you make channels and you you
get a bunch of followers now I'm not
talking about the other channel I don't
know anything about them and don't so
don't take this as me saying anything
bad about anybody but uh we actually had
these people email us
kits and um they wanted us to review one
of their meters
now uh I don't have any problem with
that but it's just I like doing things
whenever it it um it like kind of
seamlessly fits into our videos but yeah
we get people wanting us to review stuff
all the time so I did consider reviewing
uh their meter but another thing is I
don't really
like negative reviews like I don't I
don't really like saying well I wish the
button was a little different I hate
that crap drives me nuts so I'm not a
good reviewer because I don't want to
say anything bad about
them right
so I don't the review thing is just not
really for
me but in an roundabout way we ended up
getting one of them anyway so we
appreciate Neil sending us this I think
we'll definitely be able to use it and I
have no doubt that it's probably a nice
little little thing so I have never
actually owned a capacitance beater but
we're going
to use it now what do you think let's
see if this will sit if I can get this
to sit here where you can
watch as we
check look at that can you see it I
think you can see
it now other channels would have figured
this out before they started filming
it okie dokie
so we're going to do this one first it's
a big hunking 2.5 microfarad you know
before we do that let me do this so it's
a
2.5
this is a brand
new
2.2 okay let's put Neil's capacitance
meter to the
test I'm going to hold it with my hands
which might screw up the me the reading
a little bit let's see if it does let's
see if my skin screws up the capacitance
reading at
all
2107 on a brand new 2 .2 now I'm I'm
going try to do it without touching both
leads hold on a
second
okay yeah so it's giving me
2.1 that's probably right this is
probably a um cheap cap let's try a
10 10 microfarad 250
volts
brand new
one 9.8 9.9 something like that okay so
the thing's pretty accurate it's at
least in the ballpark don't you
think so we're going to try this 2.5 now
this thing is from
1962 see the date code
3162 so testing a wax cap
capacitor from
1962 we
get it takes it a second to come
through
10 so
10 microf farad um instead of 2.5 so
that's that ain't good
that ain't even close now we also have
these little capacitors This Is Not wax
this is
like it's more like a ceramic or
something I don't know what that's made
out of but this is supposed to be
a
03
10% so 300s of a
microfarad
and 10%
so
33 or
2700s it's going up I don't know if
that's the cap though or my fingers
because I'm touching both of them let me
let me redo
it
this one has the leads the cap has the
leads cut off let's try it a little
better there we go there's our reading
31
nanofarads which is
031 so in other words this thing is from
also the
60s and it's debt on the
money so this type we probably don't
have to replace and those are the that's
the
spra that's a good brand name in it or
is it just a brand name I've heard
of so that's what we're doing so the one
is way off but come on come on people
you can just look at it and tell that's
off look at it it looks like a damn
candle cool all right so we updated that
one let's pull some more out by the way
the actual Power Amp can sit
flat because because the Transformers
make a pretty solid base where you don't
have to worry about breaking the tubes
if you're
careful all right so I'm going to go
back through uh following my list and uh
swap out the Caps as I go and we'll see
what we run into in here but I'm going
to try to test some of them beforehand
because you know we just ran into this
same issue where perhaps the ones I'm
taking out are better than the ones I'm
putting in so I'm going to test them as
I go with the capacitance meter and swap
what is necessary okay so I'm just going
through and replacing them uh one by one
uh a lot of times it's really easy
because you've got a little um strip
here where you know you can cut off the
old one and put the new one right back
where the old one was you have to be
careful to watch polarity though you
know uh but sometimes you have to wing
it a little bit so like the these are
these are the can capacitors up on the
top it's just a big can and there's
three different capacitors built into
this one for instance so it's a 30 UF 30
UF and 30 UF it's labeled on the side of
the can and it has a little diagram to
show you which wire is what if you look
really
close it shows you which
uh there's a little symbol by the things
that show you which one on the legend on
the can uh that is but it's a little
it's a little bit tricky because this
capacitor here so we basically this is
the the positive leg of the cap and the
negative leg is the ground which is
basically attached to the plate right so
you can solder the negative leg of a cap
here and then you have to take both of
these resistor legs and solder to the
positive leg of the cap that you're
putting in to replace it with and so you
kind of run into a a u uh a problem
where you don't have enough space to put
everything um you can take the can off
and Hollow it out sometimes you can find
a replacement for the can that's the
right the same
exact um capacitance you know that's a
little rare
um so I usually just try to put them
here in the way but you have then you
have to make sure that none of the legs
are going to bend over and touch the
wrong place that can cause you lots of
problems uh for instance if this wire
were to touch this wire on this resistor
you'd short two things out and blow
something up you know so you got to be
careful how you do it and you got to
make sure that everything stays the same
so this these two resistors have to re
connect to your new cap which then has
to connect to ground somewhere and then
uh this cap needs a wire and a resistor
connected to it and then there is yet
another resistor connected to it and
then over here you've got two wires and
a resistor so you have to keep all of
that uh doing the same exact thing as
you um as you put the new caps in so it
just takes a little bit of trial and
error to make sure everything's fitting
in there properly and won't short out
after it's moved around a little bit so
so um got a few of them swapped out
we'll swap out some
more okay folks
so I got the cap swapped
out uh a few of the resistors mainly in
that one the ones over here were more
inspect
okay and then I was able to test the
tubes I'm going to do an entire other
video about that but we uh we bought a
tube tester and we were able to test
those I would just put it in this video
but I want to show you the whole thing
and do the whole shebang and make it a
big big deal cuz it's a big big deal to
me okay so we'll do that on a separate
video all of the tubes tested fine
except for three of them so in other
words none of the tubes tested fine
instead of except for four five six
seven eight nine of them so there were
nine good ones and three bad ones um
which would definitely cause
problems
right so I've got it all uh I've got it
all
together put it all back in and uh now I
guess we're going to turn it on and see
if anything burns up so here we
go nothing exploded immediately do you
see any smoke from either amp oh I'm
starting to see some glow on this
one
I don't
know looks pretty good now you heard it
before that glow down in
there we still might clean these amps up
a little bit better to um the uh we
still have to clean up the bottom of the
machine but you know we're still in the
testing phase
folks so the
three tubes that were bad were there
were two um um
12 ax SS on
the control lamp over
there
um and then there was
a 12
au7 no 12
A7
so ecc83 and ecc81 do you you Europeans
and by the way when I say that I say it
with nothing but love we love our
Europeans okay I'm just checking to see
if anything looks like it's catching on
fire everything looks
cool uh we're good now why would
something catch on fire because I
screwed up that's why so if I screwed
something up and shorted something maybe
it would
right
so I have another surprise
I have
found I'm not going to show it right
now let's see okay let's try that I have
found some
records that I
believe uh I can play
without having it knocked off YouTube
what do you think about that should we
go turn the light let's turn the lights
off people so we can test it we got crap
all in the floor look at this look look
at it's a gang gear look at all this
stuff
everywhere maybe if uh that would turn
away maybe if we go this way it' be
easier to get
back over here to the juke box it's over
I think it's in this corner don't hit
nothing don't step on
anything okay we made it
back all right you know what it's night
time let's turn it up to hell with the
neighbors
now with the Lights
Out Boy you can see those tubes glowing
now glowing tubes does not mean that
they're working it's just a byproduct of
a tube they happen to
Glow that's all it means
people so we're going to try one I have
no clue if it's going to work see if I
can
gonna have to go down low
folks
okay it's probably going to be loud if
it
plays heard a
pop
so I'm going to fill it full of rock and
roll but YouTube won't let you play that
without getting a copyright strike but I
think they'll let me play
[Music]
this
[Music]
wow I think it's got a skip in it here
in a
minute
[Music]
let's try another
one let's try another one what do you
think yeah so YouTube you know I can I'm
going to fill it full of rock and roll
but if I play it playing you know a
freaking Chuck Barry song or something
YouTube gets all
upset but I don't think they know what
this
is I found some special records that no
one knows about on
[Music]
[Music]
YouTube I don't know I think that amp
sounds pretty
good
[Music]
[Music]
[Music]
[Applause]
[Music]
Happ
[Music]
[Music]
la
[Music]
[Applause]
[Music]
all right folks so there you go I am
going to do a whole other video like I
said about the tubes and the tube
[Music]
tester
so we'll do a whole other video about
the tubes and the tube tester and we'll
play it some more on
that but I hope you enjoyed it so far I
think we've about got her up and running
I need to clean it some more and do some
more uh cosmetic stuff put all of the
records in it of course um but yeah
she's really starting to look a lot
better all of this too is just in the
wrong spot it'll that'll look a lot
better whenever we get done so I hope
you enjoyed it leave your comments down
below make sure to give us a thumbs up
for taking the trouble to all this for
you we didn't have to invite you into
our showroom here people when we're
working on our jukebox we were just
doing that because we care about you so
leave your comments below hope you
enjoyed it uh if you want to help our
Channel you can use our links to Amazon
if you're going to make any purchases on
Amazon so there is a link down below
click it it takes you to Amazon if
you're going to buy anything on Amazon
after you click our link it gives us a
tip for sending you there cuz that's an
advertisement right and uh last but not
least make sure to check out my brother
Donnie we work on Old pinball machines
arcade games and jukeboxes my brother
Donnie works on Old Vehicles things like
that I'm over there on his channel a lot
go check it out the link is down below
this is a row Ami Tropicana
jukebox now with working
tu
[Music]
[Music]
[Music]
la
[Applause]
[Music]
a
[Music]
m