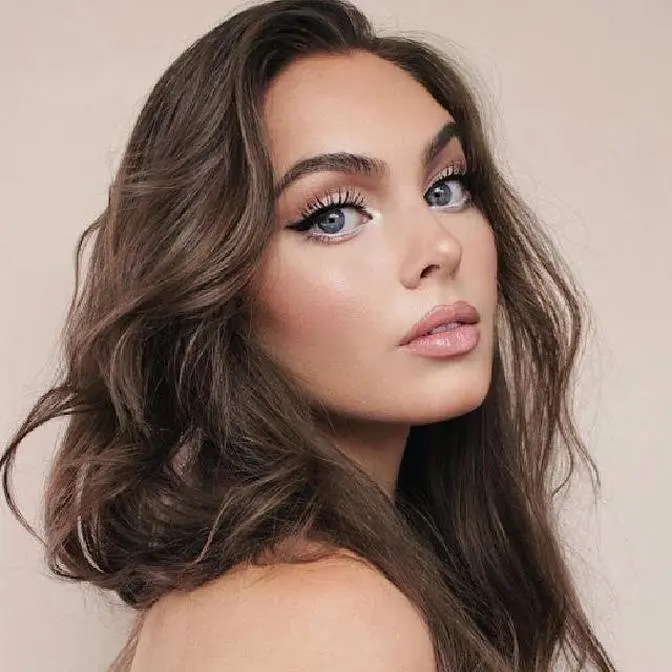
(WATCH IN HD) Hey girls!!!! Which hairstyle is your favourite!? Also, long time no post, I've been sick but I'm getting better and getting back to regular filming :) Give this video a thumbs up if you love my hair tutorials and follow my on twitter and insta @jackiewyers!
I used the NuMe Bubble wand! Dove Flexible Hold Hairspray
Songs: Because You Live Jesse McCartney No One Aly and Aj --- MY JAM Princess Charmin by Megan and Liz Princess of China by Coldplay Ever Ever After by Jordan Pruitt Miracles Happen by Myra I'll Be by Edwin McCain Supergirl by Suzie McNeil A Dream is a Wish Your Heart Makes by Lily James Bibbidi Bobbidi Boo by Helena Bomhan
Disclaimer: Not a sponsored video! I love Disney.
Staring out at the rain with a heavy heart.
Hey, guys.
It's Jackie.
And to state the obvious, my hair is looking pretty crazy
right now.
This is not the tutorial.
This is the aftermath of doing a bunch of tutorials
today on my hair.
So I hope you guys enjoy these four styles inspired
by Lily James as Cinderella.
I seriously love Cinderella in the new movie,
as you guys can tell.
And she had some really cool braided hairstyles
before she went to the ball.
So I thought I would do that.
And I think they look great for second day hair.
So I hope you guys enjoy.
And let's get into it.
This first hairstyle is super quick and easy.
And I apologize for my voice.
I'm just getting over a cold.
But here are my second day curls.
My hair is pretty matted.
So I'm gently brushing it out from bottom to top
so I can actually braid it later on.
For this look, separate your hair into a middle part
and then section from the part to just behind your ear.
Brush the section out one more time.
And on this side, we're going to do a simple French braid.
Divide this into three smaller sections
and pull the outer strands over the middle strands
like a regular braid, adding in a little more hair
into the outermost pieces each time you cross over.
Once you've French braided to the top of your ear,
normally braid and tie off the hair,
leaving some length at the bottom.
Gently tug the braid apart and give your hair a quick tease.
And now for the other side.
Again, divide a section just behind your ear.
And the difference with this braid
is we are creating a lace braid.
I know a lot of you guys know how to do this.
But like a French braid, you're pulling two outer strands
over the centerpiece, except this time,
pick up smaller pieces just along your hairline
to add into the one side of the braid.
I'm doing two extra stitches of the lace braid
while pulling my hair backwards so it lays nicely
when it's pinned back.
And then I'm finishing off the rest of the braid normally.
Again, tie the braid off and pull it out a little bit
for a fluffier texture.
For added curl and wave, use a bubble wand.
And this one's by NuMe.
And just curl some pieces closer to the root for more volume.
And then toss them up.
Spritz a little light hold hairspray into the curls.
And then pin that one side back.
To cover up the two bobby pins I pinned in an X
to hold the braid back, I added an accessory from Michaels.
And it's this really pretty pink butterfly.
And hers was blue, but I love pink.
So there you go.
Look number two is similar.
Just French braid both sides to the ear
and then braid regularly down.
And fluff the braid up like the last time.
Comb back the hair at the crown of the head
and tease a little bit so you don't
see the part trailing off.
Gather both braids to the back of your head
and create a very loose knot like how
you would when you start off tying a shoe.
And keep a hold of the knot and bobby pin
the braid into the surrounding hair to lock it in position.
And that's the simple braided back.
I added some fake flowers for a pop of color
and a more princessy vibe.
For this next style, lay spray tightly
and keep on adding hair into the braid along your hairline.
And this time we want to go past the ear.
So keep on adding hair now down by your neck.
And when you're adding in, make sure the strands
have enough length so that the braid can
be pulled back comfortably.
Finish off the braid normally.
And I'm so sorry about my voice.
This is going to be cringeworthy to edit my voice together.
But I really wanted to get this up here finally.
So once you have that, just tie it off as usual.
Once both sides are braided, pull apart the braid.
As always, you guys know the drill.
And then pull the braids backwards.
Now from the back view, we are going
to create a very loose French braid.
So of course, the first step is to create
three different sections.
And you're going to incorporate those two lace braids
that we created into the outermost sections.
And then start braiding regularly.
And as you add in a little bit of hair each time,
leave out some hair as well.
We don't want to add in all of the hair into this French braid
because we're going to have some loose flowing hair
beneath the braid so that it's very soft and feminine.
And it gives you extra length.
Loosen up the braid.
And hopefully, you can see all of the detail
of the little braids in there and the messy texture.
And this looks really great when you have some highlights
so you can really see the movement.
I just dyed my hair really dark after this video.
So I'm glad I got this done when I still
had some lightness and highlights
because you guys will see very soon that it is a lot darker
now.
I wanted a little bit more curl.
So I'm going in with that same bubble wand
and just fixing up some pieces.
And I really recommend these wands.
It's super cool because you can do really tight curls with it
or looser, more irregular looking curls.
There's just a lot of possibilities with it.
And whenever I want to do those kind of old school Taylor Swift
curls, I tend to go with my bubble wand.
We are finally at the last look.
And my hair looks a little tousled
from doing the other hairstyles.
But this one is one of my favorites again.
So leave some strands out around your face
and pull your hair into a half up, half down pony.
And I went a little thicker on the top of the top half
than I usually would in an Ariana Grande type style.
But that's what makes this look kind of cool.
And then soften up the top.
Give it a little bit of a messy texture
by pulling at the roots lightly.
And next, we're going to create a little bun.
With long or thick hair, I like to divide the section into two
and then twist one and create a simple ballerina bun.
And I tie it off with an elastic.
And then with the second section,
I like to lightly twist around and then just pin it over top.
And there's my finished bun.
Curl and fluff up the front pieces and then add a headpiece.
And I tried out a couple ribbons and sashes.
But what works best for me was a very lightweight scrap
of fabric.
And I just cut it and tied it around my head twice.
And this look is so fun and very messy made in.
So if you try it out, for sure send me a picture.
Put them together and what have you got?
Bibbidi-bobbidi-boo!
Salakadoola-minchika-poola, bibbidi-bobbidi-boo!
It'll do magic, believe it when I say.
Watching, I hope you guys enjoyed this tutorial.
And if you did, please give it a thumbs up
so I know to do more hair looks.
And I apologize for like never wearing full shirts.
Like today, I really wanted to wear a little spring dress,
even though there's snow on the ground here.
I was just fooling you all.
I really wanted to wear some new spring stuff
I bought in the tutorial.
And I look naked in like half the tutorial
because I ended up cutting it off like before the dress.
So I'm going to try to wear more clothes.
I realize like most of my tutorials
I wear like skinny straps or like no straps
because it's just hot with my lights.
So that's the reasoning behind it.
But anyways, if you have any requests,
you can let me know in the comments down below.
And all of the songs and products used
are in the down bar as well as my social media links
like Twitter and Instagram.
So give me a follow to stay updated.
And I will see you guys next time.