
Find YOUR Best Makeup Look! A Makeup Guide 💞
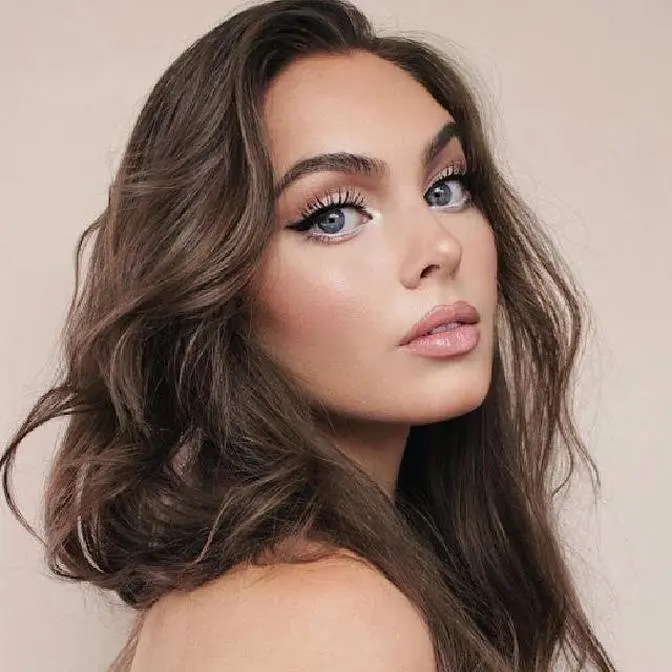
welcome to an hour long compilation of beauty tutorials to help you find your best makeup look. From mastering everyday makeup for your CONTRAST level, a glamourous look for occations, or matching your animal pretty look - I hope these guides are helpful!
Comment below YOUR favorite look, & see quizzes on jackiewyers.beauty : https://www.jackiewyers.beauty/quiz
#JackieBeauty #Makeup #ContrastMakeup #AnimalPretty
Hey, it's Jackie and welcome back to my channel for three different makeup
looks that showcase the contrast makeup theory. This is a viral trend on TikTok
from French makeup artist Aliénor and she talks about tailoring makeup
application to the natural contrast of someone's skin tone, hair color, and eye
color for an overall harmonious look. Since I'm doing three styles, I will be
altering my skin tone a little bit for each look and I'm trying out a bunch of
different base products from SheGlam. Here's a roundup of the foundations and
concealers that I'll be using. I'll let you know what's best for oily skin or
dry skin. If you're on the lookout for affordable base products, these are all
under $10. Let's get started with low contrast, which means you have not a lot
of difference in the depth of color between your eyes, skin, and hair. So
naturally, there's already quite a bit of harmony going on, so we can go with like a
no-makeup makeup look. For foundation, I chose the SheGlam Skinfinite
Hydrating Foundation in the shape Porcelain. It's a creamy, medium coverage
foundation and you can sheer it out to mimic the look of natural skin, but you
get that extra hydration and gorgeous glow. It can be low contrast at any skin
tone. It'll just depend if your eyes and hair are close to the color of your skin.
This is great for normal to dry skin. My skin is normal. This is the type of
foundation I typically go for. If you want some high coverage foundation to
cover up any acne or discoloration, this is a good fit. It's the Skin Magnet
High Coverage Foundation Stick and this is the shade Linen. It is super light, so
they definitely have a good range of products. Like, this is basically white.
I'm gonna double as my concealer. While it's higher coverage, it's totally
breathable and light and it's very portable, so you can keep this in your
makeup bag and just touch up your makeup on the go. Finally, let's set the skin. I
love this powder. It's the Insta Ready Face and Under Eye Setting Powder in
Bubblegum, so it has a pressed powder up top and then you unscrew it and you have
translucent powder as well and Bubblegum Pink is great for brightening. I set
mostly underneath the eyes and then just dust the powder over the skin because I
do really like how the foundation looks as it is. I added in my favorite nose
contour for a little bit more dimension so things didn't look too flat. This is
Tawny Amber and it's the Sun Sculpt Liquid Contour. Since I'm a full-blown
blonde today, I'm using the She Glam Brow Pencil. This is the Instafill Brow
Pencil in the shade Blonde. This is a really nice blonde shade. It doesn't pick
up too warm or anything. Add a couple freckles. I'm using this palette in all
three looks today, but I'm just gonna keep it simple because these are
supposed to be everyday looks. I know I do have a flower crown going on, but it's
partially to make this wig look okay and it is inspired by a fairytale
princess and I wonder if you'll guess which one. Lightest shade, Pebble Toss. This
is matte. I'm applying to the inner corner for a pop, taking the shade Earthy
Eyes, applying this to the crease and winging out. We're adding in the shadow
for subtle contours so you really want to blend it out so you can't really tell
where it ends and begins, but we're still kind of adding that structure to the
face. Desert Dweller under the lash line. Touch of Shining Horizon. Oh, pretty. The
Softest Barely There Liner, just using a brown eyeshadow. She Glam All-in-One
Lengthening and Volume Mascara. I just use the volume side, the big brush like
this. Just a little bit to my lashes. I'm still gonna add a little bit of color to
my cheeks. This is the Peach Dew shade in the Cheek to Cheek Blush Duo. So this is
cream and then this is powder. Ooh, this is subtle but it gives that nice pop of
glow. Since we want this natural, you can add a little bit of the Boyfriend Blush
placement where you just drag it a little bit down here so it looks like
you're naturally blushing. Speaking of skin products, even though these items
are under $10, they still have skin-loving ingredients, fragrance-free,
alcohol, gluten-free, with added minerals, and the products are vegan. This is the
shade Brazen that I'm using on my lips in the So Lippy Lip Liner. Oops, see the
color? I'm creating a stained effect here with the Pout Pillow Cushion Matte
Liquid Lipstick in Counting Sheep, basically taking most of the color off.
And there we have it. Everything is very soft, but I think adding a bit of natural
color to the lips and cheeks makes everybody look a little bit healthier, so
that's the route I took it. With all the makeup done, you can see how beautiful
this foundation is sitting with all the other cream products. I love this one.
Moving on to medium contrast, I have a bit of a tan, deeper hair. This is a wig,
but I do love this length, and the objective here is still to create a
balanced look that enhances the features without overwhelming them. For the skin,
let's amp up the coverage this time. This is the Full Coverage Foundation Balm, and
I have the shade Bamboo and Nude, so let's swatch on my cheek and see what
would be a better fit. Bamboo and Nude. I think it's leaning this way. There's Nude
and Bamboo. Yep, definitely Nude. You get an instantly flawless application with
just a few strokes, and it has a non-greasy formula and a thin
consistency, but you can build it up. This is giving beautiful coverage. It's a
great shade, and I like to apply with a foundation brush. How sleek is this
packaging? And this formula resists oil and sweat, so if you have oily skin, this
one's perfect for you, and it's non-drying. Then for concealer, we're gonna
brighten up a little bit more. This is the She Glam Lake Magic 12-Hour Full
Coverage Concealer in Chantilly. It has a soft matte finish, and a little goes a
long way. I could have done even less little dots. So if you have any leftover
darkness that you want to correct under the eyes, this is perfect. And with medium
contrast, we can handle a little bit more bronzer slash contour, so I'm gonna be
using the the Sunbeam Matte Liquid Bronzer, and I picked up the shade
Caramel, which I think would be a really good fit, because right now I'm looking a
little washed out. See how the contrast between the skin and the hair is just a
little bit dramatic? Let's soften. This is inspired by a celebrity, because I will
always steal celebrity noses without shame. I'm not gonna share what my
celebrity inspirations are for this, because I want to see if you can guess
who I'm inspired by each time. Comment below. Finally, setting the face with this
two-in-one powder. We have this under-eye powder here. It looks white, but it is
translucent. And then underneath, translucent powder, but in loose form.
Blush for medium contrast, I want a bit more of a pop to the cheek. This is the
shade Tangerine, and it's their Divine Flush Matte Blush. This has a pretty
ombre effect. Also picked up Seduction if we want to add to the contour after. I
can never just use one blush. I'm gonna try Seduction. For brows, I did them off
camera, but I just kept them a little bit darker, more groomed, and have a little
bit more of an arch. I wanted a bit more sharpness to really frame the face. And
then for the palette, we're gonna be using the Live to Roam palette again. I
love this one. Super fun packaging, and great neutral shades. Sandcastle all over
the lid, mountaintop in the crease, building up with Mud Road, keeping it
soft, fading over the lash line. Instead of only using those light to shimmery
shades, we can handle more of a soft smokey eye. Brightening the brow bone.
When I work with grays and cooler tones, I still tend to like to add just a tiny
amount of warmth just to blend out. I feel like it looks a bit more natural.
For eyeliner, I'm taking a deep brown instead of black. It does have a really
soft smoke with just shadows, but how cool is this eyeliner? This is the Easy
Glide Matte Eyeliner Pencil, and I use it to tightline. I also like to create more
of a point in the inner corner. Creates more of like a sexy cat eye shape. Just
remember to actually put this down before you put the lid on, because I have
made that mistake before. An outer corner lash would look really pretty, or just
building up that lash on the outer corner. This mascara has two ends, so this
second brush is for volume. This is the So Lippie Lip Liner in the shade
Neutral. Oh my gosh, it comes with a little sharpener! I didn't know that.
This is the SheGlam Glow Addict Lip Balm in the shade Rocky Road. So brings me
back to the 2000s. Just a touch more color. And finally, I love adding a little
bit more highlight. This is Tea Cake, and it's the Glow Bloom Liquid Highlighter.
Here's the look I would recommend for medium contrast. Finally, we're on to
high contrast, and unlike medium contrast where we tried to soften up the look,
this time we're gonna match the intensity that's already there. So
there's quite a difference between the skin, the hair, the eyes, the brows, so
we're gonna add, you know, a little bit more eyeliner, some pop to the cheeks and
the lips, so that everything is intense and striking. That's how to balance out
this contrast, so let's get started with the foundation. I wanted to try two
different formulas. First up, on this side of my face, I'm starting with the SheGlam
Complexion Pro Long-Lasting Breathable Matte Foundation in the shade Butter
Cream. This foundation goes on beautifully, it looks like your skin but
better. And then on the other side, this is the SheGlam Skin Focus High Coverage
Powder Foundation, also in the shade Butter Cream. I hope you can see, but this
side is a little bit lighter, and I did find that I didn't get as much coverage
around my eye, whereas I got more of a seamless finish. But that being said, this
was so easy and quick to use. So I just applied it, it felt really soft and
smooth on the face. But I think I'm forever a liquid foundation girly, so let
me know if any of you prefer powder foundation. I don't think I really grab
for it on my channel very often, but it is kind of like an easy one-step fix
because I usually go in with foundation, concealer, then I powder, whereas this is
all in one step. So I think that's kind of the preference, but I do prefer this
one, so I'm gonna even it out with a little bit of this on this side. Another
quick on-the-go product is the Rapid Retouch Cream Concealer, and this is
linen, so this one is very fair and super high coverage. The foundation already
gave me enough coverage, but this is really great for brightening. High
contrast, the brows are super bold already, but let's add a little bit more
definition with this concealer. I really like this concealer. You can apply it
with a brush as well. See how high coverage that is? Gave myself a more
snatched nose, a little bit of cheekbone definition, and now I'm setting with this
powder, Alabaster Magic Veil Setting Powder. I'm keeping this look more matte
than the first two. Again, with the Chic Glam Live to Roam Palette, you could go
in with a soft cut crease, but since I took the brows really, really bold, I'm
gonna focus more on the lash line and lashes, and then have a pop to my cheeks
and lips. Desert Dweller in the crease, I'm creating a bit of an exaggerated lid
shape. Mud Road for a bit of liner. This look is a bit more sculpted. I'm not
using a ton of makeup for each look, but this one is a bit more sculpted. We're
gonna amp it up with some black liner. I'm building up my lashes, and I prefer the
volume side of this mascara. Fanned out lashes. Wow, I think high contrast is my
favorite style of look so far. Let me know what your favorite is. Obviously, I
don't have black hair. I'm more low to medium contrast, naturally, but I feel so
sculpted. I'll be so interested to see if there's like a clear winner on which look
is your favorite. For blush, I'm using the Floral Flesh blush palette. We have a
range of beautiful blushes in here. They're very pigmented. I started with
this one down here, and it looks a little bit off at the beginning because we
don't have any lip color, but I am adding it in a more like natural shape. So
instead of it being like a snatch contour, I'm just bringing in that color
and just kind of dabbing it throughout the cheeks. I started with an inspiration
of a live-action Disney princess for this one, but now I've taken it my own
way, and let's finish up with lips. The color on the cheeks is a little bit
brighter, and it'll look nice with a berry lip. Can't forget a bit of lip
liner. Right now, this is kind of giving a bit of Priscilla Presley. This is the
She Glam Dynamite Bloom long-lasting matte lipstick in the shade Dare to Be.
It's really pretty. You could keep it deeper or go with a little bit more of a
pop. This is a bold plan. Sometimes it's nice to add a little bit of the lipstick
on the cheeks to match it perfectly. Yep, this is my favorite look. Reminds me of
Snow White. I love how the foundation looks, the powder. This matte lipstick is
really beautiful. It's super matte, and I feel like, yeah, it doesn't transfer.
It just transfers a tiny bit. Maybe I'll do, like, another Snow White-inspired
tutorial if you want to see it. This contrast makeup theory definitely
checks out, and you'll have to let me know in the comments which you think you
suit or which was your favorite, because makeup does have no rules if you really
like a bolder look and you are low-contrast. You can totally wear it, but
it's just a fun way to see maybe what would be best on you. We've tried out
quite a few base products from She Glam, from foundation, concealer, and powder,
I'll go through what's best for each skin type. Starting with foundation, She
Glam Skinfinite Hydrating Foundation. She Glam Complexion Pro Long-Lasting
Breathable Matte Foundation. Full Coverage Foundation Bomb. It looked amazing on
camera, and it's very high coverage if you're looking for that. She Glam Skin
Magnet High Coverage Foundation Stick. Worked beautifully, but I used it for more
of a concealer. Skin Focus High Coverage Powder Foundation. Did its job, but I'm
not into a powder foundation so much, but let me know your opinion on that one. And
then concealer, we have the She Glam Rapid Retouch Cream Concealer. This is
super high coverage, I really enjoyed using it. And then also the She Glam
Like Magic 12 Hour Full Coverage Concealer. Super high coverage, great for
highlighting. Top powder, I'd recommend the She Glam Face and Under Eye Setting
Powder Duo, but the single translucent powder also works great. All the products
used you can find on SheGlam.com, and I have individually linked everything down
below. If you want to try out a really fun quiz to figure out which look would
suit you best, head over to my website JackieWyers.beauty. I hope you like the
looks I came up with, and I'll see you in my next one.
Hey, it's Jackie, and welcome back to part two of the Contrast Makeup Theory. If you
haven't seen part one, I have a quiz where you can find whether you're low,
medium, or high contrast, meaning the value of color between your skin, eyes,
brows, and hair is either subtle or strong, and you can create a makeup look
to complement your innate contrast levels for an everyday harmonious look.
It's a great base theory to figure out what works for you, but then you can
totally amp it up and find your best glamorous look. Of course, you can try out
any, no matter the contrast levels, but if you find whenever you do try to wear
more makeup, you just feel like it looks off, hopefully one of these looks will
work for you. There was a lot of interest in some of the lip shades that I used
last time, so I'm partnering again with She Glam, and all of these products that
I'll be sharing are super affordable, cruelty-free, and the packaging is super
cute. There's something for everyone in these lip combos. I'm gonna skip
foundation today because I want to try out the red lip theory. This is where you
wear a red lip without any base makeup, and it pulls the most focus, kind of
diffuses the rest of the skin, and makes you look put together without having to
do all the base. Plus, it'll look more natural, which I think is perfect for low
contrast. But first, I'm gonna define my brows a little bit more. This is the
Instafill Brow Pencil in the shade Blonde. My lips were feeling so dry, so to prep,
I'm using the Crystal Glaze Moisturizing Lip Care Set. This would make such a
great gift, cute Galentine's Day present. You can get one or all four, and these
are sheer, so pretty, they smell good, and they have fun names. So this one's Candy
Lane. Strawberry Milk has more of a pinky sheen to it. Cocoa Cookie. Melon Pop had
the most different scent. It was definitely more fruity. I love the
crystal-like shine, they're not sticky, and my favorite is Candy Lane because I
never really like wearing a lip color without a lip liner, unless it's clear.
Two palettes here. First, I'm going with this warmer brown, and I'm starting to
create an outer V shape. Gonna be pretty soft, and then with this cooler tone
palette, I'm taking this contour shade, starting to carve out the crease. I'm
using my favorite Sunburst Glow Mixer, patting this on a brush, and adding it
almost like a cream shadow to the center of the lid and the brow bone, and then
topping up with this shimmery shadow. Now we have a really subtly sculpted eye
when it's all blended together, and it looks really nice with a little bit of
eyeliner. I feel like I'm a mix of Heidi and Lauren Conrad with this hair right
now. Super cool liner. This is the Easy Glide Matte Eyeliner Pencil. I'm tight
lining, dotting underneath the bottom lash line, creating a really soft wing,
but then I'm blending out with a brush. I just applied some outer corner lashes
with a tiny bit of mascara, but they're a little bit bigger than I wanted them
to be. I'm just reusing a pair I already had, but I'm not gonna add any mascara
over top of them to try to keep them a little bit more natural. Feels so weird
to not have any contour or like face makeup on. Let's try the red lip theory,
and then I'll probably add some contour. I pulled some red shades. These are the
Lip Facts lip liners. I'm gonna go with the shade But First Coffee. I'm overlining
my upper lip. Something I love about these lip liner pencils is they have
their own sharpeners that come with them right on the lid. That way you can't mess
up your lip liner pencils. I've destroyed so many eyeliners and lip liners by
using the wrong sharpener, just thinking it, you know, works and then it's not the
right size. So this is perfect, and I'm also going to use Mojave. Yeah, let's
create a little bit more dimension. And the other one I pulled is Gatekeeper.
Gatekeeper is a little bit more on the red side, but I prefer to go with a
slight brown for the outer corners, and then we'll blend over top so you'll only
see the red. I went through all the Chic Lame lipsticks, and this is the most
perfect red. It's called It Takes Guts, and this is the Dynamat formula, so it's
super matte, but what's interesting is it goes on creamy, but then it dries down
almost like a liquid lipstick. It's pretty unique. I haven't seen anything
quite like it, and then once it's dried you can add more. Once this completely
dries down, it is transfer proof. It's so vibrant, and this is a very true red. And
what do we think of the red lip theory? Would you wear, you know, no makeup on
your face and just rock a red lip and, like, do your eye makeup? Or do you think
it needs something? This looks really nice in person. Like, my skin does look
fresh. I am having a good skin day, but even if you do have a couple little
blemishes, the red is supposed to pull the focus, and you can get away with, you
know, no foundation at all. But I think I'm gonna add a little bit more bronzer
just to give a bit more definition, but still keep it a little bit more natural.
Also, I really want a nose contour. Bronzer. This is Mud Pie, and it's a Sunbeam
Shimmer Bronzer. Blended in really nice. I am not hating the no foundation or
concealer, but I am gonna bring a little bit more brightness to the skin and life
to it with, again, the Sunburst Glow. This is in Light Medium Cool. One of my
inspirations was my favorite picture of Gigi Hadid today, but then I added a bit
more of a lash, slightly different shade of red, and then with the hair, this is
kind of more like 2000s. At first, I was not sure about this whole look, but now
I'm loving it, like with the messy hair, the undone skin, but it just looks glowy
and natural. I love the red lip with this. I think I'll do this again. Like, I
usually, when I wear red lip, I go with a full coverage base. Like, I don't think I
ever have not tried that. So I'm wearing It Takes Guts, and these are high
coverage enough that I can apply another one over top, and you won't really
disrupt the color. So this one, like I said, is stronger than ever if you want
to go more cool-toned. I really liked the brightness of the first shade, and I
think it suited this look a little bit better for this coloring, but still so
pretty. I will go deeper with the last look. And finally, if you don't want to go
quite as vibrant as, like, a bold, bold red, but you still want to do a red look, a
strawberry is a really nice shade to go with. This formula is the SheGlam
Pelt Perfect Shimmer Lip Plumper. They also have the Shine Lip Plumper without
any shimmer to it. It's just more like a gloss, and the one I've applied has, like,
tiny little finely milled shimmer. This time, we have a bunch of nude options for
medium contrast. In part one, we went with a soft smokey eye and a medium-toned
lip, warmed up the skin so there was less contrast between the hair and the skin
for an overall harmonious soft look. But in my opinion, the best glam look for
medium contrast is Mila Kunis' Smokey Eye. For the base for this full glam look, I
went full coverage. This is the Full Coverage Foundation Balm in Nude. It's
honestly so full coverage, I'm not going to use any concealer, but I am going to
start using a little bit of bronzer like we did in the first video. This is Burnt
Sienna, and it's the Sunbeam Liquid Bronzer. Around my forehead, underneath
the cheekbones, under the chin, and really blending this out just to soften up the
skin and the hair next to each other. Also, brows, I darkened up off-camera, and
I've kept them a little bit thinner, and they have an arch to them. Setting with a
bit of powder. Usually, I like to use a powder puff, but I don't need as much
powder because the finish of the foundation is pretty matte anyway. And
let's jump into the eyes. This is what I'm going to do with the Intense Smokey Eye.
We'll add the nude lip, and then I'll add the blush to make sure I don't overdo
the blush. The Black Easy Glide Matte Eyeliner Pencil is a great base for a
smokey eye. So I've rimmed my bottom lash line, the tight line, all over the lid, and
then just with a small brush, I'm smoking it out and then building up by the lash
line again. It's a great tacky base, but when you do start to blend it out like
this, it can get pretty grungy. Like, it won't just stay unless you set it with a
powder. So that's what I'm gonna do. I love a smokey eye when there's some
warmth above the crease. I'm gonna take this shade here. Taking a bit of a golden
highlighter, I'm gonna bring this through the brow bone. Taking a deep brown first,
I'm gonna add this across the lid. Start to mattify the eyeliner pencil. I don't
want to put too much on the brush because we're just building up slowly.
Bringing back some warmth so it's not lost. A lot of going back and forth with
this look. Taking them off, applying this under the bottom lash line, and mix with
the black. It should come off a bit more purply. Darkest black, let's add in that
liner again. Shadow this time. It's gonna blend in really well with all the other
shades we've applied. Looking pretty good. I want to add a bit more shimmer to the
lid. I think this taupe shade will be nice. The little pop of brown here makes
it so flattering. I think that's a really important part to make it look softer,
even though it is pretty dramatic. Adding a little bit more of like a gun
metal shimmer in the inner corner. I think with my eyes it's a little bit
too smoked downward, so I'm gonna fix that up and then add some mascara. This
look looks especially good if you do chunky mascara lashes, and then if you
want to add a little outer corner like I did, it'll help elongate the eye, but your
eye might already have more of that almond shape. I just have very round eyes,
so I like to add that touch. This is the Cheek to Cheek Blush Duo Peach Juice, and
we have a cream and then a powder. And then for lips, I have a nude in each
formula. I've already prepped the lips with my favorite lip oil. How cute is
this? Also, this one smells like coconut. I bring this everywhere with me. And
between the Lip Facts lip liner, I decided to go with neutral, but maybe
I'll switch it to the more brown shade. Yep, this is the perfect shade. It's a
little bit more of a pinky nude, and we are going with pinky nudes today.
Feeding this into my natural lip. It is pretty similar in color, but we've just
enhanced the lip line. And here are the nudes that I pulled from the Dynamite
Bloom Long-Lasting Matte Lipstick Collection. I chose Encore Energy because
it's the lightest one. Really pretty nude. Again, super creamy. And when this dries
down, like I said, it's completely matte, but I do like to add a little bit of my
favorite lip oil. There's a clear formula and then a shimmer. They do that
a lot with She Glam lip products. Just for some added moisture. This one's Gotcha.
And this is Have No Fear, so a little bit darker. This is the matte packaging, and
then we have a glossy finish. And this one is glossy on the inside as well. This
is the Mirror High Shine Lipsticks, and this one's my favorite. It's called Own
Your Shine, and it's a great topper for any lip product, or you can just add it
over a lip liner. I like butter. This is what more of a medium pink looks like
with this entire look. Next formula are the Lip Plumpers, and they have a glitter
version, and then one that's just shine. And these have a crystal finish, like
sugar crystals. Out of the glitters, we have a really pretty nude. It's basically a
clear balm, but you have a bit of peach. They're pretty. They're sheer, and they
have a lot of sparkle to them. Same formula, just no shimmer. So there's my
take on glamour for medium contrast, and if you're a redhead, you might suit low
contrast if you're like strawberry blonde and have freckles. But if you have
more of a deeper auburn shade, you're probably in the medium category, and I
wouldn't recommend this look, but the fox pretty look that I did if you're
looking for a bolder glam. Finally, for high contrast, I might have been
influenced from recently seeing the new Nosferatu movie. I did a tutorial in
updo for Ellen Hutter's No Makeup Makeup look, but I also love romantic
gothic looks. So that is what this is, with a pin-up influence. Love a good
witchy or vampy vibe, especially in the winter. Anyone can try this out, but you
do see this look on a lot of famous beauties who have this color. Just like
in my first high contrast look, I'm going with the same base. This is the
Chiclam Complexion Pro Long-Lasting Breathable Matte Foundation. I love this
one. It's in the shade Buttercream. Since this is pin-up, I'm really going for
flawless, and I'm going to add some brightening to the center of the face.
This is also Buttercream, but it is slightly lighter, and it's the Lake Magic
12-Hour Full Coverage Concealer. I like to apply underneath the eyes and pat out
with my finger, and sculpt out the brows. Really great, affordable, matte, high
coverage base. Love these products together, and I'm going to set further
with powder. Oops, before powder, I am going to use a little bit of a cream
contour. This is Clay, and it's the Sun Sculpt Liquid Contour, just underneath
the cheekbone. I'm not going to use any bronzer at all, so this is super cool
toned. I can feel my neck kind of swollen. I think I'm getting sick. That is why I
started with foundation today. I like to give usually the full effect, but I didn't
look well, so I added a little bit before I went on camera today. But by the end of
this, we will not look sick. We will look glamorous. Something you'll notice with
this look, with the placement, is I'm keeping everything pretty rounded. So
with my cheekbone, I went low and round, my brows are round, my lip shape will be
browned, and I just think it gives a really pretty romantic look, even though
we're keeping with gothic tones. I love this pink powder for setting. This is the
under eye portion, and then there is a loose powder, but I'm just going to use
this all over the face. So I take a powder puff and press, and it gives such
doll-like skin. Fair, I love doing a high coverage base that's really matte. I
don't really go for it when I have a tan, I like the more natural look, but I
feel like such a doll already. Adding in a little bit of nose contour, and I'm
also going to use this as my eyeshadow palette. The shade Canyon Trail, taking a
tiny amount on a brush, and then I've carved out from my eye socket and an
exaggerated shape for that pin-up style. Made a bit of a taller nose bridge. So
yeah, feel free to skip a nose contour, do it however you like to do it. Let's do
the quick smoky eye. For the eyeshadow, I want it to be a kind of pin-up, but a
little bit more smoky, like not too classic 50s. So I've taken a silvery
shade, this is Shining Horizon, patting this over the lid. With Desert Dweller,
I've started to create a rounded shape up to the tail of the brow, and then
building up the eye again with Mud Road. This is like a charcoal shade, it's pretty
close to black. And then with Mud Road, fading to be a little bit more like a
All these shades look warmer next to the warm packaging, but on me you can see
that they're pretty cool toned, especially when you just go in with a
light hand. Finally, because I didn't want the lid too bright and bold, I took some
of Mountaintop just to mute down the lightness, but we still have a bit of
sparkle. Finally, Pebble Toss on the brow bone to really make it pop and the inner
corner. Whenever I show this eyeliner, I get so many questions because it's the
coolest. This is the Chiclam Easy Glide Matte Eyeliner Pencil. The shade is black.
I'm gonna do a pin-up wing, but keep it a bit softer. It's gotta be one of the
easiest eyeliners to use. Mirroring a smudgy wing on the bottom lash line as
well, and I'm keeping the waterline without any eyeliner so that we get a
doll-like eye. Just added a little bit of mascara and then some outer corner
lashes. Outer corner lashes definitely add to this look. I remember last time I
put too much blush. This is super pigmented. Just a bit of color blended from the
contour into the eye a little bit. I want like a pop of crimson. Chiclam has so
many amazing lip colors, especially in this color palette that I'm going for,
but because I am gonna swatch a couple on my arms to kind of figure out what
shade I want. Lip oil first. I love this one. I decided to go with the Jelly Wow
Hydrating Lip Oil in Princess Vibes because it is like a purple-y shade and
I feel like it's witchy. Sparkly. I definitely don't have any other lip oils
that look quite like this, so they're one of my favorite Chiclam products. And
while the different shades are super fun, they do for the most part look clear, but
then you have either a sparkle or like a subtle tint of whatever color that you
get. Ooh, and all the sparkles. A lot of you were really interested in these
lipsticks from my previous tutorial. This is the shade I'm Risky. Deep plum with a
matte finish. Ooh, that's a really pretty shade. You can't tell me that this isn't
the perfect lip color to complete this look. It feels like it's drying, almost like
a liquid lip, but it's not in the formula of a liquid lip, so it's super cool. The
Chiclam Dynamatte Bloom Long-Lasting Matte Lipstick. A Bold Plan. A Deep
Berry Pink with a matte finish. Dare to Be. It Takes Guts. True Red with a matte
finish. These are some of my favorite matte lipsticks that I've ever tried. I
recommend moisturizing your lips beforehand. They're super long-wearing, so
it's good if you can wear it for, you know, quite a long time. Looks like the
same packaging, but it is shinier. This is the shade Rent Free. High Key. This is
Own Your Shine. It's a clear balm, and I think it would look really cool with the
black liner around the lips I'm gonna do. Like I mentioned, I've kept the upper lip
round, so I've over lined through here a little bit, and then extended out the
outer corners, and I'm blending in. I love the shine. Obviously, I've changed the
color quite a bit because I did add the black in the middle, but these feel like,
oh my gosh, butter on the lips. So much shine. I think this is super cool, but
let's go more in the kind of deep berry direction. And finally, the Pilt Perfect
Lip Plumpers Hot Cocoa. I thought this was sheer when I put it on my arm, but no.
If you want lots of color, super smooth. Wow, that one looks gorgeous as well. What
do you guys think? Did you prefer the matte with this look? Do you like this
glossy, bampy shade? I really can't tell. I think the matte one was my favorite, but
this is really nice too, and it's super comfortable if you like more of a shiny
look. Let me know which contrast look you are in the comments down below, or which
look was your favorite. If you would be daring enough to try out some of these,
or if you preferred more of the everyday looks that I already covered. Again, huge
thank you to SheGlam for working with me on today's video. I love how they let me
be super creative while showcasing their affordable products. Tag me if you try
out these looks. I would love to see your faces and repost you. And if you want to
check out my quiz over on JackieWires.beauty to find out which
contrast level you are, again, that is linked down below, as well as all the
other products. And yeah, this was fun. I will see you in my next video.
Hey, it's Jackie, and welcome back to my channel for a types of pretty make
tutorial. Lately on social media, I've been seeing these types of pretty videos,
especially on TikTok, where people are categorized into types of animals. Deer,
cat, fox, and bunny. I believe this is originally a Korean trend with even more
animals, but these are the main ones we're focusing on. If you're curious to
find out which animal inspiration suits you best, you can head over to my new
website. I will have it linked down below and take the quiz, or you can just take
inspiration from whatever animal you think is the cutest. On screen, you can see
some celebrity inspirations, and the main feature of Dear Pretty is big, round,
dark eyes. We'll aim for a soft look using neutral brown tones, a touch of
warmth with a peachy blush. Since we're doing several looks, I skipped over the
base a little bit, but I did start with the Touche Eclat YSL Blur Primer because
it's so ethereal and pretty with the little gold flecks. And then my go-to
foundation is the Beautiful Skin Foundation in 5 Neutral. This has a glowy
medium light coverage. And moving into highlighting and contouring, I'm using
some cream products. One of my holy grails is the Makeup Forever HD Skin
Palette. I love doing some highlighting and contouring, and it feels very light
on the skin. I'm enhancing low, rounded cheekbones here, and then just defining
the jawline a little bit. Around the forehead, though, I am wearing a wig that
have little bangs, so I will be taking these down. This wig is from YesStyle.
Actually, they have such good wigs. It takes a little bit for them to come, but
they're really reasonably priced. Super soft. Before setting the cream products,
this is my all-time favorite blush right now. This is the Makeup by Mario Soft Pop
Plumping Flesh Veil in Just Peachy. I adore this shade, and I think it's
perfect for this look to brighten up the skin. Following the round cheekbone up, I
really want to take these bangs down, so I'm gonna powder. And this is one of my
new favorite powders. It's by Anna Sui, and it has the cutest packaging. This is
a brightening powder. I want to keep it pretty luminous, but my forehead really
needs to be mattified for the bangs. I'm obsessed with the butterfly on the
packaging, but also, it's very light. It sets the makeup, but you can still see
the sheen from the foundation underneath, so I just love it. Giving a bit more
definition to my nose. This is just what I like to do, but I'm not doing anything
too sharp for this look. For eyebrows, keep them full, natural, and if you can,
keep them a little bit more straight. I'm using this beautiful Flores' eyebrow
pencil that works amazing, and then setting with the 24-hour brow set by
Benefit. For this look, the eyeshadow palette that I'm using is the Master
Matte's The Neutrals palette by Makeup by Mario, and I'm selecting this shade right
here and creating a wash of color all over the lid. Next up, I'm taking this
deeper neutral brown, and let's apply it through the crease. We're gonna make sure
the eyes appear quite round and doe-eyed. Blending out and adding some
lightness to the brow bone. I want it to be soft, but the eyes are definitely the
focal point for this look. Creating a little bit of a wing, just with some shadow.
We've gone with the really simple shadows, and then I have this ColourPop
cream gel pencil in the shade Brouhaha, and I'm applying this to the tight
line, really enhancing the lashes. You can also take this under the bottom lash line,
and then this part is optional, but if you do want to make your eyes appear
even bigger, you can go with the Makeup Forever Artist Color Pencil in the shade
Boundless Bisque. I prefer this to a white, I just think it looks a little bit
more natural. You can line your waterline. Before finishing the simple eyes, I'm
gonna move on to lips, and I'm using my all-time favorite, the Iconic Nude Lip
Cheat, and I am gonna over line for a pouty look. This feels so nice and light
on the lips. This is Vanilla Smudging Lip Pencil in Coral Chew. Chew? Hopefully I'm
saying that right, but I love the way this feels. It doesn't have a lot of
transfer. It's great. And again, I like to work in a little bit of coral, because
with all the deeper tones, I just find it's a little bit brightening. I just
applied the flutteriest lashes that look so natural, so typically I'll curl my
lashes and apply mascara, and then apply falsies, but I didn't apply any mascara,
and these look incredibly natural. Like, some people definitely have lashes this
big, I'm not one of those people, but these are the Pear Touch, and they're 10
to 15 millimeters, and they mimic human hair. Now I am gonna add a little bit of
mascara. This is one of my all-time favorites. It's called Fairy Drops
Mascara, just on the bottom lash line. It's a beautiful rose. It's so pretty, I
almost don't want to use it, but it is a gorgeous highlight. The overall deer vibe
is pouty, ethereal, and soft, mostly neutral, with a pop of warmth to it. And I
had to show you this set of earrings from Fable London, because they are deers.
I'm gonna pop these in. My ear looks red, not because the earrings, because my
nails. I cannot function with these nails. Here's my celeb inspiration for Bunny
Pretty. Also, whoever this glamorous girl is, she's like the main inspo, and then
also Elle Fanning. The vibe of Bunny Pretty is cute, angelic, with makeup in
shades of pink to mimic a bunny's tongue. This style of makeup will look best on
people who are in the spring and summer categories, and it'll just depend on what
type of pink you choose. And jumping into foundation, I've already applied the
Make Up For Ever HD Skin Hydra Glow. I love how light this feels. It gives a
little bit of coverage, and has a nice radiant finish. Since this look is all
about pink, I just got some new brushes in PR. This is by SL Miss Glam. Got a
cute little bag. Let's open this up. A little thank-you note. Oh, pretty. Okay,
these are perfect. So these are double brushes, which are great for travel. Look
at how cute they are. I thought these would be really fun to do this bunny
look. These are the Dual Pink Collection. This whole look is very bright and
peachy pink. So this is the Yenza Super Serum Silk Concealer in Fair One. I
really like this concealer. It blends in really nice, especially underneath the
eyes, and it is pretty full coverage. Yeah, this is one of my favorite full
coverage brightening concealers. Let's try this palette from Make Up For Ever.
One of my most used palettes of all time, and you can tell by how messy it is, is
this bronzing and highlight palette that I use a lot. This one, though, has a mix
of blush shades, as well as some bronzing shades. I think this shade here might be
perfect for this look. The style is soft, so it's not going to be super sharp and
angular. I'm doing a bit of a barely there contour with this shade here, but
then I added some of these shades over my nose, and let's layer some blush. I
initially started applying with a brush, but it definitely packs more of a punch
if you just use your finger. I love the finish of this. Again, very radiant and
dewy, but I think I'm gonna add another powder blush to really amp up the color.
But this looks great for every day. Going for a button nose type of effect, so I've
added a shadow right here, set with powder. This one is really cute and
really translucent. You can't see it on the skin, but it beautifully mattifies.
I'm adding a little bit of light powder, but you could just go in with a brow gel
for this look. Little faux freckles, or you might already have freckles. This
also can really enhance the look of the contour. If it's a little harsh, you can
break it up with some freckles. Gives it a bit more of like a cottagecore feel,
like a bunny. Let's amp up the blush one more time. I pulled two different options.
This one is from the drugstore, and it's the Milani Coral Cove Powder Blush. It
has this beautiful rose. I've had this for a long time. I do think this really
would suit the look on me. I have kind of a warmer golden undertone to this blonde,
but if you want to go more cool toned, this is a stunning option. I might even
use this just to try it out, but it's the Happy Powder Blush from Rare Beauty.
Oh, this is perfect. Yeah, this just gave the boost I was looking for. But since I've
been dying to try this out, I'm going to add a little bit of this cooler toned
pink as well. You can mix warm and cool toned pinks on your face. It won't be
like that crazy of a difference, and it might even make it pop a little bit
more, so let's try it. Oh, it definitely gives a more luminous finish. Oh, that made it pop
even more. I love it. Another product that I picked up in a mini is the Rare
Beauty Positive Light Enlightened Luminizer. I got a mini because I just
have so many highlighters that I don't end up going through. This looks so pretty.
Let's do a cute nose highlight. Perfect. That's the only place I'm going to
highlight on the face, and I'll do the inner corner of the eye. Eyeshadow is super
easy. This is a beautiful palette. It's Pillow Talk by Charlotte Tilbury, and I
took this light pink, like muted pink shade, and just added it all over the lid.
Just a neutral wash of pink. Then I took the slightly deeper shade, add it into
the crease. I also winged it out a little bit. It's super soft. You can go with the
lightest shade up top on the brow bone. If you want to keep this look in one
palette, you could take the same shadow here on a bit more of a dense brush and
apply it underneath the bottom lash line and create a soft wing. If this isn't
deep enough for you, you could bring in a bit of a deep purple. I think that'd be really pretty.
Stemming out the eyes, and then I did go ahead and, like in the doe-eyed look, went
back in with the Makeup Forever Boundless Fisk on the waterline. Totally
optional. My eyes are a little too brown for this trick, but we're still gonna do
it and keep it bright in the inner corners. I'm loving this one so far. Make
sure you give your lashes a good curl for this look. We're really gonna focus
on the upper lashes and not the bottom lashes at all. Curl, double curl the tips.
Favorite mascara. For lips, of course we have to try the viral Bunnytongue Lip
Gloss. This was not the inspiration behind the shade, but basically on
Chinese social media this video went viral and people were trying to find the
best swatches that matched the bunny's tongue, and this one came up a ton. I have
seen reviews that it's a little bit sheer, so I'm gonna use a little bit of
concealer on my lips to make sure that it pops. That's a tip that I saw to do.
Not too much because we don't want it crusty. And I am gonna do a little bit of
lip liner as well. Can't go wrong with Iconic Nude from Charlotte Tilbury.
Adding some height to the cupid's bow. Let's blend this out a bit. I did my first swatch
over on TikTok. I love how this gloss looks. I don't think it's as bold as a
picture of a bunny tongue, but this look together is so pretty. It's something I
think I'll wear very often. Won't look quite as brightening without my, like,
fake blonde hair. I'll put it on my palm. Everyone seems to do that. So it is pretty
sheer, but you can build it up. Kind of similar to Sabrina Carpenter, but with
brighter pink tones. So instead of those rich rosy tones that Sabrina likes to
wear, it's a bit more springy and bright, and I think it's really pretty. But let's
add an outer corner lash. They're the Harmony lashes from Sophia. These are so
pretty. Popped on Harmony like last time. I did use the little clip it comes with,
and these look so nice. I blended them in. The band is so light. It feels like I'm
not wearing lashes, which is my favorite.
Pretty. I feel like a bit more of a pop. Since I'm just one person transforming
myself into how I imagine each of these looks to be on me, you could definitely
alter this to suit you. I really think this pink look would be flattering on
everybody, and it would just be if you're more cool-toned, go with a cooler tone
pink, warm tone, or neutral. I say go a little bit warmer. I don't know why, but I
always prefer a little bit warmer of a pink on me. And that is the bunny pretty
look. Let's move on to Fox Pretty. And this look captures the essence of a red
fox, natural and earthy, likely appealing to those in the true autumn category. And
for those exploring Fox Pretty without the red hair, the overall vibe is just
very bohemian. Got the red wig on. This one looks a little more wiggy than the
blonde, I feel like, but I do really like this color. And I've been experimenting
with the Nude Stix mini kit here. The vibe, as I said, was bohemian, and the
blush shade is Bohemian Rose. So I thought it would be perfect. I used
Bondi Bay under the cheekbones, Bohemian Rose on the cheeks, and Yes Honey at the
top of the cheekbones. I just blended this all in. It gives a very natural
finish. And to suit this red hair a little bit more, I have taken the
Precisely My Brow in the shade 2.75. It's great for redheads, and I've applied
this as little freckles all over my forehead, my cheeks, and really full and
brushed up for the brows. I know this isn't everyone's cup of tea, but I loved
this picture of Sadie Sink. I'm not even doing mine as bold as hers look, but I
love it. Let's set with a bit of... Oh, that is a lot of powder. Set with some powder.
Now the freckles are kind of barely there, but still peek through. I want a
little more drama on the cheekbones. This is by Tom Ford. I'm only using this shade,
so really you can go with any deeper shade like this. It's more on the browny
rose side, just enhancing those contours so I look all foxy. And I want pops of
metallic with this look, so I'm using the Bar of Gold from Charlotte Tilbury.
Adding a bit of a nose snatch per usual. And finally for the shadows, I just had
so much fun with this entire palette. I used every shade. I started with Cove, and
I blended this over my lid into the crease in a V. And then with Glowing,
which is this stunning shade here, applying that to my lid for a bit of
sheen. You can intensify it with your finger as well. Then I started to blend
into the crease with Coconut with a really light hand to extend that V, and I
also use this as some liner. Again, like a barely there liner type situation. And
finally, Coastline on the brow bone. I'm really just experimenting here, but this
really was the perfect palette for this look. With Dimensional Dark Brown, also
from Makeup Forever. Clearly Makeup Forever has become one of my favorite
brands. I'm tightlining the eye just to prep for lashes, and rimming the inner
corner. Before adding lashes, I need to decide on lips. I have so many options. I
know I want to go with a bit of a berry lip stain. I think that'd be really
pretty. Let's just try La La Land, but I do like to line. My lips are feeling a
little dry because I did two looks today. Starting with Pillow Talk Medium by
Charlotte Tilbury. Just to switch it up, I'm gonna keep the lines a little bit
straighter and sharper. Okay, let's blend it out a bit. Might not quite be berry, but I think it'll go
really well with this look. Creating a stained effect. Oh, I love this. This one's
very different. Definitely more of a bold look from the other two, but I'm loving
it. I thought about doing kind of a berry blur for the deer look. I'm glad I saved
it for this one. You can always just double up and use your lip shade as a
blush, too, to make sure it really matches. I love adding a pop of metallic. To top it
all off, I went with a pair of lashes, and these are the Healing Lashes from
Esopia. They are accent lashes, so I just applied them to the outer corner, and of
course, with all of these looks, you can obviously not do falsies, but I think
they just always elevate just a little bit and give each look its own distinct
look. I could so do a Hauling Roden look again. Do you guys remember the
Teen Wolf hairstyles that I did a long time ago? I feel like this wig is pretty
good, and I added a little braid, which is very Lydia. If you do love animals, I'm
pretty sure there's a lot of fox stuff on Fable England as well. Let me see. Yeah,
look at this bag, the enamel earrings. Next up is Cat, and I feel like there is
a crossover between Cat and Fox. Like, if you take away the red hair, Rihanna
totally suits Fox as well. Finally, let's cover Cat Pretty. I decided to go with a
very black cat vibe, and this look is very angular and high-contrast. Also, very
sexy and a little bit 90s. I'm going for cool tones here. Winged liner, a seductive
pout. Like the red hair, the black looked crazy on me until I added darker brows,
so we're already starting off with the brows done, and I've applied my
foundation. Brows, I'm using the APH Dip Brow. These brows are a little bit
inspired by Phoebe Tonkin, Megan Fox. I bought the dip brow for a 2016 inspired
tutorial with Nostalgic Products, and I wore a great black wig in that video. I
thought that's what I was applying, but this is actually a topper from this
Priscilla Presley look that I did, and it's not really meant to be worn as a
wig like this, and it keeps getting tangled. So if it looks ratty, it points
in this video. Using a touch of the Rare Beauty highlighter, I do really love this
one. We're going smoky and more cool-toned. This is my favorite silvery
palette. It's from Victoria Beckham Beauty, but first I'm taking a bit of a
bronzer shade and adding this through the crease and under the bottom lash
line. This is subtle, but I find it really helps blending out those cooler shades
so it fades into the skin nicely. Starting with the lightest shade,
bringing this through the front portion of the eye. I love this silver shade. Fade
it over the entire lid. Then we'll start to smoke out in an outer V with the taupe
shade, and then you can use a touch of black by the lash line, but we are going
to go in with liner. The Ruffer eye brushes are so easy to blend with. They
really can amp up your makeup game if you're struggling with blending. And I
also use this palette in an upcoming Grace Kelly tutorial. I filmed a short
video and I'll have to re-film it, but this was the go-to palette because Grace
Kelly loves gray eyeshadows. Also during the Sephora sale, I got this beautiful
eyeshadow. This is one of their newest shades. It looks white, but it has a bit
of a silvery tint to it. Ooh, pretty. It's just brighter and a bit more cool-toned.
Eyeliner, I'm going with my most used. This is LILYBYRED AM9 to PM9 pen liner
in black. I created a wing. I decided to go outwards rather than upwards. I'm gonna
add a flick in the inner corner, going very close to the mirror so I don't mess
it up this time. I wouldn't say this liner is my best work, but the lashes
should help. This might feel a little bit random, but I love to bring in a
really rich warm shadow underneath the bottom lash line, even with cool tones, to
really make the blue eyes pop. So this one is a copper. You can skip this if you
want it to stay all cool tones, but this is just my favorite. I don't know. I don't
usually go for cool tones. In this picture, that's my main inspiration.
Megan Fox's lips look more rounded, but it is yesified. It's added into the gods.
These are just taken from Pinterest, and there's so many edits of celebrities, but
sometimes I really like how the enhanced photo showcases or makes the makeup more
dramatic. So if it captures the makeup, I use it as my inspo. This isn't a Megan
Fox transformation, so I'm gonna go a bit sharper with the Cupid's bow. I'm using
the ColourPop lippy pencil in CTRL. I want to say that like curdle. Mixing two
shades, I picked this up for, again, the 2016 tutorial, and I actually really love
it. It's the Invasion Hydra Matte lipstick from Gerard Cosmetics. So I added that on
the outer corners to blend in the lip line, and this butter gloss looks like a
really interesting shade. It's actually kind of bubblegum pink, but if you mute
it out, it's really pretty. Finally, to further enhance this Black Cat inspired
look, I went with the Echo lashes from Asobia. I was a little worried as I was
doing this that it wasn't gonna turn out as I wanted it to, but I definitely think
this gives Black Cat energy. What's really interesting about these lashes
that like doesn't apply to me at all, but they're for girls who play sports. Like
you can just pop them onto your natural lash line without any mascara. They look
super natural. They're very light, and it feels like you're not wearing lashes, but
I definitely wore them in more of a glammed up way, but I love these. So I'll
have them linked down below. I did work with them over on Instagram, but I'm a
big fan of the brand. Two people I find very cat pretty are Mila Kunis and
Phoebe Tonkin in these photos. If you do want to go with more of the warmth, then
you could check out the fox look. That one might suit you a little bit better,
but I wanted to do a four distinct looks. If high contrast looks good on you, you
might be in the winter category. I've been mentioning different color seasons
throughout this video to kind of share my thought process behind creating the
looks. So if you want to know my actual color season, because I have been wearing
wigs and like altering my coloring this whole time, I am a soft autumn. So here's
another video I did that's Doe-eyed inspired, but just with my own coloring,
and I'm clearly a soft autumn. These are so uncomfortable. Again, if you want to
check out my new site, you can browse tutorials. I've made them into article
form. I also like to write personal essays. I have beauty reviews on there.
I'm adding to it all the time. It's a new passion project that I've been loving. If
you want to keep on watching, here's some Teen Wolf hairstyles. These are Lydia
inspired, or if you want more of a routine video, you might like my updated
beauty maintenance routine. We also talk about my filler experience on there, so
it's a juicy one.