
How I PAINT a REALISTIC PORTRAIT in OILS - My favourite portrait yet!
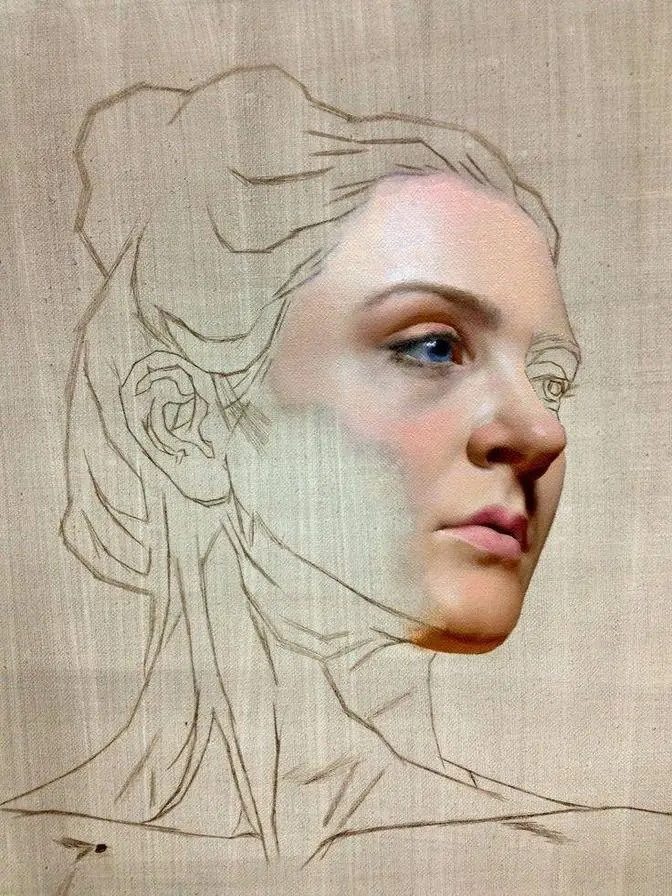
In this short video, we're going to be painting this portrait,
and I'm going to walk you through some of my favorite techniques.
Roll that intro.
Hi there, and welcome to the studio.
My name's Andrew, and it's a pleasure to have your company here once again.
Now, when I say here, you might not recognize where I am.
I'm in a brand new studio.
I've moved location, and now I've actually separated the studio into two different spaces.
So welcome to the drawing room.
Now, this was a pool room at some stage.
The previous owners were playing pool up here.
I'm not much of a pool player, but that is a really good layout space.
Now, I've got my old drawing board over there,
so I'm gearing up for some more sketch endeavor videos.
But while I'm building the new studio and getting everything set up down there,
I thought it was high time I actually brought you a painting video
so I didn't make you wait so long this time.
So now what I want to do is share with you in this video
some of my favorite portrait painting techniques.
Now, here's my subject.
This is Tuhoe.
Tuhoe is a really striking looking gentleman,
and he came to see me down at my old studio
when I lived at the bottom of the South Island here in New Zealand.
Now, Tuhoe is an extraordinary guy.
You might recognize him.
He had an incredibly checkered and tumultuous past that he since walked away from.
He was an ex-gang leader.
He's turned his life around now completely,
and now he's a force for good.
Now, the subjects that I gravitate towards as an artist
are those people that their faces seem to tell a story.
Without them having to open their mouths and say a word,
you can see the life just written on their faces.
And Tuhoe has got a striking face.
Now, he's got one of those characteristic Maori tattoos,
otherwise known as a moko.
And when I first met Tuhoe,
he actually reminded me of one of my favorite artist's paintings.
You see, there's a bit of a New Zealand icon here,
and one of my favorite portrait painters of all time,
and that's Charles F. Goldie.
Really amazing traditional oil painting,
but really inspiring subjects,
but also the technical approach was just off the charts.
Every time I've seen a Goldie original in the flesh,
and there are several here in New Zealand hanging in museums,
they're just amazing.
You can feel the life in the skin.
It's something to behold,
and what I wanted to do with this painting
is maybe just tap into a little bit of that character.
Now, unfortunately, Goldie's not around anymore
to pick his brain as to how he painted his portraits,
but I was thinking it must have been
a pretty traditional palette that he was using
without the aid of modern pigments.
So I've shifted my palette here,
and this time I'm using Rublev oil colors.
Now, again, before we get underway,
if you ever want to know what materials I'm using,
then simply click those links in the description down below.
I've listed all the paints that I'm using
as well as my brushes and mediums.
So now that we're familiar with the subject
and the inspiration,
let's jump into the studio and paint a portrait.
I got some pretty good reference material here
for this painting.
So here, with a washed, toned Belgian linen stretcher
at about 16 by 20,
I begin to make my initial construction lines
using a synthetic pointed round
and a combination of burnt umber and quinacridone magenta.
Now, there's just a hint of medium on the end of my brush.
I use some calipers to get pretty close to a circle,
and then I find the brow ridge,
which cuts through the equator of that circle,
making a sphere,
and then from here,
it becomes relatively straightforward
to place the eyes, the nose, and the mouth.
I go into much more detail on how to do this
in the full version of the tutorial,
and you'll find that in the description box down below.
I firm up some of these marks with much heavier brushwork,
and then rub away some of those lighter construction lines
using just a little bit of medium and a clean rag.
Now that our figure is firmly established within the canvas,
I go ahead and start with the background
using a one-inch Tisch dagger brush
and a loose assortment of bold brush marks.
I generally tend to go for an off-green,
slightly blue color behind portraits
that have got a lot of red skin notes.
I'm always playing complementary opposites
off against one another.
So if we have some red, rich skin tones
with lots of warmth coming through,
then generally it looks pretty good
compared to green and blue,
the opposite side of the color wheel.
But I also play down the background color.
Notice how it's really muted.
This will really help the skin tones
and the light on the face really stand out proud
amongst all this loose, muted brushwork.
Now Tuhoe is wearing a black t-shirt,
but I thought this might be a bit boring
for a traditional portrait,
so I decided to change the neckline slightly
and have a little cut appear here
for maybe some buttons or a slight collar.
I don't want too much detail to take place in the shirt
or even in the background
because it might draw attention away from the face.
I begin to map in some of these skin tones
with a broad Tisch Dagger brush
and start working into those shadows,
a combination of burnt umber and some burnt sienna.
I really enjoy that sculptural effect
given by the ambient glow
coming through the studio windows.
We've got some really nice soft shadows
with some deeper tone
and then some really beautiful, gentle highlights.
There's nothing too harsh about this portrait.
Ordinarily, I'd use two different types of light,
a very strong, bright directional light
to get some crisp edges
and then balance this out with a cooler ambient light,
normally natural light.
But here, I felt the light coming in
through the window was just perfect.
Now to get a bit of a cool glow
of some of these hairs on the shadow portion,
I'm mixing in some ultramarine blue and burnt umber
and brushing this through in the direction
that the hair is traveling
and blending it slightly with that background
and surrounding skin tones.
I'll be able to tease out individual strands of hair
and even have some real minute detail
given by a triple zero rigor
or a pointed round
for those hairs that are standing proud in the light.
But what we must do first
is establish a general base,
just a nice loose assortment of brush marks,
try to achieve a likeness,
establish a three-dimensional form,
and then worry about all the surface details.
And in this portrait,
there's gonna be a bunch of detail.
Now here in my reference material,
it doesn't show a lot of information
about what the hair is doing.
So I did use some artistic license
and borrowed from some other angles
that I was able to capture on the day.
I use a half inch Tisch dagger
to get some finer lines around the eyes
and establish some character.
But if this provides too much texture,
I can always tamp those brush marks back down again
with a synthetic filbert brush.
Now some of these synthetic filberts
are great for those precise marks like here,
where the skin is reflecting
some of that ambient light,
following the contours of the wrinkles
in Tuhoe's forehead and areas around the eyes.
Just a little bit of that cool glow
pulls some of these areas forward
and makes the form appear much more three-dimensional.
Now don't get me wrong,
I love using my Blue Ridge oil paint.
But here, the roubleve
has been a nice little deviation from the norm.
I decided though that I needed some higher key colors
like turquoise phthalo and quinacridone crimson.
These two colors are perfect for the tattoos.
And I want something that's nice and transparent
and very thin to work into
some of those surrounding brush marks.
The turquoise and the crimson come together
to make a very dark tone.
And then I come back and rework some of these colors
in with the surrounding marks,
deepening the tone wherever I have a recess
or a crevice that's in shadow.
In some of the areas of tattoo
that's facing that ambient light,
I allow a bit more yellow to come through
and even mix in a touch of yellow ochre,
lifting the tone slightly with lead white.
Now it was really important
that I got this tattoo accurate
and it was a bit of a challenge at first.
I had to go slowly and steadily,
just one line at a time
and just make sure it hugs
the three-dimensional form just right
and it appears in the right location of the face.
This tattoo after all is individual
and unique to Tuhoe.
And these synthetic filberts
are great for these precise marks
and have helped a lot with this technique.
Now everything is relatively thin here
in application so far.
I may come back later
with some thicker brush marks
to bring out more texture,
catch more light
and reflect that back to the viewer.
It just so happens that thinner paint
tends to be better
for some darker areas in our painting
but that thick impasto
really does reflect more light
so we can use a physical nature of the paint
to drive the three-dimensionality
within our portrait.
Now because I'm working wet and wet
it is lifting the paint ever so slightly
and the oleo gel is giving me
much more working time
than I would have with liquid.
It means I can achieve
a much more painterly effect
and have an extended window
to apply this brushwork.
The trick to getting clean lines though
is to have a couple of different brushes
on the go
and to mix up continually fresh paint
and not try to expect the same brush
to travel so far over the canvas.
Otherwise what we start to do
is pick up surrounding colors
and we end up with a muddier result.
So keeping that precision is key
by reloading the brush continually
and making sure that we just go
one stroke at a time.
Now here with Tuhoe's mustache and beard
I begin to mark in
some of those deeper shadows
that appear between the hairs
and then start to paint in the tattoo
just below that lower lip.
There's a really nice reflection
of some of that ambient light
glowing off the lower lip here
where it forms a shelf facing upwards
and there'll be a nice highlight
that occurs along this lead edge.
And similarly the upper eyelids
are going to get one of these
brighter highlights
applied with just the end
of a synthetic filbert brush.
I apply some finer marks
with a synthetic pointed round
dropping the tone in the corner of the eye
and then working in the whites of the eye.
And notice here how the white of the eye
is not necessarily white.
It's a cool gray.
I've toned things down here
much much more.
This will allow some of the brighter tones
like a little flash of sparkle
maybe along the lower eyelid here
to stand out and reflect
more of that light.
It's all about our tone
at the end of the day.
Now you may have heard the old saying
paint what you see
not what you know.
Well here is a perfect example of that
because we know the whites of the eye
are white
but we don't really see them appear that way
do we?
No what actually shows up
as brighter white
are those little brilliant sparkles
that appear in the eye
and add that touch of life.
Now with an older filbert synthetic brush
one that's really splayed apart
I apply this stippling technique
to the front of the face
just as the paint starts to go off
and set up a bit of a surface tack
I go in and apply some of these marks
and these are little individual reflections
coming off some of the pores
into my skin
and it just adds another layer
and another level to the realism here.
I then take a very small
synthetic pointed round
and work in some individual creases
in the lower lip.
Now sometimes I'll use a
synthetic ivory dagger
this is a great brush
in conjunction with some of those
synthetic pointed rounds
I can achieve quite a high level of detail
but I'm pretty strategic
with my detail marks
I'll only detail areas of the painting
where the light is shining across the surface
or areas I want the viewer
to spend a lot of time looking
and I enjoy that aesthetic
of the way a painting just fades away
into a mess of abstract looking brushwork
towards the periphery of the painting.
Now with these strands of silver hair
the dagger brush is perfect for this
I have two different tones going at once
a darker gray for some of those shadow areas
and this lighter gray
as the hair approaches the light
coming in through the window.
Now I've mixed more and more
lead white coming through
and I have a touch of ultramarine blue
in the mix to cool things down
I'll then go back and work
between some of these hairs
with a much darker tone
where that t-shirt is showing through.
It's all about getting variety
in the types of silver that we have here
and once I've got a nice base established
I'll come back in with some brighter marks
to lift out some individual hairs
and I find that painting a realistic portrait
is more about strategy and methodology
than anything else
it's about getting everything
in relatively the right sequence
so that we're in control
at every step of the process
and we gradually work our way
and build up to that final detail.
Now I decided to go back
and revisit the background
as it dried it went quite dull and matte
where some of the oil had sunken
into that background layer
it's not too much of a problem though
a lot of this could be fixed
with a coat of retouch varnish
or even a final varnish layer
but here I wanted to deepen everything down
drop the tone a bit more
to give that appearance
that Tuhoe was emerging out of the shadow
stepping into the light.
I also wanted to add to that effect
where I had some darker tones
towards the top of the painting
fading into a lighter green
as we approached Tuhoe's shoulders
and then again that contrast is in play here
with the darker shirt
against a lighter background
and you'll notice in my paintings
that generally I'm playing off
these tonal differences
dark against light
light against dark
like here with some of these silver hairs
against a darker background
it all comes down to contrast and tones
at the end of the day
an old frayed bristle dagger brush
is fantastic for painting hair
it's quite time consuming
to paint every individual strand of hair
and often when we try to do this
it doesn't actually look that realistic
so we want to have some indication of texture
of the hair
and a nice assortment of some random marks
and then come back and work in
some strategic little lines here and there
with either an ivory rigger
or a synthetic pointed round
not only does this save a lot of time
working in this way
and also an added benefit
is having it look more realistic
but there's something interesting
that goes on in the viewer's brain
when looking at a painting
that's detailed with these techniques
see here just a few strategically placed
fine details
will end up forming enough information
for the rest of the gaps of that information
to be filled in in the viewer's mind
so just a few little bits here and there
make the entire painting appear
as if it's detailed
when in actual fact
there's only a select bit of detail
in various strategic locations
and again this is best reserved
for those areas that are in the light
like here with these silver hairs
that are contrasted against that background
now to get a really nice fine line
I love these ivory riggers
you have to go back
and continually reload that brush though
just the ends of those fibers
are loaded with paint
and a couple of smooth strokes
following the same path
can make a really nice fine line
but there's only so far
that we can go with it
and if we press too hard
we kind of lose that effect
so just the ends of those bristles
is great for that hair technique
I then apply a fine bit of glazing
it to drop the tone
in some of the shattered portions
of Tuhoe's face
and this is just a tiny bit of pigment
suspended in medium
just dry brushed over the surface
this was by far
one of the most enjoyable portraits
that I've ever painted
and I really look forward
to the opportunity
of painting Tuhoe again
well I really hope
that you've enjoyed this video
and you've come away
with some new techniques
and maybe a few new ideas
to apply to your next painting
I just want to take a quick minute
and say a huge shout out
and a thank you to Tuhoe
for posing for this painting
thank you so much
for coming down to the studio
my friend
spending that time with me
I always really enjoy
our conversations
now I first met Tuhoe
in Queenstown several years ago
and he was selling his book
down at the marina
and I bought a copy
and I could hardly put it down
ultimately it was a story
this is really a modern day example
of somebody going from soul to Paul
and it was incredibly inspiring
yes very challenging
in the beginning
but ultimately a story of redemption
taking something
that was such a grotesque negative
and turning it into
an ultimate positive
so if you want to check that out
then I'll put a link to that
down in the description down below
as well as a link to a film
that Tuhoe starred in
called Day Trip
and that was pretty cool to see as well
now again if you want to find out
even more about oil painting techniques
then make sure you click that link
in the description down below
it's the top one right there
and you can find out more
about my portrait painting workshop
now this is six different demonstrations
both male and female
a variety of techniques
a variety of skin types
there's all kinds of things
that we have to talk about
so make sure you check that out
click that link in the description down below
if you want to take your portrait painting
even further
thank you so much for spending this time
with me here in the studio
if you want to go and follow me on social media
those links are down below as well
I'm on Instagram and Facebook
but of course most important
make sure you subscribe through my website
at andrewtichler.com
I'm in regular touch with my subscribers there
and you can also find me on Patreon
again all those links down below
now I'm going to see you again
very very soon
with even more painting techniques
and hopefully be coming to you
from a brand new studio space
until then happy painting