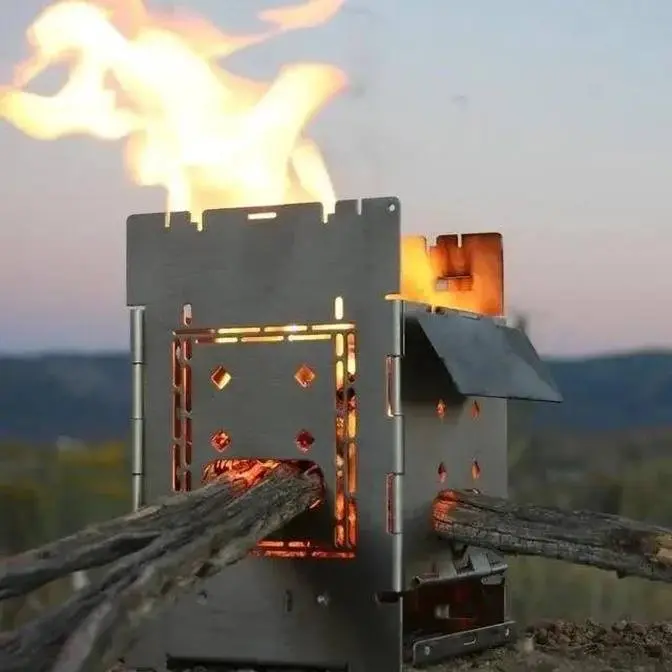
The chicken weighed 4.66 lbs. I cooked it for a total of 1:18 I burned approximately 7 oz. of denatured alcohol, but I think I could do it with 5 or 6 oz. by following the guidelines below.
What I Learned: Next time I think I'll: #1- Oil the outside of the pot lightly for easy turning. #2- Leave the simmer ring off the Trangia (run on full high) for the first 10 minutes or so, then put it back on (fully opened) for about an hour or until the chicken reaches about 150 degrees (f) then remove the simmer ring for the last 10 minutes or until the chickens temp reaches 165f - 170f.
Hello, Steve here. Hey, I've got a full camp kitchen packed into my backpack,
and I'm headed up to this nice little secluded spot up here.
This is really a great area because there's no motorized vehicles are allowed up here at all,
so it always stays nice and quiet and peaceful. And I'm going to do a little cooking with the
firebox stoves, but this time rather than using the five-inch firebox
to do the horizontal baking, or maybe I shouldn't say baking, I'm going to be roasting today.
I'm going to do it with the Nano, and I'm going to try to do it with alcohol,
with a Trangia alcohol burner. This is where my kids always say we're entering the wilderness
because it really tightens up here, and we start to get into the pine trees just a little bit here
now. Plenty of firewood there, huh? My trusty stool here. I love this thing. I've had this
backpack since I was a teenager. My plate, 14 centimeter pot, 16 centimeter pot. It's got all
my stuff in it. My Jack Klor Classic. I'll put that on my belt right now. GSI camping table.
This makes a camp kitchen just a little more civilized. Okay, I've got the Trangia,
and this Trangia is just a little bit different. You can see that it's solder sealed, so
Perry Peacock from Wilderness Innovations, we share a warehouse together,
he did a bunch of testing on these Trangias, and he discovered that most of them
actually leak. It's just such a very, very small leak that it doesn't really make that much of a
difference, so he started solder sealing them, and we have had a couple of them return
because they were leaking, so sometimes they leak enough that you actually notice it,
but I think most of the time you don't notice it because it just evaporates the fuel,
the leaking fuel just evaporates away, and you never know the difference
if it's just a really small leak. So this one is solder sealed, and he solder seals them
anybody could solder seal them. It takes a little bit of,
oh what's the word I'm looking for, a little bit of practice, a little bit of technique,
but anybody could solder seal them, but I think we will probably be offering them
solder sealed in the future as an option on our site. So this is my Gen 2 Nano that used to be a
Gen 1 Nano, so I just drilled these holes myself, but it works really nicely, and what I'm noticing
when I set this on the carbon felt, this goes out to about the same footprint as the firebox,
as the 5-inch firebox, so that's going to give me a nice stable platform. Now these are the
bottles that we sell on our site, 8 ounce flask, and then I also have some cooking oil,
which I've got it very well marked as cooking oil so that I don't get them mixed up and squirt
alcohol on my food. This is going to be the challenge to see if that chicken will actually
fit in this 14 centimeter pot. I've got to get my chicken prepared here. Now what I've done
is, this is wrapped up in paper towel just because I knew I'd need a lot of paper towel
to dry off my chicken. So last time when I baked a chicken, I just pulled it out of its package
and put it right in the pot. It didn't have the extra parts with it, and so I didn't need to do
much with it. Now this chicken I have been soaking in a sea salt brine, drip dry just a
little bit, and that's what I brought all this paper towel for is so that I can really dry this
chicken off. Last time it was kind of wet going into the pot, and it may have contributed to it
sticking to the sides a little bit I think. So I just want to get this bird nice and
dried off, get as much of the water out of it as I can. Okay, and then I'm also going to
oil it up really well. So just to verify I've got my cooking oil, it's not my alcohol,
and I'm going to go ahead and put plenty of oil in my pan and then plenty of oil on my bird.
I'm going to go ahead and just make sure that I've got this pan coated
everywhere. Then a little bit of salt, additional salt, even though this was soaked in a brine. I
sure we get this breast side, and it does look like this is going to be a very tight fit,
and it just might not fit. Hope for the best, and do what you have to do to make things work
if you don't get the best. Hope for the best, improvise for the worst. All right, let's see
if we can cram her in there. Okay, so it is going to be a very tight fit, but it does fit.
So I'm actually going to oil this lid a little bit as well. Make sure that's my cooking oil.
A little bit more oil down in there because worst case scenario it'll just run back out,
but it can't hurt anything. Okay, then we'll go ahead and put the lid on here,
and since we do have our stainless steel clips, we'll just lock that bird in there.
The alcohol stove has come to a bloom, or has blossomed, so I'm going to go ahead and put that
bird on there. I'll go ahead and get my pan under there to catch those drippings. Ash is chasing a
squirrel. That's good times. Okay, that's sizzling a lot, so there's more heat there than what I
absolutely need, and because I am trying to conserve fuel, I am going to go ahead and put
that simmering on there. Let's just slow this heat down just a little bit. I think we'll need a
Maybe something more like that. Let's see what that does. I just want a nice sizzle,
but not so much that I'm worried about burning the outsides of the chicken.
Okay, I've pretty much just opened up the plate all the way, so it's just kind of covering the
jets a little bit, but the sizzle seems to be about right, and I'm not seeing a real excessive
amount of flame coming around the sides, so I think that this should probably work pretty well
for us. I'm going to go ahead and just give this a little rotation here. I decided to take the
simmering off and just really let this chicken get hot fairly quickly in this beginning stages
of cooking, and then maybe throttle it back, you know, for the last half of the project.
Well, it's starting to smell like fried chicken, so that's a good sign.
So about every two or three minutes, I rotate it, and I've kept it on high without the simmering,
and we've been running for, let's see here, 33 minutes. Sometimes it helps. I've just got this
stick, and I'm just kind of lift up the back as I rotate it, and that helps it rotate just a little
bit smoother, because there's quite a bit of weight in here if you think about it. You know,
that's about four and a half pounds of weight, and so, you know, I was hoping I could just rotate it
here and just have it work really well, but using a stick on the back side just helps it be a little
smoother. Okay, I think I better check my fuel level, and it's right down there towards the
bottom, so I'm going to go ahead and snuff that out. So I'm going to add the last of this bottle.
I think I'll be able to fit all this in there, but these are eight ounce bottles,
and so it looks like one of these bottles will fill your alcohol stove pretty darn full three times,
and I got about 20 minutes burn time with it running on full blast with the last two
fillings. So I'm actually going to throttle this back a little bit. I'm just going to cover up the
jets, not the whole thing, so it's fully open, but this does kind of interfere with the heat feedback,
and it does settle the flame down quite a bit. So I think it'll make a pretty significant
difference even though it is fully open. So let's go ahead and get this back on. It hasn't quite
come to a bloom yet, so I'm just going to put this on here for a minute till it comes to a bloom,
and then I'll put the simmering on. I can kind of hear the jets down there, so I'm just going to go
ahead and put that on. And I've been running the pot this direction every once in a while as well,
because this chicken is so tight-fitting in there. You know, I figure whatever contact there
is with the bottom, you know, I can go ahead and brown it as well. I put a little bit of oil
on the outside of my pan, just some of my cooking oil, and now it rotates just so nicely and easily.
I'm actually going to rotate this front leg back a little ways. I'm realizing that I don't really
need the stability out front like I thought I might, and the front legs are just snagging with
that handle bracket as I rotate it. So rotating these backwards will kind of get them out of the
way for this handle bracket. So that way, when this bracket comes around, the pot leg or the
pot stand will be out of the way and I'll be able to just rotate it past. I should have done that a
long time ago. Use my stainless steel tongs here to open my oven door. And the way that's able to
work is because of these metal clips that actually hold that lid on. So that becomes a latch. Go ahead
and open up the oven door, and let's see if we can take a temperature. Let's see here. I think this
will get us into a breast right here. Let's see where this goes. Wow, we're already at 179, so
this is done. So I'm going to go ahead and pull out my probe here, and I'm going to lock my lid
back on. Well actually, if this isn't too hot, I should be able to lock my handle right there.
That allows me to pick it up without it tipping. We unlock this handle. I'm going to go ahead and
get out my knife and just run it around these edges where the chicken is touching the side of
the pan. Now I can see in the areas where the chicken wasn't touching the pan that the juices
did burn onto the pan a little bit. So let's just see if we can work this bird out of here,
and I'm going to set my knife right there. All right, there we have it. So I do have a couple of
dark spots on the chicken. So it's just a couple of spots that are a little bit too dark, but all
in all, it looks really nice. I think we need to go ahead and cut into it and see how moist it is.
Okay, let's cut into this. Oh yeah, that's really nice. Let's see what this breast tastes like.
Okay, so it's definitely fully cooked. I just cut all the way down,
all the way down in there, and I don't see any sign of it not being fully cooked. So
get a piece of this chicken out. Look at that. Just really nice. Really turned out nice.
I have to say the skin got a little darker in just a couple spots than what I would have liked,
and I did cook it a little bit longer than I should have. I didn't realize,
you know, that was about an hour and 18 minutes, which is how long the other one took.
So I think when that alcohol stove is running on high, it's a little hotter than I realized.
So I definitely could have cooked it just a little bit less,
but it's still real good. I think I'm going to cut off a leg. Try that. Look at that.
That's a nice piece of chicken. I think letting it soak in the salt brine
did help. It has a really nice flavor. Very, very good. And the brown spots
are really, really delicious. Yeah, that's good. That's really good.
That salt brine, I think, helped a lot because that is just really delicious and rich.
That's good chicken. I'll tell you what, what I need to do is some corn on the cob
to go with my chicken. That sounds really good right now. Well, I had a really great time doing
this. On the way up here, we saw a lot of wildlife. A couple jackalopes ran past.
Really beautiful country up here. Nice and peaceful. Ash has had fun chasing the squirrels,
but I'm going to go ahead and say goodbye. But I would like to ask you all to go check out my
website, fireboxstove.com, and I would really appreciate it if you haven't subscribed. Go
ahead and subscribe and join the conversation down below. Leave a comment. Tell me what you
think. Let me know if you have any other ideas for other videos you'd like to see.
And please like this video as well. I really appreciate it. Thank you all. Bye-bye.