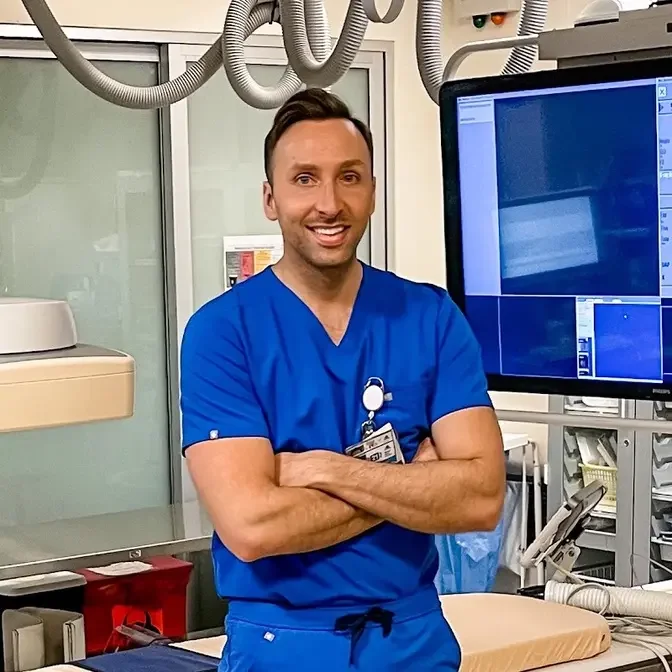
The long anticipated Desk Setup 2020 Video is finally here! It took a long time to get all of these pieces in and setup for the video, so I hope you all enjoy it! If you have any questions about anything featured in the video, let me know down below!
I don't know how to start this video.
What am I doing?
The time has finally come for the video that nobody really asked for.
And that is my desk setup video.
Welcome back to my channel everybody. For those of you who are new around here,
my name is Michael, AKA Dr. Cellini. And on today's video,
we're going to talk about my desk setup.
Part of it was that I kept seeing YouTube videos of people making insanely
awesome desks and I was super jealous. And then the other part of me,
I am a YouTuber, right? I mean,
I have the a hundred thousand subscriber plaque. So like I'm legit, right?
And the third part of that is I'm also a radiologist and I look at a ton of
different radiology images on my computer at home.
So I needed something crisp that I can see these fancy images with.
So as you all know, efficiency is like my middle name. It's not,
but it should be anything to make my life easier while editing is totally worth
the money in my opinion,
because I don't have that much extra free time being in fellowship working every
single day.
So if I can maximize my efficiency while editing and while doing my YouTube
stuff, this is totally worth it.
So let's go ahead and get in to each part of this desk setup.
So for starters, I went with this super modern, sleek,
all white smart desk two from autonomous.
I'll put a link in my description of all of these things I talked about.
The reason I went with this desk is for one,
I wanted something that was all white because my apartment is all white.
Secondly, I wanted something that was very streamlined or sleek,
but also sturdy at the same time.
A lot of times these desks look like they're starting,
but this thing is like solid and it's actually really heavy,
but this thing is super rigid and sturdy, which is awesome.
And one thing I didn't mention yet is that it is a standing desk so I can move
it up and down to whatever height I want.
A lot of that is because I'm used to these kinds of desks working as a
radiologist. We read images on our desk all day long.
So we want something where we can stand up and read and also sit down if we want
to as well. So this one comes with four programmable heights.
There's one, two, three, four buttons, memory buttons.
So I like to keep one and two for me and three and four for Andreana.
So I can just hit the one button and it goes to my sitting height.
And if I hit the two button, it goes up to my standing height.
This thing is amazing and it's actually like not expensive whatsoever.
It's definitely the most affordable standing desk on the market and it has to be
the sturdiest. This thing is awesome. Um,
and if you want to get a desk like this,
use the link in my description and use the code Cellini 10,
you'll get 10% off your purchase.
The other thing I forgot to mention is the standing desk. It's so quiet.
Hear how quiet that is or do you hear it or don't you hear it?
Super quiet, huh?
Usually a lot of standing desks sound like an airplane taking off,
but this one definitely doesn't. All right. Now, as far as this chair goes,
it's just a leather chair. Um,
I wanted something to kind of break up the all white tone I was going for here.
So the wife and I picked out this leather chair to kind of break it up a little
bit. It's like a burnt leather. I got it from Wayfair and yes,
I bought it like three months prior to all this stuff going on.
So don't give me any hate mail on that.
Now let's talk about the power behind the entire desk.
And that is my 2020 MacBook Pro 13 inch right here.
This thing powers this entire desk. Well, not the desk itself,
but it powers this whole section. What I do all the work on, not cheap.
I'll tell you that much. I kind of like maxed out everything on it.
But the reason being is for the last year I've been working with a MacBook air.
It just couldn't handle what I was kind of putting it through.
Anytime I was using like iMovie,
it would kind of freak out and I wasn't sure if it was going to last.
It did last me, but it also, I wanted to move over to final cut pro.
The old computer literally just couldn't handle it.
So I'm like the king multitasker here. I'll be editing a video.
And while the video is downloading, I'll be editing a thumbnail and Photoshop.
My other computer couldn't handle that.
This one does it without any trouble whatsoever.
Love this computer or this laptop. Do we call it computers anymore?
I don't know. Um, it also has a USB-C port.
There's one USB-C cable that connects to the monitor.
It also powers the computer while this is on. So it charges,
powers this all through one cable, which is crazy. I, that's what I wanted.
I wanted something minimalistic, no cables anywhere.
And if I can get away with just one cable powering all of this stuff,
that's amazing. This thing is awesome. I'll put up all the stats.
So you guys don't like that,
but I pretty much upgraded everything except for the memory.
I think I got the memory at like 500 gigabytes.
I put everything on a hard drive anyway, so I don't need that much data.
This Mac book is actually resting a top, the book art from 12 South,
which I was lucky enough to have them send me this as well. Again,
I wanted something in space gray or white, but since my laptop is space gray,
I wanted that to match with my laptop stand to not throw off the aesthetic here
and just clean lines, grays and whites.
So this thing is fantastic.
I can literally just pop out the Mac book anytime I want and take it with me.
It's sturdy. This thing doesn't move at all. Beautiful.
It's aesthetically pleasing on the eye and also functional.
So thank you 12 South. Again, link in the description.
Let's go ahead and talk about this lovely monitor.
This was probably the hardest decision I made.
I wanted something big and meaty and I wanted something overly large for no
reason because screen real estate is everything.
I was toying with the one normal monitor and a vertical monitor because that's
what we use in radiology. But ultimately I decided on this.
I actually got rid of the stand that it comes with and put it on this monitor
arm back here. Again, it provides more of a sleek floating effect.
And that way I can kind of push everything under it and have my entire workspace
to work on if I need to. This monitor was the hardest decision.
I was going to go with like a big 38 or like even a 49 inch ultra wide monitor.
But first of all, who needs a monitor that big? I mean,
I wanted it let's be honest. They're super expensive though. I mean,
this wasn't cheap either.
I think it was like 800 bucks or something like in the description,
but I'm super happy with what I did here. There's so much real estate. I mean,
I can open so many tabs on this thing. So this is just an example of when I open
final cut pro, my timeline is on this entire area over here.
There's so much real estate and you can see everything.
I honestly don't even have to scroll that much because you can see pretty much
the whole timeline here. So it makes editing a breeze.
I can even open up an Excel spreadsheet and take up half the screen if I wanted
to and maybe open up like another tab or something.
The point is there's a lot of real estate here and that's what I love the most.
I don't think this angle does it justice of how big this monitor is,
but sometimes I have to like take a step back because it's so big and hard to
see. This thing is amazing. This picture is of Adriana.
I took this on our honeymoon at Mauritius.
You're debating whether or not to get a high def square monitor or get an ultra
wide monitor for productivity. Go with ultra wide.
I mean shouldn't tell you what to do. So again with the monitor stand back here,
I wanted it to be kind of have a floating appearance.
I got this stand off of Amazon.
I think it's rated for like a 32 inch monitor, but this one is fine.
It swivels and also tilts towards me as well and I can move it multiple different
angles forward, back, et cetera.
It has a cable management system in the back as well.
It hides the cable perfectly. Perfect setup.
All my space is open here and it frees up everything.
So floating monitor stand is life. So now let's talk about the mouse.
You saw me open this on a prior video link up here or here.
This is the MX master three mouse from Logitech. Again,
the reason I got it is because of this scroll wheel right here.
For those of you who don't edit videos, you don't really understand,
but the fact that I can just sit here and scroll with my thumb makes going
through a timeline and editing a video so efficient.
I can also program these side buttons to delete video clips or whatever button I
want it to be programmed to. This wheel here,
it moves so freely and is so comfortable to use.
It's just an overall well-designed mouse with a lot of different function,
especially for YouTube creators like myself. MX master three from Logitech.
Go pick one up. Link in the description. Not sponsored, wish I was.
Next up is the IQUNIX F96 wireless keyboard.
This thing is just a thing of beauty.
Also I unboxed this on a prior vlog as well. Link up here. Um, this thing,
again, I wanted the all white aesthetic here.
It has a nice aluminum frame around it. It's super heavy and sturdy.
It's not going anywhere and it's set at the perfect angle for typing.
And let's not forget using this keyboard is just so fun and it's,
it's just fun to type on. I reached out to my friends over at IQUNIX.
They sent me this one. It's amazing. So it's Bluetooth wireless.
It has RGB color scheme throughout the back of it as well.
The key travel is amazing. Like I said,
it'll pair to multiple different computers.
You can use it on two different laptops if you wanted to.
It charges through a USB-C port up here, but the battery life,
I haven't even charged this thing in the last three weeks. Honestly,
I guess you'd have to be on your computer like all the time to wear it on this
battery. There's a lot of different modes for the RGB color scheme.
And at night you can actually see it a lot better, but either way,
this thing is so minimalist, modern, love this thing.
Also click the link in my description.
If you want 15% off of this keyboard or want to check out their other products,
they make some pretty solid keyboards. They know what they're doing over there.
I have a separate plug right here or another USB-C cable.
And what this does, it runs underneath the desk. It comes to a multi-port,
which I have right here, which is right next to the controls of the desk.
And I can literally just slide my SD card in here. It's an SD card reader,
another USB-C port. It has four USB ports on the back as well.
It's just something easy.
I don't have to like go fumble around and try to connect connectors to my
laptop. I can literally just come in,
slide this under the table and my SD card right here.
And I'm ready to edit my photos or videos or whatever.
I got this off of Amazon, put that link in the description as well.
So now let's talk about cable management. It's kind of hard.
There's so many different things going on with this desk,
but I tried to minimize all the cables,
keep everything clean and clean lines and just free of clutter.
I have the one USB-C line going from my monitor to my laptop.
I have the one USB-C line going from there under the desk to my multi-port.
What you don't see is I also have a power strip underneath the desk,
which powers my desk, the light, which I'm going to put up next to my desk.
It's also where I can charge everything I need to.
So essentially I have one cable from my monitor to my laptop,
one cable from there to the multi-port underneath my desk.
And this whole desk is plugged into one outlet.
So I only have one plug going up the side of this desk to this entire desk,
which is crazy.
So that pretty much touches on everything on my minimalist white on white desk
setup or white with a touch of gray desk setup.
I have a few more things over here, just like notes.
I have like this Dr. C book, which my friends, Andrew and Emily got me.
I got this awesome high end fancy pen when I graduated residency.
Then I have a little succulent back here, which is dying at the moment,
which isn't fun. I need to water it.
Someone tell me how often you're supposed to water these things.
Some say like once a month, some say like never.
Mine's dying and I water it like once a week. I might be drowning it.
So let me know if you're a succulent enthusiast in the comment,
this Dr. Mike Hollywood Cellini sign.
It's actually kind of like a joke from my stepdad.
He got this for me probably when I was a second year med student.
He always calls me Hollywood because I like do my hair and like dress well when
I go places, which is just normal, but he thinks it's abnormal.
And he got me this desk sign for whenever I have a desk,
when I finished residency and everything. So I've had this with me.
I used to have it on my bathroom mirror in med school and then I kept it with
me. Now it's here and I need to get a little stand for it inside joke there.
So anyways, that officially concludes this video.
I hope you all enjoyed this desk setup. If you have any questions,
leave them in the comments below.
Everything will be linked in the description below so you can go check it out.
If you want any of it on your own, let me know what you think. Otherwise,
see you on the next video.