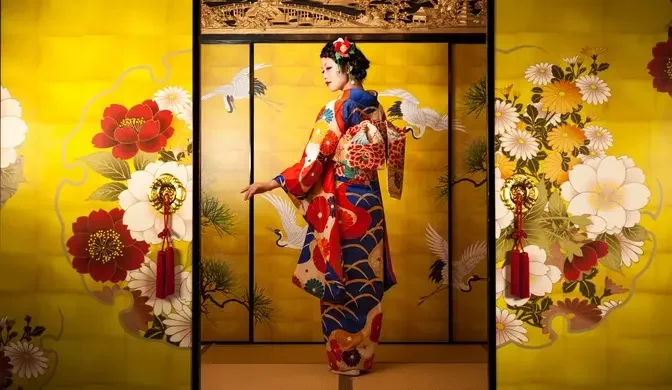
This video show you how to make a kimono undergarment - a juban. This is version of a juban is super simple to sew and you can use any fabric you have at home. Since I made actually 2 juban - one for female kimono and one for male kimono, you can use this tutorial for all your juban needs.
00:00 Misconceptions about Kimono Undergarments 03:10 The Material and Construction 07:12 Cutting and Marking out 14:24 Starting with the Male Undergarment 18:22 Making and Attaching the Sleeves 21:43 Marking out and Attaching the Collar 23:21 Making a Chikara Nuno 25:17 The Mikawa Erishin 28:37 The Reveal and Wrap Up
Music: "Mizuki" by Bad Snacks "Dreams" from bensound.com "Shibuya" by Bad Snacks "Drunken Countess" by Verified Picasso "New Moon" by Bad Snacks "Kimono Life" by Sondey
Since I have posted my how to make a kimono the easy way video I get so many requests of how to
make a kimono undergarment or I receive questions of if making an undergarment is the exact same way
of making kimono and this video hopefully gives you all the answers you want for this.
In case you're here for the first time my name is Billie Matsunaga and I'm a fully trained and
certified kimono teacher and stylist and in this video yes I'm going to show you how to make a
kimono undergarment but there are a few misconceptions about kimono undergarments
I by the way like the Japanese expression you use for it they say katadzukeru you tidy up
those misconceptions so let me tidy up those misconceptions. Number one is kimono undergarments
are always full length you probably have heard about kimono undergarments the so-called nagajupan
that is basically a long dress you wear under your kimono and those are not the only types
of undergarments I in fact have a whole video about kimono undergarments what was worn in
history what is usually worn today and I will link it up here and down below so you can check that
video out and learn more about undergarments but basically you will have to remember that
there are two types of undergarments one is the one long undergarment that we call nagajupan
and then you have a two-piece undergarment and as I already said it's a two-piece so it consists of
a skirt layer that we call susoyoke and a top layer that is called hanjupan and in fact this
video is actually a two-part video because I have already shown you how to make a susoyoke in
this video when I talked about what to wear for kimono in winter or how to put up a kimono winter
outfit and I will also link this video down below in case you haven't watched that yet and today I
want to show you how to make the top layer the so-called hanjupan I very often do according to
your body shape actually recommend two-piece undergarments because the undergarment or the
important job of a kimono undergarment is the collar shape how this collar sits on you
and according to your body shape it's going to be easier for you to only have a top layer with the
collar shape and then the bottom layer is just a wrapped skirt anyway another thing that I will
have to stress is that in history two-piece undergarments were way more common than nagajupan
nagajupan became common in the end of the 19th century and at the turn of the 20th century
this is since we are wearing more nagajupan and actually hanjupan and susoyoke so it's not
less or more traditional actually in history a two-piece undergarment would be way more common
today I want to make two hanjupan one of them is for my normal female kimono that I am wearing
and the second one I'm gonna do is very close to a masculine construction because I want to wear
that in my junior hitoe lessons under my school uniform because in my school I am wearing a so-called
and the back collar is not lowered with those and when you sew a female construction where you're
supposed to wear the collar lower it's just not sitting right when you try to wear it right
against your neck so I have two fabrics this one is a printed cotton that I have purchased from
again one of my favorite fabric stores that is actually located in Kyoto so I have to order
online and I have another embroidered cotton I'm gonna use this one is white this one is the one
I'm going to use for the masculine construction this is the one I'm going to use for the feminine
constructions a tiny bit more beige gray it's really cute and I am going to use the machine
and I know that a lot of you who are watching my content I know that you love to do unshin
and you love to practice that but please hear me out there is a time and place for inshin you can
not unshin everything and you also should not unshin everything this is a very loose cotton weave
and yes you can hold it together with unshin but I'm going to wash this that is why I'm going to
use cotton for this because I want to be able to wash this in my regular washing machine and
unshin will not be sturdy enough to actually endure that so I do recommend either using the
machine for this or backstitch it when you still want to hand stitch it for on the sleeves and
here's a tiny thing you can actually buy them and you find sometimes you find them in second-hand
stores you find finished sleeves I'm going to go with this type of sleeve you call this tsutsu
sode in Japanese and you can tell this is not a regular kimono sleeve the reason why I want to
make this is because then this undergarment is wearable with all of my kimono because when you
make a kimono sleeve you can see that my kimono sleeve actually is way longer than my juban sleeve
and when you have a sleeve like this this undergarment is wearable with all of your
kimono it doesn't matter how long the sleeves are in case you think this is not as accurate
or as traditional or whatever in history this type of sleeve was the sleeve for undergarments
so putting actual kimono sleeves on undergarments is quite a modern thing it's a mid-end-edo period
is where and rather Meiji period where this type of style is actually getting big for undergarments
this one is the more accurate one for the real real undergarment you should watch my undergarment
video for that so I gonna gonna use these for one of those not exactly these because I settled
actually on some some sleeves I have just purchased in a second-hand store they are
actually polyester and they're quite stained but I have an undergarment with seamless sleeves and
they're just too cute and I want to see this with this together and for my masculine construction
I am going to do this sleeves with this fabric so you're gonna see how to do this sleeves
okay so let's get started I started to cut the fabric into the width and length I need
length was by the way for me 140 centimeter and width I did 90 centimeter because I constructed
the two back and front panels out of one main piece so I cut it on the fold so one piece of
them would have the width of 45 centimeter which makes in total a width of 90 centimeter after
cutting one piece out of one fabric I used that as a guide on the other fabric and cut that too
then I marked out my seams I first started to mark out the hemline then I folded it open and
marked out the length of the center back seam that is four centimeters shorter than the katayama
height then I marked out the 10 centimeter for the neck opening that I would later have to cut
into the fabric on top of the central back seam and then I sew the center back seam in
should I be able to do this in one day yes did I do it in one day
no well you know what a new day means I can show off one more of my beautiful kimono so I'm fine
with that anyway the last thing you saw me doing is setting in the center back seam when I do a
project like this where I make something out of a big piece of fabric and it's just fake the center
back seam I like to first set in the center back seam so I can measure back width and everything
from there for me it's right now easier just to mark out 30 centimeter into the fabric 30 centimeter
are my back width that's I that is what I'm going to do with this project you might need a little
more on the katayama this place where the fabric is then later folded over to form this part here
this is where I'm going to mark out my so-called shoulder width I'm going to go with my kimono
measurements I have to look them up um where's my katahata it's about 36 centimeter I'm going
to give myself here on the top and on the front the width I'm going to use for this fabric the
sewing instructions actually tell me to use the whole width because the sewing instructions think
I'm having about a 35 to 36 centimeter wide fabric I actually cut mine to 45 centimeters so
I have plenty of fabric on the front and I thought I'm probably going to give me something between 35
and 40 centimeter width on the front that's plenty that's actually way too much for me
but you know what I actually like to have my undergarments a tiny bit bigger so I can also
in case I want to dress somebody else can use those so I haven't really settled on the width
yet but this is something that should give you an idea of how why you want to have the fabric
on the front okay and that is what I'm going to mark out first I also will have to mark out
the mitsuguchi which is the opening under the arms and I'm also gonna mark something out that is
which is the two openings on the side seams you will see what I mean later
and sodetsuke is also what I'm gonna mark out sodetsuke is 19 centimeter from the top sodetsuke
is the sleeve seam where you put on the sleeve and then miyatsuguchi is 15 centimeter and then
from the bottom I will have a 11.5 centimeter opening of the side seams that is gonna be my
umanori I marked out sodetsuke miyatsuguchi and umanori on both back and front panels
and on the front I marked out the line on which the collar will be attached this line connects
the end of the neck opening down to the hem then I cut in the neck opening and then I cut open the
front to create two front panels then it was time to pin together the front and back panels at the
side seam so I've marked out my side seam as you can see this is just this tiny seam of course for
the male version this is gonna look a tiny bit different because there is no opening under the
shoulders this opening here does not exist for male kimono so you don't need to do this so
the side seam is just gonna be 15 centimeter longer and that is all so let's quickly sew this
by machine down and then I'm gonna fold over the edges like this and I'm gonna blind stitch this
over by hand and then I will have to call it this day off I could only work for like 40 minutes today
between lessons and I have another youtube video to finish editing so that's what I'm gonna do
tonight so you will see another kimono in this video and don't you think it's finally time to
we're gonna start with the male version of this garment and I have started with
marking out the hem on both sides and after that I have sewed in the center back seam
already with the male version of this garment a big difference is that the center back seam
extends from the hem to the so-called katayama I've marked out the katayama here with a pin so
you can see which what line I actually mean here because I don't think you can see my markings
on the camera really well the katayama is the line or the fold where you fold the garment
over to have a back and front and for male kimono male undergarments male coats whatever you do in
kimono when you make a male version the center back seam always extends all the way from the
bottom hem to the katayama and this is also where you're gonna insert the slit for the opening of
your neck so you can see there is a big difference between the female and the male version besides
that the making is mostly the same and another difference between male and female garments is
and you probably have already noticed this that female garments actually leave a opening under
their sleeve the so-called miyatsuguchi so you can enter your kimono here is this opening here
you don't do this for male kimono they don't have this and also the sleeves are going to be fully
attached to this garment which you do different with female kimono you still keep it open here
but I'm gonna get to that when we're gonna do the sleeves a tiny bit in more detail for male
garments you don't have this miyatsuguchi you don't need that you just sew all the way through
and here's gonna tweak in my terms I'm gonna leave the miyatsuguchi in the garment I'm planning to
wear this with which is my school uniform in my imondo school that has no lowered back so it's
basically sewn like a male garment but it has a miyatsuguchi and when you have your top when
your top layer has a miyatsuguchi you usually also have a miyatsuguchi in the juban yes my
juban my undergarments also have a miyatsuguchi when you really really look for it you should
actually be able to see my skin but I'm not gonna show you I marked out exactly the same measurements
as I did for the female version since my size won't change again when you want to make a male
version you mark out everything as I show you here on screen also notice the differences between the
female and the male version for example the missing miyatsuguchi then I pin the side seams together
and sewed after I finished the side seams I created a rolled hem at the hem and sewed this
also in place by hand and the sleeves are really really simple on this as I already said we're not
gonna make like full kimono sleeves because then you can wear it under every kimono without having
to worry if your undergarment sleeves fit or not so I'm gonna make this type of sleeve that is
a undergarment sleeve you usually see this on your hadagi but in history this was actually put
onto juban by the way as I already said for the male and female difference this is a female sleeve
because it has an opening here it is not on the bottom this is not fully sewn together you actually
have an opening here and that is an indicator for this is a female sleeve for the male sleeve version
you're just gonna sew the whole bottom together and then attach this onto your garment so you have
a fully closed side you don't have that for the female version for the sleeves I cut out two 41
centimeter long and 28.5 centimeter wide rectangles because one edge was the selvedge of my fabric
I left the sleeve openings unfinished and only sewed the bottom together with a 1.5 centimeter
seam allowance since these are going to be female sleeves I left 10 centimeter of the bottom seam
open again for male version you sew the whole bottom together
then I did a rolled hem to finish off the seam on the inside of the sleeve
after that I marked out a 1.5 centimeter seam allowance for the sleeve seam
to pin in the sleeves I align sleeve and main piece hold them at the cut diameter together
and turn the main piece inside out then I pin the sleeve seam markings together
and I sewed them together by hand because I personally find sewing this by hand way easier
than trying to squeeze it through the machine the next day I marked out the color width
first I marked out a centimeter seam allowance from one edge from that seam allowance the women's
color is then marked out 10.4 centimeter at the center and 14 centimeter at the bottom
and then you connect those two points with a line of markings a male color also starts
with the one centimeter seam allowance marking and then it is 10.4 centimeter
all the way through this is how easy a men's color is in the past I have given you length is
for colors but those were mostly guessed usually you have to measure on the juban or kimono how
long the color has to be some of you have already noticed that my measurements do not work for
everyone so this time when you want to know how long the color has to be please measure it on your
juban after pressing the seam allowance in I pinned the one centimeter seam allowance side
onto the juban can we for a second behold and look at this perfect color done a really good
job sewing this on I'm so happy but yeah following your own markings and measuring is everything for
the color I have recently found out okay and now I'm just gonna iron this and then I fold this part
here over and blind stitch this on and the color is finished too for the inside of the collar I made
two so-called chikara nuno to enforce the edges of my neck opening cut out a square from some
leftover fabric fold it in half into a triangle twist the peak of the triangle press this with
an hot iron into shape and then it is held together with some running stitching these
two chikara nuno are then basted onto the seam allowance of the neck opening there is also a
smaller rectangular piece cut out of cotton fabric that is going to be basted into the center of the
collar to strengthen the back neck this is again only sewed onto the seam allowance on the inside
of the collar the collar is then folded over to cover up the first color seam and blind stitched
on and on top of that I'm gonna do something really special and I'm gonna use a so-called
mikawa erishin and as the color the name already says it is an erishin which means it is a color
stiffener and usually when you put on a kimono you would put in a color stiffener into into your
nago juban of course of course only females do them or when you wear a female kimono you do it
men don't need that so it's usually a place piece of plastic you put in here in your haneri this
white color you can see here peeking out and I knew this mikawa erishin which is basically just
really stiff cotton I hope you can hear it's a tiny bit stiffer and this is just really stiff
cotton and this is replacing this piece of plastic and of course you will have to sew this on I have
marked this mikawa erishin out like I did with the collar so it makes a lot of sense to put this
actually on when you attach the collar because then you can use the same markings and then I
cut it out along the markings because this is such a stiff fabric that you don't want to have
any seam allowance you don't want to fold it in and try to force it you just want to fold it in
half over it and then sew it on and because I will need two of it I have cut this one already
and I'm gonna use this one now as a pattern to cut the second one in place too and by the way
this is also the exact same stiffness that you use for a obi so I have some leftovers that I'm
gonna cut into scrap fabric and when some of my patreons is gonna ask me what kind of interfacing
or how stiff the interfacing should be for an obi I can send them a piece of this and then they can
go to the craft store or fabric market sewing store where it's a gone and they can take this
piece and they can check over there doesn't matter if it's then a fusible interfacing or
interfacing like this non-fusible and you will have to kind of fuse or sew it in that won't
matter but I'm actually quite happy that I have some leftovers anyway okay let's cut this
I unfortunately forgot to press record when I cut the edition and I'm really sorry and I used
that pre-cut edition and put it onto the new one so I could cut it into the exact same shape
then I pinned the mikawa edition onto the corner and sewed it on like a haneri only without a seam
allowance of course the haneri was added on top of this as well but for the sake of making
this video shorter I skipped that step and instead I will link my very old video of how
to sew on a haneri in the top right corner and down below in the description box and here we are
we have a finished hanjuban or actually two finished hanjuban and I am wearing the female
version of it right now I have to be honest I have worn it the past seven days and I put it to
the test I went on a business trip to Tokyo and I wore it on the plane right after I have actually
finished it and I was so pleased because it's very lightweight and because all my under layers were
cotton I did not really care about how much I sweat with those two editions it just held so
well in place I could completely lean back into my plane seat and the seat on the train it was just
super comfortable and I loved it when I go on a trip I have to bring tons and tons of luggage
and I was just really happy how the color kept its shape because I put in the mikawa edition
and then my normal plastic edition I have to be honest that the mikawa edition itself just the
cotton layer is not stable enough to hold the color nicely in place so that was a tiny bit of a
bummer but as I plan to also wear this inside the house when I don't go outside but I want to have
the kimono feeling with my yukata I mostly plan to wear this with my yukata I think the mikawa
edition will be just fine but when I go outside I'm definitely gonna put in another edition
the male version of my hanjiban or as I now call it my non-binary version of the hanjiban
was also what I could test in Tokyo because as I already said I made this actually to be worn with
my Emondo school uniform and that uniform looks yes a tiny bit like a miko outfit at shrines
and I just really wanted a specific undergarment made for that purpose and I love the fit and
finally the white kosode that I'm wearing on top said really really well and I was just happy with
it anyway I hope you learned something new in this video I hope you all are going out and making a
in case you're not 100% sure about your measurements or your size I have made a whole
video talking about kimono measurements that I'm going to link in the top right corner again
and of course down below and in case you also need some help with putting on that undergarment
again linked video top right corner and down below in the description box and I hope I see you in my
next video which is going to be a huge adventure and I'm so happy that I have now all the
undergarments made for it that I can take that step and do that adventure and I see you in my
next I'm gonna say adventure again kimono adventure bye