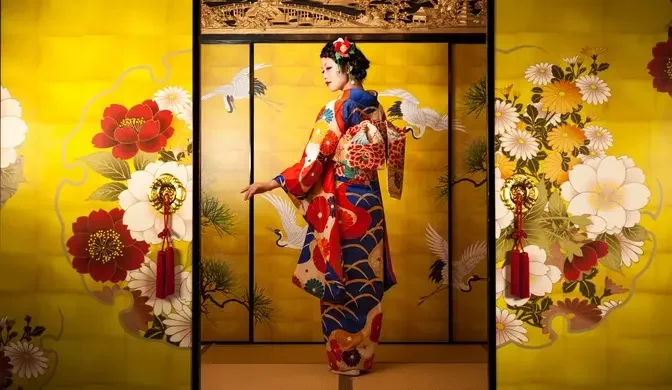
In this video I'm dyeing Japanese tie dye, shibori (絞り) with plant dye. I'm dyeing furoshiki (風呂敷) for my kimono storage with turmeric. Turmeric is said to have a moth repellent effect and that it's why it was a very popular plant dye for furoshiki in the past. Today the yellow color is still iconic for furoshiki. To make it a little more interesting I also tried 2 different shibori methods.
Thank you so much for watching!!
00:00 Intro 04:13 Jiire - Preparing the fabric 6:37 Nuishime Shibori - Sewed Shibori 10:38 Itajime Shibori - Shibori with boards 6:12 Dyeing process 21:49 Color fixation 28:27 Reveal 33:08 Playdate with Franzl
Music: "Mizuki" by Bad Snacks "New Moon" by Bad Snacks "Dreams" from bensound.com "Shibuya" by Bad Snacks "Subway Dreams" by Dan Henig "Gaiety in the Golden Age" by Aaron Kenny "Kimono Life" by Sondey
So I'm gonna make two different tie dyes and the first one is the one that is gonna make a tiny
bit more work to get finished. We're gonna make a Nui Shime Shibori. We are going to prepare the
second shibori that I want to try and that is called Itashime Shibori. Does this fit on top of
here? Oh no, I put it in. Look at this color! Such a pretty yellow.
In case you're here for the first time, my name is Billie Matsunaga and I'm a Fumitrain
kimono teacher and stylist and you might know that I love studying about Japanese weaves and
There's always more to learn and always more to explore but my favorite still is shiborizome,
Japanese tie dye. Oh yes, my absolute favorite. On top of that, I really love plant dye. It's also
one of my absolute favorite topics to learn about and it's also something, both of it,
what you can do easily at home and the plant dye we are gonna use in this video is something
that you can find in the kitchen. It is turmeric. In Japanese, you call it tameriku or
ukon which is a type of ginger. Ukonzome or dyeing with turmeric. I'm just gonna call it
in this video because that is easier for me to pronounce. Ukonzome in the past was extremely
popular to dye furoshiki. Furoshiki are a big pieces of cloth that are used for either
transporting things or for storage. For example, in your kimono storage, you would wrap the kimono
in furoshiki and ukonzome was popular for dyeing furoshiki because ukonzome or ukon
as a type of ginger was told to have an insect repellent effect and therefore,
most furoshiki in the past were either blue dyed with indigo that is also told to have
an insect repellent effect or yellow with ukon. Today, furoshiki are still very often dyed in
blue or yellow with chemical dye which doesn't make any sense with the insect repellent
effect but this is how iconic those two colors are for furoshiki because furoshiki were dyed
with ukon or indigo for such a long time. And when you like dyeing things like I do,
keep in mind fibers that are easy to dye is actually silk and wool and that is because
those are protein-based fibers and the protein will really hold onto the pigment
and that is why it's easy to dye. Speaks by the way also for your hair. Hair is also protein-based
that is why hair is relatively easy to dye. Unfortunately, this doesn't work for plant-based
fibers like cotton or linen and we're gonna dye cotton today and to really have a good outcome,
we're gonna do something that is called goire or jire. That is a step in the dyeing method
and it uses the so-called gojiru which would be translated with bean soup which is soybean
soup or soybean juice or you could also say it's just soy milk and we all know that soybeans
actually have a lot of protein in them and we're gonna stuff that protein into the fiber and make
it easier to dye and we're seriously gonna use soy milk for this step. So in the meanwhile,
I have already my fabric soaked in water and actually it's been in the washing machine
because I was too lazy to do it all by hand and this is now gonna get into the soy milk.
This is now five liters. I don't think that this is enough for the fabric that I have
and I'm feeling a tiny bit guilty because it feels like using food for this
and it's not a good feeling to be honest. So now we're gonna let this sit for 10 minutes.
This step is by the way also done with silk fiber although silk fiber is already easy to dye
and that is because that plus protein in the fiber will make sure that the pigment will go
straight through the fabric and don't spread to the side and that will help when you for example
paint a pattern on it or dye it into a pattern that that pattern or motif is gonna be really
crisp and nice. I took it out of the soy milk and I let it spin in the washing machine to really get
it evenly dry so there are no spots with too much soy milk or too less and now I'm gonna redo
this step just to be really really sure that this will dye really well. Usually when you would redo
the step you would add a tiny bit more soy milk into this. Again, new soy milk. I don't have any.
I'm not gonna go and buy some so I'm just gonna put it back in here and again I'm gonna now let
this sit for about 10 minutes and then I'm gonna put it into the washing machine. I'm gonna spin it
and then I'm gonna hang it up and let it dry until tomorrow and tomorrow we will get into some
tie dye fun. I have emptied out one of our guest rooms. Why? And blah blah blah in another video.
We're gonna focus on this today. So now I have this empty floor space here and I thought I'm
gonna use this to mark out the pattern of my tie dye. Oh my gosh this audio in here is already crazy but
I'm sorry. So I'm gonna make two different tie dyes and the first one is the one that is gonna
make a tiny bit more work to get finished. We're gonna make a nuishime shibori.
Nuishime means sewing and shimeru means tightening up. So it's basically a sewed
and tidied up and tied up tie dye and this is what we're basically gonna do. We're gonna make
a running stitch throughout the fabric and then we're gonna tighten that up and put it into the
dye. I have thought of a cute pattern. I have cut it out of cardboard. I'm not sure if this is gonna
work well but you know what we're just gonna try it and if it's not gonna work well I don't care
right now like seriously. This is just a fun project and we're gonna try this out.
So I marked out some guidelines for the pattern. Then I put the pattern along those markings and
and then I sew a line under it directly next to the fold. Just a normal line of running stitches.
This is one way of nuishime shibori. If you want to go the super easy way you would just sew a
normal running stitch directly at the marking and then later gather it up. So one line out of eight
is sewed down. I'm not quite sure how big I should make the stitches. At least the book I'm referring
to does a one centimeter stitches so I try to stay at one centimeter. They're not super even right now
because this fabric is actually quite hard to sew because I think the goire we did yesterday
did a really really good job because it feels like silk to sew right now. In case you don't know
at least kimono silks are sometimes according to the weave really hard to sew because in Japanese
it would say haritoshi ga warui. It means that the needle doesn't go through really easily. So right now
I'm actually quite sure that this is due to the goire we did yesterday that this is so hard to
sew because I've never had that much problem with a cotton fabric especially not in this usual
super plain weave. And after two days of sewing here is the finished nuishime shibori. I think it
looks so cute gathered up like this. I have really really tied it up super tightly so this won't
open up in the dye hopefully. And there are also some blood stains on it because I stabbed myself
more than once when trying to sew this. Anyway today we are going to prepare the second shibori
that I want to try and that is called itashime shibori. Ita means board. Shime again means
shimeru, tightening up. So you're gonna fold up the fabric in a specific way and then you put that
between boards and tie it up. And that is why it's called itashime shibori. And you might now think
oh every shibori dye is actually renamed after the way it is tied, tied up. No it's not. There are
many different shibori dyes. For example there is so-called arashi shibori that looks like a storm
in the end and that is why it's called arashi storm shibori. My absolute favorite is actually
a kumo shibori. Kumo means spider and the outcome looks like a spider web. That's why it's called
kumo shibori, spider shibori. So you see there are two ways of naming a shibori some. It's usually how the
pattern is produced, what is used to produce a pattern or it is how the pattern looks like
in the end. But before we get started folding this up and tightening it down, I want to show you what
books I have used for reference. I have used three books for reference. The first book is the shibori
some no giho. I bought this in an old bookstore, an antique bookstore in Kumamoto. So I don't know
where you can find this. And I have used this book here, kantan somemona. It's a book for kids
and that's the reason why I actually made this video because I found it in the library and I
remembered how easy it is to actually do plant dye at home with stuff you just have at home. That's why
I have this reference too. And one book that you also might be interested in is the complete
Japanese tie dyeing. This book is with English translations. Not the whole book is English but
I think the most important parts are English. For someone who can read both, I can always tell you
that the English translation is never good enough. But I think it's actually quite okay
actually. Anyway this is something you might be interested in. Let's get started.
First I folded guidelines into the fabric to make sure that later I could make exact accordion pleats
to one eighth of the width of my fabric. And yes I made up a system while doing this and
actually the second half went better than the first half. After the accordion plates were
finished, I fold a triangle into the fabric, turn the fabric and then fold it another triangle and
I could finally cover up half of the triangle and tie it up.
Everything is ready. I am too excited. So this is how my itashimeshiburi looks like right now.
I think I could have done a better job when folding it but it was huge. It felt like a huge
origami so we will see how this will work. I have now 10 liter of boiling water in here
and usually you want to have per liter 30 gram of the ukon powder. I have put in a tiny bit more
because I actually want to have a really really bold color but we'll see how this will work out.
Okay let's put this in. Let's put it in. I'm so excited. I am so excited.
The smell is crazy. The shiburi, the tie dye, especially the itashimeshiburi,
it's gonna change a lot according to if you're gonna put it into water first or not. It's gonna,
the outcome is gonna change a lot. Probably let's put this into water first.
Now I'm gonna put it right in. I'm gonna put it right into the dye. I'm gonna do it.
Oh wow.
I want to dye actually all at once but I'm not quite sure if that is a smart idea.
I don't know if you can see it. It's ukon. You can tell it's ukon completely. This is ukon.
Does this fit on top of here? Oh no I put it in. Oh it fits in. Oh yeah it fits.
Why am I just trying to sabotage myself? But now that it's in, it is in. Oh it looks good actually.
The smell. Oh my gosh it's so intense.
You know what? I've decided to change basket, not basket, bucket because my husband will be
probably really angry when I destroy his or stain his laundry basket. And we have a,
not basket, bucket. We have a outside bucket for garden work. The bigger one. I'm probably gonna
use this one. And I unnecessarily, you saw it probably already in the footage. Why is it so
loud outside? I have opened up the window because the smell of ginger in here is crazy by the way.
So I have bought a hedgehog tenugui. It was just too cute not to take it with me.
I should have washed it first because it's, oh this one is stiff. Oh my gosh it's, look at this
color. Amazing. It's exactly how ukon some furoshiki should look like. I have to be honest,
I would even already take this out. I think it has a absolute awesome color.
Oh yeah we're already 20 minutes in, that is why.
This is just normal water and it's there to rinse the powder from the fabric.
Okay let's put this in as well. I'm gonna put this in as well.
Nui shime shibori. Okay I'm already trying to prepare this getting outside.
I could have done this outside in the very beginning by the way, but
why not doing it inside, staining everything, destroying your kitchen?
I mean life would be no fun when you don't do this kind of stuff.
up how it's called in English so I'm going to put it up on screen, but in Japan you can just buy
this regularly in the supermarket. I have never tried to find that in a supermarket outside of
Japan so I don't know how available it is, but if you know leave it down below in the comments for
those people who want to try and are not quite sure where to get this. We are going to mix.
I think it was three liters or two teaspoons. We're going to use this book as reference because
I found this book was the best on it. It is two teaspoons on three liters. It is not teaspoons,
it's big spoons. This is a way to measure ingredients in Japan. So when it's two teaspoons
on three liters, let's do 12. 12 sounds good. 12 liters. So I need eight. One,
eight. And because this is really hard to melt in purely water,
what I was just trying to get in the bag is put it in boiling water.
So in case you're not too familiar with a dyeing process, you need to fixate the color with color
fixation, which is a chemical process to let the pigment settle in the fiber. You can color fixate
actually before you dye, but usually it's done after. So this is a color fixator. I'm gonna put
this in. And this color fixating process also very often changes a tiny bit also the color.
And according to what color fixator you're going to use, the color will change accordingly.
Look at this color. Such a pretty yellow.
So anyway, so I've just done an ask in my top three on Instagram. And one of the questions was,
what are your top three of specific colors, like grayish or teal, like really specific colors.
And actually one of my absolute favorite color is called Kihada in Japanese, and it's dyed with a
that is called Kihada. I think they use the bark of it to dye the color. And it's a very specific
greenish light yellow. It's very close to neon yellow. And I really love that color. And I
seriously, I would love to plant a Kihada tree in our garden just to dye that color.
It is really a pretty color. I was so happy we filmed inside because our neighbors were
really loud today. And so we could have a tiny bit more silence on the inside.
But next time when I'm going to do this kind of stuff, I'm definitely
going to do it outside. You can probably also see how more relaxed I was after I went outside
and could work here and not be afraid of staining the floor or the walls or
crashing my light.
So you should put it in and then stir it for about five minutes. Actually, you could see I've
tried to do a good job with the stirring. And now I'm going to let this sit for about 10 minutes
and stir from time to time. And then we're going to wash it in water and going to take off the
tie dye. And then we are finished and we can let it dry. I am so excited to open up the tie dye.
So I've hung it up right next to our beautiful garden. And this one turned out the best,
I think. The other one is okay. I probably should have tied it up a tiny bit better.
It's not bad, but it's not exactly what I wanted. If this would be pure white,
it would be actually cool. As you can already see on this one here, this is how the color looks wet.
And this is how the color looks dried. So it actually will get this light. And you can also
see I did not a really good job dyeing it because it's quite uneven. I mean, I can re-dye this
easily. This one here is what I can't re-dye because I already pulled out or tried to pull out
the shibori, the tie dye because I have no time anymore. And I actually have to get ready to do
a lesson. We'll see. Let's do the lesson and then we'll see. To wrap up this experience,
I hope you can tell I had a lot of chaotic fun. This is me. I had so much fun, I swear. I'm
extremely proud of how the color turned out. It's exactly the yellow I was going for, which is
amazing to me because I actually feared I had to redo this a few times to finally get the yellow
because that is what happens usually with plant dye when you want to have a very specific type
of color. You will have to repeat the dyeing process more than once, twice, sometimes five
to seven times and more to have this one shade you're looking for. Ukon obviously dyes really
well so I actually started off with something super easy. When I look at the only yellow furoshiki,
I have to say I could have done a tiny bit of better job with actually stirring it because
it's very patchy. It's not too bad that you could actually tell when you look at it but I find the
patches all the time. But next time when I dye, I'm just gonna do it better. The Itashime shibori
was definitely the least work and I think it is still an awesome outcome. I could have of course
tied up the boards a tiny bit better but I think with working almost with all the things that I had
at home, this worked out really really well and I think it looks like the sun. The Nushime shibori
after having it dried and ironed is actually my favorite. I think it turned out so well and it
still also has this texture left in it that is so iconic for shibori some. Shibori always leaves a
bit of a texture in the fabric and this makes it so extremely unique and special. Of course I could
have tightened it up a tiny bit more and neater but again there is always a chance to make it
another time so I am actually pretty proud of it. I have already also put them into the wash and see
if the color washes out and it did not wash out at all. What you have just seen in the footage
is exactly the color that remained after washing it so I think color fixation did work really really
well. Also when you're wondering why I actually made those furoshiki, I am planning to use them
in my kimono storage. I want to use them for storing my oofuri sode or you could also call
them kakeshita or hikizuri furisode. There are a lot of names for them. It is the kimonos that are worn
without a ohashori and they're dragged over the floor while walking and you have to fold them up
in a specific way. They're folded down in the so-called yogi tatami which makes them bigger
than the regular kimono when they're folded down and then you can put them into paper casing so
when you fold something of yogi tatami it is way too big for those paper casings. They don't fit in
there so I was really in need for something to finally store those kimono properly. I made the
furoshiki way bigger than I actually need them because when my collection of oofuri sode is
growing I probably will have to put more than one furisode together in one furoshiki. That is why I
made them bigger from the beginning. I'm just really happy to finally have something so I can
store those oofuri sode properly because buying real plant dye big furoshiki is really expensive
but it's so easy to make it by yourself at home and way cheaper. I really hope you have enjoyed
this video and you had a lot of chaotic dyeing fun with me. When you liked it please leave me
a comment below, a thumb up or share this video. This would really help me out a lot and when you're
new here and you want to learn more about kimono from a professional kimono teacher feel free to
subscribe. I would be really happy to have you here and I talk to you in my next kimono adventure. Bye!
Do I look good?
And what do you think? Did I do a good job?
Don't talk to me like that!
What do you think? Is the yukata more interesting? Great, isn't it? Thank you, thank you.