
Brilliant Ways To Use Dollar General Items To Create High End Christmas DIY's
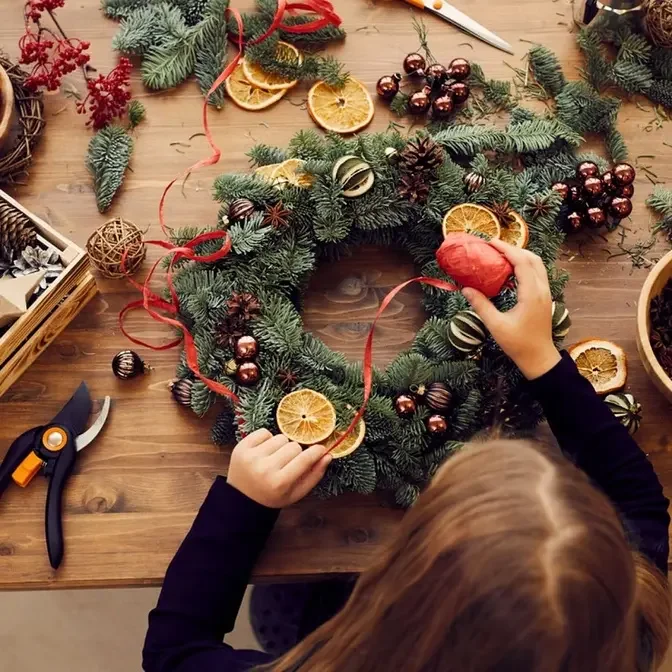
In today's episode, we're grabbing some items from Dollar General to make these beautiful high-end Christmas DIYs.
I hope you enjoy.
For our first project, we're going to use two of Dollar Tree's square styrofoam blocks.
They come four in a pack and they're already pre-cut.
We're going to hot glue those end-to-end and let that set up for about a minute.
Then we're going to take this gorgeous decorative gold charger that I found at Dollar General for only $1.
We're going to be attaching that floral foam to the center of the gold charger using a very generous amount of hot glue.
We're going to be creating a gorgeous floral arrangement. To keep the floral foam from being seen
through the floral arrangement,
we're going to hot glue some Spanish Moss around each of the edges.
This Spanish Moss actually came from Dollar Tree.
The majority of the greenery that I'm going to be using in this arrangement came off of two pieces that I
thrifted and redid a couple of weeks ago, and I saved all of that greenery.
I'm going to start by attaching these pieces,
which look somewhat like some garland with wire in the middle, and place one in the center of each of those floral foam blocks.
Also, I have two picks from Dollar Tree.
They are gold glitter ferns, and I wanted those to kind of drape off of the charger.
Then I have four picks. These came from Dollar Tree,
and they have some gold glitter on the pine cones and some of the greenery.
I'm going to use that to fill in some spaces on each side.
This greenery pick came from Walmart for about a dollar, and that's going to blend in really well with those glitter ferns.
I'm going to put one on each side of those glitter ferns and kind of twist it around.
Then I'm going to be using these
beautiful greenery pieces that came off of these stars that I thrifted a few weeks ago,
and I also had a few more in my stash.
I'm going to put these in at an angle,
so they'll kind of stick up a little bit further, and this is really going to fill this arrangement out.
I'm going to put three on each of the long sides, one on each end,
and then I want to take some more and kind of turn them sideways and
put those towards the bottom to really fill this piece out. And now for the star of the show, this beautiful
nativity scene that has some gorgeous gold tones all throughout it. I found this at
Dollar General for $3.
We're going to put a generous amount of hot glue on the bottom of that and set it on top of our floral foam and center
it. Then these are some more thrifted greenery pieces that I pulled off,
and I'm going to place those around the top of the floral foam
and fill those areas in. I'm going to add in a few more
of the glittery gold ferns throughout to kind of have that color tone going all the way around,
and I added a couple at the top. Then I'm going to fill in with some more Spanish moss to cover up
any of the floral foam that you can see, and this is how it's looking so far.
You could stop there, but I decided to make a bow to go on this.
I'm going to use this brown ribbon with the gold trim that I found at Dollar Tree in that plus section.
I'm going to leave a tail and then create a nice size loop.
Then I'll create three additional loops the same size and leave another tail on the other end.
Then I'm going to pinch that together in the middle using a small zip tie.
I'm just going to wrap that around where all of the pieces are pinched together at the loops,
tighten that up, and then I'll dovetail each of the ends of the tail.
Now you could take a floral pin,
or you could use some hot glue to attach this on the inside of your floral arrangement to keep it in place.
I also decided that I did not like that really tall gold piece sticking up at the top,
so I traded that out for some greenery and added some more gold right off to the side.
And this is how it turned out. You guys let me know what you think.
For this project, we're going to use some pine cone ornaments that came from Dollar General.
They're eight in a pack for one dollar. They also have some that are frosted.
The twine portion for the hanger comes off super easy.
You could just pull that off with your hands and then some of the pieces on the back
you may want to trim down so they're a little bit more flat.
We're also going to be using one of Dollar Tree's eight inch wire wreath forms. They come two in a pack.
We're going to take the wired wreath form and turn it upside down.
We're going to be gluing the pine cones to the back side. They fit perfectly inside of this wreath form.
Now for video purposes, I'm using hot glue, but you could definitely use a more permanent adhesive.
We're attaching this to the three wires on the wreath form and I set out 12,
but when you get down to the last two,
you may need to
dig some more out of the box to find two that will fit because some of them are smaller than the other sizes.
Then we're going to turn it over on the back side and reinforce it with even more hot glue. And if you're worried about
scratching anything that you hang this on or how it looks, you could always glue some felt to the back side of this.
Once that cools off, we're going to take some of Dollar Tree's berry garland.
We're going to wrap this around. You could just attach that beginning piece to the wreath form itself.
Then we're going to wrap it around in between each of the pine cones,
trying to get most of the berries to show in between the pine cones. So this is going to give it a little pop of color.
Then you could take that very end piece and again attach it to your wire wreath form on the back side.
Then we're going to take some greenery.
This is some leftover greenery from a thrifted project I did. I'm going to cut this down into three sections
because I want to add some of this as a filler in between each of the pine cones on the outside.
Just make sure that your wire or stem is not poking through the front.
We're going to glue it to each of the pine cones that are on there as well as the wreath form.
Once you have your last piece in there, kind of remove most of your glue strands.
And I wanted to create a ribbon type hanger.
I'm using some two and a half inch ribbon that I already had on hand.
I cut it down to 20 and a half inches and hot glued the two ends together.
Then I'm going to glue this on the back side of the wreath to the wire itself,
but make sure that the ribbon doesn't show through the bottom. And this is how it turned out.
For this project, we're going to be using two large wooden beads.
I'm placing this on a dowel just to make it easier for me to paint.
I'm going to paint each one of these with two coats of a white acrylic paint and let that dry.
We're also going to be using some markers that I found at Dollar General.
You can get this in a pack of eight for about five dollars.
They have a regular tip on one end and a fine tip on the other and they come with a variety of different colors.
So I think that's well worth five dollars and the colors are pretty bright.
Now that the paint is dry, we're going to be making some snowman faces on each one of our wooden beads.
So I'm just using the black marker as well as the orange marker and then we'll set those to the side and let the marker dry.
We're also going to be using some Dollar Tree scarecrow hats.
Now they're a little bit larger than my bead. So I need to cut these down.
I'm going to pull the top and bottom piece off and then take the styrofoam piece in the middle and with my utility knife
cut that almost in half just to make it a bit smaller.
Then I can glue the top back on and once my glue sets I can flip that over using my scissors and trim it
very close right there to the edge. I'll do the same thing for the bottom, but I'll make sure to leave
a brim for the hat so you don't want to cut it all the way to the edge of your styrofoam.
You want to leave a little bit of that. So this is how it's looking so far.
Now we're going to take a large doll needle.
We're going to stick that in the center at the top of the hat and make sure we go all the way through
just to create a hole. We'll do that for both of those and you'll see why just a little later on in this project.
Now you could leave it as is,
but I decided to add two coats of a black acrylic paint to mine to really make it look like a snowman hat.
Once that dries, I'm going to take some ribbon
from Dollar General and you can find these for a dollar and I'm going to cut this in half to make sure that it is
thin enough to be able to glue this around the hat just to give it a nice pop of color.
I'm going to do that for both of the hats using the same color ribbon,
but you could really switch this up and use a different color if you like.
We're also using some of Dollar General's frosted pine cone ornaments. You get eight for a dollar.
They already have the twine hanger on the end.
Now it may not be long enough. So what I did was pull one side of this off because it's just hot glued on there.
Then we can feed that other end through our bead.
We're going to add a little bit of hot glue to make sure that the face stays in place and doesn't rotate around.
Then we can add some more ribbon to create a scarf.
Now I chose to use the same color ribbon as I did around the hat.
Again, I have cut that in half to make it thin enough. We're just going to glue that around between the
bead and the pine cone.
Once I trim that down, I'm going to take that other end and feed it through the hole that we created on the hat.
Pull that through the other side.
We'll add a little bit of hot glue to make sure that the hat stays right on top of the bead.
Now you could stop there, but then I decided to take a white chenille stem,
fold the end over to create a hand. Then we're going to cut that
into two pieces. We'll fold the other end over to create a hand on the other piece.
And we're going to glue those right into the pine cone to make the snowman arms.
Now once you have that done, of course, you're going to need a way to hang that up since we cut the twine.
All I did was hot glue
a loop at the very top and this is how they turned out. You guys let me know what you think.
If you love little Christmas scenes or displays, then I think you're going to love this project.
Grab one of Dollar Tree's wooden plaques. Paint it the color of your choice.
I'm giving mine a coat of watered down antique wax just to give it a stained look.
We're also going to be using a Dollar Tree sleigh ornament. Some mini presents that I believe came from Hobby Lobby.
I'm going to glue
two in the bottom of this and one on the top, but you can add as many as you like.
We're also going to be using a Santa Claus ornament from Dollar General for three dollars.
These are so cute. They have the cutest details on it and they come in a variety of different outfits.
We'll be using a bottle brush tree from Dollar Tree.
Once you set all of your items on your plaque,
if you decide to, you can go ahead and go back and hot glue each one of these in place to make sure they stay there.
And then I decided that the hat was sticking up a little too far.
So I'm going to add a little bit of glue and fold that over and look how cute this turned out.
The next time you're in Dollar General, make sure to check out their holiday stems.
You get a lot of greenery for three dollars.
I chose these two stems. I actually found these last year, but they had some that were very similar this year.
I'm also going to be using a grapevine wreath. So if you have a roses near you, you can find these for five dollars and 99 cents.
I'm going to add a little bit of greenery to the stem.
I'm going to bend the stems to form the shape of the wreath and then attach them to the wreath using some floral wire.
I'm going to feed that through the grapevine wreath itself right where the two stems overlap.
Making sure that I twist that very tightly.
I also like to go back once I cut the excess off and push that down with some pliers to make sure it's not going to
scratch anything. On each side,
I'll add a piece of floral wire through the grapevine wreath just to tighten it right in the center of each of those stems.
Cut that excess off.
Push that down with my pliers and then make sure I fluff my greenery out.
Of course, I'm going to do that on the other side as well.
To create a bow, we're going to use some of Dollar General's gorgeous wired ribbon.
I found this one for two dollars and I also have a red and black plaid.
We're going to cut down four of these at 14 inches.
We're also going to cut down four of the black and red plaid at 14 inches.
Then you'll need one of each at 28 inches.
We're going to take our 14 inch pieces first. We're going to create a loop.
Pinch it together at the bottom.
Hold it with one hand and then continue to create loops with each one of these 14 inch ribbons.
Just alternating your pattern. Once I had all of mine together, I felt like I wanted it to be a little bit fuller.
So I cut four more of the red and black plaid just to place on the outside.
To hold all of these together, I'm going to be using a zip tie.
You'll just make sure you wrap it around the bottom where all of your pieces are held together.
Making sure that the loops are on the outside.
Before you tighten that up all the way, you will want to leave a little bit of space because we're going to add another zip tie.
I'm going to trim some of that excess off at the bottom to make sure that my bow will be able to sit flat.
Then take a piece of zip tie to feed in where you previously put your zip tie.
And leave that because that's how we'll attach it to our wreath.
Now you could cut these all down to 14 inches, but because this Santa Claus ribbon is going one way,
I wanted to make sure that both of these are going to be going in the same direction to create the tails for our bow.
So just cut those in half, pinch them at the top or gather them together at the top
and hold that in place with a zip tie before you tighten it all the way. Add another zip tie and then tighten your
first zip tie. The second zip tie is what we're going to use to attach to the center of our wreath.
Once you have that attached, I'm going to go back and dovetail each end of the tails for our bow
just by folding that over and cutting it at an angle.
I want those to have a few little waves. So I'm going to kind of crinkle that up in the front
so Santa's face is kind of pointing outwards. Then we can attach our bow right in the center using that zip tie
and cut the excess off. Don't forget to go back and fluff all of your loops out and this is how it turned out.
I hope you enjoyed today's projects. And if you have a favorite, let me know in the comment section down below.
I always love to know which one is your favorite.
If you haven't subscribed already, I would love for you to click that subscribe button right below the video.
Thank you so much for spending time with me today. Please take care and I will see you guys next time.