
#55 How To Paint A Sunset Sky | Oil Painting Tutorial
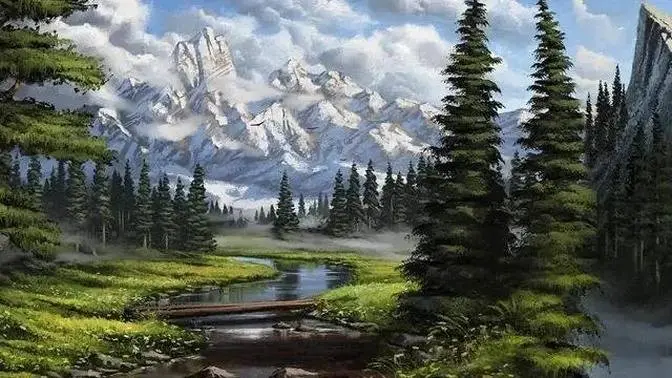
Good morning and welcome to this rather dreary Wednesday morning. It's not dreary in here though
because we are going to be working on this lovely scene here. A few of you asking
demonstrations on doing a sunset sky so that's what I'm going to show you today.
You should get the vast majority of the picture done but I'm going to focus
on this sky which is what I'm going to work on right now.
To start I think what I'm going to do is I'm going to work with the lightest areas which will be
these areas here. I mean the sun I'm going to imagine it's somewhere over here. It's probably
probably about there so this side of the picture is going to be a lot lighter
and you've got the sun catching the clouds here and they've got a real golden colour.
So I want that to be as strong as possible. So I'm going to start there and then I'm going to
work on the lighter colours and then I'm going to go on to the darker colours and then the blue.
Let's do that now.
Working on those lighter colours first I think makes sense because if you go if you put the
darker colours in and then put the lights over the top which would probably be the
more natural way of doing it you tend to kill the lights and you don't put as many of them in.
So I'll put those lights in I'm just it's going to be quite blocky but then I can put the darks
afterwards. I think the trick is to try and do as much of it as I can while it's wet. I don't
want it to be drying while I'm doing it because once that happens it then becomes very difficult
to blend. It probably will happen to a certain extent but you need to limit it as much as you
can. You really want to be working wet blending all the colours into each other. So let's get
going. So first of all let's mix some colour for this light area here and we're going to go straight
in with titanium white and I'm going to use just a touch of Windsor lemon to begin with because
that's going to give you a really nice strong light yellow. Now I'm not worried too much about
the photograph I'm going to get it similar it's not going to be identical. I think as you know
by now it's not something with these smaller quicker pictures that is you know I put a great
deal of effort into it just doesn't really matter as long as it's appealing. So let's get going.
Let's build up on the end just get it in roughly the right places.
So I'm not using any liquid with this because the liquid is going to
make it dry quicker and we don't want that. I'm mixing a bit of that
darker yellow in now just to fill in these gaps.
So I'm just blending it as I go and that's obviously the benefit of
working with the oil paint is it stays wet for that bit longer
compared to acrylics and allows you to blend it as you as you work. So I'm just softening
it a little bit with this blender here it's just a really soft mop it just gives it
just smooths off any of the little peaks in the paint. Okay now I'm going to move on to
this larger area here of the blue and get those larger areas painted in first
and it makes a blending as I say that a bit easier.
So I'm going over the edges of the clouds the blocked in edges of the clouds
so that when I come to do the clouds I'll be able to blend in with that blue that's there.
So you don't don't have to be too precious about it you know you go over the edges that's fine.
As we go near to the top of the sky here the top of the picture we're going to
just darken it a little bit not too much it's always a bit of a balancing act I think doing
skies because although you want them soft at the same time you want them to have a bit of punch.
I mean the light in the photograph and this is so strong and unless you thicken up on the paint
you're just not going to get that so you want it you want a sort of a mixture of softness and
strength and sometimes if you thicken up on the paint you know in these areas here
okay it'll stand proud of the surface a little bit but it will have that strength of colour
so it's a bit of a trade-off really unless you're someone that likes a thick paint on a
picture of course. Now I'm working on these sort of darker areas of this cloud
and I'm just loading the paint up on it and I'm just kind of
scumbling it into the white paint that's there it's all going on fairly soft I will
just give it a little bit more of a soften and once that's done go over it with that blending brush
you've got these are these clouds here reach out into the sky
use a new brush so I get a nice nice sort of sharp edge
I'm just sort of scumbling it in we blend it blend it later in a minute
quite pink actually you need to a bit more crimson
now I'm working on these darker clouds here I should just have enough time to
get those done before it starts to dry a little bit so now because the paint is starting to get
a little bit sticky I have worked in a little bit of liquid but it will start to
now I've added that liquid that'll that'll dry even quicker so you need to work fast
so with the sky I'm going to now just do the very very lightest points and I will do those
just a little bit thicker I mean they'll stand out but also when the light does hit it when the
picture light or whatever your whatever the is being used by whoever buys it when it
hits it these these little areas here will just glow that's like I'm not going super thick with
it just just a bit thicker than there's than is already there I don't know whether the camera's
going to pick up but already that's got that bit more punch to it I don't need to do too much
really not really a lot that I need to put on there just the odd little bit
okay so that is the sky finished