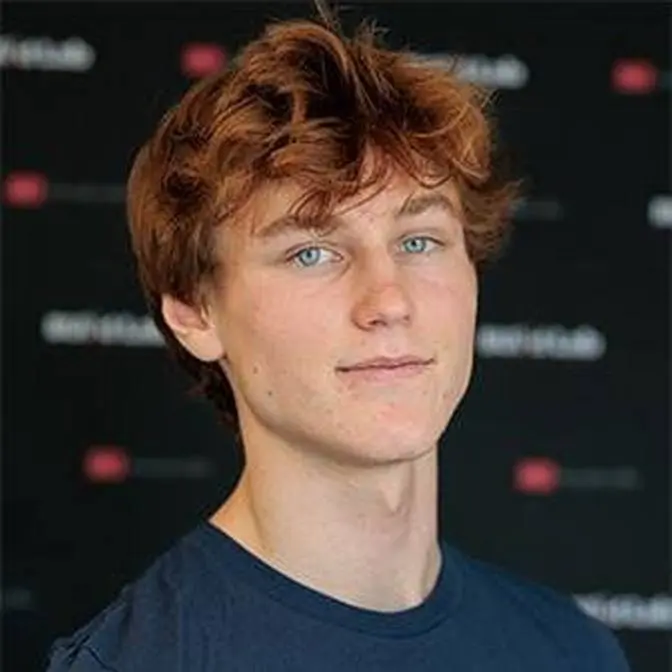
I shot a quick clip on my phone, then let AI rebuild the entire world around me, same me, same movement, everything else generated. That's the whole idea here: instead of making an AI clone of yourself and fighting that uncanny-valley feeling, you keep the real human and let AI handle the background, lighting, and effects. In this one I walk through OpenArt VFX (powered by a model called Switch AI) and show you all three of its core tools — swapping out backgrounds, relighting a shot, and full video in-paint VFX where you add or remove anything in the frame. We go demo by demo: replacing my living room with a creator studio, a retro diner, and a neon city; relighting the same clip for golden hour and night; then masking myself out to change my outfit, drop in a mansion background, and add a glowing sci-fi effect to my hand. By the end you'll know exactly how to pull this off with your own footage, plus how to try it free and where to grab a discount if you want the paid tools.
CHAPTERS: 0:00 Real Footage, AI-Generated World (Before & After) 0:25 What This Video Covers 0:45 3 Problems With Current AI Video Tools 1:20 The Fix: Keep the Human, Generate the World 1:42 What is OpenArt VFX? 2:04 How Switch AI Works Under the Hood 2:25 How to Follow Along for Free 2:48 OpenArt Dashboard Walkthrough 2:57 Demo 1: AI Background Replacement 3:31 Backgrounds: Presets vs Custom AI Prompts 4:16 Background Swap Results & Lighting 4:38 Upscale, Mask View & Export Still Frames 5:01 Retro Diner & Paris Skyline Results 5:26 Demo 2: AI Relight Video Feature 5:58 Relight Split Test Setup 6:22 Golden Hour Relight Result 6:46 Nighttime Relight Result 7:07 Demo 3: Video In-Paint (True AI VFX) 7:31 Masking Your Subject With AI 8:05 AI Outfit & Background Swap (Suit + Mansion) 8:42 Adding a Glowing Sci-Fi VFX Effect 9:28 Testing Mask Accuracy: Shirt Color Change 9:41 Video In-Paint Results 10:15 Other OpenArt Tools (Extend, Restyle, Motion Sync) 11:00 My Honest Verdict on OpenArt VFX 11:36 How to Get the Best Results 11:47 Free Trial + 15% Discount Code
------------------- Clips channel @jonlawclips
I do NOT sell any products of my own. Watch out for scams.
So this is footage that I shot on my phone in about 10 seconds,
and this is that same clip after AI rebuilt the entire world around me.
Same words, same movement, everything else is generated.
And the part that matters is that that is actually me.
That's not some AI-generated replica of me.
That is a symbiosis of AI-generated footage,
and then the realism of humans that AI video still can't perfectly capture.
That is a totally different way of thinking about AI video generation,
and that's exactly what I want to show you how to do in this video.
We're going to cover the leading platform in this space,
and I'm going to walk you step-by-step through how you can create footage like this yourself.
That's going to be the video. Let's go.
Now, we cover a lot of AI video tools on this channel and all of the world's leading ones,
and they are really, really good at making a lot of progress.
There are still a few problems, though, that are not perfect.
Number one, complete control over every aspect of the generated video.
Number two, that kind of uncanny valley feel where if you create a digital clone of you,
it just something is off. It doesn't look exactly quite like you.
And then number three, consistency, where again, you can be 99% of the way there,
but if you're 1%, you're 0.2% of the way off,
and that just won't feel consistent across multiple clips.
So that's the pitch of taking real footage,
keeping the central subject or human,
and then rebuilding or generating the world around that subject.
So the AI can handle the things it's really good at,
the background, the lighting, and effects while you keep the actual human.
And so ideally, you get the realism of the human
and still the advantage of the generation with the AI.
That in mind, we're doing this with a platform called OpenArt VFX.
It is a AI video transformation tool where you upload your own clips
that can be on a phone or a camera or wherever you get it from,
and it can transform those clips in three ways.
Number one, swap the background.
Number two, relight the scene.
And number three, add custom visual effects to certain parts of the frame.
And what's under the hood there is a model called SwitchX.
And the way it works, just like if you're familiar with masking and video editing,
it separates you as the subject from the background,
and that's what lets it go and alter that background in any number of ways.
And then it processes that clip as a continuous sequence,
as opposed to frame by frame, which is a common approach taken for that kind of model.
So that is what helps with consistency.
And then finally, it is really good with lighting.
So that in mind, we're going to jump into a bunch of demos
where I show you all of this and how to use OpenArt VFX.
Now, you're going to learn better from this video
if you follow along while you're watching it.
The good news is you can do that completely for free,
and you help support the channel.
You can just go to this link on the screen or in the description.
And again, it's free to get started, and you can try it out while you are watching.
That in mind, let's jump into demo number one.
So guys, here we are inside the OpenArt dashboard at openart.ai.
And the three main demos I want to show you are these core features we can see here.
So replacing the background, relighting the video, and then video inpaint.
And let's just jump into it.
So I'm going to upload a reference video.
I want to show you what that looks like.
It is me in my living room.
So pretty basic shot.
I have a few different emotions here that we can play around with.
So I'm going to upload this as a reference video to OpenArt.
Now, it's going to ask me to select frames.
I will go ahead and select, let's say, just the first half of this video.
So me waving.
Let's click confirm.
Now, there's a few ways in which I can select the background that I want to be inserted in.
Under presets here, I can select from any of these,
or I can just describe the idea to the AI.
So I want to do this a few times.
We'll explore both of those options.
First, let's just go actually for the default they have here.
So the clean creator studio as opposed to a living room type look.
So something more professional that I could actually use for a real end shot in a YouTube video.
And let's go ahead and click generate.
And while this generates, let's try two variations as well.
I think number one, let's go for a retro diner.
That'll be a fun one.
We'll generate one more like so.
And then let's upload a custom prompt.
So a moody neon lit city rooftop at night.
That's cinematic with a shadow depth of field.
So same shot, I will have three different AI infused backgrounds.
Okay, we can see the results here.
This is already looking pretty epic.
Let's go ahead and give it a watch.
So there we go.
That's the three seconds we selected.
That looks really good.
You can see it played around with the lighting a little bit.
Now, if we want to modify it in any way, we can go ahead and upscale or we can just modify.
We can also export still frames from it, which I think is an underrated feature.
But to actually use this otherwise, we could just go ahead and click download.
And then we'll have our file.
Now, if we also click mask instead of result,
we can go ahead and see the layer it extracted for me versus that static background.
But overall, really impressive results.
Let's check out the other two and then we'll get into the really fun stuff.
So the re-lighting and then the VFX.
Okay, here is the retro diner.
And looking good.
I think what's important to note here, the lighting is different from the previous one, right?
So that's part of that re-lighting that we'll get to see a little bit more of.
Fun stuff there.
And let's check out the third.
And here is that third replacement with that Paris skyline.
So now for demo number two, I want to check out the re-light feature.
This will be a quicker one.
Let's go under video to re-light video.
And then I'm going to keep this same video as a reference that we previously uploaded.
And then I want to repaint that with this golden hour glow.
And then I'm going to describe that as cinematic golden hour warm key light.
So we're going to keep the same shot.
We're just changing the lighting to make it look like whatever we have in our heads.
In this case, that golden hour, like let's say sunset style feel.
Let's go ahead and click generate.
And then what I want to do is a split test.
We're going to keep the same exact clip.
And then all I'm going to change is this preset.
And then say I want low key lighting with deep shadows.
So same exact clip, just re-lit with AI in a different way.
And then for the third background that split test,
I'm going to give it a Paris rooftop evening prompt.
So at night cinematic with the skyline and cafe light view.
Okay, here's the warm lighting result.
This looks really good.
What I love is the subtlety between we can see the shading right here that's warm,
but then also the shading on the other side of my face.
So I'm loving the look of this.
Let's let it play all the way through.
And there you go.
That's just re-lighting a shot.
Takes about 60 seconds and you're pretty much done.
Now here's the equivalent of that at night.
So we can see it changed the sky in the background.
So it became evening kind of sunset,
added the moon and then we have the darker lighting up front here as well.
Okay, now for this third demo and core feature,
that is the VFX effects that I mentioned.
And basically the way this works, like you'll see in a second,
it's just you select the areas that you want to change.
So you can play with assets in various ways.
You select what you want to be changed.
And then the VFX magic will be done for you by the AI.
And let's see that in action.
And then the VFX magic will be done for you by AI.
Now you can use this to remove assets,
you can add assets or you can alter them in some way.
So what I'm going to do is select from the first frame,
basically everything except my head.
So I'm going to select paint right here.
We're going to go to a big brush
and then I'm going to paint basically everything that's not my face.
Let's go ahead and fill that in.
Now, if you've ever had to mask anything in video,
you'd know exactly how much effort that takes.
So something like this is really awesome to see.
So I've selected basically everything except my head.
I'll click preview.
I'll click confirm.
And then I'm going to click create with AI.
And then here we can just describe the changes that we want.
So let's say change my outfit to be a suit
and change the background of this shot to be a mansion.
It's going to be that's going to be something simple
and we want to see how realistic this is.
Let's go ahead and click generate and we'll see what this looks like.
Now we can see what this shot looks like here.
So that's what the reference is going to be.
And then let's say change the outfit and background of the guy.
Now we can do more here as well.
We're going to play around with that in a second,
but let's just do this for now and let's generate.
So while this is generating, let's have a little bit more fun here.
I'm going to click create with AI.
And then here for frame 51,
I'm going to say add a glowing sci-fi energy core to the hand of this person.
Let's click generate.
So this is something closer to that standard VFX
of let's add something that isn't there to the shot.
And then for that, let's click edit selection.
We're going to delete this.
I clicked auto select, it auto selected me.
So that should track the hand as well.
We'll click confirm.
And then this is the reference we're going off of here.
So we'll say add a glowing sci-fi energy core to the hand of the guy.
And we'll click generate.
And to test the accuracy of the mask,
let's do something super specific as well for this third little one.
So that'll just be change the shirt to the color red.
Okay, we can see the results here.
So we have the suit that is actually perfectly adjusted
to the face and the background here as well.
Let's check out the second demo.
Okay, this will be a fun one.
Let's give it a watch.
So there we go.
That's our VFX glowing energy core added.
Pretty cool.
Okay, and let's give number three a watch here.
So look at that.
That is just about a perfect mask, perfect replacement.
And the reason for that is, I think,
a very clean cutout here and a good reference image.
So really cool to see that doesn't look like AI,
that looks completely realistic.
Now, quick run-through as well before we wrap up.
There's a lot of the platform that we didn't cover.
So you can create end-to-end with AI under video.
There's all these other tools,
extend video, restyle, motion sync that we didn't cover.
On image, there's a ton.
This is really a production platform of sorts.
And I'm really looking forward to keeping up with this
as they add things, as the quality improves.
Something that I think we're just getting into globally
are your world models.
So that is gonna be really epic to play around with.
Overall, overall, if you like these features,
overall, if you like these three features
that we looked at in this video,
I think you're gonna like to investigate
and explore the platform more as a whole.
And that in mind, that is OpenArt.
So my overall take on these
are that the background switch and relight
are practically useful in the situations where they are.
If you have a need for something like that,
this is gonna be an immediate fix,
an immediate time saver,
and will genuinely help you out.
On the VFX side, I think that's even higher yield
that can replace a lot more of the time
that's typically required to do the custom masking
and to redo and add and replace and remove.
I think what's critical there
is the cleanliness of the shot.
So putting effort into, in this section,
making sure the area to change looks good,
making the targets or the reference image good.
If you nail those two things,
then that is how you get the best use,
I think, out of your video in painting.
So there you go.
That is the core of what I wanted to show you.
And I hope now you feel confidence
to be able to go and do that process yourself.
I said this earlier, if you wanna try it out,
you can get started for free.
You go to this link on the screen or in the description.
And if you wanna support the channel
and you just wanna try out those tools on a paid plan,
there's a discount code in the description as well.
And that code will get you 15% off.
And if you want the best possible value,
the annual wonder plan will bring the actual cost
for video to about 40 cents,
which I don't need to say is good.
That's 40 cents per video.
Out of mind, that's the description.
I hope you go create something awesome
and learn something today out of mind.
I appreciate y'all for being here
and I will see you in the next one.
Cheers.