
23 Raised Bed Gardening Tips I Wish I Knew Sooner
80 Video Views·Mar 20, 2026
AI GeneratedMay contain errors
Hello and a very warm welcome back to the garden. Today I want to focus on tips for raised beds,
23 tips that I wish I knew earlier. So if you're new to gardening, used to growing,
or you're trying to make the most out of your raised beds, I hope this video is useful.
So I love raised beds because they're their own defined space. And just so you know,
like the first tip just to start off with is the size of a bed. You don't want it
too overwhelming. I remember back in the day at the other garden, there were some beds that were
just too wide. And so I really do think there's a bit of a sweet spot when it comes to the size
of a raised bed, which for me in this garden is maximum width of 1.2 meters or four foot.
That means when you're down in the garden, you can actually reach the middle. These ones are
a bit narrower at a meter. So you can see I can reach at different depths. And then in terms of
the actual length of the beds, because, you know, I want to make sure it's usable enough,
but I don't want it to be too long that then forces me to want to like hop over rather than
going around the bed. And so three meters or 10 foot, that's kind of the length that I'm happy
with. So I would say those are the maximum widths and lengths and a bed, anything that's that size
or smaller is something nice to aim for. So you could always have some beds that are just a square
meter in size. So I'm just trying to tame this thornless bramble and brambles fruit on last
year's growth. So the nice fresh growth here, I'm keeping in then the dead growth where you can see
where it's fruited. It means I have the confidence to be able to cut that out and then retrain it
along. And I want to push it back here so I can create more space to plant things up. Now here,
I have an edge in a corner and here I have something, this is a sedum, which we grow,
that's available at Dovey Plants. And this is evergreen and it has such a nice, fresh,
vibrant taste, which is great for adding into salads. And one of the top tips I always say
is use the edge of a bed. You see, the edge of a bed is actually quite pristine growing area.
You've got all that where things can trail over. So if you can grow certain things like nasturtiums
or sedums, or just allowing anything like herbs, thyme, et cetera, to just grow over the side,
what it does is that it helps to soften these hard edges and it brings a real nice feel
of abundance into the garden. And it also adds that color as well. Now this I've just pulled up
is going to be a free plant. Love a free plant. This Japanese wineberry that has come from the
other side. And this is not an imposter. This is a welcome visitor. Now a little kind of trick,
if you only have a really small garden, is that between the two beds, you can use this to make
compost. So right now I have this wood chip that has broken down. And this is something that I
learned from Liz Zorab, that you can then put it as a mulch around particularly your perennials
and then put fresh wood chip down. And that happens every two or three years. But there's
also a way that you can turn your pathways into compost pathways by, woohoo, that was very eager
to get out, by building up loads of different material, just as you would a compost bin,
but just along the path. So you're not actually wasting any space, even though having compost
bin is not a waste of space, but it means it's in situ composting that you can then,
when it's ready in only about six months time, you can lift and use it to mulch both of the beds
either side. So it's just those kind of like little tricks that avoid you having to move material
around the garden all the time. So I need to do a bit of weeding in the pathway here, but
it's only the start of the growing season and I'm just removing some poor quality leaves off
these brassica plants, mainly just for aesthetics and to keep them nice and happy.
But a real useful thing to know about raised beds, particularly later on in the season,
is that the edges of a bed will dry out faster than the inside of the bed. So when you're watering,
put a little bit more emphasis or put a little bit more water around the edge of the bed versus
the middle so it doesn't dry out. Or you can be quite clever and grow things in a polyculture way
where things that don't mind dry conditions so much, like certain types of herbs, can be planted
around the edge of a raised bed and the things that want a lot of water, like brassicas, can be
planted in the middle of a bed. Now I need to finish planting out these onions from the last
video. I've just been a bit busy with the book launch, but a little tip. Whenever you're
transplanting or seed sowing, if you're the kind of person that likes straight lines,
which I don't blame you, there is something satisfying about it, but here I'm planting
out these onions in a diagonal. Now this is a top tip. If you plant things in diagonal rather than
in blocks or grids, you can actually fit around 20% more plants within the same space. So that's
a really useful thing to know about. But the other part is if you do want to make the most and feel
like you have straight lines, whatever way that you're planting, just getting two pieces of sticks
or two sticks and tying a bit of string at the widest point of your bed. You can then roll this
up and use this as a tool to just quickly stick it in, roll it out, as probably what the Romans
used when they run out of candles for straight lines on roads at nighttime, which is really cool.
You could do that as well. Those are tea lights, but that's just a real simple way of just trying
to keep everything organized, particularly if you have a small garden and you're trying to
maximize what you can grow in every bed. So this garden is on a slightly south facing slope,
which is useful if this is pretty level, just level with the angle of the ground. I don't need
to do anything, but if your garden is quite flat, what you can do is angle the soil within your bed
slightly towards the sun. So it maximizes the soil again to help, especially early in the season,
to help the soil warm up for when you're planting or sowing. And that's just going to help everything
with transplanting, germination rates, all those kinds of things. And all you need to do that is a
rake. So this bed had a bit of a mulch, quite a deep mulch. And you can see that there's not actually
much material left. So what I'm doing is I'm raking this off. I'll pop it down to the side for
now. That can go back onto the compost bin, but it's all been breaking down nicely. And now I'm
just going to give this a nice rake so I have a good bed to start growing in. And what I was
talking about earlier with bed sizes, there's a really important consideration to make, which is,
if possible, try and standardize all your bed sizes. So all your raised beds are the same size
or as many as possible. So there's two bed sizes here, the three by 1.2 meters and the three by
one meters. The reason why was to try and get as much growing space into the garden as possible.
But by standardizing your bed size, it means it's really easy if you're doing a planting plan or
something and a bed worked, you can just copy and paste it at a different bed another time.
But more importantly, if you build something like a hinged hoop bed, which is something that can
really help with getting things underway, or perhaps you might not be allowed a polytunnel
if you're growing in an allotment. But having a hinged hoop bed, you create a nice sheltered spot
where you could grow things like peppers and little bush tumbling tomatoes, those kinds of
things. But it also means that you can move it between your beds. So you might use it really
early on in the year to start off things like beetroot or peas or whatever. And then when it
comes to planting out your peppers, you can then move it to the next one where the peppers are
going to be because you're not going to plant your peppers in between all of your beetroot.
So standardize your beds whenever possible. Now a real useful thing, if you're working with raised
beds, you'll be using a rake a lot. Using both sides of the rake. So if I'm trying to move
material quite equally and have a nice level surface behind, then actually using the rake
that way around works really well. One of the things that you want to create if you're going
direct sow is something called a tilth. And a tilth is just a nicely prepared kind of soft
seed bed that is ready for use. And so after I've raked it out quite nicely, I can actually
turn the rake around to use the teeth of the rake to then just gently kind of tickle the surface of
the soil here. And by doing that, by lifting upwards in that movement, I'm actually pulling
out any kind of bigger stones or sticks that I might not want. And I can move it to the edge of
the bed and then clear it out of the way. And then I'll show you how to make this bed look really
nice by using the third side of the rake. This is just maybe a vanity thing, but it's kind of fun
where semi-firmly you're tapping down and you're just creating a really nice even finish
ready for you to do your seed drills or transplant. But it does make a nice difference,
especially when you see all the, it's quite satisfying, all the lines from the teeth. So
this here I kind of have as like a bit of a perennial herb bed. What's been quite nice is
I've got some weeds, but I've also got some blood dock that has self-sown and germinated.
And it reminded me of one of my favorite tips, which is direct sowing where possible,
or if you can direct sow where possible, it's going to give you the healthiest,
most vigorous plants. Because if you start seeds off in modules and plant out,
that's great for succession planting. That's great for trying to maximize. But in terms of
the most vigorous plants to grow, by direct sowing them, it means that their roots have no limit from
day one. So even the smallest seedlings, if you pull it out of a bed, you'll see how long those
roots are. And they just can't do that in a module. And also they don't have to worry about
transplant shock. So just a little thing, it's really easy to get caught up with all of the
modules, which is a lot of fun, but direct sow wherever possible, because that's going to give
you the most resilient plants. And I think that's really useful to know. If you're building some
raised beds or you want to expand your garden, I think there's less compost than you might
actually realize that you need to establish a bed. So when we created these beds for the
self-sufficiency garden, the idea was around two to three inches, so five to seven centimeters of
compost on top of a load of topsoil, and then mix that into the top kind of four inches or 10
centimeters of topsoil. So I'd say at minimum, when starting out with beds, if you can, aim for
at least five centimeters or two inches of compost and fork that in. And that's going to be more than
enough, particularly for like your first growing season to make sure that you have plenty of
fertility, because hopefully by the time it comes to then the following spring, you have your own
compost that you can use. Now, if you're thinking about creating beds, just a little tip as well,
is a lot of people ask about what material to use, like should it be metal or should it be wooden?
And the thing about me is that I love wooden beds, but the most durable are going to be metal,
but that of course comes at a price. So there's no like right or wrong, whether you're using
wooden or metal, I think that's kind of down to your budget and what your goals are for gardening.
So the thing that I like about wooden, and I get them here in the UK from Scaffold Direct,
they're like thicker scaffolding boards and they last really, really well, at least
about 10 years. And if one of the sides goes rotten, I can replace that side. It's a lot easier
to fix a wooden bed versus a metal bed. And also the metal bed sometimes can be knocked into
and have dents and stuff, whereas you're not doing anything like that with a wooden bed,
it's not going anywhere. Now, one thing I haven't highlighted, because I wanted to do this separately,
was what kind of height should a raised bed be? And it's basically as high as you want it to be,
or as tall as you want it to be. Obviously, the taller it is, the more material it's going to
to fill up. But what I found is anywhere between like the eight and 12 inch mark,
so 20 to 30 centimeters, works really well for me. One of the things that I would say is,
if you're on grass, it can be a little shorter. So it can be like 10, 15, 20 centimeters tall.
But if you're building raised beds where it's like really stony, or even on hard standing,
then you want it to be at least 30 centimeters or a foot, preferably up to about 45 centimeters to a
foot and a half. And that is ample to grow pretty much every single vegetable you want to grow,
including potatoes. Another thing, just aside, I'm not including this as a tip,
but I like wooden raised beds because I can stand on the sides and I can also sit and perch on the
sides. I couldn't do that with a metal bed. With my weight, it will fold in on itself.
Now, one of the most common questions, I'll save that for later. One of the most common questions
I get about raised beds is, oh, what about slugs? Which is very valid. But actually,
I think there's an advantage to raised beds with slugs, is because at night, which is the best
thing to do, is you've got three nights on the trot with a torch and pick off all of the slugs.
And actually, I find the slugs much easier to spot in the night by having a clean surface
that you can see the slug up against. And it's because they're like shiny and slimy.
With a torch, they like stand out like little gemstones. So I can just go through and pick
them off. And if you do that three nights on the row, and maybe use a little bit of nematodes,
there's really not much you have to worry about when it comes to slugs. Trust me, I've been
growing in raised beds in Wales for over 20 years. If slugs were such a problem, as some people
thought, as long as the management is there, I don't think I'd be growing in raised beds anymore.
Now, this is a really useful tip. The next tip I'll talk about, if you don't have much compost.
But in terms of a very basic rule of thumb, if you've got a smaller garden,
how much compost do you put on your beds each year? What even is like two or three centimeters
visualized when you've spread it out? A very simple way of knowing it is if you get a 30 liter
potato bucket like this and fill it up. If I put this over a square meter and spread it out
perfectly, it'll give me three centimeters, just over an inch of compost. So there's these little
tricks like that that can really help. Now, as I said, the next tip will help if you don't have
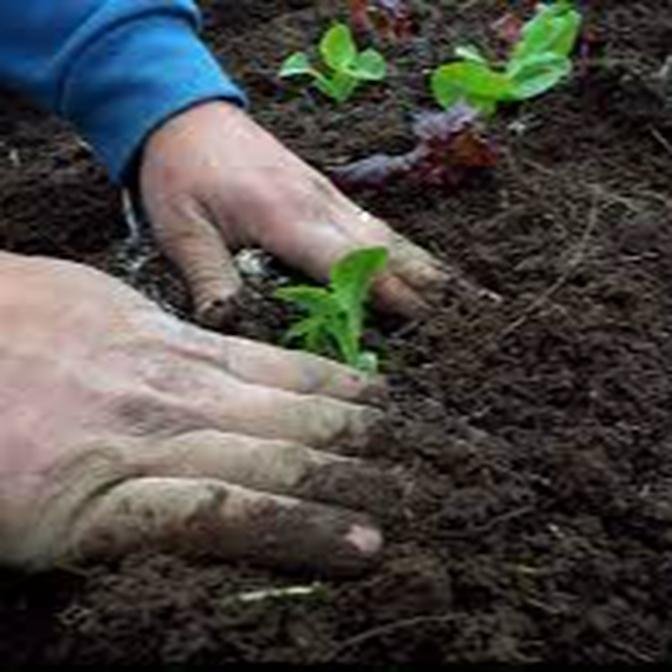
much compost. And it is whenever you're planting something out,
get a handful of compost like that, a bit of root in there, which is great.
Make a hole, stick a handful of compost in the hole, put a little bit of soil over the top,
and then plant the plant. And that little bit of soil will encourage the plant to go out seeking
for the fertility, which is hiding just underneath. And for most plants, that is more than enough.
Now, over the years, what has helped me the most build healthy soil is placing down quite a bit of
mulch in autumn. And you can see there really isn't much left. People always worry about slug issues,
but most if it breaks down, it's on contact with the soil. And so that is going to actually break
down a lot faster than say putting it in your compost bin. And here I've got some
mashua that I forgot to harvest, which I might as well do now. But the only thing that I would
say is if you're mulching material, you could mulch with this, but if you chop it up, it's
going to break down even finer. And then it's totally up to you. Like if I'm just transplanting
here, I don't even need to move whatever mulch is left over. I can just transplant in between,
a bit like what I was exactly doing with the onions. But I'll say out of all of the tips,
in terms of building a healthy soil naturally over time, slow and gentle, slow and steady wins the
race. It is just putting that mulch down in November, not having to worry about using compost
until springtime when the plants need all those microbes and fertility.
Now I have two tips in terms of time management, because the last thing I want you to feel is
overwhelmed when it comes to doing stuff in the garden and you have all of these beds. And what's
so nice about a single raised bed is that you can treat it like its own micro project. Rather than
worrying about all of the other beds, just say, you know what, today I'm feeling the pressure
with work and life and whatever. I just want to come enjoy the garden. You can just focus on one
bed to either sow or weed and split it up nicely. Now the second tip is, if at all you're ever like,
you know what, I don't even know how I'm going to deal with it this year. You have two options.
One is to just broadcast sow a cover crop like phacelia or something like that, or just grow
some pumpkins in a bed and kind of abandon it and see what happens. The other thing that you're
allowed to do is just put down a couple of layers of cardboard and put the bed to sleep. Rest the
bed over the growing season and just wait until next year. There is no shame in an expanding and
contracting, the other way around, contracting and expanding. There we go. My hands had other ideas.
The amount of space in your garden that you grow and what you grow. And I think every year should
mirror what your needs are and feel free to change and adjust. I really believe that a garden should
feel as beautiful as possible and as full as possible. And the thing that I wish I did much
earlier on in life is split up my vertical structures throughout the garden, rather than
having them either around the edges or just one big structure for runner beans. By splitting them
up, it just creates more visual interest. These are going to be acting like living towers, adding
a lot more interest throughout the garden, where a garden can actually be, sometimes vegetable
gardens can be quite flat. And I want to bring up a bit of height and a bit of interest. And so that's
just a real simple thing to do as well. Growing tall varieties of peas, things like sweet peas
as well, grow sweet peas. They're great for the kitchen table, but spread out your vertical
structures. So I've just come in to hide a bit from the rain, but the next tip again is about aesthetics
is to think about, I already spoke about kind of growing things over the edges of beds, but a way
to kind of be more intentional about color and vibrancy in your garden is to cap the end of your
bed, say the 10 centimeter of a bed, the end, with different types of edible herbs and flowers.
Because what that does is that it creates these little pops of color throughout the garden, which
is really important. It brings insects and beneficial insects through your garden and
it also just elevates it. Sometimes gardens can, especially vegetable gardens, can be very just
green. So if you can just dedicate ends of your raised beds to other things that are going to
and look beautiful, like this violet cress. I also grow a garlic cress. I always get confused
all the time. Then that makes a nice touch. There's so much that you can do with raised
beds. The other thing I like about raised beds with sides is that it's easier to put up
certain types of vertical structure. I can just nail or screw it into the side without having to
worry. But the best tip is pinch ideas from other gardeners. We all have different ways of doing
particular things and I've got this playlist here where a lot of those gardens are raised bed
gardens. Go have a look at what they're doing, try it out and adapt on it, build upon it,
have some fun and just see how it goes. That is what gardening is all about at the end of the day,
that and flavour and a full belly and some flowers.