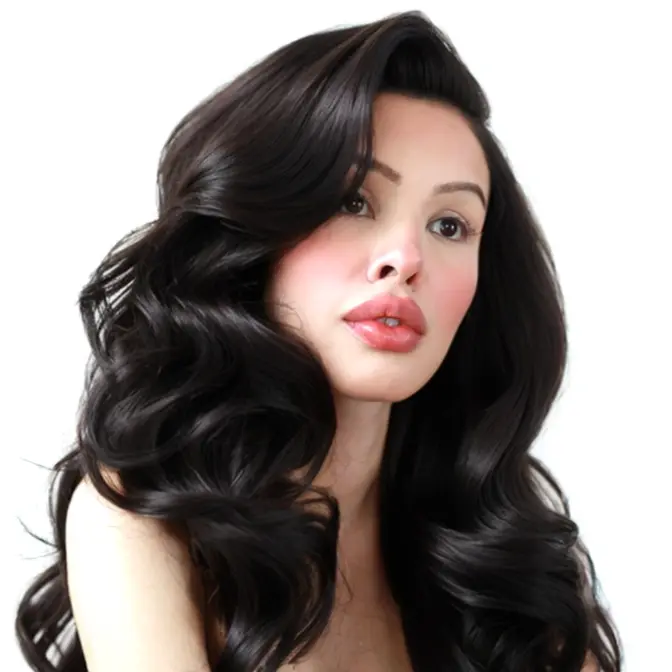
My best friend Emily was kind enough to let me paint her face for today’s tutorial! I hope you enjoyed watching me do makeup on someone else. If you have any requests for specific makeup tutorials you’d like to see on different skin tones and face shapes.. let me know! I’d love to bring in more of my friends for these videos.
hi everyone welcome back to my Channel
today it's not me this is my best friend
Emily and I said Emily can I do your
makeup I really want to do a
highlighting contouring video and she
said yes so today I'm going to be
showing you how to highlight and Contour
your face I've done a couple videos like
this but I wanted to do one with
somebody who has different features than
I do so I can show you how I would
highlight and Contour Emily's face I'm
going to list all of the products I use
in the description bar below if you like
watching these videos where I do makeup
on somebody else let me know in the
comments below and give this video a
thumbs up and let's get started Emily's
got the most beautiful skin so I wanted
to hydrate it and use a little bit of
moisturizer before I start applying the
makeup I always like to let the
moisturizer sit for 5 minutes that way
the makeup stays in place and doesn't
slip and
slide I'm starting with a foundation
that is Three Shades lighter than
Emily's skin tone and I'm creating small
triangles underneath the eyes one thing
I wanted to mention in this video is
that when you highlight it makes things
look bigger and wider so when you make a
really large triangle underneath the
eyes it can actually have a not so good
effect and it can make the face look
really wide so you want to make sure
that you're keeping the Highlight fairly
short and simple that way things don't
look wider or bigger keeping this
concept in mind I'm highlighting down
the bridge of the nose in a straight
line this is going to make the nose look
really sharp and defined and pointed
which is a really good cute look that's
kind of what we all want and I'm also
highlighting the chin Cupid's bow and
the
forehead so I've brought the features
forward that I wanted to highlight using
a lighter Foundation now I'm going to
balance that out using a darker Contour
shade and this is a darker Foundation
it's about four Shades Darker than her
skin I'm tracing underneath Emily's
cheekbones and this is going to give her
a really defined look which is going to
look amazing and I'm also going to
Contour along the perimeter of her face
really just to balance out the highlight
and make her face look nice and
structured and slim she naturally has a
great face structure so I'm going to
just be kind of highlighting and
contouring that but I'm not going to be
changing the shape
Emily has a really straight nose but I'm
going to bring a little more definition
to it using the Contour Shades I'm
tracing right beside those highlight
Shades and I'm kind of wrapping it
around the tip of the nose I'm also
going to place some of that darker color
along the sides of that highlight on her
chin and then along the lines of her jaw
just to create more structure and
[Music]
definition okay now it's time to blend
and I don't really like to go into this
all at once I'm taking a beauty blender
and I'm starting to blend that highlight
out just to kind of see how far that
highlight's going to go I'm patting
underneath the eyes I'm going to Pat
along the nose under the chin and the
Cupid's bow and this is going to spread
the highlight and let me know if I need
to add any more and I'm also going to be
using two separate tools this is like
the best tip I can give you use two
separate tools to blend your two
products the light and the dark because
if you use the same tool things can get
muddy really really quickly
using small circular motions I'm going
to start blending that Contour with a
really fluffy Little Brush and I love
this method it works so so well using a
fluffy brush with these foundations
makes everything look so blown out and
Blended and perfect so I really like
this method and I definitely recommend
it if you're a
beginner one thing you can notice is
that when I'm starting to blend out a
product and it's just straight pigment I
hold the brush really close to the feral
because that gives me the most pressure
and then once the start to blend out I
will release that pressure by holding
the brush closer to the tip of the
handle and that just gives me less
control which is going to give you a
softer blend if you have problems
blending definitely pay attention to how
you're holding your brush the pressure
applied has a lot to do with how things
are going to soften up and
[Music]
blend
[Music]
the nose is such a small area and the
work we did on it is so precise that I
don't recommend using a large brush to
blend everything out I like to use a
small eyeshadow brush with natural
fibers and just kind of soften up those
lines the makeup that I used on Emily
today looks so Flawless and she really
didn't need any powders because her skin
is normal and it doesn't get oily so I'm
not going to add any powder on her today
but of course if you have oily skin I
recommend adding a powder over top just
to set everything and make sure that it
doesn't get oily and greasy I'm taking a
small 217 brush from Mac this is just a
really small blending brush and I like
to use this underneath the eyes to blend
the eyes Shadow and the concealer
together so that there's no harsh lines
and then I added a blush and here is the
before and after that's the completed
look you guys I really hope you like
seeing this technique if you like this
kind of video where I'm doing makeup on
somebody else let me know in the
comments below I'd love to do more of
these I really have fun doing makeup on
other people so let me know in the
comments below and until next time I
love you guys and I'll see you later
[Music]
bye