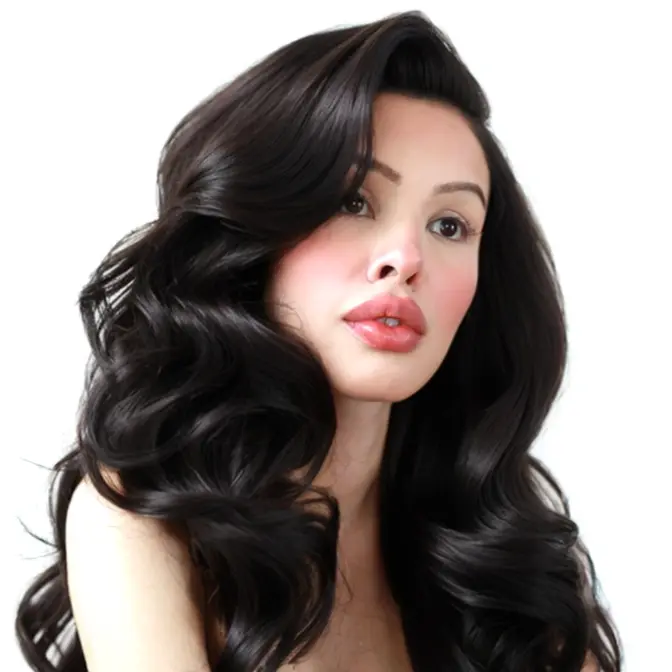
Hi, I'm Alexandra. I believe life can be both glorious, tricky and even painful.. which we all know. Beauty is a practice I have enjoyed from early childhood as a way to build my confidence in myself. Not just on "special" occasions, but in my every day life and decision making. On my YouTube channel I show you practical steps and psychology to understand and apply methods in all areas of beauty; inclding fashion, makeup, hairstyling and femininity, to help us evolve and transform into our personal visions. I believe when a girl feels good about herself, she can make better choices for herself in ALL areas of life. Welcome to my channel, I'm glad you found me.
hello gorgeous before we get started on
how to apply foundation it's important
to remember that preparation is key to
achieve a Flawless complexion make sure
the skin is exfoliated it's hydrated and
moisturized because when you're applying
your foundation the secret to success is
making sure that the skin itself can
support the makeup on top so that means
that there's some type of barrier and
moisturizing support there so that the
foundation doesn't literally start to
get eaten up by your skin throughout the
day I'm applying primer to my skin and
this is so hydrating but I'm also using
this moment as an opportunity to
stimulate blood flow into my face and
get the sculpted appearance that comes
with lymphatic drainage from facial
massage you don't need a fancy technique
to do this your body will work with you
and this will make all the difference to
de-puff and make your face look the way
that it naturally does before salt and
sugar and like a lack of sleep where a
lot of fluid build up all the reasons
why our face can become puffy it can be
mitigated by giving your body the
assistance it needs to drain that fluid
and that will make your makeup look more
beautiful it's a really well kept Beauty
secret and I wanted to share that with
you now let's start with foundation for
the makeup
I'm using a really good foundation today
that is so undetectable in fact it's
meant and designed for using on camera
and that means that it just completely
disappears into the skin and looks
really natural but I like it for
in-person stuff too if you will it just
looks so beautiful and real
when you're using a sponge or a brush or
however you're applying your foundation
it's not sinking into the skin when you
apply it and it seems Blended and put
together it's slowly but surely drying
as you press the makeup into your skin
using a sponge while it dries down and
adheres to your skin is going to give
you a more Flawless less streaky
appearance
today we're going to contour and
highlight I prefer using concealers that
don't dry Down super quickly and no
stick products because those are so
stiff that you end up exfoliating your
skin trying to blend them contouring and
highlight is fascinating and it's so
artistic it's a bit Advanced so make
sure that you're not in a rush while
you're doing this it's going to look
beautiful in photos and you can really
affect and change the atmosphere of your
face using Contour there's something
important to know about placing contour
and highlight for that matter both of
these products when they're Blended out
which of course they need to be are
going to travel upwards downwards
outwards when you place these down
assume that you'll see the gradient
travel outwards so place them
conservatively less product than you
think you need and place it higher up
since the key with makeup is to make
everything a little bit more lifted
versus pulling it down so with the cheek
Contour it's important that it's placed
a little higher for example the more
subtle the contrast between your
highlight and your Contour the more
enhanced the atmosphere of your face
will be versus if you use a very dark
Contour in a very light highlight you
can actually completely change the look
of your face
today I'm doing this because I want to
add a dimensional effect that really
can't be achieved without the layering
and it's never good when you're in a
rush to be somewhere if you're going to
be doing this give yourself enough time
because the blending is exactly where
you make it all come together
I like using these disposable but you
can totally reuse them for many many
times makeup wedges they're very simple
to use but they're also very small and
they're great for detail work as well as
larger areas like Foundation which I
love them for and I'm using a very
specific motion which is just a press
the makeup sponge in directly onto my
face you never want to pull out of
impatience and that can totally happen
like when you know you have this whole
map of color to blend out you can become
impatient and start swiping with the
sponge but that will surely mess up the
foundation and just make it look rough
while I use this motion on the areas
where I'm doing the Contour I really
want to keep it drying down in the area
it was placed so I'm not trying to bring
it outwards while it's drying I'm
actually pressing it into the skin and
I'm not going to get nervous even though
it looks really intense right now
because the more it dried down it is the
more I can blend it out and drag it to
where I'd like it to be but if I start
doing that too soon what would happen is
the color that Contour shade would go
into areas where it really wouldn't be
flattering meaning I'd bring it up under
the eye by accident or I'd drag it all
the way down to the jawline meaning my
face would no longer have the structured
appearance from the Contour it would
just darken my whole makeup
one of the things I've started to do
over the years with Contour is to
understand that this is the cream layer
of my color application so some parts of
the skin I actually want to leave a
little bit more pigment it may look as
though there's more blending that's
needed however when I calculate the
amount of powder that's going to go over
top to set the makeup I can expect
everything to be a little darker in the
highlighted areas and a little bit
blurred in the Contour areas so keeping
things a little bit more Stark actually
ends up looking incredible by the end
thumbs up this video if you're enjoying
it so far now I'm going to blend out
underneath the eyes which is a really
key part it's so important to keep the
color that is under the eyes under the
eyes and not over the whole cheek in the
90s it was really common to just put
really light on under eye cream that was
like a concealer and it was really scary
I think for the Next Generation because
we all didn't want to have really bright
circular under eyes so the triangle
method became really popular however it
isn't really a beautifying factor to
have a very light massive highlight in
the middle of the face so when you're
blending try not to drag it all the way
down to the cheekbone area and make sure
that you leave space for the blush and
all of the color to blend back into that
Contour now I'm going to take a really
light Ivory powder this one's from h m
and I don't know why it's so good it
just blows me away it's just I think
because it's from h m that's why I feel
that way I just didn't expect them to
have good makeup it's not sponsored I
just bought it because I needed powder
and it ended up being like my favorite
now I'm going to highlight of course
underneath the eyes with that and then
I'll take a contour shade before we go
in with blush I'm going to continue that
Shadow using this palette and this is
going to be really important because it
will set the makeup that I have on my
face but it will also help to build a
gradient which we currently really don't
have the Contour still looks really
Stark and the Highlight is really bright
so this is going to act like a blurring
gradient product and using a brush that
isn't going to deposit a lot of color
like this has hardly any bristles it's
very very loose and like fluffy and that
is going to help me to really even this
over the skin and begin to build that
gradient Factor that's going to make
this look beautiful
don't apply a lot of powder and then try
to blur it out again with the
exfoliation that can happen just from
trying to blend something in you're
going to end up with a great blend but a
really kicked up texture to your skin
and it's better to add things smoothly
and lightly when it comes to powder now
the blush color you use is really
important I'm using this beautiful color
that has a pinky tone now pick a blush
that really adds Vitality back into your
skin if you pick an artsy color like
purple or something that just looks
unnatural it really won't tie in this
sculptural look the way that it would if
you pick something that kind of looks
like blood flow we want to mimic
Vitality with this and that's going to
give the most natural glamorous look
that we can get which is exactly what I
like
I'm gonna put a little bit on the nose
too and then blur it up under the eyes
and into the Contour
there's this amazing soft focus makeup
trick where you take a powder like a
setting powder and you basically put
this over top of your completed makeup
look and I'm not talking about your
setting powder I'm talking about once
the makeup's already set taking a brush
and a translucent powder that is really
well suited to your skin and this is
going to add a very blurry effect to all
of the layers that you have going on so
if you have contour and then blush and
then highlight this is going to blur all
of it so that you can't tell where it
starts and where it stops use small
circular motions and then blend it over
the skin and it'll look Flawless and
airbrushed I love this trick and it
helps it last a really long time too I'm
going to use some highlight over the
cheeks so cute I love this one because
it is very like foily but in a skin-like
way so it doesn't look completely fake
or like I'm literally wearing glitter
it's just a natural Sheen and this looks
pretty but I think we have to rearrange
what it is to do the eyes because I used
to think I would do like a whole
eyeshadow look to go with this but I
think since the face has so much going
on there's actually a lot of value in
continuing that blushy effect over top
of the eyes especially if you have dark
eyes like me this is a really cool way
of doing your eyes that's maybe a bit
under cover underground it's not common
but it is very flattering so you take
your blush and you put this not in a
sweeping cat eye motion outwards but
actually in a more triangular shape
working it up towards the brow this
shape of the eye shadow forget the color
the shape is going to help emphasize the
length of the face making it look long
and structured versus the cat eye effect
which will kind of widen and encourage
the eye to look across the face making
it wider now this shape is awesome but
but so is the color because it is blushy
and natural but if you have a lot of
pink in your skin and lighter eyes try
doing that same shape with taupe I'm
going to use a powder I really like this
kit because it has a glittery powder it
has like a soft focus powder for setting
your face but my favorite is this
highlight it's my favorite for my eyes
and I always use this palette anytime I
need to highlight my eyes I'll put it
under the brow bone and I like it
because it has enough powder enough
pigment and I can blend it with my
finger if it looks a little too Stark
but some highlights don't really give
enough and with the eyes you want that
shine especially if you have dark eyes
I'm going to take a Precision liner
liquid liner let me know in the comments
below what eyeliner you think is good
because I am I'm like I've been under a
rock with makeup because I just start
like use what I like and now I'm looking
to like upgrade some of these products
this one in particular is one that I'm
not a fan of so it's not bad but it's
just difficult to work with I think and
it's the only one that I like kept using
for a while even though I didn't like it
which is isn't my favorite thing to do
this is an eye coal and this is going to
go under my lash line a bit of an
advanced trick you take your eyelid and
you just hold it up while you line the
under part of your lash line this will
give a fuller effect but it's a bit
intense and I only just started doing
this recently because I was like way too
scared to do that before be careful if
you try it and I'm going to put this
underneath my lash line as well of
course I love that lived in liner look
that's like my favorite
for the eyebrows I'm using two products
lately one is to structure the brows and
that is the super fine brow pen which is
very Inky and I use it to make the hairs
look longer make the eyebrows stand up
taller on the side where my one eyebrow
is lower and then I use a little pencil
just to fill in both of them so one is
for color and one is for structure and
it gives a more dimensional effect then
if I were to just use the pencil for
everything I'm going to fill both of
them in conservatively I always zoom out
in my head and look at my whole face and
don't really zoom into the eyebrows too
much because when you do that you end up
over shooting it over filling them in
and that's not really a point of facial
Beauty to make the eyebrows really
intense so I like to just keep it in
check I don't need to make them perfect
but I do want to fill them in a little
bit and make them more angular since I
placed the eye coal in the lower lash
line it had a bit of time to merge with
the oils on my skin and like the
concealer that's there so if I just
start to blend with a little brush
adding no product at all I get a really
nice like graphite slightly grayish
color just the mixture of the concealer
in the coal and it looks so lived in and
natural I love this effect
I have loved Freckle pens for like a
year now this is so fun because it just
adds a beauty mole wherever you want to
add one and whenever I have a breakout
which I do I'll take this little pen and
just make a DOT you can make a small one
or a big one and it's very easy to use
and it looks pretty natural so I'm going
to add this over the little breakout
that I have on my cheek to make a beauty
mole and to make it look as though it
was there before I did my makeup I add
some powder over it if you really want
your makeup to look amazing curl your
lashes it's kind of like a forgotten
step but it just adds something
especially when you did add that lash
line effect with the eye coal on the
upper lash line you get a really full
lash that's standing up and it just
helps everything look more lifted and
awake in the makeup look even if you're
doing something more Smoky like this now
I'm going to use my mascara apply it not
too crazy because I'll be using false
lashes today as well I'll leave all of
the products and links to buy in the
description and I didn't mention this
when the video started but none of these
products are sponsored this is all just
my own opinions and I hope that goes
without say but I thought I'd mention it
I will link those below and also I'll
link my lip blush treatment that I had
because I had a permanent makeup tattoo
put on my lips to make it look like I
have a lip tint and I love it and I made
a video all about it so I'll link that
below for you to watch next once I get
the lashes on it's go time okay we're
just gonna do one last thing and then
the makeup is on and it's done all I
want to do is add a little bit of
mascara to the lower lashes okay two
steps lower lashes just a little bit and
then of course lips I'm using a lipstick
that I think is so cool and I always say
this about this lipstick it's by
Charlotte Tilbury and apparently one of
these sells every eight seconds I think
that amazing in terms of business but
it's also very interesting to me because
the color is obviously so good that
someone somewhere every eight seconds is
like oh yeah I want that and I kind of
agree this color is so vital and nice
and natural and like I don't like the
phrase my lips book better I I really
don't but it is true it is like my lips
but better
I'm gonna add a little choker and this
is just gonna add Final Touch I hope
that you like this makeup give it a
thumbs up if you enjoyed and leave a
comment below tell me your favorite
makeup product right now I can't wait to
see you in my next video go check out my
lip Lush treatment and I'll see you very
soon I love you bye