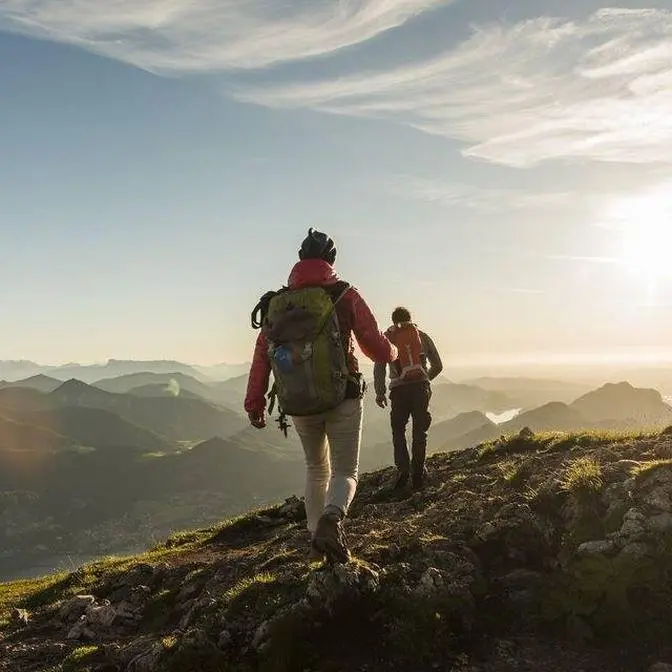
The Tararua Ranges are a classic Aotearoa tramping destinations but they are potentially the most underrated in terms of extreme weather. Despite its everlasting charm, the Tararua Forest Park has a reputation for extremely high winds, dense fog, and icy conditions as cold and windy days on the mountain tops are the norm rather than the exception. It sees some of the strongest winds and most dynamic weather of anywhere in the country.
This video explores the alpine section a popular tramp, The Southern Crossing, to help you prepare for the harsh conditions, particularly in exposed areas so that you make it home safely.
Brought to you by the NZ Mountain Safety Council + their Partners + Quite Nice Films #Hiking#NewZealand
The Tararua Ranges are a mountainous playground that generations of Aotearoa trampers have come
to enjoy. Despite its everlasting charm, this area has a reputation for extremely high winds,
dense fog and icy conditions, which have caught even the most experienced trampers off guard.
One of the four classic Tararua tramps takes you on a journey across the open tops of the
The Southern Crossing
The Southern Crossing is a 35 kilometre multi-day tramp that takes you from Ōtaki Forks to Kaitoke
at the head of the Hutt Valley. The best time of year to do the crossing is from November through
March. Outside of this period you're more likely to encounter snow and icy conditions which require
advanced winter tramping skills and equipment. The average daily summer temperature sits around
However it often feels much colder due to wind chill, even on relatively warm days.
This has led to many hypothermic trampers and in some cases fatalities. There are 160 days each
year that experience gale force winds and you can expect approximately 200 days of rain per year.
It's important to remember that most of your time will be spent on an exposed ridgeline,
which means there's a good chance you will experience heavy rain, strong winds, snow and
Prepare for all conditions by taking warm and waterproof clothing as well as a good pair of
tramping boots. You'll also need plenty of water and a distress beacon is a good idea for any
As with all walks and tramps in New Zealand, make sure you leave your intentions with a trusted
contact and inform them when you have finished your tramp. You can do this on our Plan My Walk
app. It takes the guesswork out of trip planning by bringing together the information you need.
It's packed with heaps of useful features to help you create a trip plan to share with others.
Download the app or check out planmywalk.nz. The southern crossing starts at the Ōtaki Forks
entrance to the park. Slips often block road access on this side, so check the road status
before you leave. Plan ahead and organise transport for both ends as this is a one-way journey.
Your day begins with a five kilometre climb up to Field Hut and this should take around three
to four hours. Built in 1924, Field Hut is one of the first purpose-built tramping huts in Aotearoa.
Bookings aren't required but it is a popular spot during peak times, so if you're looking
to spend a comfortable night below the bushline, get here early to avoid sleeping on the floor.
Not long past Field Hut, the bush will open up to the exposed ridgeline that you will spend most of
your trip on. This section is known as Tabletop and it will be your first decision-making point.
The Tararua Ranges experience some of the most wild and changeable weather in the country
due to the natural wind funnel that is the Cook Strait. Exposure to wind, rain, snow and ice have
proven to be fatal on multiple occasions from this point forward, while low visibility can make the
track impossible to navigate. Use your knowledge of the weather forecast and look to the south
or northwest for any incoming weather. If you have any doubts about the weather or your group's
clothing and equipment, then turn around and try again on another day. It's another 5 kilometre,
3 to 4 hour climb along the ridgeline from here to Kime Hut. Overall, the track is a mixture of
packed dirt with sections of loose rock. Just be sure-footed, stick together as a group and keep
an eye on the track markers. After a couple of hours, there will be two track junctions,
one at Bridge Peak and another at Hut Mound. It's essential that you stick to the track and follow
the signs to Kime Hut. A wrong turn at either of these points will only send you further into the
Tararua Ranges when Kime Hut is just down the slope. A night above the bush line can provide
some pretty spectacular sunsets, however, Kime Hut has no heating and is notoriously cold.
Bring a warm sleeping bag and a few extra layers if you are planning to spend the night here. This
is also a good spot to have your second decision-making point. Assess the weather and how
your group is doing. It's a 7.5 kilometre, 5 to 6 hour walk from here to Alpha Hut, so it may be
better to stay an extra night at Kime if the weather has taken a turn for the worse. A short
climb past Kime Hut will bring you on to Field Peak. On a clear day, you will have a good view
of the ridgeline you'll be travelling across for the rest of the day. As you descend Field Peak,
there are a few sections of track that are narrow with a steep drop-off on the western side.
Tread carefully and stay focused as a small slip here due to snow or wind could be deadly.
From here, it's a steady climb up to Mount Hector. A memorial cross for the fallen local
trampers of World War II will mark Hector's summit. This is the highest point of your journey
and the views will be well worth it on a clear day. Use this spot as your third decision-making
point. You will be exposed for the rest of the day and this is where bad weather or low visibility
can get you into some serious trouble. Look towards Alpha Hut and assess the weather
conditions. It may be better to retreat back to Kime Hut if it isn't looking good.
If it all looks clear though, you can start the descent down from the summit towards Alpha Hut.
This is the steepest and most exposed section of the route, so take your time,
pick your footing carefully and stick to the track, particularly in poor visibility.
After approximately a kilometre of ridgeline walking, you'll come across an area known as
False Spur. This aptly named ridge has been mistaken for the path to Alpha Hut,
so there may be a worn path made by those who have made this mistake.
Just make sure you follow the track markers to stay on the right path.
Low visibility can continue to cause confusion, so keep to those track markers and look out for
the track junction to Alpha Hut. One final push along the ridgeline will bring you into the bush,
where Alpha Hut will be a welcome sight. Have a well-deserved rest and refuel.
You'll need it for the descent the next day. It's approximately 17km or 7-9 hours from Alpha
Hut to Kaitoke. Get an early start to avoid walking in the dark. Also, stock up on water
at Alpha Hut because there is no reliable water sources for the rest of the day. You are under
the cover of bush from here on out, but a bad storm or high winds can still make it an unpleasant
experience. On a clear day, you can continue along Marchant Ridge to the road end. Bull
Mound and Omega tracks can quickly bring you down into Toheraniko Valley if you need to escape
wild weather on the ridgeline. However, Block 16 track will be your best bailout option as you
won't have to cross the river once you reach the valley floor. Just be aware that this will be a
much rougher track than what's on the ridgeline. Watch your footing on the way down no matter what
path you take, stick together as a group and brake when you need to. It's going to be a long
slog down to the end. The southern crossing is a rewarding experience in the right conditions,
but it can quickly become a hostile alpine environment. Don't underestimate it and
prepare adequately by aiming to tramp from November through March. Be prepared to turn
back or stay an extra night due to bad weather. Stay informed about the weather forecast and have
an alternative trip option if the weather is not suitable to attempt the crossing.
Now get out there and experience the everlasting charm of the Tararua Ranges for yourself.