
Container Onions - The Complete Guide
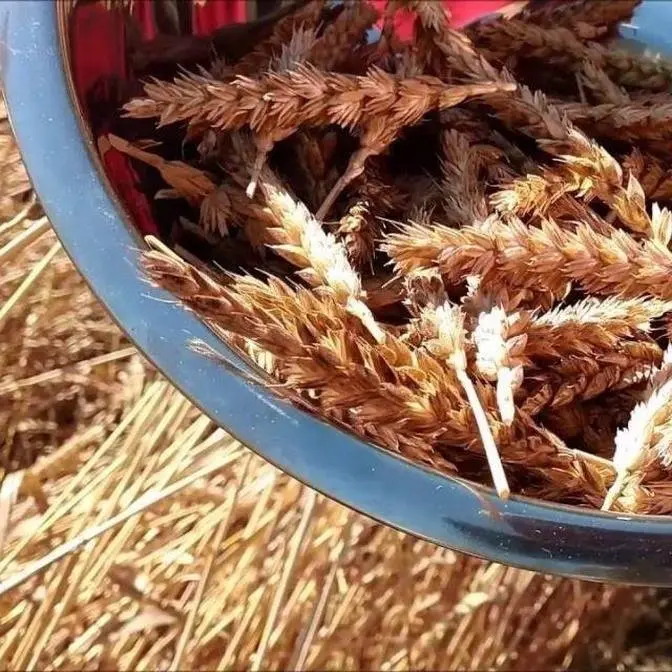
They say the common onion is one of the easiest crops to grow for beginners.
Honestly though, I have to respectfully disagree. Sort of.
Follow their requirements like a recipe, don't stray too far from the procedures,
and onions won't give you too much trouble. In fact, done right, these guys can be crazy
prolific and you could be swimming in onions every summer.
The issue is, onions are a long crop, and one with specific needs.
Coupled together, and this can result in some pretty frustrating outcomes.
So today, I'll walk you through all the ins and outs of growing bulb onions in containers.
Every tip you could possibly need to have massive harvests every summer.
I know that we've said we have to be diligent with the procedure to successfully grow onions,
but actually, there's three different ways to plant these guys.
We'll cover each of them in just a second, but first, let's look at the universal requirements
of all onions, regardless of how you plant them. Like most crops, it all starts with the soil.
Onions grow best in a loose, rich, well-drained soil with medium to high organic content,
constant moisture, and a neutral to slightly acidic pH. Yes, the harvestable bulb,
which are actually a modified set of leaves, does grow right near the surface.
But the long, straight, stringy roots, kind of like garlic but even longer,
reach quite far down searching for that moisture, and of course, those nutrients.
Speaking of those nutrients, onions really are moderate to heavy feeders,
and growing them in poor soils is going to give you poor results.
Initially, we feed our young onions a balanced NPK, nitrogen, phosphorus, and potassium blend
just to get them going, right when they sprout their third blade. About three weeks after that,
and every subsequent three weeks moving forward, we feed them a heavy nitrogen dose.
You see, onion bulbs are not roots or flowers, nor are they stimulated by any increase
in phosphorus or potassium. Made purely of modified leaves, nitrogen is where it's at.
Important note though, all feeding and watering needs to stop at least three to four weeks
before you intend to harvest. If you want to store onions with the longest lifespan,
you gotta stop feeding and watering by this date, it's vital.
Like all alliums, onions are a full sun crop, requiring six plus hours a day of full direct
sunlight. Growing them in containers makes this easy, and we can just move our onions around
to where the sun is. The wrong location, or shading out by adjacent crops,
is gonna yield poor results every time.
Okay, with the universal requirements all set, let's get planting and go over the specific ways
to grow the best onions. Like we said, there's three ways to plant your onions, seeds, starts,
or sets. By far my favorite way is from starts, but let's begin with direct seeding first.
Now, before we can plant, even direct seeding, we have to realize that there are three types
or categories of onions to grow, all based on where you live.
We have to make sure to pick the right one for our region, or it's simply not gonna work.
Basically, onions are categorized by the day length, which stimulates their bulb production.
Meaning, as soon as the day reaches a certain number of hours in length,
the onion plant switches from leaf and foliage growth to bulb formation.
Long day onions begin to set their bulbs when the day length reaches 14 to 16 hours long.
Short day onions, however, are gonna begin to bulb up when that day length reaches 10 to 12 hours.
And as you can probably guess, the intermediate ones are somewhere in between.
Choosing the right onion for your climate and your area is gonna dictate how well your
plants bulb up, as will the timing in which you plant them. And that timing of when to
plant your onions is fully dictated on what variety you choose, as well as what zone you're
growing in. Some varieties are planted right before winter, like we do with our garlic,
while others are planted in the spring, much like most of our other crops.
Overwintering ones are usually labeled as such, but always be aware of what type of onion you're
growing. Here in Canada, I've never had much success with the overwintering onions, despite
growing a ton of garlic, so I've always just planted my onions in the spring for a late
summer harvest. Speaking of that planting, let's get into it. Like we said, there's three different
ways to plant your onions. Seeds, starts, and sets. Let's start with those seeds. Onion seeds
are small, black, irregularly shaped kernels that are anything if unassuming. Direct seeding them
is super easy. Grabbing your pot or container of choice, again, one onion plant per gallon,
fill it up right near to the top with some organic potting mix. Pack it down firmly,
and we now have a landing pad for our onion seeds. Watering it first is optional, but it does create
the ideal environment for seed germination, and it's much easier to water now than after we seed
it. These guys are sown shallow, no more than a quarter inch deep. Onion plants eventually need
four to six inches of spacing between each other, and you can do that right away when you're seeding,
or you can seed them heavy like you do carrots, and then thin them after they sprout.
Onion seeds have a notoriously short shelf life, so don't rely on 100% germination.
Speaking of that germination, in the cooler days of spring, onions can take up to two weeks to
sprout, and when they do first come up, they just look like little blades of grass and are easily
missed, so be aware of that. As we mentioned, if you've sown your onion seeds heavy, wait till
they're about an inch high and thin them to the strongest individuals. Remember, we want to strive
for that four to six inch spacing between each plant to allow them to bulb up to maximum size.
Here's an example of two that were not spaced properly and are growing side by side.
Easily 40 to 50 percent smaller than all of the other bulbs in this pot. Speaking of those pots,
in this case fabric grow bags, you want to grow about one onion per one gallon of soil volume.
The depth doesn't really matter as long as you have at least six inches. Smaller varieties you
can pack more in, yes, just use your best judgment. Keep the soil moist but never soggy,
and again, always in that full sun location. First feeding is three weeks after sprouting
with a balanced mixture, and then again every three weeks after that with a nitrogen high dose.
Stop all watering and feeding three to four weeks before you intend to harvest,
and that's growing onions from seed in a nutshell. All in all, this is going to take you 90 to
upwards of 150 days seed to harvest. Okay, as fun as growing from seed is,
my favorite way to plant onions is from starter plants. You can make your own onion starters at
home or simply buy them from the store in the spring. Either way, pre-sprouted and pre-grown
onions are going to give you a massive head start and can shave upwards of four to six weeks
off of your growing time. Planted in the early spring for the long day types,
I start my onion seeds in little cell-type tracer containers and then move them on once they get
three to four medium-sized blades and the outside temperatures have reached 50 degrees Fahrenheit.
Grown indoors, they germinate much faster in the warmer conditions and put on substantial size
much quicker in this ideal environment. Transplanting is easy and we can observe that
ideal four to six inch spacing right away. Plant them to the existing depth that they're already at.
Easy stuff. Within about a week, they'll have taken and they can get their first balanced
fertilizing just like we did with the direct-seeded ones. After that, watering, feeding,
and then the harvesting is identical. And this brings us to our third and final way to plant
onions, by far the easiest method, and that's to use onion sets. These guys look like miniature
onions and essentially they are. Onion sets are pre-sprouted, pre-grown onions that are sent into
a dormant state, often in the previous season. Sold dry and rootless, you can find them at the
store in both the spring and the fall and they may or may not have already sprouted. Onion sets come
in these breathable bags and they should be planted soon after buying. Do note, if any of the
bulbs are squishy, don't bother planting them, they've expired. By far the easiest way to grow onions,
planting them in moist soil reanimates them and then you're on your way. Plant them no more than
a half inch deep, again at that four to six inch spacing. Lightly mulch, thoroughly water, and under
normal spring conditions, your onion set should sprout in about a week. With most of the hard work
already done, onions grown from sets are going to be ready for harvest, usually in less than two months.
Truly, it's easy beyond belief. Not to be a Debbie Downer though, but there are a few drawbacks when
you're growing onions from sets. Onion sets can be expensive and the selection offered is often
quite poor, paling in comparison to what you can get when you're growing from seed. Also, as a biennial
plant, onion sets are often tricked into thinking that it's their second year of growth. And truthfully,
it often is. Biennials, as their name implies, go to flower in their second year. And while onion
flowers are quite striking, this is not something we want them to do. Because once an onion enters
a flowering cycle, it signals the rest of the plant, including that bulb, to stop growing.
Once you see those flowers, you might as well pull the plant up and kiss those mega harvests
goodbye. With onion sets already being a year old, or at least sometimes tricked into thinking they
are, they can be notorious for this. It doesn't always happen, but it is something to be aware of.
There we go. Three ways to plant your container onions. Definitely something for everyone here.
But what about those harvests? Yes, we know we need to stop watering and feeding about three
weeks before we intend to pull them, but what then? Well, truthfully, onions can be harvested
at any time. The shoots are completely edible and the young bulbs are unbelievably tasty.
However, harvesting your onions for long-term storage is a different story. The rule of thumb
is for max longevity, bulb onions are ready to be harvested when their tops fall over and begin
to turn yellow or brown. Like clockwork, when they're ready to be harvested, your onions will
begin to bend and break and topple over right at the neck. This is because the bulbs are pulling
all of the water, carbs, and sugar out of those leaves, and once they topple over from lack of
turgidity, you know that the bulbs are ready. The actual harvesting is super easy. Just make
sure to do it on a dry day and also to stop that watering and feeding at least three to four weeks
prior. Like most alliums, onions tend to grow right at or near the surface. Loosen the soil
around the bulb to make pulling them up much easier. Brush off any of the excess dirt and
that's it, the bulb is harvested. Don't wash them, don't cut off the leaves, and don't trim those
roots just yet. Much like we do with our garlic, hang your onions up, bulb side down, for about
two to four weeks in a dry place. After that, you can cut those leaves down to about an inch
and trim off those roots right up flush with the bulb. Store your onions in a cool dark place for
up to four to six months, some varieties even up to a year. And with those varieties, picking the
right one really is half the battle when you're growing onions. Having said that, we did cover a
lot of other things today too, so let's recap those main points to make sure that we got them all.
Onions are an amazing crop and they're as versatile in the garden as they are in the kitchen.
Hopefully today I've shown you the way to unlimited container onions
and that your future harvests are as big as they possibly can be.
Hey, as always, happy growing guys and I'll see you soon.