
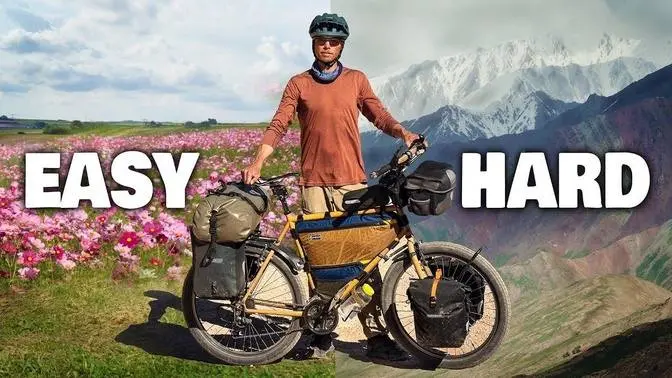
World Touring Bike_ My 90's MTB Evolution ( 25.000+ Kms on the Road )
3 Video Views·Apr 26, 2024
Hi guys, in this video I'm going to give you an in-depth look at my 90's mountain bike
turned into a rugged, do-it-all touring bike, with currently more than 25.000 km on the clock.
From a 40 euro barn sale find to a next level all-terrain beast with bikepacking aspirations.
I tell you why I chose to do this project, the key build features, how it held up cycling to
the other side of the world and the latest upgrades I did to make it a more off-road
orientated setup. At the end of the video I want to show you some special components
that really make this ride unique. So let's get our hands dirty and see how this ride is built.
In 2018 we planned to go on a world bicycle tour for two years. With some remote stretches ahead
I really wanted to know the bike intimately in case something needed to be fixed. By building
my own bike from the frame up I felt strongly I would be able to do most repairs myself.
As a beginner bicycle mechanic I wanted to be involved in every aspect of the build as
much as possible. I decided to look for a basic 90's mountain bike frame with 26 inch wheels
to start with a simple but strong steel frame that would allow me to install tried and true
components that were durable and not overly expensive. The wheel size is commonly found
all over the world so it would ensure I could find a replacement if something went wrong with them.
After months of searching online I found this bike at a barn sale for only 40 euros or about 35
dollars. I had extra bottle cage bosses and a kickstand mount welded in by a professional
bike frame builder to expand upon the functionality of the frame. To give the bike a personal touch
I had the frame sandblasted and then powder coated to the color I thought would fit the
overall design theme. Comfort, durability and function are in my opinion the three most
important features to focus on when building a touring bike and making consequential component
choices. The three contact points with the body, handlebars, saddle and pedals need to be highly
comfortable and set up ergonomically correct to have the most comfort during long hours on the
bike month after month. I spent hours researching other people's experiences and added my own as
typical dutch bicycle commuter and occasional mountain biker. I settled on a fairly upright
position to not strain my back, shoulders and neck as much so I would be able to comfortably
look around and enjoy my surroundings. I designed a custom butterfly handlebar with different
components to have multiple hand positions. This way I was able to combat hand problems that can
occur being stuck in one hand position on the handlebar. The Brooks B17 seemed to be a favorite
amongst many long distance cyclists and after giving it a try with a good break-in period it
became the most comfortable saddle I used up until that moment. And to round out the three contact
points I chose flat pedals to have a fairly large contact area to be able to reposition my feet on
the pedals as I pleased. Something I do quite a lot to change it up and keep my feet and legs happy.
All components needed to be durable and do their jobs reliably come rain or shine. You don't really
need high-end stuff. Although nice and even marginally better performing and often lighter
in weight, they are more expensive and overkill in most circumstances. I chose a good middle of the
road component set, the Dior Group by Shimano. In my experience a good balance between durability,
performance and affordability. Other components followed the same logic. The wheels needed to be
strong and got replaced with dedicated touring specced ones. I got lucky and found the front
wheel second hand and the back wheel I had specially built for this project. The function
of a world touring bike is to haul the rider and its cargo over long distances. Therefore it needs
to be able to hold a lot of weight, mostly in the form of panniers that are balanced on the frame
via dedicated racks that can handle the load. In our case we also shoot videos on the road
and the key functionality is to be able to park the bike fast and easy with a kickstand
to get out the camera and make some shots. If you want to see an overview of all the components I
used for the initial build I will link an in-depth video up here and at the end so you can see all
the details for yourself. How did the bike perform while being out on the road during a world tour?
From 2018 to 2020 we cycled from the Netherlands to Southeast Asia without any major problems
except the double-legged kickstand breaking off. The bike was very heavy about 35 to 40 kilos
and the kickstand was only rated to 25 so it's clear why it eventually broke off. Also a large
boulder flung around by a passing truck hit the frame and caused the shifter cable to get pinched
which resulted in difficult shifting of the front derailleur for a good while before I got it fixed.
The wheelset held up perfectly without even having to tension the spokes. The ball bearings in the
hubs however needed replacement after about 15 000 kilometers because of the heavy luggage and
the grind on the Pamir highway. I was highly impressed with the durability of the Schwalbe
Marathon tires. The back tire I replaced for a Schwalbe Marathon Mondial after 11 000 kilometers
and only two punctures and one slow leak developed during a two-year period so that's incredible.
Only once in the trip I had to replace the Colstop dual compound MTB braking pads also
after about 11 000 kilometers. The drivetrain held up almost flawlessly and with proper knowledge and
care I was able to get more than 20 000 kilometers out of it before having to replace it due to the
wearing down of the cogs and chain. The Shimano bar end shifters configured the stump shifters
worked like a treat with no problem whatsoever. After about 15 000 kilometers some outer cable
housing started to fray and rust and I got them replaced with inner cables as well. Rotating parts
like the ball head, bottom bracket and paddle axles were still fairly smooth after about two
years out and about. We want to go more off-road going forward. I upgraded my bike with specific
components to a hybrid bikepacking bike touring style. I completely reinvented my contact points
starting with the handlebar. I upgraded to the slightly bigger Airgun GC1 grips that are even
more comfortable than the old ones. A shout out to one of our patrons who kindly donated these grips.
The SQ lab inner bar ends give an extra hand position and angle the thumbs forward which I
really like. The bar end shifters are on special brackets to make them thumb shifters and what's
new is that I mirrored them and placed them underneath the handlebar to have better access
with the thumb and get them out of the way on the top. To have some more real estate in the front
I upgraded to these Decathlon bottle pouches where besides a water bottle it's also possible to store
other things. For some extra protection I installed this waterproof tub tube bag where I keep things
to have easy access to like sunscreen, lip balm, a knife among others. Also new is this Ortlieb
zippered frame pack. It's fully waterproof and I have still some room for a water bottle underneath.
It's not that easy to pack so I'm still messing around with the stuff to put in it.
I wanted to have a little bit more comfort on the bike therefore I installed some thicker
tires that could be run on a lower pressure to give some more cushioning. After the great success
with the Schwalbe Marathon tires I decided to go for the Supermoto X 2.4's. Because of the new
thicker tires and the small 26 inch frame the old full-size fenders weren't able to fit anymore.
So in the front I installed this small bikepacking style mini fender from Airsavers and in the back
also an Airsavers fender. This was actually not made for this kind of frame so I needed to modify
it by making a hole in the middle and wrap it around the frame. Not my best DIY job. And now for
something special these full foot sized pedals made by my friend Mischa at PedalSquad. They are
custom made to the rider's feet and are designed to have better ergonomics and be more efficient
with power transfer. They are 3D printed and in my experience next level comfortable and very
durable. There isn't anything like it so if you're interested there's a link in the description.
Another contact point upgrade is this crazy looking infinity seat that completely takes
away the pressure on the sit bones and the perineum. The first test runs are very positive
but I still need some thorough real world experience to come to a final conclusion.
If you're interested in a full review of the infinity bike seat please let me know in the
comments down below. Older steel framed mountain bikes are the perfect base to build a strong and
comfortable touring or bikepacking bike. If you're a hands-on person perhaps wanting to save some
money, has the time on hand and is not afraid to do some research, this is a very rewarding way of
creating your own adventure companion. The skills you will learn are valuable and will give you the
confidence to tackle any bike related problem out on the road yourself and it even helped me
to get a job as a bike mechanic. Of course there is newer and superior technology available
nowadays but going on a bicycle touring adventure is just a bit more special with your own custom
built touring bike. Hey guys did you like the video? Don't forget to push the button and consider
subscribing. The video up here goes more in depth into all the components I used for building this
bike. Right here I'm gonna put a video of all the bike tools to maintain your bike out on the road
and look out for our new video series cycling the western edge of the European continent.