
Instant Pot Dairy-Free Yogurt
So I'm gonna try to like look at both of you guys but it's gonna be a little
difficult. So I am back. We've been moving so I came on quickly and just said hi
last week and answered some questions but we're cooking today. We've got Sydney
behind the camera so we're live so you can ask any questions and I thought that
because so many of you guys bought the Instant Pot on sale yesterday, Amazon
Prime Day that I would do the dairy-free yogurt from Eat What You Love
today just to show you guys so that when you get those Instant Pots in the mail
you have something that you can make immediately. There are, gosh I'd say at
least like 8 to 10 Instant Pot recipes in this book. They're listed as electric
pressure cooker but Instant Pot is an electric pressure cooker so you can use
it and then if you have this book and you go to eatwhatyoulovebook.com you
can plug in this number on the back of your book and get a free PDF with 10
Instant Pot recipes that it'll just download straight to your device
whatever you're using. You can print it out, you can put it in your book, whatever you want.
And so that yogurt is in the book but it's also in that PDF and then there's a
bunch of brand new recipes in the PDF as well. If you missed the deal go to my
Instagram, the link in my bio or on Facebook. We posted yesterday. I believe
it's still going and we are also posting deals all day today. You can get
this book you guys for under $8 with the deals that are going on on Amazon. So
there's a $5 Prime Day book deal and then if you have spent $10 at Whole
Foods anytime between now and July 3rd, well July 3rd and now, you get a $10
credit that you can use on anything on Amazon. So if you apply that to the book
you can get it for under $8. It's pretty insane. And then my first book
Against All Grains, somebody got for $5.75. Nuts. Meals Made Simple, I think somebody
got it for like $8 or $9. Celebrations is like $11. So if you don't have, you can
only use it once, but if you don't have one of my books and you've been waiting
today is the day and it ends tomorrow, you have, I have never in my life seen my
books at $5. So grab it because they're $35 cover price. So alright, let's get
started with our yogurt. So we have, I'm only doing a half batch because, did a
half batch yesterday for you so that you could see what it looks like done, full
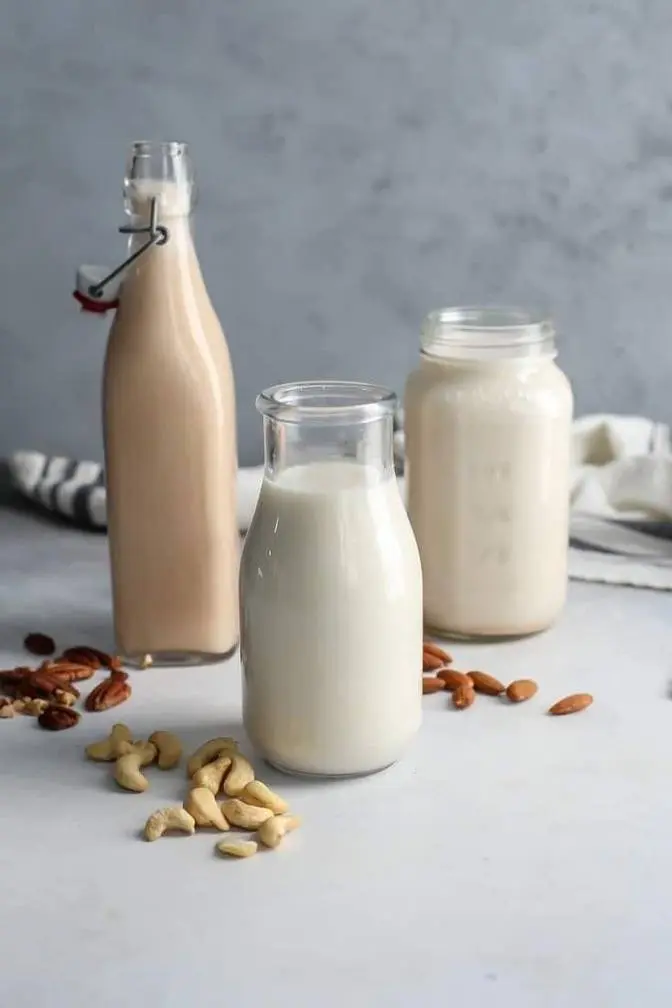
batch. We're doing a full batch. I thought we were doing a half batch. Sorry, Cindy's looking at me like nope. Nope, we're doing a full batch. So we're doing a full batch. Great. So I have a cup of cashews that have been soaking in hot
water. I'm just gonna drain them out. There's a few reasons why we do this. We
do it so that the cashews blend really smoothly and then soaking nuts also
helps to make them easily digestible rather than just straight raw. So you can
soak nuts and then dehydrate them and eat them or you can soak them and blend
them up and you don't have to dehydrate them. So I'm gonna blend, actually, you
know, before I get started on this, let me do my gelatin really quick. So I have a
pot over here with some water. You guys can follow along with the instructions,
but I'm gonna sprinkle over my gelatin and you might think that this is a
little strange to be putting gelatin into yogurt, but regular milk, when it
ferments, it actually gets thick. It curdles and, you know, the proteins change
a little bit. Dairy-free milk does not and so if you're making yogurt with
dairy-free milk, you want to do something like gelatin to help it set up. I've got a
coconut milk yogurt in my very first cookbook, Against All Grain, but I wanted
to do one that didn't taste like coconut in this one, so we're using cashew milk
and I chose to do cashew over almond because it's just so much more, it's like
thicker and more luxurious and it just does a better, it makes a better yogurt.
So I'm gonna let that gelatin bloom, which just means it's sprinkled over
water. You don't need to mix it in, just sprinkle it right over top and it's
going to start to soak up some of that water and the molecules of the
gelatin are going to start to absorb. It just helps make it easier to whisk in.
Okay, it's going to get loud for a second.
Okay, also, it just was reminded that I just put a Blendtec sale on Amazon on my
Instagram as well, so if you're looking for a high-speed blender, it's on sale.
All right, so I'm not going to actually let the gelatin bloom as long as I'm
supposed to right now because I want you guys to not be bored and to want to
leave, so I'm just gonna go ahead and get it started. It's already starting to, I
mean, you won't be able to see this, but no, you won't be able to see it. I won't be able to see it, but it doesn't matter.
Okay, so I'm going to turn this on and I'm going to move this out of the way so
Instagramers can see. So I've got this on medium, medium to medium-high heat, just
depending on your stove. What you need is for the gelatin to fully dissolve. It'll
pretty much, the water will pretty much go from like kind of lumpy and cloudy to
clear, and then if you don't see any more lumps, then you're good to go.
So I have you use a thermometer in this, but mine doesn't have a battery, and so
the way that I have explained it in the past, if you don't have a thermometer, is
that you want the liquid to be hot, but you don't want it to be boiling. You can
actually kind of do like the baby bottle test, like where you test it on
like a tender part of your skin, like your wrist or right here. As long as it
doesn't sting, you're probably good. You really just need it to be enough to make
the gelatin melt, but you don't want it to be too hot because it'll kill the
probiotics. So that is kind of the only touchy point of making this. So
everything is melted. Everybody can see, right? Hopefully. If Instagram's just
watching, can you just check without, I'm sorry, without like bumping, but I just
want to make sure everybody can see everything. Cool. All right. We're doing
the best we can. Normally when we do these, we have things like mounted, and
because this is new, are we good? Yeah, we're a bit more zoomed. Okay, great. I'll have to zoom out once you move. Okay, great. So I'm gonna pour my cashew milk in here. So as you're doing that, we have
quite a few people wondering where, or is this your work kitchen, your home
kitchen? What's up with the new kitchen? So this is an apartment that we are renting, isn't it pretty, for our office. So we've got office
spaces. Ryan is working with his company out of here. He actually has got a
partner that's working out of here as well. And then I've got an office, and
then this is Tess' kitchen. So Tess' kitchen, we were already working on cookbook
number five, and then working actually on a memoir as well. And so we just moved
into a new house that doesn't have a space for office, and so we decided to go
off-site because we've kind of grown as a company and got more people, and we
needed a little bit of space and a little bit of separation between
children and work. So also testing for cookbooks is crazy, and we do like six
recipes in a day sometimes, and so we needed a separate spot. So we found this
place and are very excited to be here. We're still not all the way moved in,
actually there's like boxes everywhere. And then our new house we moved into two
weeks ago. So yeah, that's what this is. So you'll see me in here for like
these Instagram, Facebook Live type stuff, testing recipes, and then I'll be
in my house kitchen with my kids and stuff too. We actually just did cookies
the other night, I think on Instagram, I can't even remember now. Yeah, it was Instagram.
So yeah, there's gonna be kind of two different spots now, which is crazy. So I
got this over medium heat. I'm just gonna let it kind of warm and thicken up ever
so slightly. Don't let it boil. Cashew milk actually gets really, really creamy
and thick when it does get hot, which also is kind of what helps set this up.
So since I don't have my thermometer, I'm just gonna test. I just did my finger.
Yeah, so if you if you feel it sting at all, then it's probably too hot and you
just want to let it sit. You want it to get down to about 110 degrees, if you
have a thermometer, before you put your probiotic capsule in. So I'm gonna let
that sit for just a second. I'm actually gonna bring it over here, and then we'll
put our probiotic capsule in. So let me talk about probiotics really quick. First
of all, a lot of you guys have pointed this out to me, that it's not in this
recipe. I'm trying to think what recipe it's in. Maybe there's a couple recipes
that use probiotic capsules in here, and we referenced a page number, but forgot
to put the brand of probiotics in here for you. So it's being fixed in the next
printing, and then we put a little note about it on the blog, but let me show you
guys the one that I use. It's just like easy to find, over-the-counter, store-bought.
So it's Ultimate Flora Probiotic. It's a 50 billion probiotic strain. There's 12
different strains, and it's Ultimate Flora. So I get it at Whole Foods, but the
great thing about it is that it's dairy-free, gluten-free, soy, corn-free,
everything free. And so if you can't find this, but you find like 25 billion
capsules, just use two of them. This calls for just emptying out one capsule, which
is really great. So sometimes in yogurt making, it'll have you take another
already made yogurt, which you can do going forward if you want, but this I
find is the easiest. The other thing too is just that cashew milk spoils a little
bit easier, even when it is fermented, and so I just prefer to start fresh
every time rather than putting like an older cashew milk into a newer one. But
you could grab, if you're not dairy allergic and you want to just use a
little bit, you could just grab like a grass-fed Greek yogurt and use that as a
starter as well. But I just think this is just the easiest, personally. So I'm
gonna pour in our maple syrup. So just a note about this, this yogurt ends up
getting really sour. We created the recipe so that you could use it in place
of sour cream and some of the casseroles in Eat What You Love, but because I'm
gonna be serving this to my kids, I usually add fruit on top. You can add
like chia seeds and coconut once it's done, but I'm gonna add just a little
extra maple syrup because they like it sweeter. I mean just like a tablespoon or
two, but a little bit of maple syrup is essential because it's what the
probiotic feeds on essentially while it's fermenting. So you do need to have
some sort of a sweetener in there. Once it's fermented though, with the amount
that we put in here, it's virtually sugar-free because the sugar is like
eaten up by the probiotic. So I'm asked that a lot. Honestly, you'd have to
check with a Whole30 people, but I think this would be considered Whole30 if
you were to look at the nutritional facts. There's zero sugar, so you'd
have to decide if that works for you or not, but I've gotten asked that a lot
like whether or not it's Whole30 compliant and because it's sugar-free
after it's been fermented. It's kind of like kombucha. I don't remember if kombucha is allowed or not.
So we have some people wondering, could you blend in some dates in the
cashew milk and would that work sugar-wise or does it need to be
something like maple or honey? I haven't tried it to be honest. I think it
probably would be fine because it is like a sugar from the fruit that it
could feed off of, but I don't know. Maybe somebody on here is like a fermentation
expert and could let us know, but I haven't tried it personally, so I'm not
sure. It'll definitely set up for you, I just am not sure about how sour it will get.
Do you want to move that just this way a little bit? Yeah, so people can see it.
There we go. There's really not much to see, so I
whisked in the probiotic. I let it cool. We're gonna pour it through this mesh
strainer and then pour it into our jars. So the mesh strainer, because cashew milk
pretty much completely blends fully, like it's not like an almond milk where you
have to put it through a nut milk bag or anything like that. It gets very
smooth and creamy in a high-speed blender, but the mesh strainer is really
just to catch if there was any little bits of gelatin that didn't set up or
something like that. So we're doing the Instant Pot version, which is my favorite
because you can pretty much just set it and forget it. And you know, it says that
it makes six jars and it really just depends on how many jars you have. I'm
going to do four, but I've got my Instant Pot here. You just need a little bit of water in the bottom, and then
depending on what you have, this comes with the Instant Pot, so this is what I
put them on, but you don't want them sitting directly on the bottom, and you
don't want them really submerged in the water either. Really what the water, yeah,
I'll put the lids on in a second. Really what the water is for is, I'm gonna just spill the rest of them,
it creates like a steam bath essentially, and they get, let's see, I'll just do a couple big ones, because, you know what is the best for these, you guys, are these old V-jars.
I'm just talking about the water, let me finish that top thought, and then I'm gonna go to these jars.
So the water in the Instant Pot, it just keeps it at a constant temperature. If
you have a dehydrator, you can throw them in there and keep that at a
constant temperature. If you have a yogurt maker, if you have an oven that
you don't mind like setting to low heat and keeping, it just needs to stay a very
constant low temperature, I think it's like a hundred and twenty degrees or
something like that, that it needs to stay at, then you should be fine. You can
look online and just see kind of, there's lots of different yogurt making
techniques. If you just follow the recipe straight through to how you want to
ferment it, you can kind of decide. There's ones I've seen like where you
put it in an ice chest and like wrap it in hot towels, I don't know, there's like
all sorts of things you can do, but I like the Instant Pot, obviously. So back
to the jars, two things, and this has to do with like making my vanilla cashew
coffee creamer. There's a couple things with cashews, just like I said, they do
spoil a little easier. I recently found out from my friends at, what's that brand
called? Oh, TerraSol, who make cashews and like chia seeds and stuff, they
suggest always keeping cashews in the refrigerator, raw cashews, which I always
kept some at room temperature and then the rest, like my bulk, in the refrigerator.
So I've now been keeping them in the refrigerator at all times, and then you
really want to make sure that your jars are clean, like sterilized really, so if
you put them just in a hot dishwasher, that should be fine. If you don't have a
dishwasher, I would suggest boiling them in hot water, because if you start with
any sort of bacteria in your jars, then your yogurt will spoil a lot faster. We
have accidentally had one time where yogurt, it tasted like beer. It was the
weirdest thing in the world. The cashews must have been bad, and then the
jars must not have been clean. It was like, tasted like it had like hops, like
it was gross. It was the weirdest thing, and I like searched and searched online
and figured out that that's why. So I did put the lids on, if you noticed, and you
can, you ferment with the lids on. That, it's mostly just to keep the
condensation from dripping from the top down into them. There's been, I've seen
some methods where you don't have to do that, but I like to just put the lids on,
and it's hard to do this backwards. I'm trying to line up my arrows. Hold on. You know that Inkton Pot has a
very handy dandy, like, arrow system here that you just literally line up, but I
just never can actually get it to do it from upside down, especially in backwards, which is still not going to get it.
As you're doing that, we have some people wondering if you could do, like, a mix of coconut cream and cashews.
Yes, you could. Oh my gosh. Oh, by the way, that's my, where's my arrow?
You guys, I'm feeling really, really, really struggling.
There we go. Woo! How long did it take me? 30 seconds? I don't know. Well, you know how, like, doing stuff
upside down and backwards just feels weird? I'm sorry. Yes, you could do a mix
of cashew and coconut, totally. I, if you have my first book, Against All Grain, I
would look at that for, in terms of, like, how much to use, because you're making
fresh cashew milk so that it gets thick here, so you might, like, you might need
to kind of modify a bit in terms of how much liquid you have. So I pushed the
yogurt button, and hold on, now it's already started, so I need to start again, and then you can set your time.
So I say, I think I say 14 to 16 hours in here, 12 to 16 hours. Honestly, you could be
done after, like, 10 hours. The longer you leave it in, the more sour it's
going to be, so you can really decide. You can kind of play around with it as
you've tried, and if you do it for 10 and you just don't feel like it's sour
enough, then, you know, add a little bit of extra time and keep going, and it
doesn't really matter, but yeah, the longer you ferment, the more sour it's
going to be. So, um, once this is done, you just pull, actually I stored them in the freezer because I wanted to set up as long as I could.
Aren't these jars the cutest? They're my favorite. I got them for the
photography for Eat What You Love, I think, and I just have loved them, so I always, I use them for
everything. So this is what it looks like. You will, when you bring it out of
the Instant Pot, it will likely be somewhat liquidy, and that's just because,
or I might have put them, no, no, no, okay. I was like, I might have frozen them just a little nut.
Sorry guys, I'm a little all over the place this morning. What I was going to say was that they will be somewhat liquidy when you pull them out of the Instant Pot, and that's just because the
gelatin is hot, and when gelatin is hot, it's liquid form, and then when you put it in
the refrigerator, even just maybe for like an hour or two hours, it'll set up,
and it'll look like this. And so it depends on how much you blended your
cashew milk, but it comes out, as it is, pretty smooth and creamy. For my kids, I
have found that they like it if I dump, and that's why sometimes I just do big
jars, if I just dump it all into a bowl, and I take a hand whisk, or I put it into
my mixer, and just use like the beater, and just beat it together so that there's
no lumps at all, they like it better that way, but you can see, like, it's this
super thick, creamy, dairy-free yogurt, and I don't like any of the store-bought
dairy-free yogurts. I have tried every single one of them. I don't love the
texture. Most of them use tapioca to thicken. It feels slimy to me, and then a
lot of them have like a funky taste because they use weird sweeteners in
them, and so honestly this is so easy, and I think the texture is ten times better,
and it's probably like a third of the price. We have some people wondering if
you could show the yogurt just a bit closer to the camera. I sure can. I'll be like, the price is right,
Vanna White. So that's that. It actually tastes really good. We did it for a little bit less time,
because my kids don't like it as sour. See that? Isn't that amazing? It's very, very smooth, and
honestly, even if you don't put it in a bowl and whip it up, if you just kind of
take your spoon and, like, whisk it in the jar, it gets even creamier, but
yeah, so I would suggest topping it with fresh fruit. This doesn't even have the
added maple syrup, and I think it tastes great. It tastes like a Greek yogurt
without adding any fruit or anything like that. It's definitely sour, not sweet, but
you could add some honey. You could add pureed bananas was something that I used
to do a lot when I was on the SCD diet, or the specific carbohydrate diet, and
then something crunchy like chia seeds, flax seeds on top, bee pollen. There's all
sorts of yummy things that you can add to make these really great sliced fruit,
berries, anything, but yeah, it'll keep in your fridge because it's fermented, like
a week or two is what I found. If you taste it, it just tastes more sour than
it did when you took it out, then it's probably time to toss it, or if it has a
funky smell, but otherwise keep it, and it freezes well, too. You can freeze it in,
like, little silicone muffin molds and use those and pop them into smoothies,
and already it looks just like yogurt ice cubes. I use this dairy-free
yogurt recipe for the strawberry yogurt pops in the book, which are really, really
good, so you can keep those in the freezer for your kids. You can make
frozen yogurt with this. There's all sorts of things you can do with it. It's
delicious. So, if there aren't any other questions... We do actually have just two
last ones. I had a breakfast. One of them being, people are wondering when you put
the yogurt in the Instant Pop, did you tightly seal the lids, or were they, like,
a little bit loose? I tightly sealed them. You can also just push it, like, just kind of
set it on top. It really doesn't matter, honestly. I haven't found a difference.
It's just keeping, because it's not, like, actually, like, boiling it or anything
like that, I haven't found a difference with whether or not you just prop it on
there or tightly, but I tightly seal them. And then lastly, we just had some people
wondering how, if you could quickly explain, how do they access the Instant
Pop booklet? Yes, okay, so eatwhatyoulovebook.com, and you can only
download the booklet if you have this book. It'll ask you to put a special code
from your book in. Just plug that in, and then it'll automatically send it to
your email. When you get to eatwhatyoulovebook.com, there's, well, if
you're on mobile, there's a drop-down menu on your left side. It's, like, five or
six little white bars. If you click that, it'll do a drop-down menu. If you're on
your computer, it's just right at the top. And if you click on the freebies category,
there's, like, a freebies tab. Just click on that. You'll be able to download the
nutrition facts, the grocery shopping lists, the meal plans, the Instant Pop
PDF, and then there's also a packed lunch bonus PDF. So there's all sorts of
freebies when you get this book. So if you go and get it on Amazon today for
$8, you're getting, like, a ton. You're getting a $35 book plus all of that.
So don't let it pass you by. I kept telling people, I'm like, even if you just
went and got yourself a $10 lunch at Whole Foods to get that $10 credit,
you're still coming out on top. But, like, they have a bunch of sales at Whole
Foods right now, like Organic Berries and Organic Apples. They've got all sorts of
stuff for Prime Day. So if you just need to go stock up on a few things for your
groceries as well, then you get that $10 credit and you can use it. If not, the
$5 book credit is still really great with this. I think it still puts it to,
like, $15. Or maybe, no, not $15. That's against all grain. Anyways, go grab it. Go
download your stuff. Make your yogurt. There's also, like, an Instant Pot Indian
Butter Chicken. There's an Instant Pot Yellow Curry. There's, ooh, there's a, in
that book I know I forgot about because I'm kind of ready for fall. If you guys saw
my Instagram stories the other day, we planted pumpkin seeds and it got me, like,
totally ready to skip the rest of summer and just go straight into sweaters and
boots and fall things. There's an Instant Pot Pumpkin Custard. It's basically, like,
the inside of pumpkin pie and you do it in the Instant Pot and then you put the
coconut whipped cream on it. Anyways, there's a lot of really great recipes. Oh,
dairy-free queso, like, skillet queso for the Instant Pot. Anyways, it's
packed with awesome things. So if you missed the deal on the Instant Pot, I
don't, I don't know if it's still going today. I think it is, but it was, like, 40%
off or something crazy like that. I think you could get this version, the six quart,
for 50-something bucks. So anyways, that is it. Go grab my books for
ridiculously cheap while you can. Make your yogurt and enjoy. And if you guys
make it, post pictures. Oh, last thing, sorry, Cookbook Club. It's still going. We're
lining up awesome prizes for you guys. There have been so many entries already,
which is amazing. So you just have to cook any recipe from this book and post
a photo with the book cover and you get, there's gonna be three people that win,
but you'll get all of my books, plus a really great appliance, which we still
don't know what that is yet, but it will be coming soon. We're trying to line it
up. It's been a little crazy with moving, of trying to get brands to donate some
products. So, but it's going through the rest of July. If you don't have a copy,
go get it from your library so you can still participate or borrow it from a
friend. Just take one, you know, make one thing and take a picture and post it and
you're automatically entered. You have to use the hashtag eat what you love
book and tag me, Danielle Walker. Okay, I think that's all for now. Bye you guys.