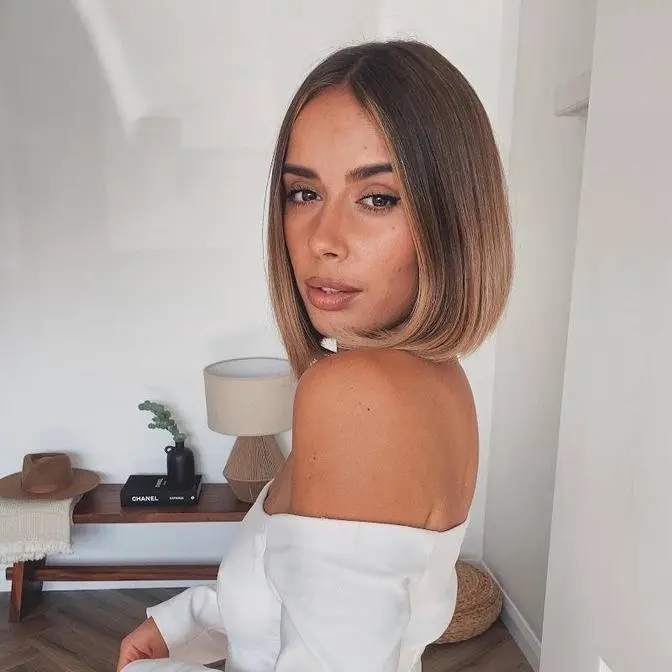
Find out more about Max Factor False Lash Epic Mascara by heading to Boots.com or downloading the Blippar app. By sampling scanning the mascara or advert you will find additional False Lash Epic content from Caroline Barnes.
False Lash Epic Mascara is £11.99 and available at Boots.
DISCLAIMER: Products have been purchased by myself or are PR samples. Any paid for content will be disclosed in description boxes and blog posts. "rstyle.me" links are affiliate links. For more information on this please click here: http://goo.gl/SIUqDN
------------------------------------------------------------------------------------------------------------------------------------------------------------------------------------------------------------- Thanks for watching! x
Hi everyone, welcome back to my channel.
So today I have an Instagram makeup tutorial
and this is in collaboration with Max Factor
and it's part of their Selfie Ready campaign
for the Max Factor Full Slash Epic Mascara,
which the Full Slash Mascaras
are my favourite affordable mascaras
and I'm so excited to be working on this campaign with them.
So I really hope you guys enjoy this video.
So in this video, I'll be showing you
how to use the new Full Slash Epic Mascara
and I'll also be giving you some tips
on how to use it from Max Factor's makeup artist,
Caroline Barnes.
But in addition to that, this tutorial
is about Instagram makeup.
So I'm going to be showing you my favourite kind of look
for when I'm on camera.
And the aim of Instagram makeup is basically
to do everything a lot more exaggerated
than you would normally.
But I'm also gonna be showing you at the end
how I kind of take my selfies
and giving you some of my tips for that as well
so that you can get the best Instagram selfie.
So I hope you guys enjoy this.
Make sure you keep on watching until the end
for the finished look and yeah, let's get on with it.
So I'm going in with my Urban Decay Naked Skin Corrector,
I think this is.
This is the peach colour and this basically corrects
any darkness under my eyes.
So I'm just popping that in the corner of my eyes
and underneath and then I'm just blending that out
using my Real Techniques setting brush.
So I'm going to get started with eyes now.
What I like to do when I want my makeup
to look really flawless and perfect
is I do a little bit of kind of neutralising and correcting
and then I will go in and do my eyes
and then come back to concealing
and the rest of my base later.
And I find it just helps your eye makeup
to look so much more perfect
and I do find that a lot with photos,
you are looking at the camera
and the main focus that everyone looks at in photos
is that person's eyes.
So it's really important to have your eyes really stand out.
So for eyeshadow, I'm going to be using
the Urban Decay Naked Smokey palette
and I haven't used this in a tutorial before, I don't think.
So very excited to be using this one.
So I'm going to start off by taking
a Zoeva Luxe Petite Crease Brush
and dipping it in the shade Password
and I'm just gonna take that through my crease
as a transitional shade.
Now I have a really small, tight crease area
so I like to use this kind of brush first at the moment
and then blend it out with a bigger, fluffier brush.
And now that colour is in there,
I'm just blending it out using a big, fluffy brush.
So now I'm taking another fluffy blending brush
and dipping it in the shade Dirty Sweet,
which is just a lovely, neutral, shimmery champagne colour.
And colours like this are really great for on-camera makeup
because they reflect the light
and they make your eyelid look so much bigger
and especially if you have dark eyes,
this will really make the colour of your eyes pop.
To make my eyes pop even more,
we're going to be taking the same brush
and dipping it in the lightest shade
and popping this on the centre of my eyelid.
And this just makes your eyes look so much bigger
and you can also highlight your inner corner
with that lighter shade.
So now I'm actually gonna go in
and work on my crease colour a little bit more
and work on the underneath of my eye
and I'm going to be using a blush shade
from the Jaclyn Hill Becca palette
and it's just this one here,
which is a nice, kind of warm, matte colour
and I'm just blending that on the outer part of my eyelid
and through my crease.
And this just helps to warm up the eye look
because the neutral shades that I'm using are quite warm.
I'm also bringing the shadow up and out at the corners
and this helps to really open up
and elongate your eye as well,
which makes them look bigger on camera
and again, just draws people's attention to your eyes.
And I'm just taking that same blush shade
underneath my eye as well, using the small pencil brush
and adding that shadow underneath your eyes
just helps to really open them up
and make them look wider.
To finish off, I'm just adding a little bit
of that Champagne Pop highlight to the tiny pencil brush
and popping that in the inner corner as well.
And I'm also going to pop a little bit of that
on the centre of the lids as well.
Next, I'm going to be adding liner.
I'm going to be using my Guerlain liner as always
because this is my favourite one.
It's so jet black.
If you're looking for an affordable version,
I would say the Rimmel eyeliner,
I think it's the Rimmel Exaggerate, is quite similar,
as is the Collection Fast Strip Liquid Liner.
Those are both kind of affordable dupes for this.
But this is my favourite and liquid liner
is a bit of a favourite of most Instagram makeup accounts.
You will see it absolutely everywhere.
And I think for most eyes, but especially dark eyes,
having some liquid liner really helps to bring the eyes out.
And especially if you have slightly smaller eyes,
it makes them look a lot wider and really opens them up.
So I start off by just lining my lash line.
And then with the little amount of product
I have left on this brush, I just draw the wing
and I very kind of lightly trace it out like that,
just so I can see where I'm going in a second.
And then I do the same on the other side.
So once I'm done with the wing and drafting that out,
I go back in and just build up my liner
and make it the shape that I want it to be.
So I'm gonna leave liner there before I turn into a panda,
because I could just keep going and going and going
and it could all go very, very wrong.
But now we're moving on to mascara.
So this is the new Full Slash Epic Mascara.
It has a really interesting wand.
It's very different to the normal Full Slash Effect wands.
So you have a real kind of curved belly to the wand.
You have the 360 kind of little spiky ball on the end.
And then you have the really fine little combs
that go all around the barrel of the brush.
So the Full Slash Effect Mascaras
are some of my favourite mascaras for camera makeup
and Instagram makeup anyway,
because they give you such good volume length separation.
But this one is actually even better.
So all of the different little bristles on the brush
apply the product to all of your lashes.
And that means that none of your lashes are left unseen,
which in the age of Instagram and its Zoom feature,
which is terrifying, this is an amazing thing.
So it just means that you can see
all of those tiny little lashes.
And this also has my favourite formula to date
because it's a little bit more wet
than the original Full Slash Effect formula.
So it gives you more time to play about with your lashes.
And that's something that if you've watched my videos
for a long time, I do a lot.
I spend ages wiggling the brush through my lashes
and trying to separate them all
and get them to be perfectly fanned out.
And because it's so wet,
it allows you more time to do that.
So I'm just applying the mascara.
And Caroline Barnes, who is Max Factor's makeup artist,
gave me some tips on the best way to apply this.
And one of her tips is to properly press
the belly of the brush into the roots of your lashes
to deposit the most product.
And then you bring it up through your lashes.
And then you can also use this bit on the end,
the 360 ball, to boost the lashes.
And it really, really helps.
And this for me is amazing
because my corner lashes are so close to my bottom lashes.
I can never get in there properly.
But this allows me to really get in there
and make sure all of my outer corner lashes
are coated with mascara.
And it also means that this is great
for applying mascara to your bottom lashes as well
because it's just so much easier.
So I now have really nice, long bottom lashes,
which really helps to open up my eyes
and makes them look really wide in photos as well.
So this is one coat of mascara all over my lashes.
And I haven't applied it to my left eye yet.
But I am gonna go in and do two coats of mascara.
This is something that I always do anyway
for when I'm on camera
because I just really love for my lashes to stand out.
And again, I think it draws people's attention
to your eyes in photos.
So I think I'm gonna come in a little bit closer for you
for this eye so that you can really see the mascara working.
So again, I'm pushing the belly of the brush
into my lashes and swooping upwards.
And I find that because my lashes are longer as well,
this little ball on the end really helps
to comb through them and detangle them.
So now I'm going through and applying a second coat
of mascara to my eyes just to really exaggerate the lashes.
And because the formula is more wet as well,
it builds very nicely.
So those are my lashes.
I'm really, really happy with them.
There is no need for false lashes.
I'm so thankful for that
because they are such a faff for me
with my long nails at the moment.
Right, now we are back to my face.
I'm going to be using my Charlotte Tilbury Magic Foundation
which is my favourite foundation
for both in real life situations and on camera situations
because it just makes my skin look insane.
So literally just buff that into my skin in dabbing motions.
And then I give it a little bit of a circular motion as well
once the product has been spread out evenly.
Next, I'm going to be using my By Terry Donzel East Concealer
and this is kind of a bit of a base concealer.
And then I'm going to conceal over the top
which is more of a highlighting concealer.
So I'm just taking my By Terry concealer under my eyes
and this kind of conceals as a base kind of colour.
It's not overly highlighting or anything
but it is very hydrating, smooths out a lot of lines
and it just covers really, really nicely.
And I also took it quite far down my cheek as well
just because I wanted it to even out the skin tone
a little bit more and it does that really well
and gives it a really nice flawless look.
So that is my base concealer done
and now I'm going to be using the NARS Radiant Creamy Concealer
So I'm popping this underneath my eyes in a triangle shape.
Then also on my chin, on this spot here
cause I wish that wasn't there,
down the bridge of my nose and also on my forehead.
And then I'm just going to take my foundation brush
after I've spread the product and use my foundation brush
to buff this out a little bit more
and just make it look a little bit more natural.
My skin was great yesterday and I've woken up today
and all hell has broken loose on my face.
I feel like I'm bouncing about quite a bit
in this tutorial with my face
but I'm not going to go on to brows
now that all of my concealer and foundation is done.
I'm going to be using the Benefit Cabral Brow Gel.
So I'm just taking an Urban Decay angled brush
and I'm just going to define my eyebrows.
I'm just filling in the top side and the arch
and then working my way towards the front
which I fill in and make it look a tiny bit more square.
So I'm basically just trying to create
a bit of a straight angled line
down towards the bridge of my nose.
So that is what I have so far.
I feel like I did a much better Instagram makeup brow
in my birthday makeup tutorial
so you can go and watch that
if you want to see me do some better brows.
So now that is all done,
I'm going to be moving on to contour.
I'm going to be taking my Lorac Pro Palette
and a flat top Zoeva brush
and I'm just taking the light contour shade.
I'm just sweeping this through my cheekbones
and then I'm going to use a different brush
to blend out in a second.
So the brush I'm actually going to use is my Artis brush
because this is the quickest brush in the world
for blending out contour.
It is amazing.
And again, blending that out with the Artis brush.
So I'm also going to be using this Zoeva brush
to contour my nose.
This is like the easiest way to contour your nose
and get it right.
This looks so over the top right now
so I'm going to take my Artis brush again
and blend out because off camera it looks totally ridiculous.
To contour the rest of my face,
I'm going to be using the NARS Yachiyo Kabuki brush.
I'm just running that through the same shade
in the Lorac palette
and just running that up onto my temples
along the top of my forehead
to make my five head more of a forehead.
And then back down my temples as well.
And then you can also do the underside of your chin.
I never find this helps,
but some people use it to eliminate a double chin.
So now that I'm all contoured,
I'm going to be going in with blush again.
And I'm going to be using the same one
that I actually used on my eyes
mixed with a tiny bit of Champagne Pop.
And I'm just going to pop that
on the outer part of my cheek.
I never really put anything on the centre,
but I like to have a little something, not that heavy.
And I like to take it quite far up my cheekbone as well.
And then finally, I'm going to be taking Champagne Pop
from the palette and just dusting this
over the tops of my cheeks,
down the centre of my nose, on my temples,
basically everywhere.
I go through phases of highlight.
I feel like we'll see it make a comeback
in December and November
because I'm just a bit of a Christmas festive highlight addict
but on an everyday basis at the moment,
I'm not really into highlight.
I like a cream highlight, but nothing too intense.
Now for lips, I'm going to be applying
the Urban Decay 24-7 Glide-On Lip Pencil.
This is in the shade Gash, nice name.
And this is a beautiful kind of burgundy red colour.
And then over the top of that,
I'm going to have the Stila Stay All Day Liquid Lipstick
in the shade, I think it's Rico, Rico, Rico.
And again, on Instagram, everything is a bit exaggerated.
So most people overline their lips.
I'm just going to do mine slightly.
So that is a beautiful red colour.
I've actually been wearing this a lot recently
with one of my Chanel liquid lipsticks.
And then I'm applying Rico over the top,
which is slightly more plummy, but still beautiful.
And these liquid lipsticks are the best.
They do not move and they make your lips look amazing.
So that is the lip colour done.
And I just decided to go for a really lovely bold lip
because I feel like with Instagram makeup,
it's really nice to balance out the top half of your face.
So we've got really intense, bold eyes
and eyebrows going on.
So I thought that balancing out the bottom half
is quite important, especially for selfies
and things like that, because it's just your face on show.
So that is it for my Instagram makeup tutorial
and the demo of the Full Slash Epic Mascara.
If you want more tips from Caroline Barnes,
then make sure you go check out her Instagram.
I will put it on the screen now so you can go check it out.
She does lots of video tutorials and things like that.
And she has loads and loads of tips.
But now I'm going to be sharing some tips of my own
on how I take my selfies.
And this is kind of my recommended way.
So firstly, I always like to hold my camera sideways.
So I will hold it like this
and hold my arm out as far away as I can.
The longer the arm you have,
the better the selfie tends to be.
And I will tend to take my selfie,
but I will make sure I don't get my arm in.
So this arm that you can see here,
I will kind of start my selfie from here,
which is why I'm always off centre in my selfies,
unless I'm quite close up.
Taking a selfie like this,
you just generally don't tend to be looking the best way.
Whereas when I take a photo like this,
I naturally turn this way.
So this is my good side.
And everything just looks a lot better and pulled together.
Always try and stand in natural lighting.
And for me, I either prefer to have a really lovely backdrop.
So say like a beach or somewhere really scenic
when I'm out somewhere,
or I will have a more white backdrop.
I generally don't sit here
in the setup that you are seeing now.
I just think my face looks a lot better
under indirect natural light.
So you want natural light,
but you don't want to be in the sunlight or outside
when the sun is like right above you
and it makes a shadow here.
So it's important to think about the lighting as well
as your makeup.
For me, I have a little bit by my back door
where there's just a white wall
and then there's a window right in front of it.
So I can kind of angle myself
so that the light is hitting me and the wall.
So there's not like a really gray,
dull background behind me.
So those are like my top selfie tips.
I really hope you've enjoyed this video.
Please give it a thumbs up if you did
and leave me loads of little like camera emojis
in the comments below.
I would absolutely love it if you could do that.
I love seeing all your emojis in the comments.
So yeah, I hope you're all having the best day
and I will see you guys in my next video.
Bye.