
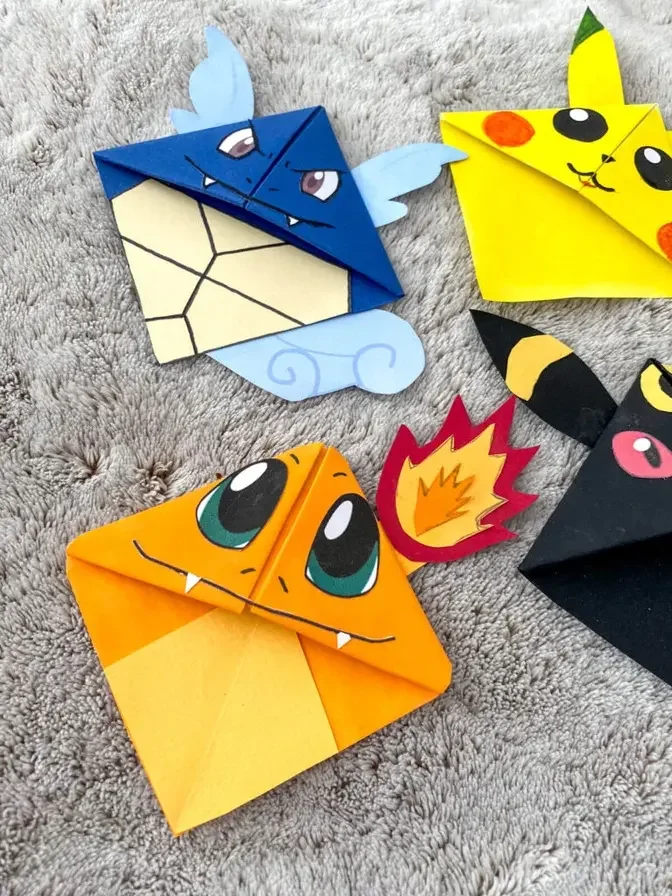
Easy Togepi DIY - Pokemon Bookmark - Origami inspired - Pokemon Go
21 Video Views·Feb 21, 2023
Easy Togepi DIY - Pokemon Bookmark - Origami inspired - Pokemon Go
Comments are disabled for this video.
Hello, hello, welcome back to Red Turd Art.
Guess who we're making today?
It's Lucky Lucky, Toe Capey.
I can't pronounce him today, my goodness.
Now, big special shout out to my friend,
Toby at Bird Keeper Toby,
who helped me put together this special list
of Pokemon friends to make all week long.
This is our last one of the week.
I hope you've liked the ones we've chosen.
I can't make all 300.
I'm really, really, really sorry.
But if I get, say, 10 or 20 of you
commenting with a certain name, I will make it.
But we need about 20 or so comments with the same name, okay?
I can't do every single Pokemon.
I'm really sorry.
But yes, great series.
I've done loads of them.
Check them out, all down below, all in the iCards.
And obviously, go and have a look at Toby's channel too.
He knows everything there is to know about Pokemon.
But anyway, let's get making.
So to make Toe Capey, we're gonna use some cream paper,
like we did earlier in the week for Meowth.
Some white paper.
These are actually card.
They're quite stiff.
It's only because this is the only cream I could find.
But if you don't have cream, do use white
and maybe use a pencil to colour it in.
Some black pens, a pencil, a glass,
and some red and some blue.
And of course, some scissors.
And of course, my glue stick, which has gone missing.
Let me find it.
Ah, here it is.
Thought I'd had to do this craft without a glue stick.
So let's get started.
Now, because I am using card rather than paper,
which is what I normally use.
Let's see, she's making a lot of noise.
This is a bit stiff.
So this is gonna be a little bit harder than I normally do.
But to be honest, it's still the same craft
and it's still as easy as all the others.
It's just that my paper is different.
And it kind of goes to show
that you can use any paper you want.
Now, when I was doing the other videos, it was raining.
And guess what?
Today, it's really sunny.
So you're gonna see some colour changing
going on in my video.
So I've got my basic square,
which I've already turned into a triangle.
Bring this up.
So in all my videos,
I show you again and again how to make the bookmarks.
That's because some people only ever watch one video
while some of you watch all my videos.
And I want everyone to be able to know how to make these.
I could have just skipped forward.
So open it up.
But I don't want to skip because I want you all to learn.
Bring this down.
So it's one flap.
Make nice tough creases,
especially if your paper's thick like mine.
Bring this over and tuck it in.
So bring this over and tuck it in.
So, very stiff.
Here we go.
That's okay though.
I've kept my little piece of card
because I'm gonna need it.
But in the meantime,
I'm now gonna create the egg part.
So I'm just gonna use a glass.
Now, this is a glass that I usually use
and it fits really nicely onto my,
what's it called?
Bookmarks.
I think a slightly bigger one might actually be better.
But let's see how we go with this one.
I'm gonna do a loose outline
and I'm gonna cut my circle out slightly bigger
and then just use the other side.
Just because I think a slightly bigger glass
would work slightly better.
But you know, you have to work
with what you've got in your house, right?
And we don't all have the same things.
Also, don't worry about it not being perfect.
An egg isn't round, an egg is oval.
I just did that because it makes it easier
to do this craft.
So we go.
And I'm kind of making up as I go along,
if I'm being honest.
Haven't made to pay you before.
So now I'm gonna have this imaginary line.
Well, I actually can draw it
because then this is the reverse.
I think about here is good.
And then I'm gonna zigzag it.
So the line is just sort of to give me
a rough idea of where to stick to.
And then zigzag some little cuts and big cuts.
Maybe another big one.
There we go, that should do.
Look at that, isn't that a good egg?
Brilliant, love it.
Okay, now I'm gonna decorate this
and I'm gonna stick it on
and then I'm gonna shape the sides.
So for Topegi, we're going to use a blue pen
for a triangle, like so.
And then another triangle maybe down here.
These are ordinary felt-tip pens, by the way.
Some people have asked me about them.
I can share a link below.
They come in great packs
and I really, really like them.
Oh, there's a sun changing.
Then I'm going to put a triangle up here.
I've decided on purpose with this craft,
I'm not gonna bother putting on the feet and the arms
because I think he's cute without them.
But if you wanted to add them,
of course you can.
You just cut out extra bits and stick them on.
This is about you and your crafts
and you making things the way you like them.
Now, one thing I wanted to also mention,
if you're really listening to my videos,
is I have a really cool TEDster crew playlist.
So the TEDsters are obviously the people
who watch Red Ted Art and love all my crafts.
And if you do a video and you mention me,
so you mention Red Ted Art in the video
and in the title and in the descriptions
so people can find me,
I will add you to my playlist.
I don't mind what you do in that video,
if it's just a shout out
or if you're doing one of my crafts,
that's great too,
as long as you give me a mention
and I will happily add you to my playlist.
It's also a great way to find other people
to make friends with on YouTube
because you can check out the other people's playlists
and see what they've been making.
So I've got my two piggy egg.
I'm going to now glue it on.
Then put glue all over the egg
because obviously it's going to stick out
a little bit at the bottom, isn't it?
So you don't want glue there.
So I'm just going to put some glue on here,
like so.
Maybe put some glue at the top
because I definitely want that to stick down properly.
And then put it on like so.
Oh man, I'm already so excited.
Goodness, I love it when crafts excite me too
and not just you guys.
Right, so I've got my basic shape.
I think you can already see how it's coming, can't you?
I'm going to trim this.
I've got card, so the card's really stiff.
If this was paper, I'd be all right.
So, and there's a teeny weeny bit peeping out there.
Now I need some triangles.
Now I want them all to be the same shape.
So I'm going to use the corner
and the corner over here.
Like I said, I am making this up as I go along.
So sometimes I change my mind.
I think that works all right.
So I might have to just mark it
and cut some of those extra strips off.
I think that's probably, is that good?
Actually, you know what?
I'm going to just cut them a little bit.
Like so.
The same.
Ha, that's better.
I think that works for me.
And this is the first time I'm making Topeki.
I really love it.
I did a rough draft, obviously.
Can you see my rough draft?
Look how different it looks.
La la.
And then I went, right,
I'm ready to make it for my Tedsters to see.
Okay, now on this one, with all the other Pokemons,
I've actually been cutting out the eyes
and sticking them on.
But the Topeki eyes are so small
that I'm going to just draw them on.
I'm going to just get a pencil first
just to make sure I've got it all in the right place.
I can rub the pencils out.
Normally, I just draw straight on.
But I think, as this is the last step,
I kind of want to get it right.
And once I know I've got it right,
I can go over it with a pencil.
And I think that is good.
I'm happy with that.
Not with a pencil, with a pen.
Oh, the sun's changing again.
Oh, that's so good.
I have to say, I really have enjoyed this challenge.
I've done seven new Pokemon characters
in the past seven days.
I hope you've enjoyed the challenge too.
Obviously, I have lots of other crafts here
in Red Head Art as well.
Not just Pokemon.
Brown, a bit of time.
And a bit of pink.
I'm going to find another pink later,
make that a bit pinker.
And then the last, but not least,
the Toopeggy little bits here.
And there we go, Toopeggy done.
What do you think?
Oh my goodness, he's adorable.
Anyway, I hope you've liked this Red Head Art
Pokemon special.
Don't forget to like, subscribe, comment down below,
and do come back for all my other crafts.
I've got loads to share with you,
loads of ideas, all easy, all fun, all great DIYs.
So, see you again soon.
Bye.