
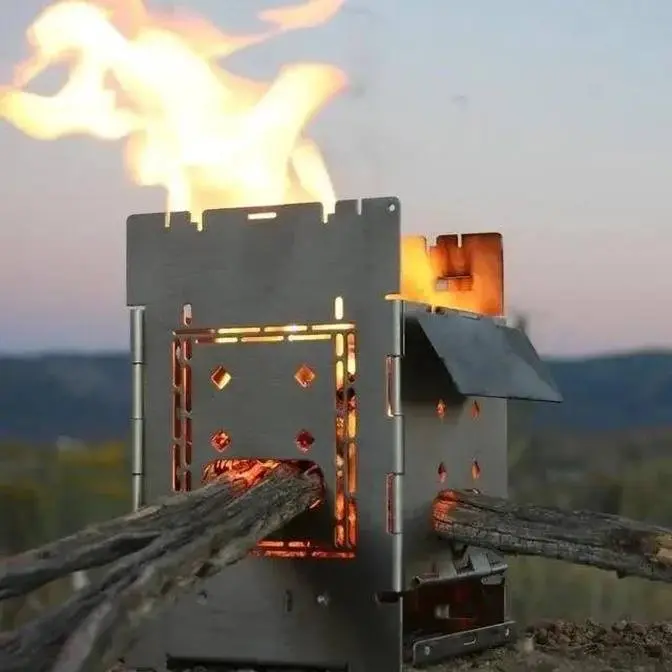
Adjustments and Care instructions / Folding Firebox Stove.
1 Video View·Aug 16, 2012
Adjustments and Care instructions / Folding Firebox Stove.
Contact us here: [email protected]
Purchase products here: https://www.fireboxstove.com/index.php?route=common/home
Here I demonstrate some adjustments to keep your Firebox tuned to perfection as well as care instructions.
Hello, this is Steve from Firebox.
This video is going to be about taking care of your firebox stove.
So first I'm going to go ahead and talk a little bit about some adjustments that you can do.
You know, I don't really think that you will ever need to do these adjustments,
but just in case I'm going to go ahead and tell you some tips and tricks on how you can kind of make everything on
the firebox
fit
just perfect. And it should fit just perfect when you get it,
but if, I don't know, if something, if it gets dropped or something happens to it and things are just a little bit out of whack,
I'll tell you exactly how you can adjust those things.
Now first I'm going to talk about if you have a
grill attachment or a boil attachment and how it fits into the top.
So it fits in just like that,
and then you, you would use your fire stick, and you would kind of pry this until it pops into place, right?
Well, if this opens up too much,
or closes down too much for whatever reason, and you need to adjust it,
it's really simple. And what I would recommend is, see, you have this side here that does not have the notch, the little half circle notch.
That side is the side you're going to put in first.
And then once that's in and against that edge, then you want to see how these tabs are lining up with these slots.
And if they line up perfectly,
then you don't want to mess with this side. You know, unless it's, it's gotten bent out a little bit, you may want to straighten it.
You know, and you can put a, you can put one of your,
your fire sticks up against it and just see if that looks straight. And if that looks straight,
and if these are lining up, then you don't want to mess with this side.
Because this side is the side you're going to use to adjust
the, if you change the angle, then that will change where these,
how these line up with the, with the notches that they coincide with.
So if they line up, you don't want to do anything. If they're a little bit, you know, to this side,
then you'd want to kind of bend and tweak. You can just do that just by hand, very gently, kind of
bend and tweak that angle
until you get these, these notches on this side to line up. And then you use this side
to adjust the tightness.
Now this one's, this one's
about how I like it. It doesn't take very much
effort to open it up and get it to pop into position, but some people might like it to be a little bit tighter.
So I just, you know, very carefully,
and you don't have to be too careful, but it doesn't take really that much
to make it,
to make it adjust just a little bit. So that, just that little bit of pressure that I put on there
actually moved it, you know, I don't know how much,
less than a 30 second, but it did move it enough to where, to where it is just a little bit tighter.
You know, you can pop that in there and it holds in nice and tight.
So that's how you want to adjust that. You know, these being flat panels,
they're fairly easy to adjust that way. Now the only other adjustment that I would want you to be aware of
would be
when this fire grate
folds down,
and it comes into contact with this, this side over here,
you want that to be fairly snug,
but you don't want it to be so tight that you can't do it. See how I can, I can pop that up with my
hand pretty easily?
Now if this were too tight,
and you either couldn't get it to go down because it stops right there, or once you got it down
you couldn't get it to go back up,
I'm pushing on it with my hand to make it so it's too tight.
But if it were too tight like that, and you couldn't get it to go up,
all you would need to do is push this all the way up, and then you put a pair of pliers on these hinges,
okay, the ones that are attached to this panel,
okay, so if it were too tight,
then you want to move it up. You want to move it away from this panel.
So if they were too tight, you would put it on here, and you would pry it up slightly.
Okay, now I'm going to go ahead and do that,
even though it wasn't too tight,
and then when you close that, see how that just fell right down into position?
Which is kind of nice, but I've actually got a little bit of a gap.
I don't know if you'll be able to see it in the video,
or not. There's just a slight gap. Maybe I'll just kind of open it up, so it's even more of a gap.
So if you have a gap there,
you know, you want to close that up.
So then you would just fold your
fire grate all the way up flat, and then you just get a hold of these with a pair of pliers,
and just pry down just a little bit.
You know, and it's better to do less than more, because you can always do it again if you didn't do it enough.
So now I do that, and see it's stopping before it even gets in, but it's tight,
but it'll still come up.
Okay, so that's real nice that way.
Okay.
Okay, now I actually want to talk about
stainless steel here a little bit, and how stainless steel is able to prevent corrosion.
Stainless steel prevents corrosion
by the formation of chromium oxide.
Okay, now you metal experts can tell me, please tell me if I'm wrong, but from what I understand,
there's a minimum of 12% chromium in stainless steel in order for it to be
considered and classified as stainless steel. Now that chromium within the alloy
will actually form a layer over the surface of
the stainless steel
that's called chromium oxide, and that chromium oxide is what actually protects the material
from the elements and from corrosion.
Now what happens with stainless steel is when it gets extremely hot, which the firebox does get extremely hot,
you'll notice we have these great big air holes in the bottom.
That feeds a lot of oxygen up into the fire, and really makes for a very, very hot fire.
So these side panels get extremely hot, and when they do get extremely hot,
then elements within the material get pushed to the surface.
Once they get pushed to the surface, that disrupts that surface coating of chromium oxide, and that
enables the whatever gets pushed to the surface will actually
oxidize, and that's why it turns colors.
That's why it turns blues and reds and kind of a rainbow color sometimes, and
eventually in fireboxes that I've had in the past,
they end up pretty much turning black because of all of that oxidized
material that ends up on the surface. It's kind of like a
scale, or even like when you weld and you leave your puddle there, as that puddle cools,
the elements inside get pushed to the surface, kind of the impurities or whatever, get pushed to the surface in the form of the slag.
Then you chip that slag off, and you have a bright shiny weld down underneath there.
Well, it's similar with the stainless steel. When it gets that hot,
elements get pushed to the surface, and that's why you get so many different colors, and those elements will
oxidize, and that's how you can actually get the formation of
rust.
Now, let me show you a... I have a washing machine drum
that I took out of my washing machine because the bracket broke, and this had been in the washing machine for six years,
and it had had
bleach, detergent,
continuous moisture for six years. When I pulled it out, it looked perfect. Not a speck of rust on it,
no colors. It was just bright and shiny and looked like it was brand new.
Well, you can see I put a bunch of holes in the bottom of this, and I turned this into a fire pit, and
I built really hot fires in here, and you can see the rainbow colors,
and you can even see the formation of rust up through here, up in this area. If I turn it sideways,
you know, this is actual rust here. Okay, now it's not because this is cheap, crummy, stainless steel,
because, like I say, it had endured six years of continuous moisture,
bleach, and
detergents, and it looked great. It's because of the...
that chromium oxide layer was
disrupted by these elements that got pushed to the surface, and the elements themselves are what's
oxidizing now and creating this surface rust.
Okay, so I would recommend with your firebox
either A, just go ahead and let it be black, let it turn colors,
okay, and just keep it dry.
Just be a little bit careful with it and keep it dry. Now, if it does,
you know, if your pack falls into the river, and it gets wet, and it stays wet for a duration,
then it may form some surface rust, and what I would recommend you do in that situation is
scrub it off
with a brand new Scotch-Brite. This isn't brand new,
but a brand new Scotch-Brite is nice and sharp, and it will actually get that off.
So here we have, you know, my old trusty firebox, and you can see the difference in color. Down here,
the bottom where it doesn't get hot, you know, it's just kind of a little bit yellow, and then up here
it's like a dark gray color. Okay, and then right here in the center where it gets hot, once again,
it's a different color from these outside edges of the ash pan. So I'm just going to scrub here in the center,
and you can see that if you scrub off
that scale that gets pushed to the surface, you get back down to that stainless steel, and once you do that,
then that chromium oxide can form right there again, and it will protect the material again, okay?
So that's what I would recommend doing, is if you want it to be bright and shiny,
you know, you just need to scrub this stuff off and get back down to where the chromium oxide can form that layer,
and then you're going to be in good shape. See how that comes back to shiny?
But it takes some elbow grease, you know. It takes a little bit of work, and if you have a brand new
Scotch Brite, it takes a lot less work. This one isn't new by any means,
and you can kind of feel with your fingertips what parts of it are sharp.
So as you wear out your Scotch Brite, you just kind of need to move to a new spot.
You just scrub it up until you get back down to that shiny area, and see now that will form that chromium oxide,
and it will have a certain amount of protection once again.
So once again, you metal experts, you let me know what I'm saying,
what aspects of what I'm saying are wrong, because I'm sure I'm saying something wrong,
and
let's discuss it down here.