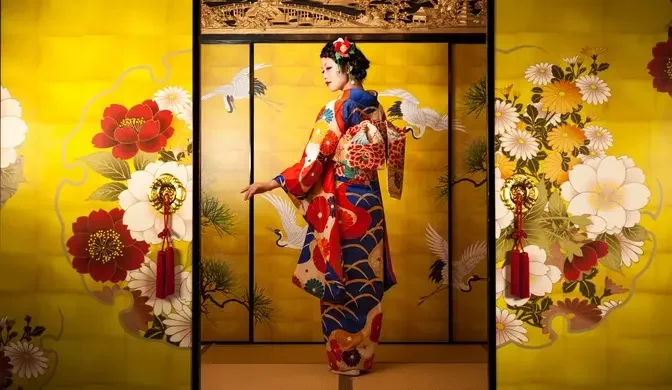
This video shows you how to put on a yukata with a method I was researching for years. It is the most simplest and comfortable way and the outcome will be perfect even for beginners.
If you are looking for a more detailed explanation of how I do my oshaori: find another cool obi style for yukata: check out how to make a "emon nuki" (the item for the collar, I use in this video): for watching!
Hi in this video I'm going to show you how to put on a yukata.
In case you are here for the first time my name is Bini Matsunaga and I am a fully trained
and certified kimono teacher and stylist and I proudly can announce that this way is my way how
to put on a yukata. I have been doing research and training and I have been trying several methods
for about three years now to get a way to put on a yukata the simplest the most perfect as well as
the most comfortable way. We are going to use some special items which actually makes this video a
requested video because a lot of people have been asking me for what I use all this stuff and how
do you use it when putting on a yukata. First of all we need this little item we have been making
in a diy I think two months ago if you haven't checked out the video yet I put a link up there
so you can watch it and make it because this will save your life especially when you're a
kimono beginner because this will keep your kimono color in perfect shape forever and ever.
I also received a comment about the name of it because I forgot how it was called
it's called Emon Nuki. Thanks so much for the comment and as I already have mentioned on this
channel for about a thousand times I'm wearing my kimono with elastics not with kimono ties
so we are going to use an elastic today. We need two different types of elastic there is one of
this longer elastic which is a little wider and then you can clip it in the middle this is the
thing you will use over your hip and now everyone will think oh yeah the next elastic is this little
thing we're going to use it is a little more narrow and it has two clips on the ends to clip
actually the collar and we use this for my Nanga Juppong video but I have to disappoint you
this is not what I am going to use today if you're going to use this you would need another tie
to get rid of wrinkles and to hold everything nicely into shape so we're not going to use this
there are also kimono belts which my school calls Vestobelto or waist belt
because this is the belt which goes over your hip. We are going to use a different belt which
my school calls Vestobelto or waist belt because this is the belt which goes over your waist
and this belt is actually made of two halves which can be clipped together to make one
and they also have clips on the ends to clip it onto your collar and as you can see this one is
way longer than this one because this will go around your waist twice twice
and you can also see that the elastic itself is a little wider than this one so I want you to go
for this one today you can get them I think in every kimono item store because they're nothing
special with a patent or anything so to get started you will only use one half of this
to get ready and let's dive right into it but before we can start I remember that I was asked
on my instagram to also include what I wear under my yukata which is pretty embarrassing for me so
I'm gonna show it on my mannequin the first layer is this open shirt that I put in place and drape
and then hold it with a normal kimono tie after that I use a so-called hoseigi which is padding
to get a nice shape and I need even more padding to get rid of my waist lastly I secure everything
into place with a susoyoke which is a wrap skirt okay pin or sew the emunuki on the center back
seam on the inside of your yukata it should be between 15 and 17 centimeter from the collar
put one half of the waist belt through the emunuki with the collar clip to your right
lay the yukata on your shoulders and put your hands through the sleeves put the two folds on
the collar together hold it with your left hand your right hand then holds the collar for about
20 centimeter from its ends the left hand reaches out to the center back seam on the middle of your
butt lift the yukata with both hands to the height you want to wear it do always pull the
fabric against your body so it won't fall down bring the left side to your right to measure the
width of your front skirt which end should definitely cover your right thigh if it's too
less or too much width you can change it by opening the yukata up and pull with your right hand for
less or with your left hand for more width when you have found your width open the left side and
bring the right side to your left lift it for about 10 centimeters and tuck it with your elbow
your right hand is now free to pull the wrinkles on your right side upwards bring the left side to
your right and lift it for about five centimeter hold this with your right hand your left hand is
now free to pull up the wrinkles on your left side and also to remove wrinkles on your back
place the long elastic above your hip bones and cross both ends on the back
pull and close it on the front to straighten out the ohashori set the left layer of the elastic
diagonally up and pull both layers on the right down put both hands into the opening under your
shoulders and push the fabric gently down slide to the front and do the same after that i put my
right hand inside and slide from left to right to form a crunch ohashori again both hands put the
folds on the collar together which are held by your right hand while your left hand reaches out
to the center back seam on the height of your emonuki to pull it down the back collar should
open up for about the size of your palm hand hold the back collar in place with your left hand while
your right hand adjusts the right collar on the front hold this in place with your right hand
inside while your left hand reaches for the clip of the one half elastic and clip this onto the
collar at the middle of your waist this happens all inside for a nice ohashori fold the inner
layer of fabric diagonally up you can skip this when you're not used to this i also have another
video with detailed explanations for this step then adjust the left side of the collar
hold it in place while pinning the other half of the elastic onto the collar at the middle of your
waist both clips should be fastened at the same height of your waist pass it to your left hand
on the back then your free right hand can pull the other half on the inside of your yukata through
the opening under your right arm clip the halves together on the front pull the ohashori on the
front gently down to cover the elastic over your hip and to also remove wrinkles on the back
and that's it i can promise you that these elastics will save your life and it will be
so comfortable even if you wear your yukata for hours and hours and hours next week i will show
you how to tie this obi style until then do also check out my other summer obi knot video
i hope you have enjoyed this video and if you feel like sticking around a little more
hit the subscribe button if you have already subscribed thank you thank you or leave me a
comment with further requests about things you want to see in the future and i talk to you
in my next video thanks for watching bye